English
54
Select [Save] and press <ENTER>.
Save the current network Setup.
Note
●
To use a DHCP server, make sure the DHCP
server is started.
●
Contact your network administrator for details on
[IP address], [Subnet mask] and [Gateway].
●
Shipping condition
[DHCP]: Off
[IP address]: 192.168.0.8
[Subnet mask]: 255.255.255.0
[Gateway]: 192.168.0.1
[Port]
Set the port number used for command control.
Select [Port] and press <ENTER> to set the number.
●
The available setting range is 1024 ‒ 65535.
●
Entering numbers (see page 53)
Note
●
When the PJLink protocol is used, the port setting is
not necessary.
■
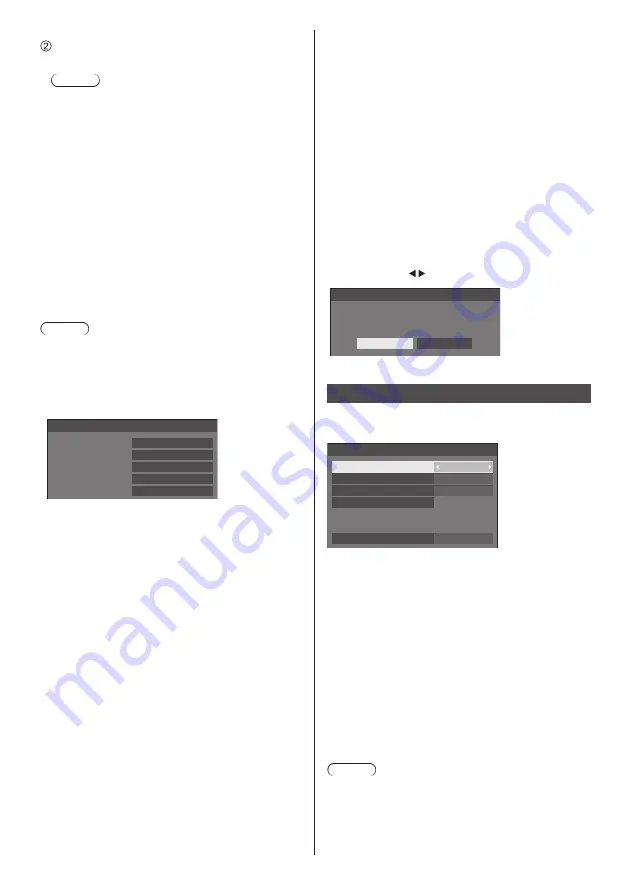
[Network status]
Checks the current Network settings status.
192. 168. 0. 1
255. 255. 255. 0
192. 168. 0. 8
12:34:56:78:9A:BC
Network status
DHCP
IP address
Subnet mask
Gateway
MAC address
Off
■
[AMX D. D.]
Set whether to allow the Display to be detected by AMX
Device Discovery.
[On]:
Enables detection by AMX Device Discovery.
[Off]:
Disables detection by AMX Device Discovery.
●
For more details, visit the following web site.
http://www.amx.com/
■
[Crestron Connected™]
When this function is set to [On], the Display can
be monitored or controlled via the network using
equipment and application software of Crestron
Electronics, Inc.
This Display supports the following application software
from Crestron Electronics, Inc.
•
RoomView
®
Express
•
Fusion RV
®
•
RoomView
®
Server Edition
[Crestron Connected™] is a function to connect to
a system developed by Crestron Electronics, Inc.
which manages and controls multiple system devices
connected to the network.
●
For details of “Crestron Connected™”, refer to the
Crestron Electronics, Inc. web site (Provided only in
English).
http://www.crestron.com/
For the download of “RoomView
®
Express”, refer to
the Crestron Electronics, Inc. web site (Provided only
in English).
http://www.crestron.com/getroomview
■
[Reset]
You can reset the network setting to the factory default
of the Display.
Select [Yes] with and press <ENTER>.
Network settings
Reset
Yes
No
USB media player settings
Set for USB media player function.
[USB media player settings] - submenu screen
USB media player settings
USB media player
Resume play
Scenario file check
No scenario file
Slide show duration
Enable
10 sec
On
Video playback mode
Standard
■
[USB media player]
Set to enable or disable the USB media player
function.
■
[Video playback mode]
Sets the video playback mode.
If image disturbance occurs at the switching timing of
motion picture files during playback in the Standard
mode, switch to the Adjust mode.
[Standard]:
Plays without a black image at the joint
between video files.
[Adjust]:
Plays with a black image (approx. 2
seconds) inserted at the joint between
video files.
Note
●
When using the Multi Media Player, a black screen is
displayed for a certain period of time at the switching
timing of motion picture files regardless of the [Video
playback mode] settings.
●
The display may be disturbed at the switching timing
of files during playback in the Standard mode.


