background image

Preparation

Basic Operation

Advanced Operation

Useful Information

R

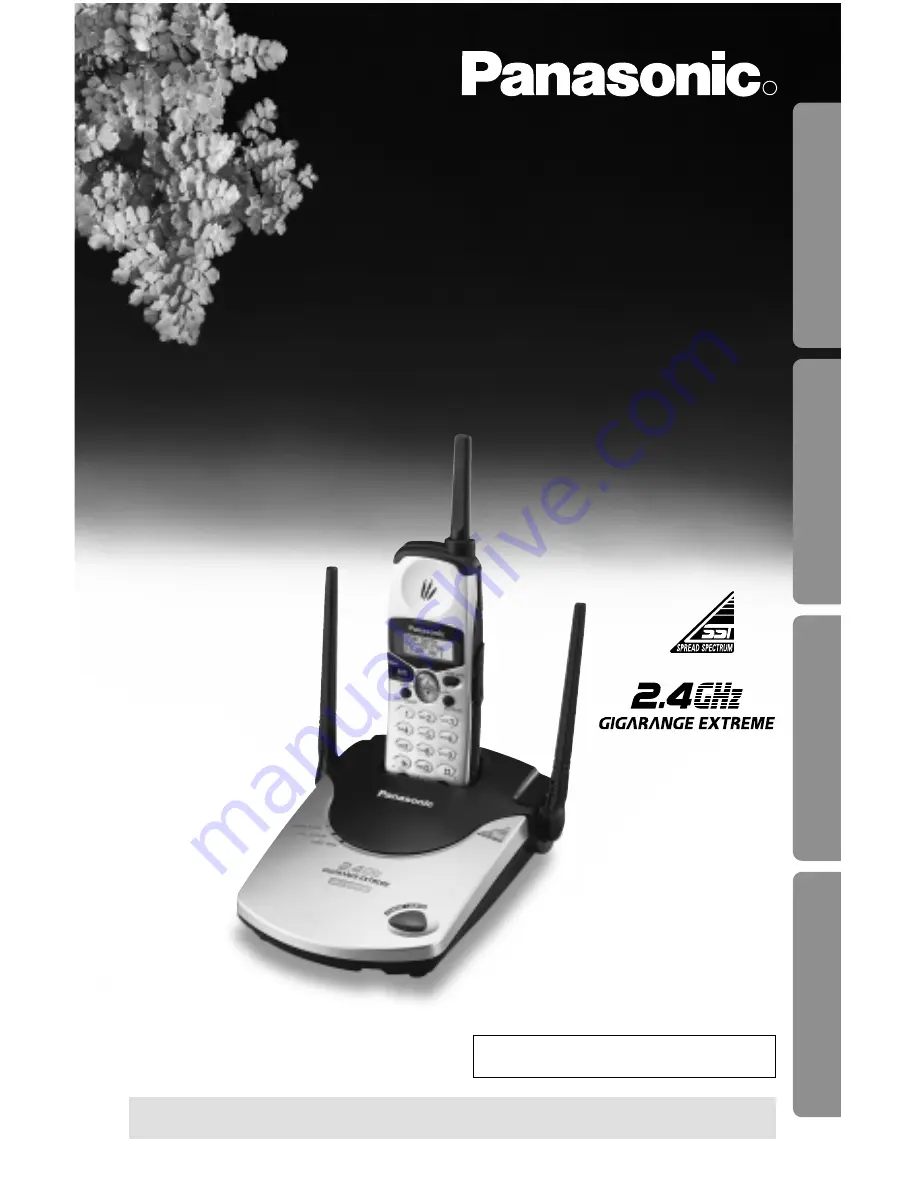
2.4GHz Cordless Phone

Model No. 

KX-TG2550CS

Pulse-or-tone dialing capability

Operating Instructions

PLEASE READ BEFORE USE
AND SAVE.

Charge the battery for about 7 hours before initial use.

Call Display Compatible

Summary of Contents for TG2550 - 2.4 Gigarange Cordless Phone

Page 1: ...peration Useful Information R 2 4GHz Cordless Phone Model No KX TG2550CS Pulse or tone dialing capability Operating Instructions PLEASE READ BEFORE USE AND SAVE Charge the battery for about 7 hours before initial use Call Display Compatible ...

Page 2: ...and Call Waiting Deluxe Deluxe Call Waiting ID are three features of this phone Please contact your local telephone company to inquire if these services are available in your area After subscribing to Call Display this phone will display the caller s name and phone number As an added service Visual Call Waiting will display the second caller s name and phone number while the call is waiting Belt C...

Page 3: ...trical appliances such as a TV personal computer or another cordless phone In a HIGH and CENTRAL location with no obstructions such as walls Raise the antennas The battery is beneath this cover Note While using the handset If you are near a microwave oven which is being used noise may be heard from the receiver Move away from the microwave oven and closer to the base unit If more than one cordless...

Page 4: ...the Ringer Volume 18 Basic Operation Making Calls 19 Answering Calls 21 Advanced Operation Call Display Service 22 Using the Caller List 24 Viewing the Caller List 24 Calling Back from the Caller List 26 Editing the Caller s Phone Number 27 Storing Caller List Information in the Directory 28 Erasing Caller List Information 29 Using the Directory 30 Storing Names and Numbers in the Directory 30 Ste...

Page 5: ...s 40 Automatic Security Code Setting 40 Handset Locator 40 FLASH Button 41 For Call Waiting Service Users 42 Call Waiting Deluxe Service 42 Temporary Tone Dialing For Rotary or Pulse Service Users 46 How to Use the PAUSE Button For Analogue PBX Line Long Distance Service Users 46 Useful Information Using the Belt Clip 47 Using an Optional Headset 47 Battery Replacement 48 Adding Another Phone 48 B...

Page 6: ...TALK VOICE MAIL PAUSE CALLWAIT FLASH TONE 2 DEF3 TALK Button p 19 21 Antenna Navigator Key BACK OK p 16 20 24 30 Display p 8 FUNCTION EDIT Button p 16 18 27 30 TONE Button p 46 CALL WAIT FLASH Button p 41 42 44 Charge Contacts p 12 EXIT CH Channel Button p 16 20 24 34 PAUSE Button p 31 46 VOICE MAIL Button p 38 Headset Jack p 47 ...

Page 7: ...e unit IN USE CHARGE VOICE MAIL CALL DISPLAY H ANDSET LOCATOR HANDSET LOCATOR Button p 40 Antennas p 3 10 VOICE MAIL Indicator p 38 Charge Contacts p 12 CALL DISPLAY Indicator p 21 22 23 IN USE CHARGE Indicator p 11 40 ...

Page 8: ...e base unit To search from the most recent call press New key To search from the oldest call press Old key p 24 During a conversation the display shows the length of the call ex 1 hour 6 minutes and 35 seconds The battery strength is also displayed p 11 The handset has lost communication with the base unit Place the handset on the base unit and try again While programming the handset lost communic...

Page 9: ... is received during a conversation p 42 or was pressed while the handset was on the base unit Lift the handset and press or again While trying to store an item or Caller List information in the directory the directory memory is full p 28 31 This is a name from the directory The stored name and phone number are displayed Please lift up and try again Memory is full Ann 1234567890 Paging NANCY BROWN ...

Page 10: ... standard telephone on the same line see page 48 If your unit is connected to a PBX which does not support Call Display and voice mail services you cannot access those services Connections Telephone Line Cord Raise the antennas AC Adaptor Power Outlet AC 120 V 60 Hz Single Line Telephone Jack CA11A Hook Fasten the AC adaptor cord to prevent it from being disconnected ...

Page 11: ...ory items programming etc The battery strength will remain for 5 seconds after using the handset then the display will return to the stand by mode see next page The battery strength is shown as in the chart below Fully charged Medium Low Needs to be recharged flashing Recharge Recharge the battery when Recharge is displayed flashes on the display or the handset beeps intermittently while it is in ...

Page 12: ...all Display Caller List or directory items and ambient temperature Clean the handset and the base unit charge contacts with a soft dry cloth once a month Clean more often if the unit is subject to grease dust or high humidity Otherwise the battery may not charge properly If the battery is fully charged you do not have to place the handset on the base unit until Recharge is displayed and or flashes...

Page 13: ...Press OK Yes key 4 Press or repeatedly until the arrow points to Chnge language 5 Press OK Yes key 6 Press or to select French Press OK Save key A beep sounds The display will return to the function list To return to the stand by mode press EXIT CH or wait for 60 seconds You can exit the programming mode any time by pressing EXIT CH To select English press or in step 6 Chnge language English OK Sa...

Page 14: ...or to select Pulse or Tone Press OK Save key A beep sounds The display will return to the function list To return to the stand by mode press EXIT CH or wait for 60 seconds You can exit the programming mode any time by pressing EXIT CH If 3 beeps sound and the display shows Save error move closer to the base unit and try again If Save error is still displayed place the handset on the base unit Star...

Page 15: ...or is still displayed place the handset on the base unit Start again from step 1 1 Press FUNCTION EDIT 2 Press or repeatedly until the arrow points to Program 3 Press OK Yes key 4 Press or repeatedly until the arrow points to Set line mode 5 Press OK Yes key 6 Press or to select B or A Press OK Save key A beep sounds The display will return to the function list To return to the stand by mode press...

Page 16: ...ON EDIT Function menu To redial the last number dialed p 19 To use the directory p 34 To select the ringer volume p 18 To store items in the directory p 30 To select the flash time p 41 To select the display language p 13 To set the C WTG Call Waiting options mode p 43 To store a voice mail access number p 38 To select the line mode p 15 To select the dial mode p 14 To set the auto talk feature p ...

Page 17: ...sing EXIT CH In order to view Call Display information before answering a call leave the Auto Talk feature OFF 1 Press FUNCTION EDIT 2 Press or repeatedly until the arrow points to Program 3 Press OK Yes key 4 Press or repeatedly until the arrow points to Talk switching 5 Press OK Yes key 6 Press or to select On or Off Then press OK Save key A beep sounds The display will return to the function li...

Page 18: ...nger Low High Ringer Low High 1 Press FUNCTION EDIT 2 Press or repeatedly to select Ringer volume and press OK Yes key 3 Press or to select the desired volume The selected volume is displayed and rings To turn the ringer OFF press and hold until 2 beeps sound The handset will return to the stand by mode HRinger volume Program OK Yes OFF Ringer off HRedial Directory OK Yes To turn the ringer ON pre...

Page 19: ...k 1112222 Talk 00 00 00 If No link to base Place on cradle and try again is displayed and an alarm tone sounds in step 1 move closer to the base unit or place the handset on the base unit and try again To redial the last number dialed Press FUNCTION EDIT TALK To redial after confirming the numbers in redial memory 1 Press FUNCTION EDIT 2 While the arrow points to Redial press OK The last number di...

Page 20: ...e unit Lighted handset keypad The handset dialing buttons will light when you press a button or lift the handset off the base unit and flash when a call is received The lights will go out about 10 seconds after pressing a button lifting the handset or answering a call Backlit LCD display The lighted handset display will stay on for about 10 seconds after pressing a handset button or lifting the ha...

Page 21: ...arty information will be displayed after the first ring p 22 In order to view the Call Display information please wait until the second ring to answer a call If the handset is off the base unit press TALK You can also answer a call by pressing any dialing button 0 to 9 or Any Key Talk Auto Talk If you set the Auto Talk feature to ON p 17 you can answer a call by lifting the handset off the base un...

Page 22: ... is compatible with a Call Display service offered by your telephone company After subscribing to a Call Display service the calling party s information will be displayed after the first ring The unit can record information of up to 50 different callers including the time and date the call was received and the number of times called in the Caller List The Caller List information is sorted from the...

Page 23: ...s to the following After 10 seconds the display changes to the stand by mode p 12 While the handset is off the base unit Press or to turn the display on If you have received 10 new calls the display will show the following If your unit is connected to a PBX which does not support Call Display services you cannot access those services In some calling areas the name display service may not be availa...

Page 24: ... most recent call press New key To search from the oldest call press Old key To scroll between callers press or 3 To exit the list press EXIT CH The handset will return to the stand by mode EXIT CH Once new calls have been checked will be added If No items stored is displayed in step 1 the Caller List is empty If more than one call is received from the same caller the date and time of the last cal...

Page 25: ...ll return to the stand by mode Display meaning You have checked this caller information answered the call or called back the caller X2 X9 The number of times the same caller called up to 9 After checking X2 X9 will be replaced with 2 new callers New Old JACK SMITH 111 2222 3 10P JUN10 NANCY BROWN 222 3333 1 54P JUN 9 X2 CINDY TURNER 1 234 456 7890 10 38A JUN 9 0 new caller New Old If there is no n...

Page 26: ...layed phone number is dialed automatically Calling Back from the Caller List FUNCTION EDIT TALK In some cases you may have to edit the number before dialing p 27 Ex You may have to add 1 for long distance calls If a phone number is not displayed in the caller information you cannot call back that caller 3 new callers New Old CINDY TURNER 1 234 456 7890 11 20A JAN12 X3 Talk 1234567890 Talk 00 00 00...

Page 27: ...is displayed in step 2 d 27 Advanced Operation Editing the Caller s Phone Number a 4 After editing the number you can continue with calling back or storing procedures To call back press TALK p 26 To store the number in the directory press OK and follow the instructions on the display see page 28 from step 3 The unit can edit a phone number into one of 4 patterns Make sure that the handset is in th...

Page 28: ... not required press OK Save key b If a name is required enter the name p 32 When finished press OK Save key A beep sounds The display will return to step 2 You can continue storing other items To return to the stand by mode press EXIT CH or wait for 60 seconds Using the Caller List You can exit the programming mode any time by pressing EXIT CH If the display shows Memory is full in step 3 the disp...

Page 29: ...Yes key A beep sounds and the information is erased After a few seconds the display will show the previous caller information To return to the stand by mode press EXIT CH or wait for 60 seconds To erase all entries in the Caller List 1 Lift the handset off the base unit OR If the handset is off the base unit press or to enter the list 2 Press OK 3 Press or to select All clear 4 Press OK Yes key A ...

Page 30: ...ed by the first word in alphabetical order Using the directory you can make a call by selecting a name on the handset display Storing Names and Numbers in the Directory Make sure that the handset is in the stand by mode EXIT CH FUNCTION EDIT PAUSE BACK OK The dialing buttons can be used to enter letters and symbols ...

Page 31: ... OK Yes key 4 Enter a name up to 15 characters with the dialing buttons or See the steps for entering names and symbols p 32 If a name is not required press OK Next key and go to step 6 5 Press OK Next key 6 Enter a phone number up to 22 digits If you misdial press BACK Digits are erased from the right 7 Press OK Save key A beep sounds The display will return to step 2 You can continue storing oth...

Page 32: ...ove the cursor to the incorrect character press BACK to delete and enter the correct character Each time you press BACK a character is erased from the right To erase all characters press BACK firmly 1 2 3 4 5 6 7 8 9 10 11 1 A B C a b c 2 D E F d e f 3 G H I g h i 4 J K L j k l 5 M N O m n o 6 P Q R S p q r s 7 T U V t u v 8 W X Y Z w x y z 9 0 Blank Number of times key is pressed Keys To move the...

Page 33: ...es 7 Press twice to enter a blank 8 Press 5 9 Press 6 six times then press to move the cursor to the right 10 Press 6 five times 11 Press 3 five times 12 Press 7 eight times 13 When finished press OK Next key To enter a phone number see page 31 from step 6 For example to enter Tom Jones While entering names the cursor will flash on the display Enter name OK Next Directory 20 items T To Tom Tom Tom...

Page 34: ...etter of the desired name until any name with the same initial is displayed see the Index table on page 35 Ex To find Frank press 3 repeatedly until the first item under F is displayed Finding Items in the Directory Make sure that the handset is in the stand by mode You can leave the directory any time by pressing EXIT CH If No items stored is displayed in step 3 the directory is empty Redial HDir...

Page 35: ...s or repeatedly to find the directory item that you want to dial p 34 5 Press TALK The number is dialed automatically 6 To hang up press TALK or place the handset on the base unit Keys Keys Index Index 1 2 3 4 5 Other symbols 1 A B C 2 D E F 3 G H I 4 J K L 5 M N O 6 P Q R S 7 T U V 8 W X Y Z 9 0 6 7 8 9 0 Redial HDirectory OK Yes Frank 4567890 Talk 4567890 HRedial Directory OK Yes ...

Page 36: ...y If you do not need to change the number press OK Save key 9 Add a number to the current number Each time you press BACK the digit to the left of the cursor is erased To erase all of the digits press BACK firmly 10 When finished press OK Save key The display will return to step 4 You can continue editing other items To return to the stand by mode press EXIT CH or wait for 60 seconds Editing an It...

Page 37: ...nd the directory item you want to erase p 34 5 Press OK 6 Press or to select Clear 7 Press OK Yes key The display will show the next item To return to the stand by mode press EXIT CH or wait for 60 seconds Erasing an Item from the Directory Make sure that the handset is in the stand by mode You can exit the programming mode any time by pressing EXIT CH Helen 1234567890 HEdit Clear OK Yes Edit HCle...

Page 38: ... unit will flash You can access the voice mail system by simply pressing VOICE MAIL To use this feature you must first store your access number Storing a Voice Mail Access Number Make sure that the handset is in the stand by mode VOICE MAIL Indicator BACK EXIT CH VOICE MAIL FUNCTION EDIT OK TALK HSave directory Set flash time OK Yes HRedial Directory OK Yes Ringer volume HProgram OK Yes HSave mail...

Page 39: ...w 1 Press VOICE MAIL The unit is connected to the telephone line and automatically dials the access number 2 Follow the pre recorded instructions 3 When finished press TALK If Voicemail on the display and the VOICE MAIL indicator on the base unit still flash even after you have listened to your voice mail message s press and release FUNCTION EDIT then press and hold VOICE MAIL until the unit beeps...

Page 40: ...of a million security codes These codes help prevent the unauthorized use of your telephone line by another cordless telephone user Handset Locator You can locate the handset or page the handset user with beep tones from the base unit 1 Press HANDSET LOCATOR The IN USE CHARGE indicator flashes The handset beeps for 1 minute and Paging is displayed 2 To stop paging press HANDSET LOCATOR again or pr...

Page 41: ...t the programming mode any time by pressing EXIT CH If 3 beeps sound and the display shows Save error move closer to the base unit and try again If Save error is still displayed place the handset on the base unit Start again from step 1 If you are connected via a PBX a longer flash time may be necessary to use PBX functions transferring a call etc Consult your PBX installer for the correct setting...

Page 42: ...vice allows your handset to display the second caller s information After you hear a call waiting tone while talking the handset will display the caller s name with the phone number and Waiting Please contact your telephone company for details and availability in your area NANCY BROWN 1 000 222 3333 Waiting Call Waiting Deluxe Service This unit is compatible with a Call Waiting Deluxe Service offe...

Page 43: ... Press OK Yes key 4 Press or repeatedly until the arrow points to C WTG options 5 Press OK Yes key 6 Press or to select On 7 Press OK Save key A beep sounds The display will return to the function list To return to the stand by mode press EXIT CH or wait for 60 seconds Ringer volume HProgram OK Yes Chnge language HC WTG options OK Yes C WTG options Off OK Save C WTG options On OK Save C WTG option...

Page 44: ...nf Answers the second call and combines it with the first Conference call to make a conference call During a conference call you can choose either Drop caller1 or Drop caller2 to hang up the first or second call Return Returns to the waiting caller while keeping the current call on hold To use Call Waiting Deluxe Service You can choose from the options on the display as shown below 1 Ans 4 Fwd 2 H...

Page 45: ...Drop 3 Conference 1 Drop caller1 2 Drop caller2 After selecting Ans Answer or Hold You can choose one of the following options Return to return to the waiting call Drop to hang up the current call and answer the waiting call Conference to make a conference call Press CALL WAIT FLASH to display the option menu Enter a displayed option number 1 to 3 to select the desired option If Return is selected...

Page 46: ... Access numbers entered after pressing TONE will not be included when redialing How to Use the PAUSE Button For Analogue PBX Line Long Distance Service Users We recommend you press PAUSE if a pause is required for dialing with a PBX or to access a long distance service Ex Line access number 9 PBX 9 PAUSE Phone number Pressing PAUSE once creates a 3 5 second pause This prevents misdialing when you ...

Page 47: ...and connect the optional headset to the headset jack as shown below When the optional headset is connected to the handset be sure to use the headset to talk with the caller If you want to have a normal cordless phone conversation disconnect the headset H Headset Jack Using an Optional Headset Plugging an optional headset into the handset allows a hands free phone conversation Please use only the P...

Page 48: ...battery with a new Panasonic HHR P401 battery To avoid memory loss replace within 3 minutes 1 Lay the handset on a flat surface Carefully insert a flat metal object and turn slowly to remove the cover 2 Replace the battery and close the cover 3 Be sure to charge the new battery for about 7 hours in order to display the battery strength prompt correctly p 11 1 2 T Adaptor Single Line Telephone Jack...

Page 49: ...ully p 11 Clean the charge contacts and charge again p 12 Install the battery properly p 48 Place the handset on the base unit and unplug the AC adaptor to reset Plug in and try again Re install the handset battery within 3 minutes to avoid memory loss and place the handset on the base unit Then try again Locate the handset and the base unit away from other electrical appliances p 3 Move closer to...

Page 50: ...ng caller information Do not pause for over 60 seconds while programming or may have been pressed when you picked up the handset Press EXIT CH and try again If a power failure occurs programmed information may be erased Reprogram if necessary You cannot store an item in the directory while the unit is in the talk mode Do not pause for over 60 seconds while storing To answer the call press TALK Sta...

Page 51: ...tery p 48 This is normal When the headset is plugged into the handset p 47 you must use the headset to talk with the caller To have a normal cordless phone conversation disconnect the headset Make sure that the headset is plugged into the headset jack properly p 47 Problem HANDSET LOCATOR does not function You cannot redial the last number dialed Recharge is displayed flashes or the unit beeps int...

Page 52: ...Users should not attempt to make such connections themselves but should contact the appropriate electric inspection authority or electrician as appropriate NOTICE The Ringer Equivalence Number REN assigned to each terminal device provides an indication of the maximum number of terminals allowed to be connected to a telephone interface The termination on an interface may consist of any combination ...

Page 53: ...4 F Placement 1 Do not place heavy objects on top of this unit 2 Care should be taken so that objects do not fall onto and liquids are not spilled into the unit Do not subject this unit to excessive smoke dust mechanical vibration or shock 3 Place the unit on a flat surface For best performance 1 If noise prevents the conversation from being understood at the handset approach the base unit to less...

Page 54: ...HAZARD DO NOT EXPOSE THE BASE UNIT TO RAIN OR ANY TYPE OF MOISTURE ONLY THE HANDSET IS SHOCK AND SPLASH RESISTANT If there is any trouble disconnect the unit from the telephone line and connect a known working phone If the known working phone operates properly have your unit repaired by one of the specified authorized Panasonic Factory Servicentres If the known working phone does not operate prope...

Page 55: ...ered or repaired in any way that affects the reliability or detracts from the performance nor does it cover any product which is used commercially WARRANTY SERVICE IN WARRANTY service can be obtained by delivering your product to an Authorized Panasonic Servicentre To locate an Authorized Panasonic Servicentre refer to your dealer or the directory of Authorized Servicentres packed with each produc...

Page 56: ...Printed in Japan PQQX12336YA SS0799ST2080 Panasonic Canada Inc 5770 Ambler Drive Mississauga Ontario L4W 2T3 www panasonic ca ...

Reviews: