background image

Before use, please read these instructions completely.
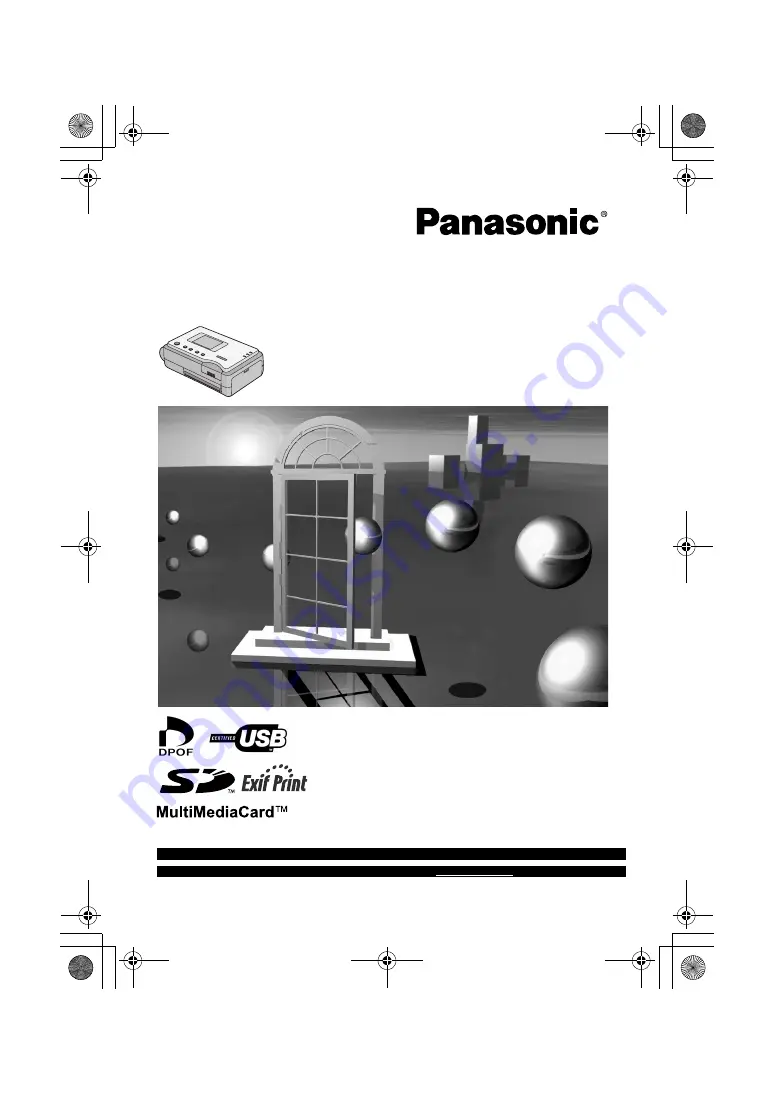
SD Mobile Printer

    Operating Instructions

Model No.

 SV-P20U

For USA assistance, please call:1-800-272-7033 or send e-mail to:[email protected]

For Canadian assistance, please call:1-800-561-5505 or visit us at www.panasonic.ca

VQT0A81-1

P20U.book  Page 1  Thursday, March 13, 2003  4:19 PM

Summary of Contents for SV-P20

Page 1: ...perating Instructions Model No SV P20U For USA assistance please call 1 800 272 7033 or send e mail to digitalstillcam panasonic com For Canadian assistance please call 1 800 561 5505 or visit us at www panasonic ca VQT0A81 1 P20U book Page 1 Thursday March 13 2003 4 19 PM ...

Page 2: ...le 5 Reverse Engineering Decompiling or Disassembly Licensee may not reverse engineer decompile or disassemble the Software except to the extent either of them is permitted under law or regulation of the country where Licensee resides Matsushita or its distributors will not be responsible for any defects in the Software or damage to Licensee caused by Licensee s reverse engineering decompiling or ...

Page 3: ...nter Driver 28 Installing SD Viewer for Printer 38 Printing a file from the PC 39 Uninstalling the Printer Driver 41 Notes on the Printer Driver 41 The Status Monitor 41 To Delete the Data of the Printing Job 41 To Confirm the USB port 42 Note for installing from the Add Printer Wizard screen 42 Notes on SD Viewer for Printer 42 Messages for Printer Driver 43 Others Precautions 44 Ink Cassette Pap...

Page 4: ...her various designations company names brand names etc are registered trademarks or trademarks of the respective companies The contents or complete reproduction or copy of these Operating Instructions could be changed without notice The USB IF Logos are trademarks of Universal Serial Bus Implementers Forum Inc l l l l 00 indicates the page to be referred to WARNING TO REDUCE THE RISK OF FIRE OR SH...

Page 5: ...ect the equipment into an outlet on a circuit different from that to which the receiver is connected Consult the dealer or an experienced radio TV technician for help FCC Caution To assure continued compliance follow the attached installation instructions and use only shielded interface cables with ferrite core when connecting to computer or peripheral devices Any changes or modifications not expr...

Page 6: ... Carrying Case RFC0069 H Battery Pack CGR S603 Optional Accessories Battery Pack CGR S601 Ink Cassette Paper set VW CSA20 VW CSASD8 Introduction This printer is used to print still pictures recorded on a card taken by a digital camera or other digital device using an SD MultiMediaCard Install the accessory printer driver on your personal computer to use the printer with your PC P20U book 6 ページ 200...

Page 7: ... sheet of paper exits here Do not insert a sheet of paper into this slot It may result in a paper jam or unit failure 10Memory Card Slot This is where the Memory Card is inserted 11Memory Card Door SD CARD 3 12Ink Cassette Insert Location Insert the Ink Cassette 13Ink Cassette Eject Lever Slide to eject the Ink Cassette 14Ink Cassette Compartment Door 15Paper Sliding Slot This slot is the opening ...

Page 8: ...older on the SD Mobile Printer 1 and slide it forward until it locks with a click 2 2 Connect the AC mains Lead to the AC Adaptor and to an AC Outlet Refer to the description above The ON Lamp flashes 3 Leave them as above until the Power Lamp ON goes off When recharging is completed the ON Lamp goes off Remove the AC Adaptor to use the Battery The SOCKET OUTLET SHALL BE INSTALLED NEAR THE EQUIPME...

Page 9: ...charging time to fully charge the battery is about 170 minutes 68 degrees F 20 degrees C and humidity 60 Higher or lower ambient temperature may cause a variation in the actual charging time When the Power Lamp flashes more quickly or slowly or turns off some abnormality may have occurred Refer to State of Power Lamp While Charging on page 46 CAUTION Danger of explosion if battery is incorrectly r...

Page 10: ...osite to the protection sheet Then carefully stack the sheets by pulling them out about 3 cm 1 inch off the package Pay attention not to contact the paper with the adhesive portion of the package 1 Please read the Precautions carefully l l l l 44 Handle the paper carefully since surface of the paper is scratched easily Printing on paper with a flawed surface causes white patches on printed image W...

Page 11: ...Cassette Do not touch the Ink Film in the Ink Cassette and do not pull it out of the cassette It is recommended that you do not pull out the Ink Cassette before the full consumption of ink because the Ink Film may sag when resetting the Ink Cassette Confirm that there is no paper and then remove or replace the Ink Cassette Do not eject the Ink Cassette during printing Close the Ink Cassette Compar...

Page 12: ...he CARD ACCESS sign is being displayed in red never take the card out or turn the power off If images cannot be recognized by this printer t is displayed on the index screen Turning the Power ON 1 Install the battery or plug in the AC adaptor l l l l 8 and hold down the button for about 2 seconds The ON Lamp is turned on The LCD monitor is turned on 2 seconds after turning on the ON Lamp The CARD ...

Page 13: ... Menu screen will be cancelled when the printer is turned off ª Menu Interface 1 Print style l l l l 14 2 Number of copies l l l l 15 3 Date print l l l l 20 4 DPOF l l l l 22 5 Frame l l l l 19 6 Trimming l l l l 21 7 Picture l l l l 23 8 LCD l l l l 24 2 3 4 5 MENU DISPLAY MENU DISPLAY MENU DISPLAY MENU DISPLAY OK SET SELECT Number of copies Print style DPOF Date print Standard 1 OFF PRINT MENU ...

Page 14: ...iew image switches to the Index screen and vice versa If you wish to print the previewed image as is proceed to Step 8 4 Press the MENU button The Menu screen is displayed 5 Press the DISPLAY button to select Print style and press the 2 1 button to set it to a desired mode Standard Prints an image Copy 8 Prints 8 screen shots of the same picture l 18 Select 8 Prints 8 screen shots of the different...

Page 15: ...process The LCD monitor is turned off during the printing operation l 24 The paper is moved forward and backward several times and exits from the Paper Exit Slot The printed paper is then ready to be removed from the Paper Exit Slot 2 Do not insert the paper into the Paper Exit Slot because this may result in a paper jam or a unit failure 9 After completion of the printing pull out the printed pap...

Page 16: ... page 51 Since the paper slides forward and back during printing keep a gap of at least 10 cm 4 inch or more around the printer during the print process Printing Multiple Screen Shots of Different Images This printer can divide the screen into 8 and print multiple screen shots of different images 1 Insert a Memory Card and Turn on the Printer l l l l 12 The Index picture screen is displayed 2 Pres...

Page 17: ...ets When using adhessive paper the picture printed may be displaced with reference to the cutting frame Even if you select 7 images or less multiple screen shots of different images can be printed On inserting a sheet of paper the index picture screen switches to the preview image and the image is printed Select eight images then print them If you print seven images or less the blank space cannot ...

Page 18: ... desired image and press the DISPLAY button The preview image is displayed 6 Insert a sheet of paper l l l l 15 Use of the Ink Cassette Paper Set VW CSASD8 is recommended All accessories may not be available in all markets When using adhesive paper the picture printed may be displaced with reference to the cutting frame NOTE The date will not be printed even if the date feature is selected 4 5 OK ...

Page 19: ...U button 3 Insert a sheet of paper l l l l 15 The image with the frame illustrations are printed NOTE The date will not be printed even if the date feature is selected When Copy 8 is selected 8 images with frame illustration are printed When Select 8 is selected a frame illustration is printed around the whole 8 images When the frame illustration is selected border areas of the image are cut off 2...

Page 20: ...ton 3 Insert a sheet of paper l l l l 15 The Date 1 mark turns to green The image is printed with the recorded date in the lower right corner If images have been saved or edited on the PC the date saved or edited will be printed The date is not printed when Copy 8 Select 8 or Frame is selected 2 OK SET SELECT Number of copies Print style DPOF Date print Standard 1 ON PRINT MENU 1 2 MENU DISPLAY St...

Page 21: ... screen is displayed 2 Press the DISPLAY button to select Trimming and press the 2 1 button to set to ON After setting press the MENU button 3 Insert a sheet of paper l l l l 15 The image is trimmed and printed 1 If Trimming is turned OFF a blank space will remain 2 OK SET SELECT Trimming Picture LCD ADJUST ADJUST MENU 2 2 Frame ON No frame MENU DISPLAY 2 3 P20U book 21 ページ 2003年1月7日 火曜日 午後3時10分 ...

Page 22: ...utton 3 Insert a sheet of paper l l l l 15 Setting the print count in Number of copies will have no effect Only the DPOF configured print count will be printed If 100 or more copies are set to be printed on the DPOF settings only 99 will be printed The SD Mobile Printer cannot configure DPOF When Print style is set to Select 8 DPOF set images are selected automatically and printed The date will no...

Page 23: ...ure brightness and shade SHARPNESS Sharpen outline 4 Press the 2 1 button to adjust the level 5 Press the MENU button twice Adjustment on the LCD monitor is approximate We recommend adjusting picture quality when you use this printer When adjusting the depth of the color on COLOR LEVEL some colors may become darker when printed Adjusting SHARPNESS cannot be checked on the LCD monitor and only is n...

Page 24: ... being printed This setting is disabled when this printer is running on the battery 4 Press the 2 1 button to adjust the level 5 Press the MENU button twice LCD Monitor adjustments will have no effect on print quality Adjust the LCD monitor if the visibility of the LCD monitor is low The LCD monitor may not be seen clearly from a certain angle Before printing it is advised that all LCD settings sh...

Page 25: ...utton for about 2 seconds Turn off the SD Mobile Printer 2 Open the Memory Card Door 1 and push the edge of the Memory Card 2 Pull out the Memory Card 3 Put the Printer into the Carrying Case 1 Í 1 2 P20U book 25 ページ 2003年1月7日 火曜日 午後3時10分 ...

Page 26: ...the Paper After Printing 1 Fold in both directions along the perforation lines 2 Tear along the perforation lines There are perforation lines on both ends of the paper Be sure to tear off both sides 1 2 P20U book 26 ページ 2003年1月7日 火曜日 午後3時10分 ...

Page 27: ...d AC adapter when using this printer connecting with your PC Remove the memory card when using this printer as the printer for your PC If two or more USB devices are connected to the personal computer normal operation is not guaranteed When connecting to a PC use the USB cable supplied A USB extension cable cannot be used When connecting to a PC with USB Hub normal operation is not guaranteed The ...

Page 28: ...xiliary USB cable The Found New Hardware Wizard screen appears 4 Click the Next Button Confirm that the item Install the software automatically is selected 5 Click the Finish Button when the Printer Driver Software is detected The driver setup is completed When the Printer Driver Software is not detected please refer to page 32 Please read also the Notes on the Printer Driver l l l l 41 carefully ...

Page 29: ...zard screen appears If a screen to select the default printer is displayed select Yes if it is to be the default printer The item for selecting the default printer may not be displayed depending on the environment of the PC After clicking Finish the message File DLL is not found can be displayed depending on the environment of the PC Many PCs may install this file on the Hard Disk Click Refer and ...

Page 30: ...on your PC environment steps 4 to 8 may be skipped If this is the case proceed from step 9 4 Click the Next Button The Add Found New Hardware Wizard screen appears 5 Click the Next Button Confirm whether your device is configured to the optimal driver detection setting 6 Check the location to be specified and enter the path as D Win9X ME if your system is Windows 98SE Enter the path as D Win2K XP ...

Page 31: ...d New Hardware Wizard screen appears again Repeat the steps from 4 through 7 12Select No when the Add Printer Wizard screen appears Select Yes to set as the default printer The item for selecting the default printer may not be displayed depending on the environment of the PC 13Click the Finish Button The driver setup is completed When the Printer Driver Software is not detected please refer to pag...

Page 32: ...rol Panel Printers and Other Hardware Printers and Faxes 4 Select Add a printer from Printer Tasks 5 When the Add Printer Wizard is activated click Next 6 Select Local printer attached to this computer and deselect Automatically detect and install my Plug and Play printer 7 Click Next 8 Select Use the following port and select the port through which the Printer is connected from the pull down menu...

Page 33: ... default printer is displayed select Yes if it is to be the default printer If the screen to select whether the printer is shared or not is displayed select This Printer is not Shared if the printer is not shared and click Next 15If a screen asking you to execute a test print is displayed during installation select No and click Next 16Click Finish The installation is now completed 11 12 13 14 15 1...

Page 34: ...on the printer 3 Select Start Settings Printers 4 Double click the Add Printer icon 5 When the Add Printer Wizard is activated click Next 6 Select Local Printer and click Next 7 Click Have Disk 8 Select the folder where the Printer Driver is located If the CD ROM drive is assigned to the D drive select D Win9X Me folder 9 Click OK Installing from the Add Printer Wizard screen Windows 98SE Me 3 4 6...

Page 35: ...lect only the USB00X port e g USB001 12Click Finish If a screen to select the default printer is displayed select Yes if it is to be the default printer If a screen asking you whether a test print is executed or not is displayed during installation select No The installation is now completed 11 12 10 P20U book 35 ページ 2003年1月7日 火曜日 午後3時10分 ...

Page 36: ...s 4 Double click the Add Printer icon 5 When the Add Printer Wizard is activated click Next 6 Select Local Printer and deselect Automatically detect and install my Plug and Play printer 7 Click Next 8 Select Use the following port and select the port through which the Printer is connected in the adjacent list Select only the USB00X port e g USB001 9 Click Next 10Click Have Disk Installing from the...

Page 37: ...rinter is displayed select Yes if it is to be the default printer If the screen to select the whether the printer is shared or not is displayed select This Printer is not Shared if the printer is not shared and click Next 15If a screen asking you whether a test print is executed or not is displayed during installation select No and click Next 16Click Finish The installation is now completed 11 12 ...

Page 38: ...ge Installation will be completed The SD Viewer for Printer is available in English German and French Please read the PDF based instructions for how to use the SD Viewer for Printer To view the installed operating instructions Adobe Acrobat Reader 4 0 or higher is required Please install Adobe Acrobat Reader 5 0 from the supplied CD ROM Before using for the first time select Readme from Start All ...

Page 39: ...D Viewer for Printer 3 Click the pictures The selected pictures are surrounded with a blue line 4 Click File Print 5 Click to open detail setting 6 Select Panasonic SV P20 The setting screen and name of printer displayed are different depending on OS 7 Set the kind of paper l l l l 40 8 Click Print 9 Click Yes 10Insert a sheet of paper l l l l 15 When Panasonic SV P20 USB00X 1 is displayed insert ...

Page 40: ...y will revert back to the print preview screen 1 Click Layout tab and select the printing direction 2 Click Advanced 3 Select the kind of paper 1 Click Paper tab and select the kind of paper 2 Select the printing direction An image may be larger than the defined printing area or may be printed on two or more pages when using some applications Adjust the paper size or paper setting in your applicat...

Page 41: ... Are you sure you want to delete the printer Panasonic SV P20 appears Click Yes This will uninstall the Printer Driver ª Notes on the Printer Driver If your system is Windows XP or Windows 2000 log on with the user name of Administrator administrator of your PC or any user name having an equivalent right to the administrator and then start to install Use the default setting ICM Image Color Managem...

Page 42: ...Open the properties of this Printer and select Enable bidirectional support in the Ports tab For Windows 2000 Open the properties of this Printer and select USB port in the Ports tab Open the properties of this Printer and select Enable bidirectional support in the Ports tab For Windows 98SE Me Open the properties of this Printer by selecting Start Settings Printers and set the USB port for Print ...

Page 43: ...ver Please abort printing l l l lInstall the driver again Error occurred Turn the printer s power off and then back on and then click Restart for printing or click Abort to abort printing l l l lRestart the job or abort printing after turning the Printer off and on Please remove the paper l l l lPlease remove the printed paper Communication with the printer has failed First check that the printer ...

Page 44: ... cannot be used Do not place the Ink Cassette or the Printer fitted with the Ink Cassette in a location subject to high temperatures Do not dispose of the protection sheet attached to the paper until the last paper has been consumed The ink cassette is made of plastic and metal and printing paper is made of resin When disposing of it observe the applicable rules in your country or region ª Paper N...

Page 45: ...eriod of time Do not store prints under conditions of high temperatures or high humidity Leaving prints under such conditions for an extended period of time could cause a deterioration in print quality Do not leave prints exposed to direct sunlight ª Optimal Use of the Battery Battery Characteristics This Battery is a rechargeable lithium ion battery Its ability to generate power is based upon the...

Page 46: ...ed If the ON Lamp turns off when charging is not completed the following reasons are probable The ambient temperature or that of the battery itself is too high or too low Wait until the proper temperature is reached and charge the Battery again The AC Adaptor is probably defective Contact your nearest Panasonic dealer If the battery runs out quickly If a fully charged battery runs out quickly the ...

Page 47: ...g of data to the card as well as the deletion of data from the card Sliding back the switch permits such operations ª About the LCD Monitor If you use the printer for a long time the LCD monitor will heat up This is normal When the LCD screen gets dirty wipe it with a dry soft cloth Do not forcefully squeeze the LCD monitor Otherwise the display may become uneven or the LCD monitor may fail In a p...

Page 48: ...g DPOF printing or when printing two or more images the images that remain unprinted are held in memory When the power is turned ON again the message Last print job interrupted To abort push MENU will be displayed for approx 5 seconds If the MENU button is pressed when this message is displayed printing will not continue ª Condensation When a bottle is taken out from a refrigerator in summer and l...

Page 49: ...ad is damaged such as the core wires being exposed turn off the printer and unplug it Do not use the printer in any way which overloads the electric outlet or wiring Do not damage the main lead or plug Remove dust or other foreign matter adhering to the power plug Do not drop or insert metal or flammable objects inside the printer Do not splash or wet the printer Do not disassemble or remodel the ...

Page 50: ...If the printer is particularly dirty soak the cloth in mild kitchen detergent neutral diluted with water and wring out thoroughly Then wipe off the dust with the cloth and wipe again with a dry cloth When using a synthetic cloth follow the precautions in the cloth s usage instructions When you use this printer on a beach or similar place do not let sand fine dust or seawater get into the printer P...

Page 51: ...t is streaming in through the paper sliding slot Because this may cause a malfunction adjust the direction of the printer Insert paper to print Insert the printing paper correctly Remove paper Remove the paper This function can t be used because there is no card Insert the card This function is not available because this card can t be used Insert the proper card This function can t be used because...

Page 52: ...ns down quickly 6 1 Are you using the Battery in an extremely cold place In cold places the operating time of the Battery becomes shorter 6 2 Has the Battery worn out If the operating time is still too short even after the Battery is fully charged the Battery has worn out 7 The CARD ACCESS sign remains displayed for a long time 7 High resolution images take a long time to read The following are ap...

Page 53: ...change the number of prints etc from the menu 13 When the DPOF printing was carried out multiple images have been automatically printed 13 If you print with the Print Style set to Select 8 a DPOF set image is automatically selected and eight images will be printed 14 DPOF setting is not available on the printer 14 DPOF set with equipment or software that allows DPOF setting This printer can use in...

Page 54: ... print Print Head Film thermal head 11 4 dots mm 290 dpi Input Socket USB terminal Up to 12 Mbps Compatible Cards SD Memory Card MultiMediaCard Format DOS Format Image Format JPEG Baseline system SD Picture DCF Design rule for Camera File system Exif JFIF CIFF SISRIF TIFF no compression Baseline TIFF Rev 6 0 RGB Full color Images compatible Number of Pixels 6144 t4096 Max Sampling ratio 4 4 4 4 2 ...

Page 55: ...prox 4 6 oz 130 g Battery Pack Panasonic CGR S603 Information for Your Safety Dimensions Approx 25 32 t53 64 t2 5 32 20 W t21 H t55 D mm Weight Approx 1 4 oz 40 g Power Source AC 110 240 V 50 60Hz Input Current 0 3 A DC Output DC 4 9 V 1 8 A Nominal Voltage 3 7 V Nominal Capacity 1 350 mAh E 20body2U fm 55 ページ 2003年1月8日 水曜日 午前10時2分 ...

Page 56: ... to products purchased and serviced in the United States or Puerto Rico This warranty is extended only to the original purchaser of a new product which was not sold as is A purchase receipt or other proof of the original purchase date is required for warranty service Carry In or Mail In Service For Carry In or Mail In Service in the United States call 1 800 272 7033 For assistance in Puerto Rico c...

Page 57: ...AL DAMAGES RESULTING FROM THE USE OF THIS PRODUCT OR ARISING OUT OF ANY BREACH OF THIS WARRANTY As examples this excludes damages for lost time travel to and from the servicer loss of media or images data or other memory content The items listed are not exclusive but are for illustration only ALL EXPRESS AND IMPLIED WARRANTIES INCLUDING THE WARRANTY OF MERCHANTABILITY ARE LIMITED TO THE PERIOD OF ...

Page 58: ...ized Factory Servicenter Panasonic Services Company 1705 N Randall Road Elgin IL 60123 7847 Attention SD Products Repair Please carefully pack and ship prepaid and insured to the Elgin Centralized Factory Servicenter Customer s in Puerto Rico please ship or carry in to location below Service in Puerto Rico Product Repairs MAIL TO Web Site http www panasonic com You can purchase parts accessories o...

Page 59: ...ícula de tinta quede floja 4 Abra la puerta del compartimento del cartucho de tinta 2 5 Empuje en la dirección de la flecha hasta que se ajuste en su lugar haciendo clic 6 Cierre 2 7 Abra la puerta de la tarjeta de memoria 3 8 Coloque la tarjeta de memoria con el ángulo cortado 4 delante con la etiqueta mirando hacia arriba y luego insértelo por completo en la ranura de la tarjeta de memoria horiz...

Page 60: ...IDE mirando hacia arriba en la ranura PAPER IN 4 ranura superior 1 El papel se moverá adelante y atrás diversas veces y saldrá por la ranura de salida del papel A continuación se podrá retirar el papel de la ranura de salida del papel 2 5 Cuando termine de imprimir saque el papel horizontalmente Í 1 PAPER IN 4 5 2 3 MENU DISPLAY MENU DISPLAY Standard DISPLAY Print this picture Date Standard Insert...

Page 61: ... Estilo de impresión 2 Número de copias 3 Fecha de impresión 4 DPOF 5 Fotogramas guardados 6 Recorte 7 Imagen 8 LCD 1 2 3 4 MENU DISPLAY MENU DISPLAY MENU DISPLAY MENU DISPLAY OK SET SELECT Number of copies Print style DPOF Date print Standard 1 OFF PRINT MENU 1 2 OK SET SELECT Number of copies Print style DPOF Date print Standard 2 OFF PRINT MENU 1 2 OK SET SELECT Number of copies Print style DPO...

Page 62: ...ica One Panasonic Way Secaucus NJ 07094 Panasonic Sales Company PSC Division of Matsushita Electric of Puerto Rico Inc Ave 65 de Infantería Km 9 5 San Gabriel Industrial Park Carolina Puerto Rico 00985 Panasonic Canada Inc 5770 Ambler Drive Mississauga Ontario L4W 2T3 P20U book Page 62 Thursday March 13 2003 4 19 PM ...

Reviews: