background image

13

VQT4U55

ENGLISH

5

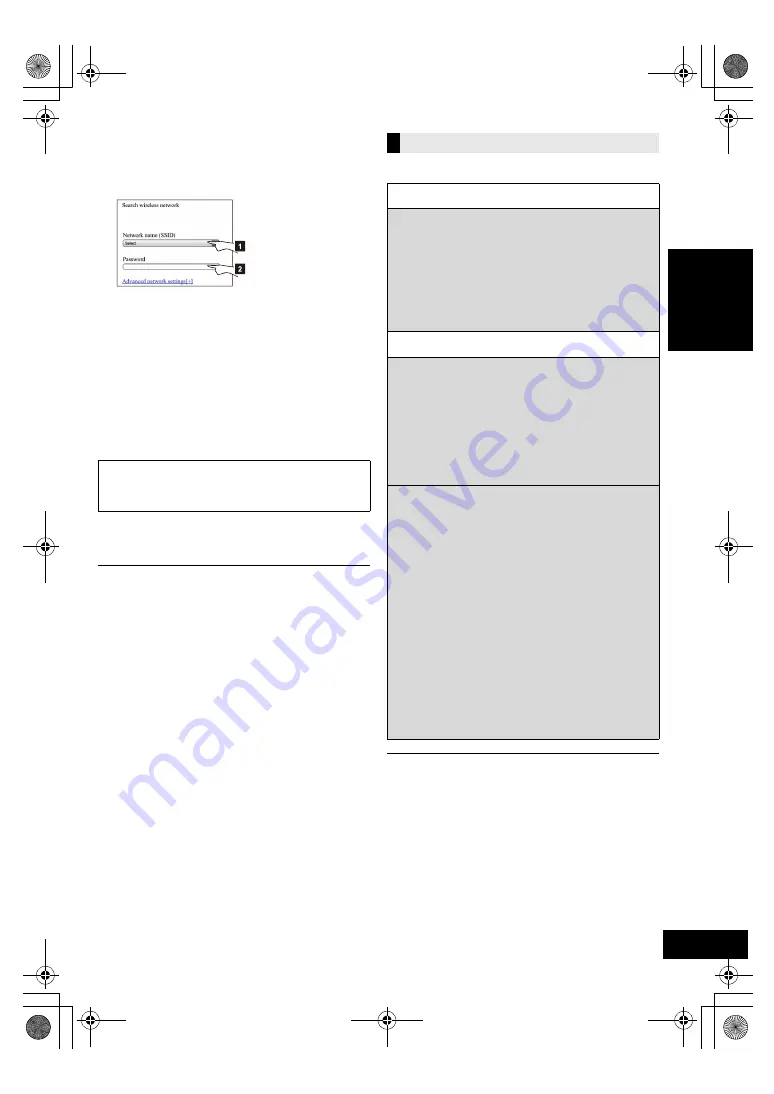
Select and input the details.

Check your 

home wireless network name

 (Network 

name (SSID)) and 

password

 for this network. This can 

often be found on the wireless network router itself.

6

Select “

JOIN

” to apply the settings.

In the pop-up screen, select “OK” to continue.
– Select “Cancel” to return to the setup window.

7

The settings are completed when “

SUCCESS

” 

is displayed and the Wi-Fi status indicator 

stops blinking

 and 

lights in blue

.

8

Make sure to connect your compatible device 
back to your 

home wireless network

.

*1: If you have set your wireless network to be invisible, select 

“BACK” and refer to “Alternative settings”.

The below settings are the alternative or additional settings 
for “Method 4”. 

(

l

12

)


Enable Java and Cookies in your browser settings.

This system can also be set using the WPS PIN code.
Replace step 2 of “Method 1” with the following steps.
(Before starting, refer to the wireless network router’s 
operating instructions for details on how to enter the PIN 
code.)
1

While “WPS” is flashing press and hold [

s

 WPS] again 

to display the 8 digit PIN code.

{.

Wi-Fi status indicator blinks purple.

2

Enter the PIN code into the wireless network router.

[1]

Select your 

home wireless network name

.*

1

[2]

Type the 

password

.

If “FAIL” is displayed press [OK], check the 
wireless network password and other settings 
and start again from step 1.

Advanced network settings

Alternative settings

Instead of steps 4 and 5

Select “

Manual settings

”.

1

Type your 

home wireless network name


into the “Network name (SSID)” field.

2

Select the 

encryption method

 from the 

“Security system” drop down list.

3

Type the 

password

 into the “Password” field 

and then select “JOIN”.

Additional settings

If your home wireless network has been 
configured to use specific IP Addresses, Subnet 
Mask, Default Gateway, Primary DNS, etc.

Before step 6

Select “

Advanced network settings

”.

{.

Input the required addresses into each field and select 
“JOIN”.

To change the settings back to DHCP, select “ON” from the 
“DHCP” drop down list.

If you want to change the name of this system 
that is displayed as the AirPlay speakers or 
DLNA renderer.
Before step 4

Select “

Additional settings

”.

1

Select “

Edit STEREO SYSTEM name

”.

2

Type a new name into the 
“STEREO SYSTEM name” field.

{.

Only ASCII characters can be used.

3

Select “

OK

”.

4

If this system is already connected to your 
home wireless network:

j

Select “

Additional settings

” and then 

select “

Exit

”.

If this system is not connected to your home 
wireless network:

j

Continue to 

step 4

 of “Method 4”.

PPC_SC-NE5~VQT4U55.book  13 ページ  2013年1月17日 木曜日 午前11時7分

Summary of Contents for SC-NE5

Page 1: ...register U S customers only Wireless Speaker System Model No SC NE5 Included Installation Instructions l 2 3 and 26 27 The installation work should be done by a qualified installation specialist Befo...

Page 2: ...e unplugged from the socket outlet immediately Button type battery Lithium battery Risk of fire explosion and burns Do not disassemble heat above 60 oC 140 oF or incinerate Unit This unit utilizes a l...

Page 3: ...his device complies with Part 15 of FCC Rules and RSS Gen of IC Rules Operation is subject to the following two conditions 1 This device may not cause interference and 2 this device must accept any in...

Page 4: ...anty ONLY FOR CANADA 31 Supplied items 1 CD unit SL NE5 1 Speaker unit SB NE5 Check the supplied accessories before using this system About descriptions in this Owner s Manual Pages to be referred to...

Page 5: ...not supplied as of February 2013 Compatibility depends on the software version Update your iPod iPhone iPad to the latest software before using it with this system Please be aware that Panasonic acce...

Page 6: ..._PORT IPOD_DOCK b 3 Basic playback control buttons 4 iPod port for iPod iPhone iPad l 5 9 5 Adjust the volume 0 min to 50 max 6 Network setup button l 11 7 Standby on indicator While this system is tu...

Page 7: ...se this system near equipment or in an environment that is sensitive to radio frequency interference example airports hospitals laboratories etc Remote control 1 Turn this system on or off 2 Select th...

Page 8: ...mm 1 8q stereo 2 Press AUX to select AUX and start playback on the connected device To select the sound input level of the external device 1 While in AUX mode press PLAY MENU to select INPUT LEVEL an...

Page 9: ...place any objects behind the unit 2 While holding the unit push the centre of the CD until it clicks into place and then close the CD lid Be careful not to scratch the CD Make sure you place the centr...

Page 10: ...your wireless network router refer to http panasonic jp support global cs This site is in English only Using the WPS Push Button Configuration PBC 1 Press and hold s WPS on the speaker unit WPS flash...

Page 11: ...SET WI FI is displayed check that the iPhone is connected to the wireless network and try again from step 1 5 A message will pop up on your iPhone Allow the iPhone to share the wireless network settin...

Page 12: ...t the app 5 When a message indicating the completion of the Wi Fi setup of this system is displayed close the app and then check the operation of AirPlay etc Panasonic Stereo System Network Setup for...

Page 13: ...network router 1 Select your home wireless network name 1 2 Type the password If FAIL is displayed press OK check the wireless network password and other settings and start again from step 1 Advanced...

Page 14: ...k settings With this function set to ON you can stream music from the iOS device or Mac PC iTunes 10 2 2 or later to this system without the need of a wireless network router Previous network settings...

Page 15: ...for details 1 Steps are based on iOS 6 0 1 Playing back music files on the DLNA server You can share music files stored in the DLNA Certified media server PC with Windows 7 installed smartphone etc c...

Page 16: ...device is indicated on the display for 2 seconds 3 Start play on the Bluetooth device This system can only be connected to one device at a time When BLUETOOTH is selected as the source this system wil...

Reviews: