RQT7834
10
S.WOOFER
S.WOOFER
H.BASS
H.BASS
Automatic presetting
Do the following once each for FM and AM.
Preparation:
Tune to the frequency where pre-setting is to begin.
Hold down [PROGRAM] until the frequency changes.
The tuner presets all the stations it can receive into the channels in
ascending order. When finished, the last station memorized is tuned in.
Manual presetting
Pre-set the stations one at a time.
1
Press [PROGRAM] then press [
g
, REW/
3
] or
[
f
,
4
/FF] to tune to the desired station.
2
Press [PROGRAM] then press [
g
, REW/
3
] or
[
f
,
4
/FF] to select a channel.
3
Press [PROGRAM].
The station occupying a channel is erased if another station is preset
in that channel.
Selecting channels
Press the numbered buttons to select the channel.
To enter a 2-digit channel, press [
>
10], then the two digits.
OR
1
Press [PLAY MODE] to select “PRESET”.
2
Press [
g
, REW/
3
] or [
f
,
4
/FF] to select the
channel.
1
Press [TUNER, BAND] to select band.
The unit comes on.
Every time you press the button:
FM
AM
2
Press [PLAY MODE] on the remote control to select
“MANUAL”.
Every time you press the button:
MANUAL
PRESET
3
Hold down [
g
/REW/
3
] or [
f
/FF/
4
] for a moment
to search for a station
.
The frequency stops when it finds a clear station.
To stop during the process, press
[
g
/REW/
3
] or
[
f
/FF/
4
].
Under excessive interference, a station may not be found.
Press
[
g
/REW/
3
] or
[
f
/FF/
4
] repeatedly to tune step-by-
step.
“TUNED” is displayed when a radio station is tuned.
“ST” is displayed when a stereo FM broadcast is being received.
If noise is excessive in FM
Remote control only
Hold down [PLAY MODE] to display “MONO
”
.
Monaural sound is selected and noise reduces when reception is
weak.
Hold down [PLAY MODE] again to cancel the mode.
“MONO” is also cancelled if the frequency is changed.
To receive FM broadcasts allocated in 0.1 MHz steps
Main unit only
Hold down [TUNER, BAND]. The display changes in a few seconds to
show the current minimum FM frequency. Continue to hold down the
button until the minimum frequency changes. The step is changed.
Repeat the above to change the step back.
Note
•
After changing the “allocation” setting, the frequencies you previously
preset in the memory will be cleared.
•
Sound is momentarily interrupted if you load/unload tapes while
listening to an AM broadcast.
Manual tuning
Radio
Radio
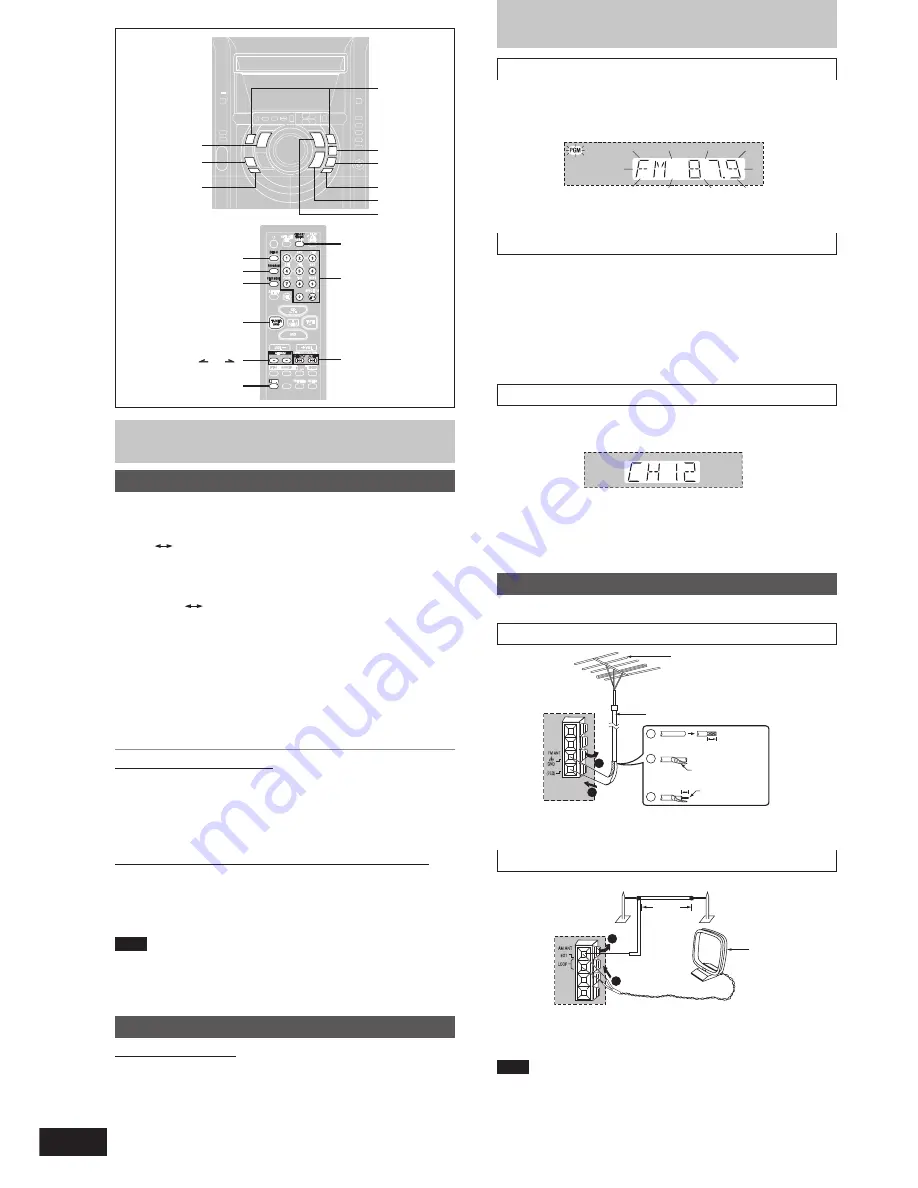
Optional antenna connections
Use outdoor antenna if radio reception is poor.
FM outdoor antenna
•
Disconnect the FM indoor antenna.
•
The antenna should be installed by a competent technician.
AM outdoor antenna
Run a piece of vinyl wire horizontally across a window or other
convenient location.
Leave the loop antenna connected.
Note
Disconnect the outdoor antenna when the unit is not in use.
Do not use the outdoor antenna during an electrical storm.
Preset tuning
Remote control only
There are two methods of pre-setting stations.
Automatic presetting :
All the stations the tuner can receive are preset.
Manual presetting
:
You can select the stations to preset and the
order they are preset in.
Up to 15 stations each can be set in the FM and AM bands.
Preparation:
Press [TUNER, BAND] to select “FM” or “AM”.
5 -12 m
(16 – 40 ft.)
1
2
AM outdoor antenna (not included)
AM loop
antenna
(included)
Rear
panel
of this
unit
1
30 mm
(1
3
/
16”
)
15 mm
(
19
/
32”
)
1
2
3
2
FM outdoor antenna
(not included)
75
Ω
coaxial cable (not included)
Shield braid
Core wire
DISC
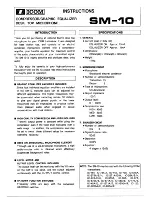
PROGRAM
PLAY MODE
ALBUM (
or
)
TUNER, BAND
c
DECK1
a
, REC
TUNER, BAND
L
, STOP
DECK 1/2
g
/REW/
3
,
f
/FF/
4
Numbered
buttons
g
, REW/
3
,
f
,
4
/FF
CLOCK/TIMER
SHIFT
DECK2
c
:
, TAPE
:
/
J
, CD
Rear
panel
of this
unit