78
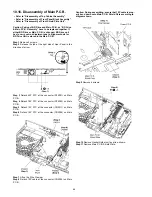
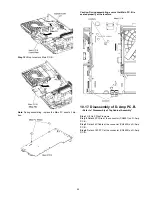
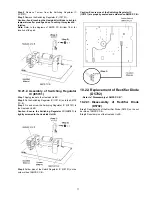
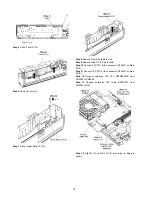
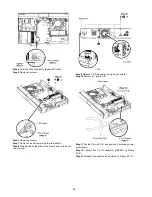
Step 5 Lift up Panel P.C.B..
Step 6 Remove 1 screws.
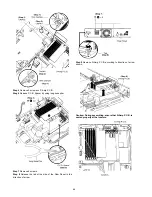
Step 7 Lift up Power Button P.C.B..
Step 8 Remove Front Shield plate Unit.
Step 9 Remove Main P.C.B. Shield Plate.
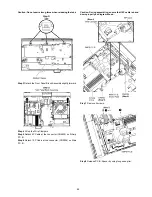
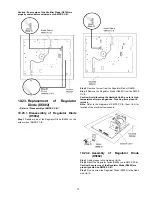
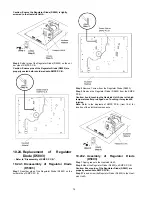
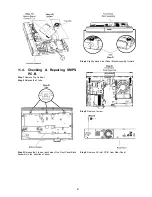
Step 10 Connect 45P FFC at the connector (P55001) on Main
P.C.B..
Step 11 Connect 18P FFC at the connector (P55002) on Main
P.C.B..
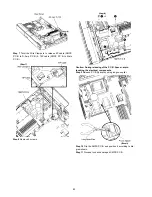
Step 12 Connect extension 18P FFC RFKZBT230P from
CN2006 to CN5402.
Step 13 Connect extension 10P cable REXX1037 from
CN2004 to JW2.
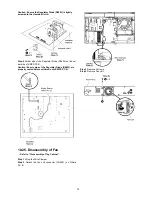
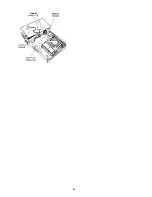
Step 14 Slightly lift up Main P.C.B. according to diagram
shown.
Summary of Contents for SA-BT222EB
Page 6: ...6 1 5 Caution for AC Cord For EB only ...
Page 14: ...14 ...
Page 15: ...15 5 Location of Controls and Components 5 1 Remote Control Key Button Operations ...
Page 16: ...16 5 2 Main Unit Key Button Operations ...
Page 17: ...17 5 3 Using BD LIVE BONUSVIEW in BD Video ...
Page 18: ...18 5 4 Using the iPod iPhone ...
Page 19: ...19 5 4 1 iPod iPhone Playback ...
Page 20: ...20 5 5 Speaker Connections ...
Page 21: ...21 5 6 Disc Playability ...
Page 22: ...22 ...
Page 23: ...23 5 7 SD USB Information ...
Page 24: ...24 5 8 File Extension Type Support MP3 JPEG DivX AVCHD MPEG2 files ...
Page 25: ...25 5 8 1 File Folders Structures ...
Page 39: ...39 8 1 3 Main P C B Fig 3 Main P C B IC2302 LB2301 CN2004 ...
Page 43: ...43 10 2 Main Components and P C B Locations ...
Page 62: ...62 10 15 6 Applying of Grease ...
Page 84: ...84 ...
Page 100: ...100 ...
Page 102: ...102 ...
Page 124: ...124 ...
Page 126: ...126 ...
Page 128: ...128 20 1 2 Mechanism BD Drive ...
Page 130: ...130 ...

