background image

26

Some do’s and dont’s on tape care.

DO:

!

Use a good quality branded tape, such as Panasonic.

!

Keep in the box supplied with the tape, or a video case, 
when not in use.

!

Try to use the whole tape when making recordings and 
avoid re-recording over the same section of the tape 
repeatedly as this will help prevent premature tape wear.

!

Take care to insert a tape correctly into the VCR to avoid 
damage.

!

Take tape out of the VCR when not in use.

DO NOT:

!

Expose the tape to high humidity or temperature.

!

Expose to liquid.

!

Expose to dust particles by storing directly on a carpet 
for example.

!

Use a damaged tape or attempt to repair it.

!

Dismantle the cassette housing.

!

Attempt to lift the front cassette flap or touch the tape 
surface.

Tape Care

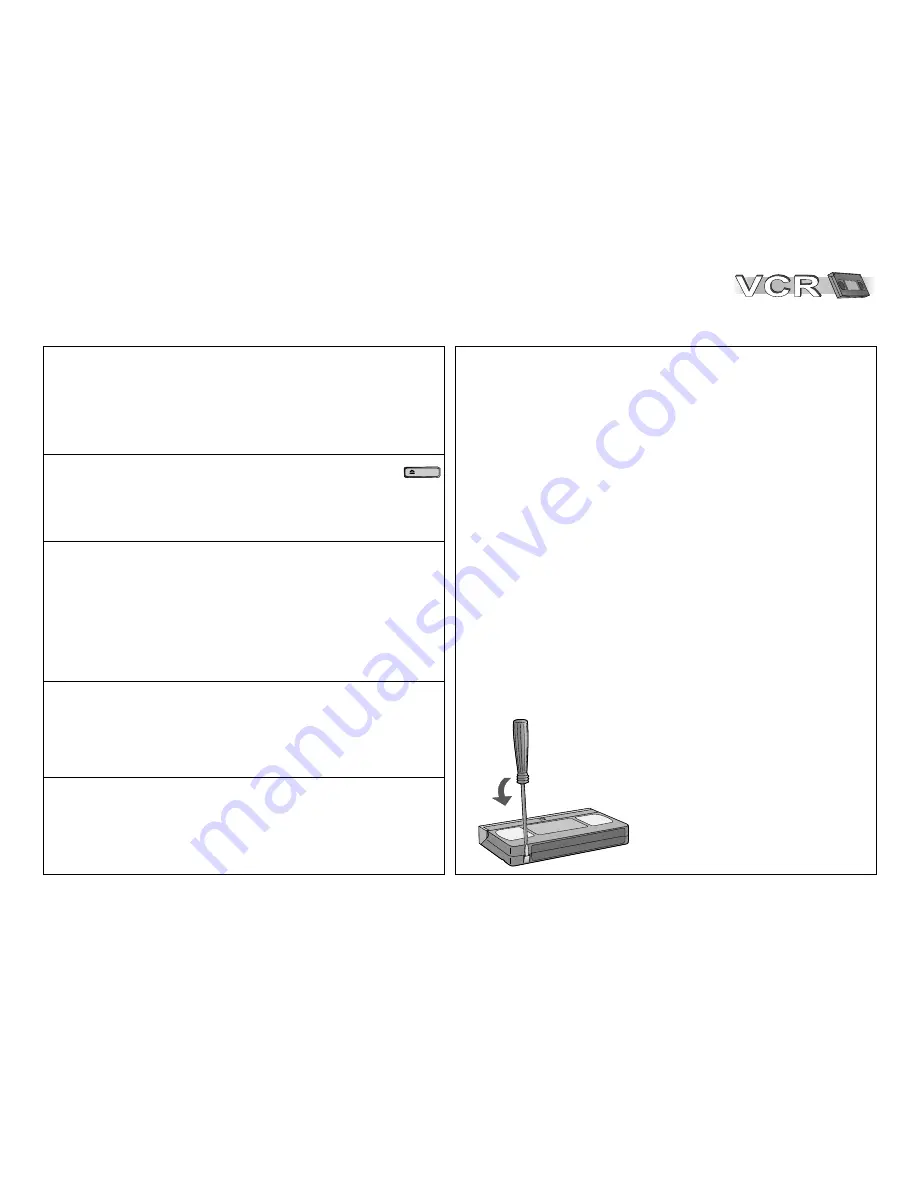
Cassette erasure protection


Break out the erasure protection 
tab to protect the cassette 
against accidental erasure of 
recordings you wish to keep.

Stick adhesive tape over the 
gap if you wish to re-record a 
protected cassette. 

Tape Counter

When inserting a video cassette the tape counter will 
automatically reset to [0:00.00].
The tape counter may also be reset to [0:00.00] by 
pressing the 

CANCEL/RESET

 button. 

Automatic shut down and removing cassettes 

If the VCR is switched into stand-by mode, the cassette 
may be removed by pressing the 

EJECT

-button.

Once done the VCR will switch back to stand-by mode.

EJECT

Playing back NTSC video cassettes

You can play back NTSC video cassettes for viewing on 
a PAL system TV set. 
If there is any interference when playing back NTSC, try 
readjusting your TV set. 
Read the operating instructions of your TV set. You 
cannot record or copy video cassettes in NTSC format.

Cinema Mode

Cinema Mode can improve the picture during the 
playback of recorded video cassettes. The attainable 
improvement depends on the graphical material used.

General convenient functions

CVC Super - Crystal View Control Super

The CVC function enables optimal picture quality. 
The picture is automatically set as clear and sharp as 
possible.

Summary of Contents for NV-VP33EB

Page 1: ...EO Plus 31 32 Recording with external recording controls 33 Manual Functions 34 39 Manual Tuning Changing the name of TV stations 34 Changing the order of TV stations or deleting a station 35 Creating...

Page 2: ...from a c mains while it remains connected to a live mains outlet even if it has been turned off 1 Open the fuse cover with a screwdriver Fuse cover Fuse 5 ampere 2 Replace the fuse and close or attac...

Page 3: ...is well ventilated To prevent risk of electric shock or fire hazard due to overheating ensure that curtains and any other materials do not obstruct the ventilation vents Do not obstruct the unit s ven...

Page 4: ...s are provided directly by Panasonic UK Ltd It couldn t be simpler Also available through our internet is direct shopping for a wide range of finished products take a browse on our website for further...

Page 5: ...with new batteries or batteries of different types Only use batteries without any harmful substances such as lead cadmium mercury Do not use rechargeable type batteries Remove the batteries if the re...

Page 6: ...disc used The Picture and Audio menus are not available when this function is enabled VCR Video Cassette Recorder Page Detailed information is available on the specified pages Display DVD RAM DUBBING...

Page 7: ...ocket RF IN socket Aerial input RF OUT socket Aerial output DVD AUDIO OUT socket COAXIAL DIGITAL AUDIO OUT socket AV3 VIDEO IN socket AV3 AUDIO IN socket L AUDIO input left channel Mono R AUDIO input...

Page 8: ...e mains Direct input via numeric key pad 18 1 8 DVD functions blue labels are enabled TV set AV input selection TV set Stand by on switch To select the respective TV program memory location TV set vol...

Page 9: ...or Fast Rewind mode Forward and backward search during playback Tracking control of disturbed images during playback AV input select button Pressing the INPUT button a couple of times will select A1 A...

Page 10: ...Keeping the button pressed increases the speed of search at 5 steps Press PLAY to resume normal playback Search Press SEARCH during playback Keeping the button pressed increases the speed of search at...

Page 11: ...to the TV set s Scart In socket Connect VCR DVD and TV set to the AC mains socket 4 2 Connect aerial to the RF IN Aerial input connector of the VCR DVD Follow the steps described below 3 Connect the...

Page 12: ...C mains lead Aerial input RF coaxial cable Audio L R Videocable TV AC IN AUDIO R L VIDEO Connecting with Audio Videocable Aerial Connect the VCR DVD OUT AUDIO R L VIDEO sockets of the VCR DVD to the T...

Page 13: ...a QUICK SETUP following VCR Auto Setup for the DVD player page 40 To set the Owner ID now press the Numeric buttons or to enter a four digit PIN number Press to correct the digit Make sure that you wi...

Page 14: ...C IN Aerial AC mains socket 1 4 AC mains lead 4 Connecting with RF cable Connect VCR DVD and TV set to the AC mains socket You can connect the VCR DVD to your TV set by using a RF cable Aerial input R...

Page 15: ...ure that you will remember the PIN number make a note of it Press the ENTER button twice to confirm Enter the Name House No and Postcode in the same way Press the ENTER button to confirm each entry Pr...

Page 16: ...cting to Satellite Receiver Set Top Box 16 VCR DVD AC IN Connecting to Satellite Receiver Set Top Box You can connect a Set Top Box to receive digital broadcast by aerial DVB T signals or a satellite...

Page 17: ...wired to the AV1 21 pin scart socket on the VCR DVD and to the 21 pin scart socket on the TV set Connect the External unit VCR DVD and TV set to the AC mains supply Switch on the TV set and VCR DVD Se...

Page 18: ...he AC mains DVD Connectors 54 52 53 18 The COMPONENT VIDEO OUT connection outputs the color difference signals P P and the B R luminance difference signal Y separately thereby enabling a higher resolu...

Page 19: ...ernal Multi channel Dolby Digital Decoder for example Prerequisites for making recordings with an external digital recorder The original disc must not be copy protected The recorder must be able to pr...

Page 20: ...ing Clock set Others select access exit ENTER EXIT Tuning Manual Auto Setup Shipping condition Owner ID select access return exit ENTER MENU EXIT The reception channels are different for UK and Irelan...

Page 21: ...channel number which differs by 2 or 3 from the present channel number For example if the original channel number was 28 enter 31 21 68 RF OFF Retune your TV until you receive the Test pattern It may...

Page 22: ...Timer Rec LED ON Others 13 38 28 29 20 36 The cursor buttons on the remote control unit allow you to navigate through menus and change selected entries With select the entry you would like to change...

Page 23: ...5 seconds Press STOP to end playback Starting automatic playback When inserting a cassette with removed protection tab playback will start automatically Playback from power stand by mode When insertin...

Page 24: ...d above To return to Auto Tracking Press CH or simultaneously If the still picture jitters or jumps V lock adjustment If the still picture jitters or jumps perform the following During still playback...

Page 25: ...ld Press PLAY to end search D This function is not available in some cases e g at the beginning or end of the tape JET REW For fast rewinding to the beginning of the tape On a E180 cassette approx 43...

Page 26: ...ive tape over the gap if you wish to re record a protected cassette Tape Counter When inserting a video cassette the tape counter will automatically reset to 0 00 00 The tape counter may also be reset...

Page 27: ...d Recording Timer recording Recording with INTELLIGENT TIMER Recording with VIDEO Plus Recording with external recording controls Instant recording of the VCR TV picture Recording controlled by timer...

Page 28: ...the recording must not exceed the tape left on the video cassette The Timer Rec button on the device also lights up if the function was not turned off D The Timer Rec button blinks for 5 seconds if th...

Page 29: ...entry you would like to edit confirm with ENTER Modify entries with and confirm with ENTER Press CANCEL RESET to delete a recording Timer recording PDC function Programme Delivery Control adjusts the...

Page 30: ...me at different days To use the INTELLIGENT TIMER function at least one recording session must be programmed in the Timer recording menu page 28 This information will be copied into the INTELLIGENT TI...

Page 31: ...er recording data press ENTER Select station and use to set date Use to set the date week or day of week and use to set the start time Use to change the start time and use to set the stop time Use to...

Page 32: ...ion again Press the VIDEO Plus button Enter a VIDEO Plus Code from a Satellite TV Guide for a satellite channel e g Sky 1 using the Numeric buttons Press to correct any mistakes Press the ENTER button...

Page 33: ...t EXT LINK The AV2 input of this VCR is equipped for use with external equipment having external timer recording control such as digital satellite receivers The AV2 input can be set to EXT LINK 1 or E...

Page 34: ...l Tuning to find TV stations the indication may appear under Pos Name on the On Screen Display when programming a VIDEO Plus timer recording Tuning access select return exit ENTER MENU EXIT Pos Name C...

Page 35: ...utomatic Tuning will start D When no stations have been set confirm all connections and restart Auto Setup D You can restart Auto Setup without using remote controller by pressing some buttons on the...

Page 36: ...ssettes recorded in VHS format only Press MENU Select Others Confirm with ENTER Select the Menu item Changes with Press MENU to quit the menu 36 Tape length AUTO E 240 SQPB AUTO OSD 4 3 Remote VCR 1 E...

Page 37: ...On Screen Display To display the Owner ID information on TV Keep EJECT pressed for more than 5 seconds D The PIN number is not displayed After 30 seconds this menu automatically disappears Owner ID PI...

Page 38: ...se of a power failure an automatic back up system maintains the clock for approximate 60 minutes D When Clock setting is set to AUTO the automatic time correction function checks and if necessary adju...

Page 39: ...due to poor reception conditions NICAM sound system Pos Name Channel NICAM 1 BBC1 7 OFF 6 7 8 9 10 1 BBC1 7 2 BBC2 4 3 ITV 2 4 CH4 12 5 CH5 13 At each press of the AUDIO button the selected sound outp...

Page 40: ...glish Deutsch Espa ol Svenska Fran ais Italiano Polski Nederlands VHS DVD Select your TV s aspect ratio The format of TV screens is either 4 3 standard or 16 9 wide screen Select the aspect ratio that...

Page 41: ...P Press PLAY to resume playback Stop playback Press STOP twice The label must face up MP3 WMA JPEG The Playback menu appears on the screen Pause playback still image Press PAUSE during playback OPEN C...

Page 42: ...Press REPEAT The display shows the REPEAT function DVD Playback functions DVD Video Off Chapter Title DVD RAM PG Off Program All DVD RAM PL Off Scene Playlist VCD CD Off Track All WMA MP3 Off Content...

Page 43: ...it then press ENTER to confirm Press ENTER to confirm any changes to the Group Title and Content Chapter objects To clear an entry press to select it first Press and to select Clear then press ENTER C...

Page 44: ...o go back to the previous screen Press or use the numeric keys to select a programme Playback starts in the background Press ENTER to hide the menu screen JPEG WMA MP3 Playback Menu Playback Menu All...

Page 45: ...D playback Synchronous recording D Playing back music NTSC formatted films or copy protected discs might result in interferences DVD RAM DUBBING DVD RAM DUBBING enables you to copy a DVD RAM to VHS ca...

Page 46: ...Group to Content and back Shows the Content of the selected Group Displays a tree view of the groups Press and ENTER to select a Group The Group s contents is shown To display the Navigation Menu Pres...

Page 47: ...ontent D WMA You cannot play copy protected WMA files This unit is not compatible with MBR MBR Multiple Bit Rate a file that contains the same content encoded at several different bit rates D MP3 The...

Page 48: ...ly played back by the appliance with the additional help of a menu While the HighMAT menu is displayed Press to select and ENTER to confirm Menu Takes you to a sub menu containing further play lists o...

Page 49: ...lect a setting as described on pages 51 up to 53 Press ENTER to confirm Press to display another sub menu press to select a setting as appropriate Press to return to the previous menu Press ENTER to c...

Page 50: ...ttings with and ENTER Select Play Menu with and ENTER Select Advanced Disc Review with and ENTER Depending on whether Intro Mode or Interval Mode was selected in the Setup menu several scenes are brie...

Page 51: ...e stored on the disc Playlist Search Directly select a Playlist stored on the disc Subtitle Language Selects the language of on screen subtitles Off No subtitles displayed D In the case of R RW media...

Page 52: ...o output switches to PCM 2 channel Picture Mode Changes the image display settings INPUT REPEAT AV ENHANCER Normal Factory default Cinema2 Enhances brighter areas Cinema1 Cinema function for viewing i...

Page 53: ...lar to surround sound at the two front speakers SP or the headphones HP Deactivate this function if the sound becomes distorted Dialogue Enhancer Puts up the volume of feature film dialogues 54 48 53...

Page 54: ...tput Still Mode NTSC Disc Output When using an audio amplifier together with a plasma TV or a digital TV the picture can be delayed in relation to the sound signal You can synchronize the picture sign...

Page 55: ...tion the digital output of PCM audio signals may be limited to 48 kHz 16 bit Choose Up to 48 kHz if the digital audio outlet is used to connect your player to an amplifier that only processes sampling...

Page 56: ...than pressing PLAYLIST to display the menu screen D The functions assigned to these buttons depend on the disc Please refer to the disc documentation leaflet Information First wipe the disc with a wet...

Page 57: ...ured under license from Dolby Laboratories Dolby Pro Logic and the double D symbol are trademarks of Dolby Laboratories Disc forms Never play anything but circular discs with a diameter of 3 8 cm or 5...

Page 58: ...487 Kannada 7578 Kashmiri 7583 Kazakh 7575 Kirghiz 7589 Korean 7579 Kurdish 7585 Laotian 7679 Latin 7665 Latvian 7686 Singhalese 8373 Slovac 8375 Slovenian 8376 Somali 8379 Spanish 6983 Sundanese 8385...

Page 59: ...re is cut off at its left or right edge Check the Video menu s TV Aspect setting on the Setup screen Check that the player is directly plugged into the TV set s AV Output and not to a video cassette r...

Page 60: ...d Date Check the start and stop time of the timer programme Check if the TIMER button has been pressed to put the device into timer mode after programming a recording Check the start and stop time of...

Page 61: ...CLOSE OPEN CLOSE OPEN CLOSE OPEN CLOSE OPEN CLOSE OPEN CLOSE OPEN CLOSE OPEN CLOSE OPEN CLOSE OPEN CLOSE OPEN CLOSE OPEN CLOSE OPEN CLOSE OPEN CLOSE OPEN CLOSE OPEN CLOSE OPEN CLOSE OPEN CLOSE OPEN CL...

Page 62: ...served 11 Green 12 No connection 13 Red ground 14 Blanking ground 15 Red 16 Blanking 17 Video output ground 18 Video input ground 19 Video output 20 Video input 21 Ground AV2 Scart Socket 1 Audio outp...

Page 63: ...t forward fast rewind time approx 60 sec E 180 cassette Operating temperature humidity 5 C to 35 C 35 80 RH Video TV system VCR PAL 625 50 DVD PAL 625 50 PAL 525 60 NTSC Weight and dimensions approx v...

Page 64: ...e 51 53 54 Chapter 42 51 MP3 41 42 44 47 51 S VHS cassettes 36 Cinema Mode 26 MPEG 19 55 57 61 COAXIAL 19 Tape counter 9 26 CVC Super 26 Tape length 36 NICAM 39 Tape remain display 9 NTSC 26 54 Date 1...

Reviews: