background image

22

VQT1C84

Preparation

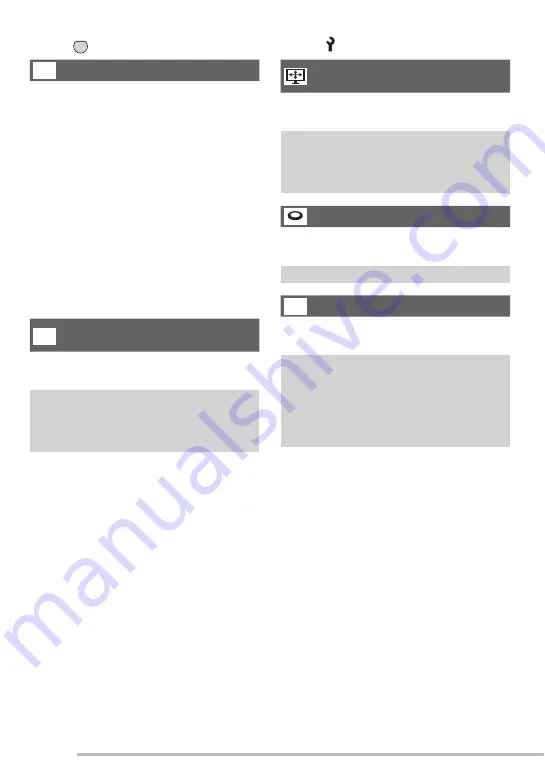
RESET

The settings on the recording or the 
[SETUP] menu are reset to the initial 
settings.
• The birthday setting for [BABY1]/[BABY2] 

or [PET] (P49) in scene mode and 
the number of days that have passed 
since the departure date for [TRAVEL 
DATE] (P54) and the [WORLD TIME] 
setting (P56) are also reset when the 
[SETUP] menu settings are reset. Also, 
[FAVORITE] (P72) is fi xed to [OFF] and 
[ROTATE DISP.] (P73) is fi xed to [ON].

• The battery type setting, the folder 

number and the clock setting are not 
changed.

VIDEO OUT

(Playback mode only)

Set to [NTSC] or [PAL] according to the TV 
system in your country (P90).

 NTSC: 

Video output is set to NTSC 
system.

q

 PAL:  Video output is set to PAL 

system.


TV ASPECT

(Playback mode only)

Set to [

j

] or [

h

] according to your 

television.


j

Select if your television has a 

16:9 aspect ratio.

q


h

:  Select if your television has a 

4:3 aspect ratio.

DIAL DISPLAY (P17)

Choose whether to show the mode dial 
display when you turn the mode dial.

OFF / 

q

 ON

LANGUAGE

Set to the language on the menu screen 
from the following languages.

q

 [ENGLISH]:  English

 [DEUTSCH]: German
 [FRANÇAIS]: 

French

 [ESPAÑOL]: Spanish
 [ITALIANO]: Italian
  [

日本語

]: 

Japanese

• When you set to other language by 

mistake, select [

{

] from the menu icons 

to set the desired language.

1

X

{

Press [

] to display menu, enter the setup menu [ ] and select the item. (P19)

MENU

SET

Summary of Contents for LUMIX DMC-LS70

Page 1: ...Operating Instructions Digital Camera Model No DMC LS75 DMC LS70 DMC LS60 Before use please read these instructions completely The illustration shows DMC LS75 GN VQT1C84 ...

Page 2: ... discs or other published or broadcast material for purposes other than your own private use may infringe copyright laws Even for the purpose of private use recording of certain material may be restricted Please note that the actual controls and components menu items etc of your Digital Camera may look somewhat different from those shown in the illustrations in these Operating Instructions SDHC Lo...

Page 3: ...ith water wipe it off with a dry cloth When the camera does not operate normally contact your dealer or your nearest servicentre About the LCD monitor Do not press the LCD monitor with excessive force Uneven colours may appear on the LCD monitor and it may malfunction Condensation may form on the LCD monitor in places with large temperature differences Wipe the condensation with a soft dry cloth I...

Page 4: ...amera becomes close to the ambient temperature When not using the camera for a long period of time Store the batteries in a cool and dry place with a relatively stable temperature Recommended temperature 15 C to 25 C Recommended humidity 40 to 60 Always remove the batteries and the card from the camera If the batteries are left inserted in the camera they will discharge as a weak electric current ...

Page 5: ...ded Picture Review 32 Playing Back Pictures 33 Deleting Pictures 34 Advanced Shooting About the LCD Monitor 36 Changing the information displayed 36 Recording a picture with the camera held high above your head High angle mode 38 Taking Pictures using the Built in Flash 39 Taking Pictures with the Self timer 42 Compensating the Exposure 43 Shooting with the Intelligent ISO mode 44 Taking Close up ...

Page 6: ...e Playback Zoom 68 Playing Back Motion pictures 69 Using the PLAY mode menu 70 SLIDE SHOW 71 FAVORITE 72 ROTATE DISP ROTATE 73 DATE STAMP 74 DPOF PRINT 76 PROTECT 78 RESIZE 79 TRIMMING 80 COPY 81 FORMAT 82 Connecting to other equipment Connecting to a PC 83 Connecting to a PictBridge compliant Printer 86 Playing Back Pictures with a TV Screen 90 Others Screen Display 91 Cautions for Use 93 Message...

Page 7: ...ack pictures on the built in memory when you are not using a card P15 Consult the dealer or your nearest servicentre if you lose the supplied accessories You can purchase the accessories separately About illustrations in these operating instructions Please note that the appearance of the product the illustration or the menu screen are a little different from those in actual use The illustrations i...

Page 8: ...AL Socket P83 86 90 11 LCD Monitor P36 91 12 MENU SET Button P16 13 Camera Switch P16 14 Status Indicator P24 15 Cursor buttons w Self timer Button P42 r REV Button P32 q Flash Mode Button P39 e Backlight Compensation in Simple Mode P28 Exposure Compensation P43 Button In these operating instructions operations using the cursor buttons are described as follows e g When you press the r button 16 DI...

Page 9: ... card optional you can record or play back pictures on the built in memory P15 Refer to P15 when you use a card 2 Turn the camera on to take pictures Set the clock P16 Select the type of battery in use on BATTERY TYPE in the SETUP menu P20 1 Set the mode dial to 2 Press the shutter button to take pictures P24 3 Play back the pictures 1 Set the mode dial to Q 2 Select the picture you want to view P...

Page 10: ...es Battery performance may vary greatly depending on the brand used and the storage life and conditions of the batteries Battery performance temporarily deteriorates in low temperature conditions 10 C or less However it recovers when the temperature returns to normal Depending on the temperature and the conditions of use the camera may not operate properly and the batteries may become exhausted wi...

Page 11: ...tteries so warm them in your pocket etc before using them Make sure that no metal objects such as a lighter are placed together with the batteries when warming them in your pocket If there is grease or dirt on the battery poles the recording playback time may become extremely short Before inserting the batteries clean the battery terminals with a soft dry cloth If battery leakage occurs remove the...

Page 12: ...xcessively and may become unusable even if charged When storing the batteries for a long period of time we recommend charging them once a year Remove the batteries from the camera and store them again after they have completely discharged Battery life The number of recordable pictures By CIPA standard in normal picture mode Batteries Used Number of recordable pictures Approx DMC LS75 DMC LS70 DMC ...

Page 13: ...oxyride batteries and alkaline batteries significantly decreases in low temperature conditions Playback time Batteries Used Continuous playback time Approx DMC LS75 DMC LS70 DMC LS60 Panasonic Oxyride batteries supplied or optional 430 min 440 min Panasonic Alkaline batteries optional 420 min 430 min Fully charged Panasonic Ni MH batteries optional 610 min 620 min The number of recordable pictures...

Page 14: ... the connection terminals on the back side of the card The card may be damaged if it is not fully inserted 3 1 Close the battery door or the card door 2 Slide the battery door or the card door to the end and then close it firmly If the card door cannot be completely closed remove the card check its direction and insert it again Select the battery type being used in BATTERY TYPE in the SETUP menu P...

Page 15: ...and format it When the switch is unlocked these functions become available This unit supports SD Memory Cards formatted in the FAT12 and FAT16 systems that comply with SD Memory Card Specifications It also supports SDHC Memory Cards formatted in the FAT32 system This unit SDHC compliant equipment supports both SD Memory Cards and SDHC Memory Cards You can use SDHC Memory Cards on equipment that su...

Page 16: ...n switch it on in recording mode to check that the clock is set correctly Changing the clock setting 1 Press MENU SET 2 Press e r to select CLOCK SET P65 3 Press q and perform the above steps 2 and 3 for setting 4 Press MENU SET to close the menu You can set the clock from the setup menu P20 When batteries have been inserted for more than 3 hours the clock setting is stored in the camera for appro...

Page 17: ...which mode is selected P22 The current mode appears on the LCD when you turn the camera on Simple mode P27 This mode is recommended for beginners Playback mode P33 This mode allows you to play back recorded pictures Advanced NORMAL PICTURE Print mode P86 This mode allows you to print pictures from a PictBridge compliant printer connected directly to the camera Motion picture mode P52 This mode all...

Page 18: ...enu item Press r at A to switch to the next menu screen Using the Menus To show the menus Press MENU SET MENU 1 3 4 3 REC SELECT EXIT W BALANCE SENSITIVITY ASPECT RATIO PICT SIZE QUALITY AWB AUTO Menu Icons The menu icons and items that appear depend on the position of the mode dial Current Page For example The first page of a 3 page menu You can move to the next previous page by turning the zoom ...

Page 19: ...s and change settings AWB MENU 1 3 4 3 REC SELECT EXIT W BALANCE SENSITIVITY ASPECT RATIO PICT SIZE QUALITY AUTO MENU 0 1 3 SETUP SELECT EXIT BATTERY TYPE CLOCK SET WORLD TIME MONITOR TRAVEL DATE OFF AUTO AUTO 2 3 MENU W WH REC SELECT SET AF MODE STABILIZER BURST AF ASSIST LAMP D ZOOM ON OFF AUTO AUTO 2 3 MENU W WH REC SELECT SET AF MODE STABILIZER BURST AF ASSIST LAMP D ZOOM ON OFF MENU SET 2 3 M...

Page 20: ...he date and time CLOCK SET P16 Change date and time Show images you have taken AUTO REVIEW Adjust how long the recorded picture automatically appears on the screen OFF q 1 SEC 3 SEC Auto review is not available in motion picture mode i You cannot change the auto review setting in simple mode or burst mode The setting is not selectable Have the camera turn off automatically POWER SAVE If you perfor...

Page 21: ...f timer is set While recording motion pictures WORLD TIME P56 Set date and time at your home area and the travel destination The local time at the travel destination q The time at your home area MONITOR Adjust the brightness of the LCD monitor in 7 steps TRAVEL DATE P54 Set the departure and return dates q OFF SET BEEP Set to select the volume of operational sound 7 No operational sound q 8 Soft o...

Page 22: ...rding to the TV system in your country P90 NTSC Video output is set to NTSC system q PAL Video output is set to PAL system TV ASPECT Playback mode only Set to j or h according to your television j Select if your television has a 16 9 aspect ratio q h Select if your television has a 4 3 aspect ratio DIAL DISPLAY P17 Choose whether to show the mode dial display when you turn the mode dial OFF q ON L...

Page 23: ...hen the access indication lights Turn the camera off Remove the batteries or the card if used Shake or impact the camera Disconnect the AC adaptor DMW AC6 optional when using the AC adaptor Observe the above caution also when pictures are being read or deleted or the built in memory or the card is being formatted P82 The access time for the built in memory may be longer than the access time for a ...

Page 24: ...cm and Z The following indicate that the subject is out of focus Focus indication blinks green AF area turns white to red or no AF area Beeps 4 times The focus indicator may light even if the subject is not properly focused if the subject is out of range 4 Press the shutter button fully to take the picture Using the flash If the flash is set to AUTO r or AUTO Red eye reduction s the flash will wor...

Page 25: ...between 50 cm and Z When shooting something that is far away and something that is close by at the same time When shooting through a dirty window When there are sparkling or shiny objects around the subject When shooting in a dark place When shooting a subject that is moving fast When shooting a scene with minimal contrast When shooting something very bright When taking a close up picture of the s...

Page 26: ...P P73 is set to ON you can rotate and display pictures on the screen or the TV according to the information of the rotation on the pictures This function may not work properly on pictures recorded by aiming the camera up or down In motion picture mode i you cannot use the direction detection function Preventing jitter camera shake Be careful of jittering when pressing the shutter button The jitter...

Page 27: ...ange the battery type being used P20 BEEP OFF No operation sound LOW Soft operation sound HIGH Loud operation sound CLOCK SET Change date and time P16 If 4 6 10 15 cm or E MAIL is set in PICT MODE the extra optical zoom is activated P29 The settings for BATTERY TYPE BEEP and CLOCK SET in simple mode are also applied to other recording modes The settings for WORLD TIME P21 MONITOR P21 TRAVEL DATE P...

Page 28: ...M COL MODE You cannot change the following settings TRAVEL DATE WORLD TIME The Backlight Compensation Backlight is a situation where light comes from behind the subject This can cause the subject to appear dark so brightening the whole image compensates for this Press e 0 appears when you are using backlight compensation Press e to cancel When you use the backlight compensation function we recomme...

Page 29: ...e 3M EZ 3 million pixels the 7M 7 million DMC LS75 DMC LS70 or 6M 6 million DMC LS60 CCD area is cropped to the centre 3M 3 million pixels area allowing a picture with a higher zoom effect Resolution and maximum zoom Aspect ratio P61 Pixels P28 61 Maximum zoom Tele DMC LS75 DMC LS70 DMC LS60 h DMC LS75 DMC LS70 7M 3 DMC LS60 only 6M 3 DMC LS75 DMC LS70 5M EZ 3 6 3M EZ 2M EZ 1M EZ 0 3M EZ 4 5 4 1 D...

Page 30: ...al zoom magnification The resolution becomes smaller as shown below when the extra optical zoom is used The colour of the zoom bar and the resolution displayed on the screen change at this time Aspect ratio Picture size h j If you press E ZOOM three times the zoom position returns to the Wide and the resolution returns to the original The resolution also returns to normal when you return the zoom ...

Page 31: ...se You can enter the digital zoom range to continuously rotate the zoom lever to Tele or to release the zoom lever once and then rotate it to Tele again 1 Optical zoom 2 Digital zoom 3 Extra optical zoom The AF area is displayed with a size wider than usual and set only to a point on the centre of the screen in the digital zoom range P63 Also the stabilizer function may not be effective When using...

Page 32: ...e for a 8 magnification When you rotate the zoom lever towards W after enlarging the picture the magnification becomes lower 2 Press e r w q to move the position When you change the magnification or the position to be displayed the zoom position indication A appears for about 1 second to check where is enlarged Recorded pictures can be deleted during the review Quick Deletion During review you can...

Page 33: ...wound one by one This camera is based on the DCF standards Design rule for Camera File system which was established by the Japan Electronics and Information Technology Industries Association JEITA The LCD monitor may not be able to display the details of the recorded pictures You can use the playback zoom P68 to check the details of the pictures If you play back pictures that have been recorded wi...

Page 34: ...pears on the screen To delete MULTI DELETE ALL DELETE 1 Press A twice 2 Press e r to select MULTI DELETE or ALL DELETE and then press MENU SET If you select MULTI DELETE perform steps 3 onwards If you select ALL DELETE perform steps 5 onwards When FAVORITE P72 is set to ON ALL DELETE EXCEPT appears If you select ALL DELETE EXCEPT perform steps 5 onwards However if none of the pictures have display...

Page 35: ...d when using ALL DELETE and DELETE ALL EXCEPT is displayed when using ALL DELETE EXCEPT If you press MENU SET while deleting pictures using ALL DELETE or ALL DELETE EXCEPT the deleting will stop halfway Do not turn off the camera while deleting When deleting pictures use batteries with sufficient battery power P23 or use the AC adaptor DMW AC6 optional It is possible to delete up to 50 pictures at...

Page 36: ...ram In playback mode F Normal display G Display with recording information and histogram H Non display 2The number of days that have passed since the travel date is displayed when a picture was taken with TRAVEL DATE P54 setting 3Displayed when you set birthday setting for BABY1 BABY2 or PET in scene mode and WITH AGE is selected P49 at taking pictures In simple mode I Normal display J Non display...

Page 37: ...ogram When the values are concentrated to the right C the picture is over exposed Pictures that are mostly white form this type of histogram Example of histogram A Properly Exposed B Under Exposed C Over Exposed Histogram The image you are shooting and the histogram may not match when shooting in a dark place or with the flash The histogram will be orange to indicate this The histogram in the reco...

Page 38: ... at straight on Cancelling High angle mode Press and hold HIGH ANGLE again for 1 second or turn the camera off High Angle mode is also cancelled if power save mode is activated Pictures are displayed on the LCD monitor with increased brightness in High angle mode Therefore some subjects may look different on the LCD monitor However this does not affect the recorded pictures If the LCD monitor scre...

Page 39: ... the subject appear red in photo flash by triggering the flash before actually recording the picture After that the flash is activated for actual recording again Use this when you take pictures of people in low lighting conditions t Forced ON The flash is activated every time regardless of the recording condition Use this when your subject is back lit or under fluorescent light q Forced ON Red eye...

Page 40: ...e available flash range to take pictures ISO sensitivity P60 Available flash range AUTO 30 cm to 4 7 m Wide 30 cm to 2 6 m Tele ISO100 30 cm to 1 8 m Wide 30 cm to 1 0 m Tele ISO200 40 cm to 2 6 m Wide 30 cm to 1 4 m Tele ISO400 60 cm to 3 7 m Wide 40 cm to 2 1 m Tele ISO800 80 cm to 5 3 m Wide 60 cm to 2 9 m Tele ISO1250 100 cm to 5 3 m Wide 80 cm to 2 9 m Tele Refer to P106 for the focus range W...

Page 41: ...speed will be different from that shown in the above table in the following scene modes NIGHT SCENERY P48 8 seconds to 1 2000th of a second STARRY SKY P50 15 seconds 30 seconds 60 seconds FIREWORKS P51 1 4th of a second 2 seconds Do not look directly at the flash at close range when it is activated Do not bring the flash too close to objects or close the flash while it is activated The objects may...

Page 42: ...n using a tripod or in other cases setting the self timer to 2 seconds is a convenient way to stabilize the jitter caused by pressing the shutter button When you press the button fully with one stroke the subject is automatically focused just before the recording In dark places the self timer indicator blinks and then it may turn on brightly to work as the AF assist lamp P65 for focusing on the su...

Page 43: ...ginal exposure 2 Press MENU SET to finish You can also press the shutter button halfway to finish EV is an abbreviation of Exposure Value and it is the amount of light given to the CCD by the aperture value and the shutter speed The exposure compensation value appears on the lower left of the screen The exposure value is memorised even if the camera is turned off The compensation range of the expo...

Page 44: ...bject you can reduce noise by setting ISO sensitivity at a low level 1 30 ISO200 When you press the shutter button halfway appears When you press the shutter button fully the shutter speed and the ISO sensitivity appear for a while Focus range is 5 cm Wide 30 cm Tele to Z ISO sensitivity can be raised to a maximum of ISO640 when using the flash when ISO Limit is set to anything other than ISO400 R...

Page 45: ...the subject is changed after focusing on the subject When the camera lens is at a distance beyond the available range from the subject the subject may not be focused even if the focus indication lights Macro mode gives priority to a subject close to the camera Therefore if the distance between the camera and the subject is more than 50 cm it takes longer to focus on it in macro mode than normal pi...

Page 46: ...anations about the scene modes press DISPLAY while a scene mode is selected in step 2 Press again to return to the scene mode menu Refer to P41 for the shutter speed Flash settings return to the factory settings when you change the scene mode P40 The colour of the picture may seem strange if you use a scene mode that is unsuitable for the shot SCN is selected if you press w while you have selected...

Page 47: ... You cannot change the white balance setting Sports mode Allows you to shoot fast moving subjects e g outdoor sports Suitable for daylight shooting 5 m or more away from the subject When shooting fast moving subjects indoors sensitivity will be the same as when you have set ISO LIMIT in Intelligent ISO mode P44 to ISO800 The digital zoom is fixed to OFF Night portrait mode Shoot the subject with n...

Page 48: ...le to Z You cannot change the white balance setting Party mode Use to take pictures at wedding receptions indoor parties etc Both the people and the background can be shot with natural brightness using the flash and slow shutter speed Technique for Party mode Use a tripod and the self timer P42 for best results Rotate the zoom lever to Wide 1 about 1 5 m from the subject The flash setting can be s...

Page 49: ...range is 5 cm Wide 30 cm Tele to Z Sensitivity will be the same as when you have set ISO LIMIT in Intelligent ISO mode P44 to ISO400 After turning on the camera in BABY1 BABY2 in scene mode the age current date and time appear for about 5 seconds at the bottom of the screen Actual age displays depend on the LANGUAGE setting Check the clock and birthday settings if the age shown is incorrect Note t...

Page 50: ...unction The flash setting is fixed to Forced OFF v You cannot use the extra optical zoom or digital zoom Beach mode Prevents under exposure of the subject under strong sunlight to allow you to take pictures on a beach Do not touch the camera with wet hands Sand or seawater may cause the camera to malfunction Make sure that sand or seawater does not come in touch with the camera particularly its le...

Page 51: ...ayed in orange P37 The Flash setting is fixed to Forced OFF v You cannot change the AF mode setting AF area is not displayed The settings on the AF assist lamp is disabled ISO sensitivity is fixed to ISO100 You cannot change the white balance setting Snow mode Exposure and white balance are adjusted to make the white of the snow stand out You cannot change the white balance setting Aerial photo mo...

Page 52: ...lity settings 1 Press MENU SET 2 Press e r to select ASPECT RATIO and then press q 3 Press e r to select the item and then press MENU SET 4 Press e r to select PICT MODE and then press q 5 Press e r to select the item and then press MENU SET When the aspect ratio setting is h Item Picture size fps 30fpsVGA 640 480 pixels 30 fps 10fpsVGA 640 480 pixels 10 fps 30fpsQVGA 320 240 pixels 30 fps 10fpsQV...

Page 53: ...30fps16 9 we recommend you to use cards offering 10 MB s or higher speeds printed on their packages and elsewhere for best results Depending on the type of SD Memory Card or SDHC Memory Card recording may stop in the middle We recommend using Panasonic s SD Memory Card SDHC Memory Card Depending on the type of card you are using the card access indication may appear for a while after shooting moti...

Page 54: ...ess r to select the SETUP menu icon and then press q 3 Press e r to select TRAVEL DATE and then press q 4 Press r to select SET and then press MENU SET 5 Press e r w q to select the departure date and then press MENU SET w q Select the desired item e r Set the year month and date 6 Press e r w q to set the return date and then press MENU SET w q Select the desired item e r Set the year month and d...

Page 55: ...on setting The travel date setting is memorised even if the camera is turned off If you set a departure date and then take a picture on a date before this departure date minus is displayed in orange and the day of the vacation that you took the picture is not recorded If you set a departure date and then change the clock setting to the date and time at the travel destination minus is displayed in ...

Page 56: ... the screen shown in step 2 in Setting the home area HOME Setting the home area HOME Perform steps 1 2 and 3 1 Press r to select HOME and then press MENU SET 2 Press w q to select your home area and then press MENU SET The current time is displayed on the top left of the screen and the time difference from GMT Greenwich Mean Time is displayed on the bottom left of the screen If daylight saving tim...

Page 57: ...lect the area the travel destination is in and then press MENU SET to set The current time at the selected travel destination area is displayed on the top right of the screen and the time difference from the home area is displayed at the bottom left of the screen If daylight saving time is used in your travel destination press e The time advances by one hour Press e again to return to the original...

Page 58: ...ILIZER P63 BURST P64 N AF ASSIST LAMP P65 O D ZOOM P31 Page 3 T COL MODE P65 3 CLOCK SET P65 Using the quick setting You can use the FUNC button to easily set the following 6 items when recording In normal picture mode STABILIZER BURST W BALANCE SENSITIVITY PICT SIZE QUALITY 1 In shooting mode press and hold FUNC until the quick setting items appear 2 Press e r w q to select the menu item and sett...

Page 59: ...eset white balance p White set for using set mode with a different white balance setting Auto White Balance AWB Use of auto white balance adjustment in inappropriate lighting conditions may result in reddish or bluish pictures Where the subject is surrounded by many light sources or there are no white or whitish objects in the frame auto white balance adjustment may not operate properly In this ca...

Page 60: ...SITIVITY Setting the light sensitivity ISO sensitivity represents the sensitivity of the image sensor to light If you set the ISO sensitivity higher the camera becomes more suitable for recording in dark places When setting to AUTO the ISO sensitivity is automatically adjusted to a maximum of ISO400 according to the brightness When using the flash the adjustment range becomes a maximum of ISO640 I...

Page 61: ... Although you cannot see the difference on the camera s screen the more the pixels the finer the picture will be when it is printed on a large piece of paper or displayed on a computer monitor Picture quality refers to the compression rate when saving digital pictures A Many pixels Fine B Few pixels Rough These pictures are examples to show the effect Number of pixels Select a higher number of pix...

Page 62: ...t work in HIGH SENS P50 in scene mode so the picture size for EZ is not displayed Pictures may have a mosaic like appearance depending on the subject or the recording condition Refer to P103 for the number of recordable pictures In simple mode the settings become as follows ENLARGE h DMC LS75 DMC LS70 7M DMC LS60 6M Fine 4 6 10 15 cm 2 5M EZ Standard E MAIL h 0 3M EZ Standard AF MODE Setting the f...

Page 63: ... camera focused on a subject The AF mode cannot be set in simple mode or FIREWORKS in scene mode STABILIZER This feature detects jitter and corrects for it MODE1 7 The stabilizer operates continuously and can assist during photo composition MODE2 8 The jitter is compensated for when the shutter button is pressed There is a greater stabilizing effect OFF When image stabilization is not desired Abou...

Page 64: ...acity of the built in memory or the card is full Burst speed slows when ISO sensitivity P44 60 is higher than ISO400 Shutter speed decreases in dark places so burst speed may also be slower The focus is fixed in the first picture The camera sets the exposure and white balance for each picture in the series When panning across areas with a large difference in brightness the camera takes some time t...

Page 65: ...g when you take a picture of animals in a dark place set the AF ASSIST LAMP to OFF In this case it becomes difficult to focus on the subject The AF assist lamp is fixed to ON while the camera is in simple mode You cannot use the AF assist lamp in SCENERY NIGHT SCENERY SUNSET FIREWORKS and AERIAL PHOTO in scene mode P46 The AF assist lamp is changed to OFF in PET P49 in scene mode COL MODE Setting ...

Page 66: ...s will appear Favourites Motion picture K BABY1 BABY2 in scene mode PET in scene mode Travel date Travel destination Date stamp complete Example of 25 screens To return to the normal playback Rotate the zoom lever towards 3 T or press MENU SET The image you select is shown To delete a picture during a multi playback 1 Press e r w q to select a picture and then press A 2 Press e to select YES 3 Pre...

Page 67: ...s displayed on the 1 screen playback screen To return to the 1 screen playback screen After the calendar screen is displayed rotate the zoom lever towards 3 T to display 25 screens 9 screens and 1 screen P66 The pictures are displayed without being rotated even if you set ROTATE DISP to ON P73 You can display the calendar between January 2000 and December 2099 If the recording date of the picture ...

Page 68: ...ove the position When you move the position to be displayed the zoom position indication is displayed for about 1 second To stop using the playback zoom Rotate the zoom lever towards W or press MENU SET To delete a picture during the playback zoom 1 Press A 2 Press e to select YES 3 Press MENU SET During playback zoom you can clear the shooting information from the display by pressing DISPLAY The ...

Page 69: ...s w q during pause The file format that can be played back with this camera is QuickTime Motion JPEG Please note that the bundled software includes QuickTime to play back motion picture files created with the camera on the PC P83 Some QuickTime Motion JPEG files recorded by a PC or other equipment may not be played back with this camera When playing back motion pictures that have been recorded wit...

Page 70: ...rom any menu item by rotating the zoom lever After selecting a menu item in step 2 refer to the description of the menu item in the operating instructions and then set it Items you can set Menu Page Item Page 1 a SLIDE SHOW P71 FAVORITE P72 j ROTATE DISP P73 b ROTATE P73 DATE STAMP P74 Page 2 l DPOF PRINT P76 g PROTECT P78 e RESIZE P79 f TRIMMING P80 COPY P81 Page 3 0 FORMAT P82 MENU 2 3 1 3 MENU ...

Page 71: ...MANUAL slide show C is the same as e r w q Press e to pause the slide show Press e again to cancel pause Press w q while paused to display the previous or next picture 3 By pressing the r the Slide Show stops About playback duration Select DURATION for setting on the screen displayed in step 2 DURATION Select intervals of 1 2 3 5 seconds or MANUAL You can select MANUAL if you have selected in step...

Page 72: ...n A is displayed is cleared and the favourites setting is cancelled You can place up to 999 pictures in your favourites list Cancelling all favourites 1 Select CANCEL on the screen shown in step 1 and then press MENU SET 2 Press e to select YES and then press MENU SET 3 Press MENU SET to close the menu When printing pictures at a photo printing store ALL DELETE EXCEPT P34 is useful so only the pic...

Page 73: ... rotates counter clockwise in steps of 90 3 Press MENU SET twice to close the menu If you take pictures when aiming the camera up or down it may not be possible to display the pictures vertically P26 The picture may be slightly blurred when the camera is connected to the TV with the video cable supplied and played back vertically When you play the picture on a PC you cannot play rotated pictures w...

Page 74: ...When you have selected SINGLE in step 1 proceed to step 3 When you have selected MULTI in step 1 repeat step 2 for each picture press MENU SET then proceed to step 3 3 Press e r w q to select SHOOTING DATE AGE or TRAVEL DATE and change the settings for the item and then press MENU SET SHOOTING DATE W O TIME Date is added WITH TIME Date and time are added AGE P49 OFF Age not added ON Age added TRAV...

Page 75: ...arked with the date stamp complete indicator A To confirm the date stamp B use playback zoom P68 Note that if you use date stamp and then specify printing the date when you order prints or on a printer both dates will be printed and may overlap Make sure there is some space available on the built in memory or card It is possible to set up to 50 pictures at one time using MULTI If protected picture...

Page 76: ... q to select the picture to print and then press e r to set the number of prints The number of prints icon d appears The number of prints can be set from 0 to 999 When the number of prints is set to 0 DPOF print setting is cancelled 2 Press MENU SET twice to close the menu Multi setting 1 Press w q to select the picture to print and then press e r to set the number of prints Repeat the above proce...

Page 77: ...e operating instructions of the printer This function is not available for images imprinted with the date stamp This function is cancelled if you imprint the date stamp on the picture DPOF is an abbreviation of Digital Print Order Format This feature allows you to write print information to media and then use the information on a DPOF compliant system DPOF print setting is a convenient function wh...

Page 78: ... Printed and the Number of Prints P76 and 77 The protect setting may not be effective in other equipment If you want to delete protected pictures cancel the protect setting first While this feature protects the pictures from accidental erasure formatting the card will permanently delete all data P82 Sliding the Write Protect switch A of the SD Memory Card or the SDHC Memory Card to LOCK prevents p...

Page 79: ...RE appears 3 Press e r to select YES or NO and then press MENU SET When you select YES the picture is overwritten When resized pictures are overwritten they cannot be restored When you select NO a resized picture is newly created When the original picture is protected you cannot overwrite the resized picture Select NO and newly create a resized picture 4 Press MENU SET twice to close the menu You ...

Page 80: ...n you select YES the picture is overwritten When trimmed pictures are overwritten they cannot be restored When you select NO a trimmed picture is newly created When the original picture is protected you cannot overwrite the trimmed picture Select NO and newly create a trimmed picture 6 Press MENU SET twice to close the menu If you trim a picture the number of pixels may be fewer in the trimmed pic...

Page 81: ...or lost 4 Press MENU SET several times to close the menu If you copy picture data from the built in memory to a card the screen automatically returns to the playback screen when all the pictures are copied If you copy picture data from the built in memory to a card which does not have sufficient free space the picture data will only be copied halfway We recommend using a card which has more free s...

Page 82: ...ed all data including protected images are irretrievably erased Please confirm that all data is transferred to your PC before proceeding with format function If the card has been formatted on a PC or other equipment format it on the camera again Use batteries with sufficient power P23 or the AC adaptor DMW AC6 optional when formatting During formatting do not turn the camera off It may take longer...

Page 83: ...and the PC 2 Connect the camera to a PC via the USB connection cable B supplied Connect the USB connection cable with the c mark facing the q mark on the DIGITAL socket Hold D and then insert or pull the USB connection cable straight Do not try to force the connector in backwards or sideways This can damage this unit and the equipment you are connecting Windows The drive appears on the My Computer...

Page 84: ...o contains for example a folder with the number 100 100_PANA in it and that card is removed and replaced with a card that has a folder with the number 100 in it recorded by a camera from a different maker 100XXXXX with XXXXX being the name of the maker and then a picture is recorded You start shooting again after using NO RESET in the setup menu P21 It is recorded to a new folder that has a number...

Page 85: ...on the card may be damaged Before changing cards make sure you do the necessary steps to safely remove hardware double click the icon in the task bar in Windows Pictures edited or rotated with a PC may be displayed in black in playback mode P33 multi playback P66 and calendar playback P67 Refer to the operating instructions of the PC too If a card is not inserted when the camera is connected to th...

Page 86: ...e printer you can print the picture data on the built in memory If a card is inserted you can print the picture data on it You cannot switch between the built in memory and the card while the camera is connected to the printer When you want to switch between the built in memory and the card disconnect the USB connection cable insert or remove the card and then connect the USB connection cable to t...

Page 87: ...ou press r is displayed with the picture you selected for printing When you press r once more the print setting is cancelled Press MENU SET when you finish selection SELECT ALL All pictures in the built in memory or the card are printed DPOF PICTURE Pictures in the DPOF PRINT setting P76 are printed FAVORITE Pictures set as favourites P72 are printed This item appears only when favourite setting i...

Page 88: ...s for printing P87 88 When you want to print pictures in a paper size or a layout which is not supported by the camera set PAPER SIZE and PAGE LAYOUT to F and then set the paper size or the layout on the printer For details refer to the operating instructions of the printer PRINT WITH DATE OFF Date is not printed ON Date is printed If the printer does not support date printing the date cannot be p...

Page 89: ...ps If this happens during printing press MENU SET and stop printing at once If not printing disconnect the USB connection cable The camera is receiving an error message from the printer when the indication lights orange during printing After finishing printing make sure there are no problems with the printer If the total number of ordered prints or the number of pictures set for print is large pri...

Page 90: ...the TV Depending on the screen mode setting of the TV when you connect the camera to a wide screen TV or a high definition TV the picture may be stretched horizontally or vertically and the top and bottom and or left and right of the picture may be cut off when it is displayed In this case change the screen mode setting Read the TV operating instructions too Pictures might be slightly blurred if y...

Page 91: ... P49 It is displayed about 5 seconds when switching to BABY or PET in scene mode Number of days that have passed since the departure date P54 22 Travel date P54 23 Elapsed recording time P52 24 Current date and time Destination settings P56 It is displayed for about 5 seconds when turning the camera on setting the clock and after switching from the playback mode to the recording mode Zoom P29 Extr...

Page 92: ...ure P78 4 Picture size P61 5 Quality P61 In Motion picture mode P52 4 3 16 9 In simple mode P27 ENLARGE 4 6 10 15 cm E MAIL 6 Battery indication P23 7 Folder File number P84 Built in memory P15 Card P15 8 Picture number Total pictures 9 Cable disconnection warning icon P89 Motion picture recording time P69 10 Histogram P37 11 Recording information 12 Favourites setting P72 Elapsed playback time P6...

Page 93: ...era off and remove the battery or disconnect AC adaptor DMW AC6 optional Then reinsert the battery or reconnect AC adaptor and turn the camera on Do not use the camera near radio transmitters or high voltage lines If you record near radio transmitters or high voltage lines the recorded pictures may be adversely affected Make sure to use the supplied cords and cables If you use optional accessories...

Page 94: ...s have a limited life Do not throw batteries into fire because they may cause an explosion Do not allow battery terminals to come into contact with metal objects such as necklaces hairpins etc This can cause short circuiting or heat generation and you may be badly burned if you touch the batteries Card Do not leave the card in places where there is high temperature or direct sunlight or where elec...

Page 95: ...IONAL DELETE SELECTIONS CAN BE MADE You have selected more than the allowed number of items in multi delete or the MULTI setting in DATE STAMP Repeat the procedure as necessary You have placed more than 999 pictures in your favourites list CANNOT BE SET ON THIS PICTURE CANNOT BE SET ON SOME PICTURES The DPOF setting cannot be set to the following pictures Pictures not based on the DCF NOT ENOUGH S...

Page 96: ...sewhere for best results Depending on the type of Card recording may stop in the middle A FOLDER CANNOT BE CREATED A folder cannot be created because there are no remaining folder numbers that can be used P84 Save your data to your computer then use this unit to reformat the card P82 If you execute NO RESET in the SETUP menu after formatting the folder number is reset to 100 P21 PICTURE IS DISPLAY...

Page 97: ...n the LCD monitor Is the power save mode P20 or economy mode P21 activated Press the shutter button halfway to deactivate these modes Are the batteries exhausted Replace them with batteries which have sufficient capacity When you use Ni MH batteries charge them The camera turns off soon after turning it on Are the batteries exhausted Replace them with batteries which have sufficient capacity When ...

Page 98: ...ene mode the resolution of the recorded picture decreases slightly because of high sensitivity processing This is not a malfunction The brightness or colour of the picture differs from the actual scene Brightness and colours may change when using a fast shutter speed under fluorescent lights but this is a characteristic of such lighting and is not a malfunction Shooting of motion pictures stops un...

Page 99: ... LCD monitor P21 Is the high angle mode activated P38 Black red blue and green dots appear on the LCD monitor This is not a malfunction These pixels do not affect the recorded pictures Noise appears on the LCD monitor In dark places noise may appear to maintain the brightness of the LCD monitor This does not affect the pictures you are recording Flash Conditions Causes Flash is not activated Is th...

Page 100: ...tteries immediately after taking a picture or if the batteries had very little charge left You will need to reformat the card to delete this type of picture P82 Remember that all data will be irretrievably erased when you format the card so save your data and check the card before proceeding The picture is displayed with a date different from the actual recording date in calendar playback Was the ...

Page 101: ...er does not recognise the card The built in memory is recognised Disconnect the USB connection cable then insert the card and reconnect the cable The pictures cannot be printed with printers Does the printer support PictBridge You cannot print pictures with printers which do not support PictBridge P86 Set the camera s mode dial to Print mode P86 The sides of printed images are cut off If your prin...

Page 102: ... again P16 When you take a picture before setting the clock 0 00 0 0 0 is recorded Images appear slightly distorted Images may be taken with some distortion depending on the zoom ratio This distortion increases as you get nearer the subject but it is not a malfunction Strange colours appear around the edge of the image Depending on the zoom magnification the picture may have some coloured fringes ...

Page 103: ...Picture size DMC LS75 DMC LS70 7M 3072 2304 pixels DMC LS60 only 6M 2816 2112 pixels Quality G H G H Built in Memory Approx 27 MB 7 14 8 17 Card 16 MB 3 7 4 8 32 MB 7 16 9 19 64 MB 16 34 20 40 128 MB 35 69 41 82 256 MB 68 135 81 160 512 MB 135 270 160 320 1 GB 270 540 320 640 2 GB 550 1090 660 1270 4 GB 1090 2150 1290 2510 Aspect ratio h Picture size DMC LS75 DMC LS70 5M EZ 2560 1920 pixels 3M EZ ...

Page 104: ...y G H G H G H Built in Memory Approx 27 MB 8 16 9 19 19 37 Card 16 MB 3 8 4 10 9 18 32 MB 8 18 10 21 20 40 64 MB 19 38 22 45 43 83 128 MB 39 78 46 92 88 165 256 MB 77 150 91 180 170 330 512 MB 150 300 180 350 340 650 1 GB 300 600 360 710 680 1310 2 GB 620 1220 730 1420 1360 2560 4 GB 1230 2410 1450 2800 2680 5020 Aspect ratio j Picture size DMC LS75 DMC LS70 5 5M 3072 1728 pixels DMC LS60 only 4 5...

Page 105: ...n 20 s 47 min 50 s 4 min 40 s 14 min 1 GB 11 min 32 min 50 s 32 min 50 s 1 h 35 min 9 min 20 s 28 min 10 s 2 GB 22 min 30 s 1 h 7 min 1 h 7 min 3 h 15 min 19 min 20 s 57 min 30 s 4 GB 44 min 20 s 2 h 11 min 2 h 11 min 6 h 22 min 38 min 1 h 53 min The volume of motion picture is limited to 2 GB per recording session The maximum available recording time for up to 2 GB only is displayed on the screen...

Page 106: ...DMC LS60 max 4 1 When recording resolution is or less Focus Normal Macro Mode dial 5 area focusing 1 area focusing high speed 1 area focusing Focus range Normal 50 cm to Z Macro Simple Intelligent ISO Motion picture 5 cm Wide 30 cm Tele to Z Scene mode settings may be different to those shown above Shutter system Electronic shutter Mechanical shutter Motion picture recording Aspect ratio h 640 480...

Page 107: ...rced OFF Recording media Built in Memory Approx 27 MB SD Memory Card SDHC Memory Card MultiMediaCard Still pictures only Picture size Still picture Aspect ratio h 3072 2304 pixels DMC LS75 DMC LS70 2816 2112 pixels DMC LS60 only 2560 1920 pixels DMC LS75 DMC LS70 2048 1536 pixels 1600 1200 pixels 1280 960 pixels 640 480 pixels Aspect ratio 3072 2048 pixels DMC LS75 DMC LS70 2816 1880 pixels DMC LS...

Page 108: ...IN Type1 jack Dimensions 93 7 mm W 62 0 mm H 29 7 mm D excluding projecting parts Weight DMC LS75 Approx 138 g excluding Memory Card and battery Approx 184 g with Memory Card and battery DMC LS70 DMC LS60 Approx 135 g excluding Memory Card and battery Approx 181 g with Memory Card and battery Operating Temperature 0 C to 40 C Operating Humidity 10 to 80 ...

Page 109: ...109 VQT1C84 Others MEMO ...

Page 110: ...110 VQT1C84 Others MEMO ...

Page 111: ...111 VQT1C84 Others ...

Page 112: ...kTime and the QuickTime logo are trademarks or registered trademarks of Apple Computer Inc used under license therefrom A A Matsushita Electric Industrial Co Ltd Web Site http panasonic net VQT1C84 H1206CK0 ...

Reviews: