background image

3. Recording Modes

82

Scene Guide Mode

Recording Mode: 

If you select a scene to suit the subject and recording conditions with reference to the 
example images, the camera will set optimal exposure, colour, and focus, allowing you to 
record in a manner appropriate to the scene.

1

Set the mode dial to [

].

2

Press 

2

/

1

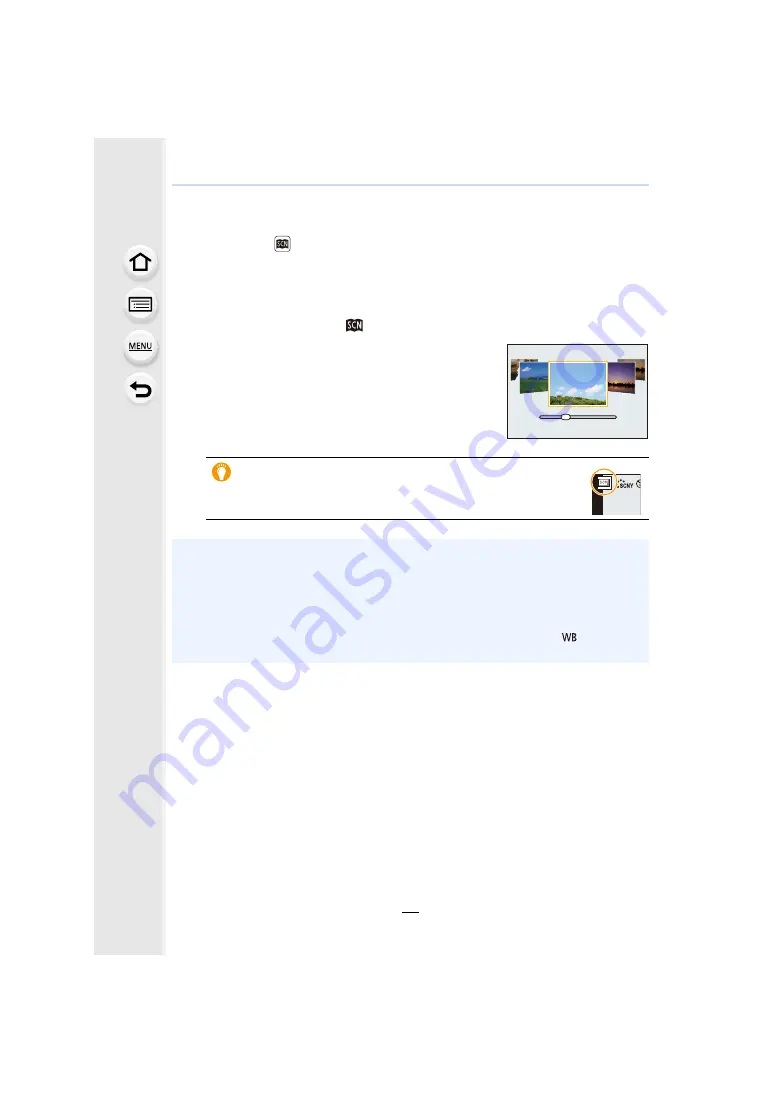
 to select the scene.

• The scene can also be selected by dragging an example 

image or the slide bar.

3

Press [MENU/SET].

It is also possible to display the selection screen by touching the 
Recording Mode icon in recording screen.

• Depending on the scene, the recording screen may seem as if frames are missed.
• To change the Scene Guide Mode, select [Scene Switch] in the Scene Guide Menu. This will 

return you to step 

2

 above.

• Some items in the [Rec] menu are not available in Scene Guide Mode as the camera 

automatically makes optimisation adjustments.

• Although White Balance is fixed to [AWB] for certain types of scene, you can fine tune the 

White Balanc

(P117)

 or use White Balance bracketin

(P147)

 by pressing [

] button on 

the recording screen.

8

Summary of Contents for Lumix DC-G90

Page 1: ...this manual for future use Operating Instructions for advanced features Digital Camera Model No DC G90 DC G91 DVQP1898ZA F0519MH0 until 2017 12 31 Message Display P325 Troubleshooting P328 Finding the information you need P2 Contents P4 Contents by Function P10 Menu Guide P192 ...

Page 2: ...earch from Contents Click this icon to jump to Contents P4 Search from the list of function names P10 Search from the list of buttons and dials P16 Search from the list of screens and icons P318 Search from Message Display P325 Search from Menu Guide Click this icon to jump to Menu Guide P192 Search from Troubleshooting P328 Click this icon to jump to Finding the information you need Click this ic...

Page 3: ...r a function Black icons Applicable modes Grey icons Unavailable modes and will differ depending on the Recording Modes registered under custom settings Indicates that the menu can be set by pressing MENU SET button Indicates that the Wi Fi setting can be made by pressing Wi Fi button Tips for skilful use and points for recording Conditions in which a particular function cannot be used Steps for s...

Page 4: ...32 Formatting the card initialisation 33 Number of Recordable Pictures Recordable Time 33 Attaching a Lens 35 Changing the Monitor Position 38 Setting the Clock When Turning On for the First Time 39 Basic Operations 41 How to Hold the Camera 41 Using the Viewfinder 42 Shutter button Taking pictures 43 Motion picture button Recording motion pictures 44 Mode dial Selecting a Recording Mode 44 Front ...

Page 5: ... 80 Registering custom settings 80 Using Custom Mode 81 Scene Guide Mode 82 Panorama Shot 85 Creative Control Mode 87 Types of image effects 88 4 Focus Brightness Exposure and Colour tone Settings Using AF 93 Setting the Focus Mode AFS AFF AFC 95 AF Sensitivity Photo 96 Selecting the AF Mode 97 AF area movement operation 102 Specifying the AF area position with the Touch Pad 105 Adjusting focus an...

Page 6: ...ime Lapse Shot Stop Motion Animation 142 Recording Using the Self timer 143 Bracket Recording 144 Exposure Bracket 145 Aperture Bracket 146 Focus Bracket 146 White Balance Bracket 147 6 Stabiliser Zoom and Flash Image Stabiliser 148 Image Stabiliser Settings 150 Setting the focal length of a lens 151 Taking Pictures with the Zoom 153 Optical zoom 153 Raising the telescopic effect 154 Zooming using...

Page 7: ...reative Video Mode 180 High Speed Video 181 4K Live Cropping 182 8 Playing Back and Editing Images Playing Back Pictures 184 Playing Back Motion Pictures 185 Extracting a Picture 186 Switching the Display Mode 187 Enlarged Display 187 Thumbnail Screen 187 Calendar Playback 188 Group Images 189 Deleting Images 191 9 Menu Guide Menus that are only available for particular Recording Modes 192 Rec men...

Page 8: ... Control 268 Playing back saving recorded images and sending them to social media sites 270 Transferring recorded images automatically 271 Recording location information 273 Automatically setting the clock 274 Editing motion pictures recorded with Snap Movie 275 Displaying pictures on a TV 276 Sending images from the camera 277 Sending images to a smartphone 280 Printing Wirelessly 281 Sending ima...

Page 9: ...n a TV Screen 301 Recording while monitoring camera images 302 Using VIERA Link HDMI 303 Importing images to a PC 304 Downloading software 305 Copying images to a PC 307 Storing on a Recorder 309 Printing the Pictures 310 Adding date and text to pictures 312 12 Others Optional accessories 313 Monitor Display Viewfinder Display 318 Message Display 325 Troubleshooting 328 Cautions for Use 337 ...

Page 10: ...110 Drive Drive Mode P118 Burst P119 Self Timer P143 Picture Quality and Colour Tone White Balance P115 Picture Size P194 Quality P195 Photo Style P196 Filter Settings P199 Color Space P200 Highlight Shadow P201 i Dynamic P202 i Resolution P203 Long Shtr NR P204 Shading Comp P205 Diffraction Compensation P205 HDR P208 Exposure Touch AE P54 One Push AE P79 AF AE Lock P110 Exposure Compensation P111...

Page 11: ...anceller P211 Lens Noise Cut P211 Monitoring HDMI output during recording P302 Sound Output P212 Screen settings Sound Rec Level Disp P179 Monochrome Live View P219 Center Marker P221 Zebra Pattern P222 Advanced recording Log recording V Log L P174 Basic settings Format P33 Clock Set P39 Adjusting the Viewfinder Dioptre P42 Q MENU P58 Beep P230 Economy P231 Reset initialisation P236 Sensor Cleanin...

Page 12: ...ing P252 Image settings Protect P242 Rating P242 Image App Image App P259 Remote Wakeup P266 Remote recording P267 Auto Transfer P271 In combination with other devices Playing back pictures on a TV P276 Printing images P281 Sending images to an AV device P282 Sending images to a PC P283 Sending images to a web service P285 Using Cloud Sync Service P288 PC PHOTOfunSTUDIO P305 SILKYPIX Developer Stu...

Page 13: ...h operations may be incorrectly recognised Do not place a hand inside the camera mount This may cause a failure or damage because the sensor is a precision device If you shake the camera while turning the camera off a sensor may operate or a rattling sound may be heard This is caused by the image stabiliser mechanism in the body It is not a malfunction Splash Resistant Splash Resistant is a term u...

Page 14: ...rm Trial Recording in Advance Perform trial recording in advance of an important event wedding etc to check that recording can be performed normally No Compensation Regarding Recording Please note that compensation cannot be provided in the event that recording could not be performed due to a problem with the camera or a card Be Careful with Regard to Copyrights Under copyright law you may not use...

Page 15: ...tails on the accessories refer to Basic Operating Instructions Digital Camera Body is indicated as camera body in the text Battery Pack is indicated as battery pack or battery in the text Battery Charger is indicated as battery charger or charger in the text Interchangeable Lens is indicated as lens in the text SD Memory Card SDHC Memory Card and SDXC Memory Card are indicated as card in the text ...

Page 16: ...elf timer indicator P143 AF Assist Lamp P215 13 Motion picture button P169 14 Mode dial P44 15 Flash P159 16 Hot shoe Hot shoe cover P313 Keep the hot shoe cover out of reach of children to prevent swallowing 17 Stereo microphone P179 Be careful not to cover the microphone with your finger Doing so may make sound difficult to record 18 Flash open lever P159 The flash opens and recording with the f...

Page 17: ... 4 Fn button Fn11 P60 2 AF Mode button P93 43 MENU SET button P48 55 44 Card door P30 45 Q MENU button P58 Fn2 button P60 Delete button P191 Cancel button P57 46 DISP button P48 47 Battery door P22 48 DC coupler cover P317 When using an AC adaptor ensure that the Panasonic DC coupler optional and AC adaptor optional are used 49 Release lever P22 50 Cover for the battery grip connector P314 Keep th...

Page 18: ...e 18 Lens H FS12060 H FSA14140 H FS1442A 3 2 5 6 1 4 1 2 3 7 6 4 5 2 3 1 4 5 1 Lens surface 2 Focus ring P107 3 Zoom ring P153 4 Lens fitting mark P35 5 Contact points 6 Lens mount rubber P339 7 O I S switch P148 ...

Page 19: ...e differently Lens Mount adaptor Four Thirds mount specification lens Mount Adaptor DMW MA1 optional Leica M Mount interchangeable lens M Mount Adaptor DMW MA2M optional Leica R Mount interchangeable lens R Mount Adaptor DMW MA3R optional Refer to catalogues websites for most current information regarding supported lenses https panasonic jp support global cs dsc This Site is English only The focal...

Page 20: ...tion of the arrow and then pass it through the stopper 3 Pass the end of the shoulder strap through the hole on the other side of the stopper 4 Pull the shoulder strap and then check that it will not come out Perform steps 1 to 4 and then attach the other side of the shoulder strap Use the shoulder strap around your shoulder Do not wrap the strap around your neck It may result in injury or acciden...

Page 21: ...er supplied and the AC adaptor supplied with the USB connection cable supplied Check the direction of the terminals and plug in out straight holding onto the plug It may result in malfunction by the deforming of the terminal if it is plugged in obliquely or in wrong direction 2 Insert the AC adaptor supplied into the power outlet 3 Insert the battery E in the correct direction The CHARGE indicator...

Page 22: ...r batteries we cannot guarantee the quality of this product 2 Insert the battery Insert the terminal end of the battery and push until a locking sound is heard Check that the lever A is holding the battery in place 3 Close the battery door Close the battery door and slide the battery door release lever to the LOCK position Do not use any other USB connection cables except the supplied one Do not u...

Page 23: ...left for a long period of time after being charged The battery becomes warm after using it and during and after charging The camera also becomes warm during use This is not a malfunction Turn the camera off and wait for the LUMIX display on the monitor to clear before removing the battery Otherwise this unit may no longer operate normally and the card itself may be damaged or the recorded pictures...

Page 24: ...tion cable supplied 4 Insert the AC adaptor supplied into the power outlet Charge the battery using the camera Charging time Approx 180 min Use the products supplied with the camera for charging The battery inserted in the Battery Grip optional cannot be charged A Connect the USB connection cable supplied to the USB CHARGE socket Place the camera in an upright position and find the terminal at the...

Page 25: ...om the power outlet for power saving You can also charge the battery by connecting a USB device PC etc and the camera with the USB connection cable supplied In that case charging may take a while Do not use any other USB connection cables except the supplied one Do not use any other AC adaptors except the supplied one The AC adaptor supplied and USB connection cable supplied are for this camera on...

Page 26: ... are used we recommend that a genuine Panasonic battery pack is used Do not leave any metal items such as clips near the contact areas of the power plug Otherwise a fire and or electric shocks may be caused by short circuiting or the resulting heat generated Do not use a USB extension cable Do not use the AC adaptor supplied and the USB connection cable supplied for other devices Doing so may caus...

Page 27: ...g is set to 1SEC and the Power Save LVF Shooting function works as intended Number of pictures and recordable time When the interchangeable lens H FS12060 is used Number of recordable pictures Approx 290 pictures When the interchangeable lens H FSA14140 is used Number of recordable pictures Approx 290 pictures When the interchangeable lens H FS1442A is used Number of recordable pictures Approx 290...

Page 28: ...pprox 50 min When the interchangeable lens H FS1442A is used Recordable time Approx 100 min Actual recordable time Approx 50 min When the interchangeable lens H FS12060 is used Recordable time Approx 100 min Actual recordable time Approx 50 min When the interchangeable lens H FSA14140 is used Recordable time Approx 100 min Actual recordable time Approx 50 min When the interchangeable lens H FS1442...

Page 29: ...me Approx 230 min The operating times and number of recordable pictures will differ according to the environment and the operating conditions For example in the following cases the operating times shorten and the number of recordable pictures is reduced In low temperature environments such as on ski slopes When flash is used repeatedly When the operating time of the camera becomes extremely short ...

Page 30: ... touch the connection terminals of the card 3 Close the card door and slide it firmly in the direction of the arrow until a clicking sound is heard To remove Insert until a clicking sound is heard and then pull it straight out Turn the camera off and wait for the LUMIX display on the monitor to clear before removing the card Otherwise this unit may no longer operate normally and the card itself ma...

Page 31: ... being written or read or deletion or formatting is in progress for example These operations may damage the card or recorded data or cause the camera to stop functioning correctly Turning off the camera Removing the battery or card or disconnect the AC adaptor optional and DC coupler optional Exposing the camera to vibration impact or static electricity If operation fails due to vibration impact o...

Page 32: ...mory Card 512 MB to 2 GB This unit is compatible with UHS I UHS II UHS Speed Class 3 standard SDHC SDXC memory cards Operation of the cards on the left has been confirmed with Panasonic s cards SDHC Memory Card 4 GB to 32 GB SDXC Memory Card 48 GB to 128 GB Rec Format Rec Quality Speed class Label example AVCHD All Class 4 or higher MP4 FHD HD 4K UHS Speed Class 3 High Speed Video 4K Photo Post Fo...

Page 33: ...Format Use a battery with sufficient battery power or the AC adaptor optional and DC coupler optional when formatting Do not turn off the camera or perform other operations during formatting If the card has been formatted on a PC or other equipment format it on the camera again Number of Recordable Pictures Recordable Time Picture Size Card capacity 16 GB 32 GB 64 GB 128 GB L 20M 1450 2910 5810 11...

Page 34: ...saved as smaller files You can continue recording without interruption When the recording format is MP4 with the size for Rec Quality set to FHD HD Files will be split up and saved and played back as smaller files if the continuous recording time exceeds 30 minutes or the file size exceeds 4 GB You can continue recording without interruption When the recording format is MP4 with the size for Rec Q...

Page 35: ...s on the lens 1 Turn the lens rear cap A and the body cap B in the direction of the arrow to detach them 2 Align the lens fitting marks C and then rotate the lens in the direction of the arrow until it clicks Do not press the lens release button D when you attach a lens Do not try to attach the lens when holding it at an angle to the camera body as the lens mount may get scratched ...

Page 36: ...he lens The lens hood reduces the inclusion of unwanted light in the recorded images and lowers the drop in contrast The lens hood cuts off excess lighting and improves the picture quality To attach the lens hood flower shape that came with the interchangeable lenses H FS12060 H FSA14140 H FS1442A Hold the lens hood by placing your fingers as shown in the figure Do not hold the lens hood in such a...

Page 37: ...e lens hood in the direction of the arrow to detach it Temporarily Storing the Lens Hood Example H FS12060 1 Remove the lens hood 2 Align the mark C on the lens hood with the mark on the tip of the lens 3 Turn the lens hood in the direction of the arrow until it clicks into place ...

Page 38: ... monitor to its original position When rotating the monitor be careful not to apply too much force Doing so may cause damage Free angle shooting The monitor can be rotated to suit your needs This is convenient as it allows you to take pictures from various angles by adjusting the monitor Taking pictures at a high angle Taking pictures at a low angle When not using the monitor it is recommended tha...

Page 39: ...d proceed to step 4 2 Press MENU SET 3 Press 3 4 to select the language and press MENU SET 4 Press MENU SET 5 Press 2 1 to select the items year month day hour minute and press 3 4 to set A Time at the home area B Time at the travel destination To set the display order and the time display format To display the setting screen of the order time select Style and then press MENU SET 6 Press MENU SET ...

Page 40: ... the home area and then press MENU SET Re adjusting the clock The clock can be reset as shown in steps 5 and 6 on P39 Setup Clock Set The clock setting is maintained for 3 months using the built in clock battery even without the battery Leave the charged battery in the unit for 24 hours to charge the built in battery To place the correct date on pictures set the clock before recording MENU ...

Page 41: ...e taking pictures Detects orientation of camera Direction Detection Function This function detects the vertical orientation when you record with the camera vertically orientated When you play back the recording the recording is automatically displayed in vertical orientation Only available when Rotate Disp is set to ON When the camera is held vertically and tilted significantly up or down to recor...

Page 42: ...nitor switching Viewfinder display Monitor display To reduce the battery consumption set Power Save LVF Shooting in Economy P231 Eye sensor might not work properly depending on the shape of your eyeglasses the way you hold the camera or bright light shining around the eyepiece Automatic viewfinder monitor switching does not work during motion picture playback and slide shows The eye sensor does no...

Page 43: ...e subject is not in focus the indication flashes A Shutter speed B Aperture value C Focus indication Press the shutter button fully push it in further and take the picture Shutter button Taking pictures Make sure that the camera does not move at the moment the shutter button is pressed Pictures cannot be taken until focus is achieved when Focus Release Priority is set to FOCUS Even during menu ope...

Page 44: ...d select the recording mode Be sure to align the mode dial with the desired mode by rotating it slowly Motion picture button Recording motion pictures Mode dial Selecting a Recording Mode Intelligent Auto Mode P65 Intelligent Auto Plus Mode P66 Programme AE Mode P71 Aperture Priority AE Mode P73 Shutter Priority AE Mode P73 Manual Exposure Mode P74 Creative Video Mode P180 Custom Mode P80 Scene Gu...

Page 45: ...nsitivity settings screen Front Dial Rear Dial e g When rotating the front dial to the left or right e g When rotating the rear dial to the left or right Mode dial Front dial Rear Dial Programme Shift Programme Shift Aperture value Aperture value Shutter speed Shutter speed Aperture value Shutter speed Custom Operation ISO Displayed Setting Front Rear Dials Sensitivity Sensitivity ISO Auto Upper L...

Page 46: ...displayed 4 Press MENU SET and set You can also complete this step by performing either of the operations below Press the shutter button halfway Press the Fn button Custom Operation Exposure Comp Disp Setting Cursor Buttons Up Down Exposure Bracket OFF OFF Front Rear Dials Exposure Comp Exposure Comp Flash Adjust Exposure Comp OFF OFF Exposure Comp Exposure Comp Flash Adjust OFF Exposure Comp OFF ...

Page 47: ...the shutter speed to the front dial and the aperture value to the rear dial Rotation F SS Changes the rotation direction of the dials for adjusting the aperture value and shutter speed Control Dial Assignment Sets the function to be assigned to the control dial in the recording screen Headphone Volume Exposure Aperture 1 Exposure Comp Sensitivity Focus Frame Size 2 1 This assigns exposure compensa...

Page 48: ...osure compensation operation to the front rear dial Except in Manual Exposure Mode Front Dial Rear Dial OFF Dial Operation Switch Setup Sets the items to be assigned temporarily to the front rear dials when you press the Fn button to which Dial Operation Switch is assigned Front Dial Operation Rear Dial Operation Items that can be set are as follows Photo Style Filter Effect Aspect Ratio 4K PHOTO ...

Page 49: ...t viewfinder style Scales down images slightly so that you can better review the composition of the images monitor style Scales images to fill the entire screen so that you can see their details With information Without information With information tilt sensor display Without information tilt sensor display With information Without information With information tilt sensor display Without informati...

Page 50: ...is performed the information on the screen will gradually become darker after approximately 10 seconds has passed and will no longer be displayed after approximately 1 minute has passed Pressing the DISP button or touching the monitor will make the display reappear This operation is to prevent screen burn in and is not a malfunction A Horizontal direction Correcting tilt to the left B Vertical dir...

Page 51: ...etween the following display modes Detailed information display Histogram display Photo style Highlight shadow display White balance display Lens information display 3 This is displayed if Highlight in the Custom Monitor Display menu is set to ON In Playback Mode With information 1 Detailed information display 2 Without information Highlight display 1 3 Without information 1 0 AWB AWB 1 98 98 1 98...

Page 52: ...ons Touch the screen with the clean and dry finger If you use a commercially available monitor protection sheet please follow the instructions that accompany the sheet Some monitor protection sheets may impair visibility or operability Not available in these cases The touch screen may not function normally in the following cases When touched by a gloved hand When the touch screen is wet Fn5 Fn5 Fn...

Page 53: ...uch an icon The icon switches every time you touch it Touch AF Focuses on the position you touch Touch shutter Focuses on the touched position before recording takes place OFF Touch AF and Touch Shutter are disabled 3 When settings other than OFF are selected Touch the subject When Touch AF is set refer to P102 for information about the operation to change the size and position of the AF area If s...

Page 54: ...or the brightness optimisation position is displayed Metering Mode is set to which is used exclusively for the Touch AE 3 Touch the subject you want to optimise the brightness for Touch Reset to bring the brightness optimisation position back to the centre 4 Touch Set Not available in these cases This function is not available in the following cases When using the Digital Zoom When 4K Live Croppin...

Page 55: ...rresponding Recording Modes Creative Video P180 Custom Mode P81 Scene Guide P82 Creative Control P88 Rec P193 This menu lets you set picture settings Motion Picture P210 This menu lets you set motion picture settings Custom P213 Operation of the unit such as displaying of the screen and button operations can be set up according to your preferences Setup P228 This menu lets you perform the clock se...

Page 56: ...5 Press 3 4 of the cursor button to select the menu item and press MENU SET You can also move to the next screen by rotating the rear dial Touch operation 6 Press 3 4 of the cursor button to select the setting and press MENU SET Depending on the menu item its setting may not appear or it may be displayed in a different way Touch operation You can also rotate the control dial to select the menu sel...

Page 57: ...ress the shutter button halfway Touch operation Press DISP to display the menu description Menu items that are not available are displayed in grey If you press MENU SET while a grey item is selected the reason why it cannot be set is displayed in some setting situations ...

Page 58: ...tting 4 Press Q MENU to exit the Quick Menu once the setting is complete You can also select menu items and setting items by pressing 3 4 2 1 The features that can be adjusted using Quick Menu are determined by the mode or a display style the camera is in When using the on monitor recording information screen P49 Select the item by pressing the Q MENU button and rotating the front dial and then se...

Page 59: ...in the bottom row and then press MENU SET A Items that can be set B Set items You can also perform the same operation by dragging the item from the top row to the bottom row If there is no empty space in the bottom row you can replace an existing item with a new select item by selecting the existing item You can follow the steps below to cancel the setting 1 Press 4 to move to the bottom row 2 Pre...

Page 60: ...tton settings select Restore to Default When not setting a function in the Fn button select Off Setting function buttons from the on monitor recording information screen You can also display the screen in step 2 by touching Fn on the on monitor recording information screen P49 Assigning functions quickly You can quickly display the screen in step 3 by pressing and holding an Fn button Fn1 to Fn3 F...

Page 61: ...Metering Mode P201 Burst Rate P119 4K PHOTO P122 Self Timer P143 Bracket P144 Highlight Shadow P201 i Dynamic P202 i Resolution P203 Min Shtr Speed P204 HDR P208 Shutter Type P206 Flash Mode P162 Flash Adjust P165 Wireless Flash Setup P166 Ex Tele Conv P154 Digital Zoom P156 Stabilizer P148 E Stabilization Video P150 I S Lock Video P151 4K Live Cropping P182 Snap Movie P176 Motion Pic Set P171 Pic...

Page 62: ...lay the position setting screen of either AF area or MF Assist When 1 Shot 4K PHOTO is set recording is performed in a specified 4K Photo Mode only once After the recording has finished the camera returns to normal state When Operation Lock is set a certain type of operation is disabled Set the type of operation to be disabled in Operation Lock Setting in the Custom Operation menu P218 If you assi...

Page 63: ... following functions can be assigned to the Fn button Fn1 Fn3 Fn button settings at the time of purchase Using the Fn buttons during playback Wi Fi P257 LVF Monitor Switch P42 Rec Playback Switch 4K PHOTO Play Delete Single P191 Protect P242 Rating 1 P242 Rating 2 P242 Rating 3 P242 Rating 4 P242 Rating 5 P242 RAW Processing P244 4K PHOTO Bulk Saving P128 Restore to Default Fn1 Wi Fi Fn3 LVF Monit...

Page 64: ...lso switch between text modes by pressing DISP A maximum of 30 characters can be entered Maximum of 9 characters when setting names in Face Recog A maximum of 15 characters can be entered for and Maximum of 6 characters when setting names in Face Recog 2 Press 3 4 2 1 to move the cursor to Set and then press MENU SET to end text input Switch text between A upper case characters a lower case charac...

Page 65: ...ed by the camera In this mode the camera makes the optimal settings for the subject and scene 1 Set the mode dial to At the time of purchase the mode is set to Intelligent Auto Plus Mode 2 Hold the camera with the lens facing toward the subject When the camera identifies the optimum scene the icon of the scene concerned will change Automatic Scene Detection ...

Page 66: ... Displayed when a flash is used 2 Only displayed when iHandheld Night Shot is set to ON 3 Displayed when persons under 3 years old registered in the camera with the Face Recognition function are detected is set if none of the scenes are applicable and the standard settings are set When recording is performed with the 4K Photo or Post Focus function Scene Detection works in the same way as when mot...

Page 67: ...r similar support when the scene detection has been identified as When the camera has judged that camera shake is minimal the shutter speed becomes slower than normal Take care not to move the camera while taking pictures Depending on recording conditions different scene types may be selected for the same subject When or is set Red Eye Removal is enabled Shutter speed will be slower during or In I...

Page 68: ...lash off Combining pictures into a single picture with rich gradation iHDR Intelligent Auto iHDR ON OFF The angle of view will be slightly narrower Do not move the camera during the continuous shooting after pressing the shutter button You cannot take the next picture until the combination of pictures is complete A moving subject may be recorded with unnatural blurs Not available in these cases iH...

Page 69: ...rotating the rear dial To return to the recording screen press MENU SET To cancel the setting press Fn2 on the blurriness setting screen AF Mode is set to Ø The position of the AF area can be set by touching the screen Its size cannot be changed Setting brightness 1 Press 2 Rotate the rear dial to adjust brightness In the Custom Operation menu Exposure Comp Disp Setting you can change the function...

Page 70: ...et To return to the recording screen press MENU SET Depending on the lens used you may hear a sound from the lens while operating Defocus Control This is due to the aperture operation of the lens and is not a malfunction Depending on the lens used operational sound of the Defocus Control may be recorded during the recording of a motion picture when the function is used ...

Page 71: ...s you to for example make the background more defocused by decreasing the aperture value or capture a moving subject more dynamically by slowing the shutter speed 1 Press the shutter button halfway and display the aperture value and shutter speed value on the screen 2 While the values are displayed about 10 seconds perform Programme Shift by rotating the rear dial or front dial A Programme Shift i...

Page 72: ...es may differ Check the pictures on the playback screen If the exposure is not adequate the aperture value and the shutter speed turn red and blink when the shutter button is pressed halfway Example In Manual Exposure Mode A Shutter speed B Aperture value Aperture value Small It becomes easier to defocus the background Large It becomes easier to maintain focus as far as the background Shutter spee...

Page 73: ... automatically optimises the aperture value for the brightness of the subject 1 Set the mode dial to 2 Set the shutter speed by rotating the rear dial or the front dial A Shutter speed Aperture Priority AE Mode When using a lens with an aperture ring set the position of the aperture ring to other than A to use the aperture value of the lens Shutter Priority AE Mode When the flash is activated the ...

Page 74: ...or the ISO sensitivity may become higher Manual Exposure Assistance When the ISO sensitivity is set to other than AUTO Manual Exposure Assistance will be displayed on the recording screen The Manual Exposure Assistance is an approximation We recommend checking the pictures on the playback screen Manual Exposure Mode Available Shutter Speed Sec When the mechanical shutter is used B Bulb 60 to 1 400...

Page 75: ...ake pictures with the shutter speed set to B When you take pictures with the shutter speed set to B noise may become visible To avoid picture noise we recommend setting Long Shtr NR in the Rec menu to ON before taking pictures Not available in these cases This function is not available in the following cases When recording using the flash only when Flash Synchro is set to 2ND When recording 4K pho...

Page 76: ...ording screen 5 Press the shutter button fully to obtain an image with reduced noise A countdown screen is displayed Wait until this step completes 6 Press the shutter button fully to start recording Images are combined every time the exposure time set in step 4 has passed 7 Press the shutter button fully again to stop recording This will run noise reduction and save the image Live View Composite ...

Page 77: ...de When the shutter button is pressed fully to stop recording the last image will not be included in the combined image Not available in these cases This function is not available in the following cases When recording using the flash only when Flash Synchro is set to 2ND When recording in Burst Mode When recording 4K photos When recording with the Post Focus function When recording with the Bracke...

Page 78: ...kground etc 3 Example When you want to take a picture with everything in focus including the background etc Preview Mode Normal recording screen Aperture effect preview screen Aperture effect On Shutter speed effect Off Shutter speed effect preview screen Aperture effect On Shutter speed effect On 1 Aperture value Small Large Focus length Tele Wide Distance to the subject Near Distant Depth of fie...

Page 79: ...ect is extremely dark and it is not possible to achieve adequate exposure by changing the aperture value or shutter speed When recording using the flash In Preview Mode When using a lens that includes an aperture ring One Push AE How to tell if the exposure is not adequate If the aperture values and shutter speed blink red when the shutter button is pressed halfway If the Manual Exposure Assistanc...

Page 80: ...ion Set to recording mode and menu settings of the state you wish to save You can register up to three custom sets to of the mode dial The following menu items are not registered as custom settings Registering custom settings Setup Cust Set Mem Custom set where you want to register settings Custom menu Setup menu Menu Guide Data registered with Face Recog The Profile Setup setting All menus Playba...

Page 81: ...ettings are switched to those settings you selected for the custom set Changing the registered content Registered contents do not change when the menu setting is changed temporarily with the mode dial set to or To change the registered settings overwrite the registered content using Cust Set Mem on the Setup menu Using Custom Mode Custom Mode It is also possible to display the selection screen by ...

Page 82: ...U SET It is also possible to display the selection screen by touching the Recording Mode icon in recording screen Depending on the scene the recording screen may seem as if frames are missed To change the Scene Guide Mode select Scene Switch in the Scene Guide Menu This will return you to step 2 above Some items in the Rec menu are not available in Scene Guide Mode as the camera automatically make...

Page 83: ... display Guide display List display Clear Portrait Silky Skin The smoothing effect is applied to the part that has a similar tone to the complexion of a subject as well This mode may not be effective under insufficient lighting Backlit Softness Clear in Backlight Relaxing Tone Sweet Child s Face Touch the face A still picture is recorded with the focus and exposure set for the touched location Dis...

Page 84: ... will be slightly narrower Clear Night Portrait We recommend using a tripod and the self timer When Clear Night Portrait is selected keep the subject still for about 1 second after taking the picture Soft Image of a Flower For close up recording we recommend that you do not use the flash Appetizing Food For close up recording we recommend that you do not use the flash Cute Dessert For close up rec...

Page 85: ...tal and vertical directions of the panorama picture varies depending on the image size the recording direction and the number of combined pictures The maximum number of pixels is shown below Panorama Shot Recording from left to right Image size STANDARD Image size WIDE A Recording direction and panning Guide B Horizontal vertical guide Move the camera at a constant speed Pictures may not be able t...

Page 86: ...hed move the camera slowly The focus White Balance and exposure are fixed at the optimum values for the first picture As a result if the focus or brightness changes substantially during recording the entire panorama picture may not be recorded at the suitable focus or brightness When multiple pictures are combined to create a single panorama picture the subject may appear distorted or the connecti...

Page 87: ...ET Displaying the description of each image effect Press DISP while the image effect selection screen is displayed When it is set to the guide display explanations for each picture effect are displayed It is also possible to display the selection screen by touching the Recording Mode icon in recording screen Normal display Guide display List display White Balance will be fixed to AWB and Sensitivi...

Page 88: ...rd w o Filter Allows you to set the camera to take a picture with and without an image effect simultaneously Types of image effects Expressive Retro Old Days High Key Low Key Sepia Monochrome Dynamic Monochrome Rough Monochrome Silky Monochrome Impressive Art High Dynamic Cross Process Toy Effect Toy Pop Bleach Bypass Miniature Effect Soft Focus Fantasy Star Filter One Point Color Sunshine MENU ...

Page 89: ...een Setting screen can also be displayed by touching in order of then 2 Select the colour you want to leave by moving the frame with 3 4 2 1 You can also select the colour you want to leave by touching the screen To return the frame back to the centre press DISP 3 Press MENU SET to set No sound is recorded in motion pictures Approximately 1 8 of the time period is recorded If you record for 8 minu...

Page 90: ...t the light source setting to the default press DISP 4 Press MENU SET to set 1 Press 2 Rotate the rear dial to set To return to the recording screen press again Point for when placing the centre of the light source A more natural appearance can be created by placing the centre of the light source outside the image Adjust the effect to fit your preferences Image effect Items that can be set Express...

Page 91: ...h tinge Toy Effect Colour Orangish tinge Bluish tinge Toy Pop Area with reduced peripheral brightness Small Large Bleach Bypass Contrast Low contrast High contrast Miniature Effect Freshness Understated colours Pop colours Soft Focus Extent of defocus Weak defocus Strong defocus Fantasy Freshness Understated colours Pop colours Star Filter Length of the rays of light Short Long Number of the rays ...

Page 92: ... on the exposure compensation screen P46 To return to the recording screen press again Change the settings by using the touch screen 1 Touch 2 Touch the item you want to set Adjusts an image effect Defocus level Brightness 3 Drag the slide bar to set To return to the recording screen press MENU SET Taking a picture with a blurred background Defocus Control Not available in these cases This functio...

Page 93: ... set P97 4 Press the shutter button halfway AF will be activated The focus indication is displayed as in a dark environment and focusing may take longer than usual If the camera detects stars in the night sky after displaying Starlight AF will be activated When focus is achieved the focus indication and AF areas in focus are displayed Starlight AF cannot perform detection on the edges of the scree...

Page 94: ...n the camera is too close to the subject or when taking a picture of both distant and near subjects How to adjust the composition while pressing the shutter button halfway When recording with Ø follow the steps below if the subject is not in the centre of the composition of the picture you want to take When the focus mode is set to AFS 1 Aim the AF area over the subject 2 Press the shutter button ...

Page 95: ...ressed halfway the focus is readjusted automatically according to the movement of the subject You can set the menu to change the setting Rec Motion Picture AFS AFF Settings AFS AFF AFC Subject is moving Sport trains etc AFC is an abbreviation of Auto Focus Continuous In this mode while the shutter button is pressed halfway focusing is constantly performed to match the movement of the subject When ...

Page 96: ...ks during recording The Focus Mode setting cannot be changed when recording is performed with the Post Focus function AF Sensitivity Photo Rec AF Sensitivity Photo r When the distance to the subject changes drastically the camera re adjusts the focus immediately You can bring different subjects into focus one after another s When the distance to the subject changes drastically the camera waits for...

Page 97: ...amera keeps adjusting the focus and exposure automatically to the specified moving object Dynamic Tracking When Metering Mode is set to P98 49 Area Up to 49 AF areas can be focused This is effective when a subject is not in the centre of the screen etc Custom Multi From among 49 AF areas you can freely set the optimum shape of the AF area for the subject P99 1 Area The camera focuses on the subjec...

Page 98: ...on Press MENU SET to clear the lock Touch the subject Perform this operation with the Touch Shutter function cancelled The AF Tracking area turns yellow while the subject is locked Touch to clear the lock About š Face Eye Detection Yellow The colour changes to green when the shutter button is pressed halfway and focus is achieved White This is displayed when more than one face is detected Faces th...

Page 99: ...a Custom Multi Horizontal Pattern This shape is convenient for taking panning shots or similar shots Vertical Pattern This shape is convenient for recording objects such as buildings Central Pattern This shape is convenient when you want to bring the centre area into focus Custom1 Custom2 Custom3 You can select a customised setting Button operation Touch operation Description of operation 3 4 2 1 ...

Page 100: ...ons press DISP Touch or drag to select AF areas To cancel the selection of a particular AF area touch the area again 2 Press the Fn button Fn1 to set Registering the set AF area to or 1 On the screen in step 3 on P99 press 3 2 Press 3 4 to select a destination to which the setting will be registered and press MENU SET Button operation Touch operation Turning off this unit will return the setting a...

Page 101: ...n certain situations such as when the subjects are moving fast In such situations the camera performs the operation of Tracking In situations where AF Tracking does not work correctly due to certain recording conditions such as when the subject is small or the location is dark the operation of Ø is performed is not available in the following cases When using Time Lapse Shot When recording with Liv...

Page 102: ...e for 4 Press MENU SET to set If you have selected š an AF area with the same function as Ø will be set in the set position Setting of the AF area is cleared when MENU SET is pressed or is touched AF area movement operation Custom Operation Touch Settings Touch AF AF The spot metering target can also be moved to match the AF area when the Metering Mode is set to Not available in these cases This f...

Page 103: ...ed with 49 points is divided into groups consisting of 9 points each 6 points or 4 points for the groups located at the edges of the screen 1 Press 2 2 Select and press 4 The AF area setting screen appears 3 Press 3 4 2 1 to select an AF area group 4 Press MENU SET to set Setting of the AF area is cleared when MENU SET is pressed or is touched Examples of group ...

Page 104: ...he picture by approximately 3k to 6k when the picture is displayed in full screen you can enlarge the picture by approximately 3k to 20k You can also take pictures by touching 5 Press MENU SET to set When selecting Button operation Touch operation Description of operation 3 4 2 1 Touching Moves Pinching out in Enlarges reduces the screen in small steps s Enlarges reduces the screen Switches the en...

Page 105: ...ifying the AF area position with the Touch Pad Custom Operation Touch Settings Touch Pad AF EXACT Moves the AF area of the Viewfinder by touching a desired position on the Touch Pad OFFSET1 OFFSET7 Moves the AF area of the viewfinder according to the distance you drag the touch pad Operation area can be selected from 7 areas Settings OFFSET1 all areas OFFSET2 right half OFFSET3 upper right OFFSET4...

Page 106: ...ith AF AE touch when Ø is selected Adjusting focus and brightness for the touched position Custom Operation Touch Settings Touch AF AF AE When the background has become too bright etc the brightness contrast with the background can be adjusted by compensating the exposure When recording with the Touch Shutter the focus and brightness are optimised for the touched position before recording takes pl...

Page 107: ...o adjust the focus position by dragging the screen You can also enlarge the area by performing one of the following operations Rotating the focus ring Moving the focus lever Pinching out or touching the screen twice 4 Adjust the focus The operations used to focus manually differ depending on the lens When using an interchangeable lens with a focus ring Rotate to A side Focuses on nearby subject Ro...

Page 108: ...ge the picture by approximately 3k to 6k when the picture is displayed in full screen you can enlarge the picture by approximately 3k to 20k When using an interchangeable lens with no focus ring Press 1 Focuses on nearby subject Press 2 Focuses on distant subjects A Slide bar Pressing and holding 2 1 will increase the focus speed Focus can also be adjusted by dragging the slide bar Button operatio...

Page 109: ... P110 Pressing the Fn button to which AF ON is assigned P60 Dragging the monitor and releasing your finger at the position you want to focus on This function is not available when 4K Live Cropping is set MF Assist and MF Guide may not display depending on the lens used To display MF Assist use the touch screen or buttons to operate the camera directly If Focus Switching for Vert Hor in the Custom ...

Page 110: ...lease AF AE LOCK AF AE Lock is cancelled 3 While pressing AF AE LOCK move the camera as you compose the picture and then press shutter button fully Setting the functions of AF AE LOCK Custom Focus Release Shutter AF AE Lock AE LOCK The exposure is locked AEL is displayed AF LOCK The focus is locked AFL is displayed AF AE LOCK Both focus and exposure are locked AFL and AEL are displayed AF ON AF is...

Page 111: ...t rear dial or the control dial to compensate the exposure A Exposure Compensation In the Custom Operation menu Exposure Comp Disp Setting you can change the functions to be set on the exposure compensation screen P46 3 Press to set You can also press the shutter button halfway to set Underexposed Properly exposed Overexposed Compensate the exposure towards positive Compensate the exposure towards...

Page 112: ... Rec menu is set to ON the brightness of the flash will automatically be set to the level appropriate to the selected Exposure Compensation Depending on the brightness this may not be possible in some cases When the exposure compensation value falls below or exceeds the j3 EV to i3 EV range the brightness of the recording screen will no longer change Values outside this range will be applied to th...

Page 113: ...ure menu is set to ON 3 Press to set You can also press the shutter button halfway to set AUTO The ISO sensitivity is automatically adjusted according to the brightness Maximum ISO3200 1 Intelligent ISO The camera automatically sets the optimum ISO sensitivity and shutter speed to suit the movement of the subject and brightness of the scene to minimise the jitter of the subject Maximum ISO3200 1 T...

Page 114: ...Manual Exposure Mode When Multi Exp is set the maximum setting is ISO3200 If you set Photo Style to V Log L the lower limit of the ISO sensitivity will be fixed to ISO400 When the following functions are being used the ISO sensitivity that can be set is restricted Creative Video Mode 4K Photo recording Post Focus recording AUTO 200 to 6400 L 100 to 6400 if Extended ISO is set to ON Live View Compo...

Page 115: ...ed when you record motion picture or perform recording with the 4K Photo or Post Focus function AWB Auto AWBc Auto Reduces the reddish hue under an incandescent light source AWBw Auto Leaves the reddish hue under an incandescent light source V When taking pictures outdoors under a clear sky Ð When taking pictures outdoors under a cloudy sky î When taking pictures outdoors in the shade Ñ When takin...

Page 116: ...ter adjusting to appropriate brightness Set the White Balance Colour Temperature to suit the light source 1 Press 3 2 Press 3 4 to select the colour temperature and then press MENU SET You can set a colour temperature from 2500K to 10000K Under fluorescent lighting LED lighting fixture etc the appropriate White Balance will vary depending on the lighting type Use AWB AWBc AWBw or If you take pictu...

Page 117: ...t to apply is not produced by the selected white balance 1 Select the White Balance and then press 4 2 Press 3 4 2 1 to adjust the colouring You can also make fine adjustments by touching the White Balance graph To reset the position to the centre press DISP You can set the White Balance Bracket by rotating the control dial P147 3 Press MENU SET Press the shutter button halfway to return to the re...

Page 118: ... P119 Recordings are made in succession while the shutter button is pressed 4K PHOTO P122 When the shutter button is pressed a 4K photo is recorded Post Focus P133 When the shutter button is pressed Post Focus recording is performed Time Lapse Shot Stop Motion Animation P138 140 Pictures are recorded with Time Lapse Shot or Stop Motion Animation Self Timer P143 When the shutter button is pressed r...

Page 119: ... performed under the test conditions specified by Panasonic The burst speed will become slower halfway However pictures can be taken until the capacity of the card becomes full Depending on recording conditions the number of burst pictures that can be taken will be reduced Rec Burst Rate Burst Rate Live View during Burst Mode H High speed 9 frames second AFS MF 6 frames second AFF AFC None AFS MF ...

Page 120: ...speed slows down when r0 appears When r99 is displayed you can take 100 or more pictures continuously Notes on focus in Burst Mode The way focus is achieved varies according to the focus mode setting and the Focus Release Priority setting in the Custom Focus Release Shutter menu 1 When the subject is dark the focus is fixed on the first picture 2 Burst speed takes priority and focus is estimated w...

Page 121: ...ously while saving the maximum number of recordable pictures decreases For continuous shooting use of a high speed memory card is recommended We recommend using the shutter remote control DMW RS2 optional when you want to keep the shutter button pressed fully while taking pictures in Burst Mode Not available in these cases Burst recording does not work in the following cases Glistening Water Glitt...

Page 122: ...3 Press the shutter button halfway to exit the menu 4 Record a 4K photo If you are using AF Continuous AF will work during recording Focus will be adjusted continuously Rec 4K PHOTO Rec Method 4K Burst For capturing the best shot of a fast moving subject e g sports aeroplanes trains Audio recording Not available 4K Burst S S S S is an abbreviation of Start Stop For capturing unpredictable photo op...

Page 123: ...mediately after the start of recording up to a period of approximately 1 5 seconds after the moment that the finger has been removed may be recorded 4K Burst S S 1 Press the shutter button fully to start recording 2 Press the shutter button fully again to stop recording C Start First D Stop Second E Recording is performed Setting markers manually You can add markers if you press Fn2 during recordi...

Page 124: ...recording screen When Pre Burst Recording is being used AF operations and unavailable menus are the same as those during 4K Pre Burst operation Rec 4K PHOTO Loop Recording 4K PHOTO We recommend that you use a sufficiently charged battery or an AC adaptor optional and the DC coupler optional Up to 12 hours of continuous recording is possible When this function is enabled is displayed on the recordi...

Page 125: ...cording with 4K Burst S S you can set the start stop tone volume in Beep Volume High speed burst recording can be used quietly when used in combination with Silent Mode Scenes not suitable Recording in extremely bright locations or indoors When subjects are recorded in an extremely bright place or under fluorescent LED lighting the colour tone or brightness of the image may change or horizontal st...

Page 126: ...6400 L 100 to 6400 when Extended ISO is set to ON The following menu items are disabled Picture Size 4K 8M Quality A 4 3 3328k2496 3 2 3504k2336 16 9 3840k2160 1 1 2880k2880 Shutter Type ESHTR Rec Format MP4 Continuous AF ON Rec Quality 4K 100M 30p Luminance Level 0s255 When recording with the 4K Photo function the following functions are disabled Flash Bracket Recording Programme Shift Focus mode...

Page 127: ...om in Power Zoom Lens is disabled Scene Detection in Intelligent Auto Mode works the same way as when recording motion pictures When the drive mode is set to 4K Photo it is not possible to take pictures while recording motion picture Only when Photo Priority is set To select and save pictures from 4K burst files on a PC use the software PHOTOfunSTUDIO Please note that it is not possible to edit a ...

Page 128: ...t files and press MENU SET If the burst time is 5 seconds or less all frames will be saved as pictures 3 Select the first frame of the pictures to be saved at once Select the frame in the same way as you select pictures from a 4K burst file Pictures will be saved as a group of Burst Mode pictures in JPEG format P189 2 Drag the slide bar to make a rough selection of scenes For information on how to...

Page 129: ...ging Selects the frame to be displayed The previous or next frame is displayed in slide view Pinching out in Enlarges reduces the display s Selects a frame while maintaining the enlarged display during enlarged display 3 4 2 1 Dragging Moves the enlarged area during enlarged display s Switches a marker to be displayed P132 Fn1 Displays the 4K burst playback screen s Switches to marker operation P1...

Page 130: ...mes to be displayed during pause Pinching out in Enlarges reduces the display during pause s Selects a frame while maintaining the enlarged display during enlarged display 3 4 2 1 Dragging Moves the enlarged area during enlarged display s Switches a marker to be displayed P132 Fn1 Displays the slide view screen during pause s Switches to marker operation P131 s Adds deletes a marker s In focus por...

Page 131: ...s detected Example At the scene when a vehicle passes by a balloon bursts or a person turns around Up to 10 markers are displayed for each file In the following cases markers may not be set by the Auto Marking function depending on the recording conditions and the status of subjects The camera is moving because of panning or jitter The movement of a subject is slow small The subject is small A fac...

Page 132: ...h a face is detected Motion Priority Displays a marker with preference given to a scene in which the movement of a subject is detected Off Displays manually set markers only You cannot delete markers set by the Auto Marking function The markers set by the Auto Marking function may not be displayed correctly if you split the 4K burst file on another device and then play it back on the camera In the...

Page 133: ...Decide on the composition and press the shutter button halfway AF will detect focus areas on the screen Excluding the edges of the screen While the shutter button is pressed and held halfway shake may be seen on the screen If no areas on the screen can be brought into focus the focus display A will flash Recording is not possible in this case 4K burst recording while automatically shifting the foc...

Page 134: ...on to the limitations of the 4K Photo function the following limitations apply to the Post Focus function AF Mode is disabled MF operation is disabled Motion pictures cannot be recorded Digital Zoom is disabled The following Custom menu items are disabled Shutter AF About camera temperature When the ambient temperature is high or Post Focus recording is performed continuously the camera may displa...

Page 135: ...rged display You can also perform the same operation by pressing 2 1 3 Touch to save the picture The picture will be saved in JPEG format Selecting the Focus Position for the Picture to Save Button operation Touch operation Description of operation 3 4 2 1 Touching Selects a focus area It cannot be selected during enlarged display Enlarges the display Reduces the display during enlarged display Fn...

Page 136: ...lly selects pictures that are suited to be merged and merges them into a single picture Priority will be given to pictures with closer focus Perform the focus stacking and save the picture Range Merging Merges pictures with specified focus areas into a single picture Specify at least two areas In focus areas between the selected two points are indicated Parts that cannot be selected are indicated ...

Page 137: ...era may automatically correct the misalignments of pictures caused by camera shake If they are corrected the angle of view becomes slightly narrower when pictures are merged Pictures may be merged into an unnatural picture in the following cases When the subject moves during recording When the distance between subjects is great When pictures are too defocused If you take pictures with a larger ape...

Page 138: ...isplays in this state only once after switching the drive mode dial 3 Press 3 4 to select an item and set 1Can be set only when Shooting Interval Setting is set to ON Recorded pictures are displayed as group pictures Time Lapse Shot Rec Time Lapse Animation Mode Time Lapse Shot Shooting Interval Setting ON Sets the time from recording start time to the next recording start time OFF After recording...

Page 139: ...hen the recording start time arrives the camera turns on automatically To turn on the camera manually press the shutter button halfway Operations during recording standby The camera is turned on 2 When you record pictures by setting Shooting Interval Setting to OFF you can press Fn2 even while recording is in progress After recording exposure of a picture taken at the time when you pressed Fn2 is ...

Page 140: ...y and the card and then restart by turning on this unit Note that the pictures taken after replacing the card will be saved as a separate set of group pictures Set the camera on off switch to OFF when replacing the battery or card When Shooting Interval is set to a longer value if the camera turns off automatically while waiting for the next recording we recommend that you use Time Lapse Shot in A...

Page 141: ...s For information on creating motion pictures refer to Motion pictures using Time Lapse Shot Stop Motion Animation P142 Adding pictures to the Stop Motion Animation group Selecting Add to Picture Group in step 3 will display group pictures recorded with Stop Motion Animation Select a set of group pictures and then press MENU SET Recording materials skilfully The recording screen displays up to two...

Page 142: ...nce NORMAL Splices pictures together in recording order REVERSE Splices pictures together in reverse recording order You can also create motion pictures using Time Lapse Video P254 or Stop Motion Video P254 in the Playback menu When creating motion pictures with a Rec Quality setting of 4K recording times are limited to 29 minutes and 59 seconds When using an SDHC Memory Card you cannot create mot...

Page 143: ... pressed After 10 seconds the camera takes 3 pictures at about 2 seconds intervals Picture is taken 2 seconds after shutter is pressed This setting is a convenient way to avoid camera blur caused by pressing the shutter button We recommend using a tripod when recording with the self timer Not available in these cases is not available in the following cases When Simultaneous Record w o Filter of Fi...

Page 144: ...e bracket settings or turn off the camera before all of the pictures you have set are taken the camera restarts recording from the first picture To cancel Bracket Type Select OFF in step 1 Rec Bracket Bracket Type Exposure Bracket Press the shutter button to perform recording while adjusting the exposure P145 Aperture Bracket Press the shutter button to perform recording while adjusting the apertu...

Page 145: ...th the Post Focus function When using Multi Exp When using Time Lapse Shot When using Stop Motion Animation when Auto Shooting is set White Balance Bracket does not work in the following cases Intelligent Auto Plus Mode Creative Control Mode When recording in Burst Mode When Quality is set to or Exposure Bracket Step Sets the number of pictures to be taken and the exposure compensation range 3 1 3...

Page 146: ...re 2 second picture 5 fifth picture Aperture Bracket Image Count 3 5 Takes a specified number of pictures with different aperture values within the range based on the initial aperture value ALL Takes pictures using all aperture values Focus Bracket Step Sets the interval between focus positions The distance by which the focus position moves in each step will be shorter if the initial position is c...

Page 147: ...ings step 2 in P144 Rotate the control dial to adjust the correction range and press MENU SET Horizontal A to B Vertical G to M You can also set the correction range by touching A White Balance Bracket G G G G G G A A A A A A B B B B B B B M M M M M M ...

Page 148: ...or the currently activated image stabiliser is displayed on the recording screen Attached lens Available image stabiliser Icons displayed When taking pictures When recording motion pictures Panasonic lenses compatible with Dual I S Mode Based on the Micro Four Thirds System standard Lens Body Dual I S Lenses compatible with the image stabiliser function Based on the Micro Four Thirds System standa...

Page 149: ... camera a message asking you to check the focal length setting is displayed after you turn on the camera Correctly operating the image stabilisation function requires that the focal length be set to match the attached lens Set the focal length in accordance as prompted by the message This can also be set using the menu P151 Preventing jitter camera shake When the jitter alert appears use Stabilize...

Page 150: ...anning Camera shake is corrected for up down movements This mode is ideal for panning a method of taking pictures which involves turning the camera to track the movements of a subject which continues to move in a fixed direction OFF Stabilizer does not work When using a lens with an O I S switch set the switch to OFF E Stabilization Video Jitter during motion picture recording is corrected along t...

Page 151: ...on minimal when you want to perform recording from a fixed perspective ON OFF This effect works only during recording is displayed on the recording screen To change the composition during recording set to OFF first and then move the camera Use the Fn button to switch between ON OFF during recording P60 In situations where the focal length becomes greater such as when a telephoto lens is attached t...

Page 152: ...en the shutter speed is faster than 1 100 of a second When you move the camera too slowly because the subject is moving slowly The background will not become a blur When the camera does not keep up with the subject satisfactorily Not available in these cases In the following cases the Stabilizer will switch to Panning even if it is set to Normal Panorama Shot Scene Guide Mode In the following case...

Page 153: ...ing Rotate the zoom ring Interchangeable lens that supports the power zoom electrically operated zoom Move the zoom lever The zoom speed varies depending on how far you move the lever If you assign Zoom Control to a Fn button you can operate the optical zoom slowly by pressing 2 1 or fast by pressing 3 4 For information on how to operate refer to step 2 and the subsequent steps on P155 Interchange...

Page 154: ...effect Ex Tele Conv When taking pictures Set Picture Size to M or S and Quality to other than When recording motion pictures Set the size for Rec Quality to FHD or HD When taking pictures Ex Tele Conv Rec 1 3k M When Aspect Ratio is set to 16 9 1 4k M When Aspect Ratio is set to 4 3 3 2 1 1 2 0k S When recording motion pictures Ex Tele Conv Motion Picture 2 7k motion pictures size is set to FHD in...

Page 155: ...tra Tele Conversion range Zoom magnification This zoom slider is displayed when using an interchangeable lens that supports the power zoom A constant zoom speed will be set The indicated zoom magnification is an approximation You can also operate the zoom by using touch zoom P158 Fixing the zoom magnification at the maximum level Rec Ex Tele Conv ZOOM 3 1 Tele Enlarges distant subject 4 2 Wide Wid...

Page 156: ...e assigned Fn button While this screen is displayed you can change the Picture Size setting by pressing DISP Not available in these cases This function is not available in the following cases Panorama Shot Scene Guide Mode Toy Effect Toy Pop Creative Control Mode When Quality is set to When recording 4K photos When recording with the Post Focus function When HDR is set to ON When using Multi Exp W...

Page 157: ...er Zoom Lens Disp Focal Length When you zoom the focal distance is displayed and you can confirm the zoom position A Focal distance indication B Current focal distance Step Zoom When you operate the zoom with this setting ON the zoom will stop at positions corresponding to predetermined distances C Step zoom indication This setting does not work when recording motion pictures or recording with 4K ...

Page 158: ...t support power zoom H FS12060 H FSA14140 H FS1442A you can operate the zoom magnification of Extra Tele Conversion by setting Ex Tele Conv Rec to ZOOM 1 Touch 2 Touch The slide bar is displayed 3 Perform zoom operations by dragging the slide bar The zoom speed varies depending on the touched position To end touch zoom operations touch again Zooming using touch operations Touch zoom Zooms slowly Z...

Page 159: ...as to appear in the resulting pictures The distance at which light from the flash is blocked by lens and the distance to which light from the flash is delivered vary depending on the lens used Check the distance to the subject when taking a picture These ranges are obtained when the ISO sensitivity is set to AUTO and ISO Auto Upper Limit Setting in ISO Sensitivity photo is set to AUTO When the int...

Page 160: ...ar the flash Blocking the flash with your hand while it is firing Closing the flash while it is firing Do not close the flash immediately after a preliminary flash is fired by using a function such as Forced On Red Eye This may cause a malfunction When the remaining battery power becomes low or the flash is fired continuously it may take time to charge the flash While the flash is charging the fla...

Page 161: ...o set the luminosity ratio and then press MENU SET You can set from 1 1 full brightness to 1 128 in steps of 1 3 Firing Mode Manual Flash Adjust Rec Flash Firing Mode TTL The camera automatically sets the flash output MANUAL Set the luminosity ratio of the flash manually In TTL you can shoot the photograph you want even when shooting dark scenes that may otherwise be too brightly lit by the flash ...

Page 162: ...tter speed for each flash setting This becomes 60 seconds in Shutter Priority AE Mode and B Bulb in the Manual Exposure Mode In Intelligent Auto or Mode shutter speed changes depending on the identified scene Flash Mode Rec Flash Flash Mode Forced Flash On Forced On Red Eye The flash is activated every time regardless of the recording conditions Use this when your subject is back lit or under fluo...

Page 163: ... cases the flash mode is fixed to Œ When the flash is closed except when an external flash is being used Backlit Softness Relaxing Tone Distinct Scenery Bright Blue Sky Romantic Sunset Glow Vivid Sunset Glow Glistening Water Clear Nightscape Cool Night Sky Warm Glowing Nightscape Artistic Nightscape Glittering Illuminations Handheld Night Shot Panorama Shot Scene Guide Mode P82 When recording moti...

Page 164: ...r closes Preparation Set Wireless in Flash to OFF Flash Synchro Rec Flash Flash Synchro 1ST 1st curtain synchro The normal method when taking pictures with the flash 2ND 2nd curtain synchro The light source appears behind the subject and picture becomes dynamic 2nd is displayed in the flash icon on the screen if you set Flash Synchro to 2ND When a fast shutter speed is set the effect of Flash Sync...

Page 165: ...lect n0 to return to the original flash output Applicable modes The flash output is automatically adjusted in accordance with the exposure compensation value Settings ON OFF Adjusting the Flash Output Rec Flash Flash Adjust i or j is displayed on the flash icon in the screen when the flash level is adjusted The Flash Adjust setting also applies to an external flash P313 Auto Exposure Comp Rec Flas...

Page 166: ...sh Placing wireless flashes Place the wireless flash with its wireless sensor facing toward the camera The following figure shows the estimated controllable range when you take pictures by holding the camera horizontally Controllable range differs depending on the surrounding environment Placement range Placement example In this placement example flash C is placed to erase the shadow of the subjec...

Page 167: ...h MANUAL 3 Set the luminosity ratio of the external flash manually OFF The flash on the camera side emits only communication light Flash Adjust Set the flash output of the camera manually when Firing Mode is set to TTL Manual Flash Adjust Set the luminosity ratio of the external flash when Firing Mode is set to MANUAL You can set from 1 1 full brightness to 1 128 in steps of 1 3 A Group B Group C ...

Page 168: ...ion of flash firing This firing allows recording with the flash at a fast shutter speed Settings ON OFF Set the strength of communication light Settings HIGH STANDARD LOW Using other settings for wireless flash recording Wireless FP Rec Flash Wireless FP Communication Light Rec Flash Communication Light MENU MENU ...

Page 169: ...be displayed after approximately 1 minute has passed Pressing the DISP button or touching the monitor will make the display reappear This operation is to prevent screen burn in and is not a malfunction Release the motion picture button right after you press it m minute s second 2 Stop the recording by pressing the motion picture button again With recording in a quiet environment the sound of apert...

Page 170: ...g the recording of a motion picture The functions available when recording motion pictures differ according to the lens you are using and the operational sound of the lens may be recorded Depending on the type of the card the card access indication may appear for a while after recording motion pictures This is not a malfunction The Recording Mode will switch when you record motion pictures in the ...

Page 171: ...uitable for when playing back on a PC etc Item Size Recording frame rate Sensor output Bit rate FHD 28M 50p 1 1920k1080 50p 50 frames second 28 Mbps FHD 17M 50i 1920k1080 50i 50 frames second 17 Mbps FHD 24M 25p 1920k1080 50i 25 frames second 24 Mbps FHD 24M 24p 1920k1080 24p 24 frames second 24 Mbps Item Size Recording frame rate Sensor output Bit rate 4K 100M 30p 2 3840k2160 30p 30 frames second...

Page 172: ...he bit rate is changed automatically depending on the subject to record As a result the recording time is shortened when a fast moving subject is recorded When Miniature Effect is selected for Creative Control Mode you cannot select the items used for 4K motion pictures When recording motion pictures in 4K use a card rated as UHS Speed Class 3 When you record 4K motion pictures the angle of view w...

Page 173: ...to avoid recording the lens noise When operating the zoom while recording motion pictures it may take time to come into focus Not available in these cases Continuous AF is not available in the following case When High Speed Video is set Continuous AF does not work in the following case When Pull Focus in Snap Movie is operating AF Custom Setting Video Motion Picture AF Custom Setting Video ON Enab...

Page 174: ...cording V Log L Motion Picture Photo Style LUTs Look Up Tables can be used for post production editing You can download LUT data from the support site below https panasonic jp support global cs dsc This Site is English only This camera records motion pictures in 4 2 0 8 bit so after post production editing luminance and colour unevenness or noise may appear in areas such as blue skies people s ski...

Page 175: ...s set to or When set to still pictures will be recorded in Quality of A You can take up to 40 still pictures Up to 10 still pictures during 4K motion picture recording Photo Priority Pictures will be recorded with the set picture size and quality The screen will go dark while recording pictures A still picture will be recorded in the motion picture during that period and audio is not recorded You ...

Page 176: ...ic can be added and various editing operations can be performed when you combine them In addition you can send the combined motion picture to a web service P275 1 Select the menu Press the shutter button halfway to exit the menu 2 Start recording by pressing the motion picture button A Elapsed recording time B Set recording time Release the motion picture button right after you press it You cannot...

Page 177: ...m black and white to colour or an effect that fades out from colour to black and white Audio will be recorded normally OFF Motion pictures recorded with WHITE IN or BLACK IN are displayed as all white or all black thumbnails in Playback Mode If you set Snap Movie in Fn Button Set P60 of the Custom Operation menu and then press the Fn button a screen that lets you switch Snap Movie between ON OFF i...

Page 178: ... cancelled Button operation Touch operation A greater effect can be achieved by creating a striking contrast of focus between the start and end positions for example by shifting focus from the background to foreground or vice versa After setting focus try to keep the distance between the subject and the camera constant When the camera fails to set the frame it returns to the first position When Pu...

Page 179: ...ent levels j12 dB to i6 dB Displayed dB values are approximate Applicable modes The camera adjusts the sound input level automatically minimising the sound distortion crackling noise when the volume is too high Settings ON OFF Displaying Setting the Sound Recording Level Sound Rec Level Disp Motion Picture Sound Rec Level Disp Sound Rec Level Adj Motion Picture Sound Rec Level Adj Sound Rec Level ...

Page 180: ...l sound of the zoom or button operation may be recorded when it is operated during the recording of a motion picture Using touch icons allows silent operation while recording motion pictures High Speed Video P181 4K Live Cropping P182 Creative Video Exposure Mode P A S M It is also possible to display the selection screen by touching the Recording Mode icon in recording screen 1 Touch This cannot ...

Page 181: ...SO Auto Upper Limit Setting AUTO 400 800 1600 3200 6400 High Speed Video Creative Video High Speed Video Settings Frame rate for recording Rec Quality for storage Slow motion effect 120fps FHD 120 frames second FHD 20M 30p Approx 1 4k 100fps FHD 100 frames second FHD 20M 25p Approx 1 4k 90fps FHD 90 frames second FHD 20M 30p Approx 1 3k 75fps FHD 75 frames second FHD 20M 25p Approx 1 3k 60fps FHD ...

Page 182: ...a cropping start frame of size 1920k1080 is displayed After setting the cropping start frame and end frame the start frame and end frame that you set immediately before will be displayed The camera will remember the frame position and size even when the camera is turned off 4K Live Cropping Pan Zoom in Creative Video 4K Live Cropping 40SEC 20SEC Button operation Touch operation Description of oper...

Page 183: ...el 4K Live Cropping recording Set 4K Live Cropping to OFF in step 2 To add zoom in out effects set different angles of view for the cropping start and end frames For example to zoom in while recording set a larger angle of view for the start frame and a smaller angle of view for the end frame The setting of the AF Mode switches to š The eye to be in focus is not indicated Brightness is measured an...

Page 184: ...e the image leave your finger touching the left or right edge of the screen Sending an image to a web service If you press 4 when displaying images one by one you can easily send an image to a web service P287 Not available in these cases This camera complies with the DCF standard Design rule for Camera File system established by JEITA Japan Electronics and Information Technology Industries Associ...

Page 185: ...ck automatically Operations during Motion Picture Playback 1 The fast forward rewind speed increases if you press 1 2 again 2 When a motion picture recorded with AVCHD is rewound frame by frame its frames will be shown in intervals of approximately 0 5 seconds Operations during automatic Snap Movie playback If you touch the screen automatic playback will stop Button operation Touch operation Descr...

Page 186: ...erformed by touching Extracting a Picture Still pictures will be saved with Aspect Ratio set to 16 9 and Quality set to A The number of pixels will differ according to the motion picture you play back Motion picture recording quality Picture size of the picture to be saved 4K 3840k2160 FHD HD 1920k1080 Still pictures created from a motion picture may be coarser than with normal picture quality is ...

Page 187: ...es the enlarged area s Forwards or rewinds the image while maintaining the same zoom magnification and zoom position Thumbnail Screen Rotate the rear dial left 1 screen 12 screens 30 screens Calendar display If the rear dial is rotated to the right the previous playback screen will be displayed It is possible to switch the playback screen by touching the following icons 1 screen 12 screens 30 scre...

Page 188: ...cording date of the picture selected in the playback screen becomes the date selected when the Calendar screen is first displayed You can display the Calendar between January 2000 and December 2099 If the date is not set in the camera the recording date is set as the 1st January 2019 If you take pictures after setting the travel destination in World Time the pictures are displayed by the dates at ...

Page 189: ...ip through images To return to the normal playback screen press 4 again or touch Each picture in a group can be treated same as normal pictures when they are played back Such as thumbnail screen enlarged display and deleting images A picture group saved at once with 4K PHOTO Bulk Saving A picture group consisting of pictures taken with Focus Bracket A picture group consisting of pictures taken in ...

Page 190: ...of the following playback methods From the first picture Pictures are played back continuously from the first picture of the group From the current picture Pictures are played back continuously from the picture being played back Operations during continuous playback Button operation Touch operation Description of operation Button operation Touch operation Description of operation 3 Continuous play...

Page 191: ...e All the pictures in the selected picture group will be deleted 1 In Playback Mode press 2 Press 3 4 to select Delete Multi or Delete All and then press MENU SET After selecting Delete All if you select Delete All Non rating you can delete all pictures except for those with ratings When Delete Multi is selected 3 Press 3 4 2 1 to select the picture and then press MENU SET to set Repeat this step ...

Page 192: ... only available for particular Recording Modes You can change the settings registered to custom sets P81 Menus that are only available for particular Recording Modes P192 A Rec menu P193 B Motion Picture menu P210 Custom menu P213 Setup menu P228 My Menu menu P238 Playback menu P239 Intelligent Auto menu Intelligent Auto Mode P66 iHandheld Night Shot P68 iHDR P68 Creative Video menu Exposure Mode ...

Page 193: ...6 Photo Style P196 Filter Settings P199 Color Space P200 Metering Mode P201 Highlight Shadow P201 i Dynamic P202 i Resolution P203 Flash P162 Red Eye Removal P203 ISO Sensitivity photo P203 Min Shtr Speed P204 Long Shtr NR P204 Shading Comp P205 Diffraction Compensation P205 Stabilizer P148 Ex Tele Conv P154 Digital Zoom P156 Burst Rate P119 4K PHOTO P122 Self Timer P143 Time Lapse Animation P138 ...

Page 194: ...es Aspect Ratio cannot be set in the following cases Panorama Shot Scene Guide Mode Picture Size Rec Picture Size Aspect ratio Image size Aspect ratio Image size 4 3 L 20M 5184k3888 16 9 L 14 5M 5184k2920 M 10M 3712k2784 M 8M 3840k2160 S 5M 2624k1968 S 2M 1920k1080 3 2 L 17M 5184k3456 1 1 L 14 5M 3888k3888 M 9M 3712k2480 M 7 5M 2784k2784 S 4 5M 2624k1752 S 3 5M 1968k1968 When Ex Tele Conv Rec is s...

Page 195: ...editing of RAW images require the camera or the dedicated software You can process RAW images in RAW Processing in the Playback menu Use software SILKYPIX Developer Studio by Ichikawa Soft Laboratory to process and edit RAW files on a PC P306 RAW images are always recorded in the 4 3 5184k3888 aspect ratio When you delete an image recorded with or both the RAW and JPEG images will be deleted simul...

Page 196: ...opriate for portraits with a healthy and beautiful skin tone Custom Use the setting registered in advance Cinelike D An effect that creates a film like finishing touch using a gamma curve and gives priority to the dynamic range This function is suitable for motion picture editing processes Cinelike V Gives priority to the contrast by using a gamma curve designed to create film like images V Log L ...

Page 197: ...brightness and the darkness in the picture Sharpness r The picture is sharply defined s The picture is softly focused Noise Reduction r The noise reduction effect is enhanced Picture resolution may deteriorate slightly s The noise reduction effect is reduced You can obtain pictures with higher resolution Saturation 1 2 r The colours in the picture become vivid s The colours in the picture become n...

Page 198: ...ot be checked on the recording screen Not available in these cases Grain Effect is not available in the following cases Panorama Shot Scene Guide Mode When recording motion pictures When recording 4K photos When recording with the Post Focus function ...

Page 199: ...to AUTO When using Filter Effect you cannot use menus or recording functions not available in Creative Control Mode For example White Balance will be fixed to AWB and the flash will be set to Œ forced flash off The following limitations apply when the Scene Guide Mode is set to Panorama Shot Toy Effect Toy Pop Miniature Effect Sunshine are not available The image effects of Rough Monochrome Silky ...

Page 200: ...ding still pictures while recording a motion picture when set to Video Priority When recording 4K photos When recording with the Post Focus function When recording in Burst Mode When Quality is set to or When recording with the Bracket function When using Time Lapse Shot When using Stop Motion Animation Color Space Rec Color Space sRGB Colour space is set to sRGB colour space This is widely used i...

Page 201: ...difference between brightness of subject and background e g person in spotlight on stage backlighting If you set the spot metering target on the edge of the screen the metering may be affected by the brightness around the location Not available in these cases In the following case Metering Mode does not work When the Scene Guide Mode is set to anything other than Panorama Shot Highlight Shadow Rec...

Page 202: ... can be switched by pressing DISP on the brightness adjustment screen Turning off this unit will return the setting adjusted with back to the default setting When Photo Style is set to V Log L the setting is fixed to Standard Not available in these cases Highlight Shadow cannot be set in the following cases When using Filter Settings i Dynamic Rec Motion Picture i Dynamic Not available in these ca...

Page 203: ...set to AUTO or i Resolution Rec Motion Picture i Resolution Red Eye Removal Rec Red Eye Removal If you set this item to ON the icon will change to or Under certain circumstances red eye cannot be corrected ISO Sensitivity photo Rec ISO Sensitivity photo ISO Auto Lower Limit Setting 200 400 800 1600 3200 6400 12800 ISO Auto Upper Limit Setting AUTO 400 800 1600 3200 6400 12800 25600 Not available i...

Page 204: ... Min Shtr Speed The shutter speed may become slower than the set value in situations where proper exposure cannot be obtained Long Shtr NR Rec Long Shtr NR Long shutter noise reduction ongoing is displayed for the same time as the shutter speed for signal processing Not available in these cases Long Shtr NR is not available in the following cases Panorama Shot Scene Guide Mode When recording motio...

Page 205: ...ion effect may not be achieved depending on the recording conditions Noise in the periphery of the picture may stand out with higher ISO sensitivity Not available in these cases Correction is not possible in the following cases When recording motion pictures When taking pictures while recording motion pictures when Video Priority is set When recording 4K photos When recording with the Post Focus f...

Page 206: ...when ON is set the following lamps light up flash WIRELESS connection lamp Self timer indicator Sounds that are produced by the camera regardless of your operations such as the lens aperture sound cannot be muted Be sure to pay special attention to the privacy the likeness rights etc of the subject when you use this function Use at your own risk Shutter Type Rec Shutter Type AUTO Switches the shut...

Page 207: ... with the mechanical shutter The camera starts an exposure electronically and ends it with the mechanical shutter The camera starts and ends an exposure electronically Flash Shutter Speed Sec B Bulb 1 60 to 1 4000 B Bulb 1 60 to 1 2000 1 2 to 1 16000 Shutter Sound Mechanical shutter sound Mechanical shutter sound Electronic shutter sound 3 When is displayed on the screen pictures will be taken wit...

Page 208: ...e images to misalign Recommended for use during hand held shooting OFF Image misalignment not adjusted Recommended when a tripod is used Do not move the unit during the continuous shooting after pressing the shutter button You cannot take the next picture until the combination of pictures is complete A moving subject may be recorded with unnatural blurs The angle of view becomes narrow slightly wh...

Page 209: ...ce to the next picture Retake Return to the first picture Exit Record the image of the first picture and finish the multiple exposure picture taking session Auto Gain If you select OFF all exposure results are superimposed as they are Compensate the exposure as necessary Overlay If you select ON you can apply Multi Exposure to previously recorded images After Start is selected images on the card w...

Page 210: ...er Settings P199 Luminance Level P210 Metering Mode P201 Highlight Shadow P201 i Dynamic P202 i Resolution P203 ISO Sensitivity video P181 Diffraction Compensation P205 Stabilizer P148 Flkr Decrease P210 Ex Tele Conv P154 Digital Zoom P156 Picture Mode in Rec P175 Sound Rec Level Disp P179 Sound Rec Level Adj P179 Sound Rec Level Limiter P179 Wind Noise Canceller P211 Wind Cut P317 Lens Noise Cut ...

Page 211: ...oise Canceller Motion Picture Wind Noise Canceller HIGH effectively reduces the wind noise by minimising the low pitched sound when a strong wind is detected STANDARD extracts and reduces only the wind noise without deteriorating the sound quality You may not see the full effect depending on the recording conditions This function works only with the built in microphone When an external microphone ...

Page 212: ...g HDMI output When using an external microphone Adjusting the headphone volume 1 Select the menu 2 Connect headphones and rotate the control dial while the recording screen is displayed or a motion picture is being played back You can also adjust the volume by touching or during playback To adjust the volume using the menu Sound Output Motion Picture Sound Output REALTIME Actual sound without time...

Page 213: ...ton Set P60 WB ISO Expo Button P218 ISO Displayed Setting P45 Exposure Comp Disp Setting P46 Q MENU P218 Dial Set P47 Operation Lock Setting P218 Focus Ring Lock P218 Video Button P218 Video Rec Button Remote P315 Touch Settings P219 Monitor Display Auto Review P219 Monochrome Live View P219 Constant Preview P220 Live View Boost P220 Peaking P220 Histogram P221 Guide Line P221 Center Marker P221 H...

Page 214: ...utter button is pressed halfway The shutter will immediately fire when the shutter button is pressed halfway The camera automatically adjusts the focus when the amount of camera blur becomes small This will speed up the focusing that takes place when you press the shutter button Custom Exposure ISO Increments Exposure Comp Reset Custom Focus Release Shutter AF AE Lock Hold Shutter AF Half Press Re...

Page 215: ...st Lamp is different depending on the lens used When the interchangeable lens H FS12060 is attached and at Wide Approx 1 0 m 3 3 feet to 3 0 m 9 8 feet When the interchangeable lens H FSA14140 is attached and at Wide Approx 1 0 m 3 3 feet to 3 0 m 9 8 feet When the interchangeable lens H FS1442A is attached and at Wide Approx 1 0 m 3 3 feet to 3 0 m 9 8 feet Remove the lens hood The AF Assist Lamp...

Page 216: ...58 or Fn buttons P60 to use the functions assigned to the cursor button such as AF Mode selection Direct Focus Area is fixed to OFF in the following case Glistening Water Scene Guide Mode Creative Control Mode When 4K Live Cropping is set Focus Release Priority FOCUS Disables recording when focus is not achieved BALANCE Performs recording while controlling the balance between focusing and shutter ...

Page 217: ... Area Display ON Displays AF areas on the recording screen AF areas are not displayed when the default AF area setting is applied to 49 Area or or in Custom Multi OFF Displays AF areas on the recording screen for just a few seconds after you start using them Even when ON is set the same operation as OFF is performed in the following cases When recording motion pictures When recording 4K photos Cre...

Page 218: ... displayed on the recording screen while the focus ring is locked Enables disables the motion picture button MF Assist Display Custom Operation WB ISO Expo Button WHILE PRESSING Allows you to change the setting while pressing and holding the button Release the button to confirm the settings value and to return to the recording screen AFTER PRESSING Press the button to change settings Press the but...

Page 219: ...me of the recorded images after picture taking Duration Time 4K PHOTO Sets whether to display hide the recorded images after 4K photo recording Duration Time Post Focus Sets whether to display hide the recorded images after recording with the Post Focus function Playback Operation Priority Allows you to change or delete the playback image during Auto Review When Duration Time photo is set to HOLD ...

Page 220: ...achieve a more precise focus Changing the Detect Level setting also changes the Display Color setting as follows Constant Preview This function does not work when using the flash Live View Boost MODE1 Setting for low brightness with priority given to a soft display MODE2 Setting for high brightness with priority given to image visibility This mode does not affect recorded images Noise may be more ...

Page 221: ... recording screen The centre of the recording screen will be displayed as Each time in is touched the setting is switched in order of Detect Level LOW Detect Level HIGH OFF Not available in these cases Peaking is not available for Rough Monochrome of Creative Video Mode When Live View Boost is being used Peaking is not available Histogram When the recorded picture and the histogram do not match ea...

Page 222: ...wards negative referring to the histogram and then taking the picture again This does not affect the recorded images Not available in these cases The highlight display does not work in the following cases During 4K photo playback During playback of images recorded with the Post Focus function When thumbnails are displayed During Calendar Playback When the display is enlarged Zebra Pattern ZEBRA1 Z...

Page 223: ...hutter speed Unsuitable areas of the range are displayed in red When the Exposure metre is not displayed switch the display information for screen by pressing DISP If no operations are performed for approximately 4 seconds the Exposure metre disappears MF Guide Monitor Info Disp Rec Area Displays the recording area according to the angle of view for still picture recording Displays the recording a...

Page 224: ...ets the function to be assigned to the focus button of that lens You can call up the set function by setting the focus selector switch of the lens to Fn and then pressing the focus button of the lens Custom Lens Others Lens Position Resume Lens Fn Button Setting Settings Focus Stop AF AE LOCK AF ON Stabilizer Focus Area Set AF Mode MF Preview Focus Ring Lock Off Restore to Default When Focus Stop ...

Page 225: ...s other than people pets etc cannot be registered To display the description of the face registration press 1 or touch 3 Set the item You can register up to 3 face images Name It is possible to register names For information on how to enter characters refer to P64 Age It is possible to register the birthday Add Images Add Images To add additional face images Select a blank face image frame to regi...

Page 226: ...ecording Register the face of same person indoors and outdoors or with different expressions or angles Additionally register at the location of recording When a person who is registered is not recognised correct by re registering Face Recognition may not be possible or may not recognise faces correctly even for registered faces depending on the facial expression and environment Face Recog only wor...

Page 227: ...ame and then press MENU SET 4 Press 3 4 to select SET and then press MENU SET To cancel the display of Age and Name Select OFF in Profile Setup Profile Setup Enter Age birthday Enter Name For information on how to enter characters refer to P64 You can print out ages and names with PHOTOfunSTUDIO Not available in these cases Profile Setup is not available in the following cases In Creative Video Mo...

Page 228: ...nce from GMT Greenwich Mean Time Online Manual P228 Cust Set Mem P80 Clock Set P39 World Time P228 Travel Date P229 Wi Fi P230 Bluetooth P230 Wireless Connection Lamp P230 Beep P230 Headphone Volume P212 Economy P231 Monitor Display Speed P232 Monitor Display Viewfinder P232 Monitor Luminance P232 Eye Sensor P233 Battery Use Priority P315 USB Mode P233 USB Power Supply P233 TV Connection P234 Lang...

Page 229: ...ion during playback or stamp them on recorded pictures in Text Stamp The elapsed days and travel destination can be printed out using the software PHOTOfunSTUDIO The travel date is calculated using the date in the clock setting and the departure date you set If you set World Time to the travel destination the travel date is calculated using the date in the clock setting and the travel destination ...

Page 230: ...les the WIRELESS connection lamp If you select OFF they will not light flash This allows you to set the electronic sound and the electronic shutter sound Settings Beep Volume E Shutter Vol E Shutter Tone Wi Fi Bluetooth Up to 17 wireless access points can be registered If you try to register more than 17 access points the oldest registered access points will be deleted Performing Reset Network Set...

Page 231: ... Info Puts the camera into sleep only when the on monitor recording information screen is displayed P49 All Live View Puts the camera into sleep from any screen during recording standby To recover from Sleep Mode Sleep Mode Wi Fi or Power Save LVF Shooting perform one of the following operations Press the shutter button halfway Set the camera on off switch to OFF and then ON again To recover from ...

Page 232: ...in use and the viewfinder when the viewfinder is in use Some subjects may appear differently from actuality on the monitor However this does not affect the recorded pictures Monitor Luminance Auto During recording this automatically adjusts the brightness depending on how bright it is around the camera During playback it adjusts the brightness to the level of the last recording If recording has ne...

Page 233: ... automatic switching between the monitor and viewfinder LVF viewfinder MON monitor If you press LVF to switch the display the LVF Monitor Switch setting will also switch USB Mode y Select on connection Select this setting to select the USB communication system when connecting to another device z PC Storage Select this setting to export images to a connected PC PictBridge PTP Select this setting wh...

Page 234: ...s enables the firmware versions of the camera and lens to be checked TV Connection AUTO Outputs images at an output resolution suited to the connected TV 4K 25p 1080p 1080i 720p 576p Outputs images at the selected resolution Even when 4K 25p is set MP4 motion pictures recorded with 4K 100M 30p will be output at a resolution of 4K 30p Even when 576p is set depending on the connected TV images will ...

Page 235: ...lder name setting Change Allows you to redefine the 5 digit user defined segment before creating a new folder Available characters alphabet upper case characters numbers and _ For information on how to enter characters refer to P64 A new folder with an incremented folder number is created If there are no recordable folders in the card a screen for resetting the folder number is displayed File Name...

Page 236: ...ered from 100 all the way up to 999 In this case we recommend saving their data to a computer or similar device and formatting the card No Reset When recording is performed after resetting this item the folder number is updated and the file number starts from 0001 A folder number between 100 and 999 can be assigned The folder number should be reset before it reaches 999 We recommend formatting the...

Page 237: ... a repair or transferring disposing of the camera refer to About the personal information on P341 Pixel Refresh Imaging device and image processing is optimised when the camera is purchased Use this function when bright spots that do not exist in the subject get recorded Turn the camera off and on after the pixels are corrected Sensor Cleaning The dust reduction function will operate automatically...

Page 238: ...isplayed in My Menu to register it Sorting Rearranges the menus displayed in My Menu Select the menu you want to move and set the destination Delete Deletes registered menus Delete Item Deletes selected menus Delete All Deletes all of the menus Display from My Menu Sets the first menu to be displayed when the menu screen is displayed ON Displays My Menu OFF Displays the last used menu MENU ...

Page 239: ...tion P255 The camera may not play back images recorded on other devices correctly and the functions of the camera may not be available for the images Single setting 1 Press 2 1 to select the picture 2 Press MENU SET If Set Cancel is displayed at the right bottom of the screen the setting is cancelled when MENU SET is pressed again Multi setting When a screen similar to the one on the right is disp...

Page 240: ... and then press MENU SET If you select Picture Only 4K burst files and images recorded with the Post Focus function will also be played back For images recorded with the Post Focus function only an in focus representative image will be chosen and played back 2 Press 3 4 to select Start and then press MENU SET Operations during a slide show Slide Show Playback Slide Show Button operation Touch oper...

Page 241: ... set only when OFF has been selected as the Effect setting Repeat ON OFF Sound AUTO Music is played when the still pictures are played back and audio is played when the motion pictures are played back Music Music is played back Audio Audio of motion pictures is played back OFF There will be no sound Not available in these cases The Effect setting does not work while the following images are played...

Page 242: ... SET to set When Multi has been selected repeat steps 1 and 2 for each picture It is not possible to use the same setting for a multiple number of pictures The number of a group pictures will be displayed if you set for a group pictures 999 is displayed if the group pictures is more than 1000 pictures Cancelling all the Rating settings Press 3 4 to select Cancel and then press MENU SET Cancel cann...

Page 243: ...son to replace and then press MENU SET Title Edit Playback Title Edit To delete the title erase all the text in the text input screen You can print out texts comments using the software PHOTOfunSTUDIO You can set up to 100 pictures at one time with Multi Not available in these cases This function is not available in the following cases Motion pictures 4K burst files Images recorded with the Post F...

Page 244: ... taken with effects other than V Log L The effect for pictures taken with V Log L will be fixed to V Log L i Dynamic Allows you to select an i Dynamic setting Contrast Allows you to adjust the contrast Highlight Allows you to adjust the brightness of bright portions Shadow Allows you to adjust the brightness of dark portions Saturation Color Tone Allows you to adjust the saturation When Monochrome...

Page 245: ...ents Returns the settings to the ones you used during the recording Color Space Allows you to select a Color Space setting from sRGB or Adobe RGB Picture Size Allows you to select the size in which the image will be saved in JPEG format Button operation Touch operation Description of operation 2 1 Dragging Selects a setting 3 WB K Set Displays the screen that lets you set the colour temperature Wh...

Page 246: ... recorded with the camera are always recorded in the 4 3 5184k3888 aspect ratio When you process them with RAW Processing in the Playback menu however their aspect ratio and Ex Tele Conv Rec settings at the time of recording will be applied to them When setting Picture Size in More Settings When images enlarged with Ex Tele Conv Rec are processed their picture size cannot be set larger than the si...

Page 247: ...d the display goes to the preview screen Press 3 4 to select items and press MENU SET to perform the following operations Next Lets you select more frames for combining Reselect Discards the frame selected immediately before and lets you select a different image 3 Repeat steps 1 and 2 to select more frames to combine You can select up to 40 frames 4 Press 3 4 to select Save and then press MENU SET...

Page 248: ...2 Press MENU SET The selected frames are remembered and the display goes to the preview screen Press 3 4 to select items and press MENU SET to perform the following operations Next Lets you select more frames for combining Reselect Discards the frame selected immediately before and lets you select a different image 3 Repeat steps 1 and 2 to select more frames to combine You can select 3 to 40 fram...

Page 249: ...ack to the operation of dragging your finger over the part you want to delete The part you want to delete can be dragged even while the picture is enlarged Pictures may appear unnatural because the background of deleted parts is artificially created For group pictures perform Clear Retouch on each picture They cannot be edited at once When Clear Retouch is performed on group pictures they are save...

Page 250: ...set under Travel Date Title Title input in the Title Edit will be stamped When you print pictures stamped with text the date will be printed over the stamped text if you specify printing of the date at the photo shop or on the printer You can set up to 100 pictures at one time in Multi The picture quality may deteriorate when text stamping is carried out When you stamp pictures in a group the stam...

Page 251: ...4 2 1 to select the picture and then press MENU SET to set repeat The setting is cancelled when MENU SET is pressed again 3 Press DISP to execute You can set up to 100 pictures at one time in Multi The picture quality of the resized picture will deteriorate Not available in these cases This function is not available in the following cases Motion pictures 4K burst files Images recorded with the Pos...

Page 252: ...picture will deteriorate Crop one picture at a time when you want to crop the pictures in a picture group You cannot edit all pictures in a group at once When you crop pictures in a group the cropped ones are saved separately from the original ones in the group Information regarding the Face Recognition in the original picture will not be copied to images having undergone Cropping Not available in...

Page 253: ... you do not need Dividing a file is permanent Decide before you divide 1 Press 2 1 to select the file to divide and then press MENU SET Rotate The picture is rotated manually Playback Rotate Video Divide Playback Video Divide 2 Press 3 at the location to divide You can finely adjust the location for division by pressing 2 1 while the file is paused 3 Press 4 The file may be lost if the card or bat...

Page 254: ...ods for creating it Refer to P142 for details This mode allows you to display pictures vertically if they were recorded holding the camera vertically Time Lapse Video Playback Time Lapse Video Stop Motion Video Playback Stop Motion Video Rotate Disp The picture is automatically rotated and displayed Playback Rotate Disp ON Not available in these cases When you play back pictures on a PC they canno...

Page 255: ... format allows you to locate images in the card easily DATE TIME Displays images by recording date If the card contains pictures taken with more than one camera this display format is convenient for looking for images When you insert another card images may not be displayed by DATE TIME first The images will be displayed by DATE TIME if you wait for a while Delete Confirmation Playback Delete Conf...

Page 256: ... pictures recorded with Snap Movie P275 Connect to a smartphone that supports Bluetooth Low Energy to expand the scope of applications Pairing connection setup P260 Camera power operations P266 Shutter Remote Control Bulb recording P268 Sending recorded images to a smartphone automatically P271 Recording location information of a smartphone on recorded images P273 Synchronising the camera s clock ...

Page 257: ...ding Mode while it is assigned to Fn1 when the camera is in Playback Mode For information about the Fn button refer to P60 Steps for pressing Wi Fi in Recording Mode 1 Touch 2 Touch Operations that can be performed by pressing Wi Fi When the camera is not connected to Wi Fi press Wi Fi The camera will then be ready to be connected to the smartphone You can connect the camera directly to the smartp...

Page 258: ...or the connection method you can easily connect with the same connection method next time Network Address P299 Button operation Select Select a destination from History with the cursor button and then press MENU SET Touch operation Touch Select a destination from History Do not remove the memory card or battery or move to an area without any reception while sending images The camera cannot be used...

Page 259: ...the Image App menu for further details on how to operate When you operate the Image App on the smartphone that is connected to the camera via Wi Fi Help in the Image App may not be displayed depending on the smartphone In this case after terminating the connection to the camera reconnect the smartphone to a mobile phone network such as the 3G or LTE network or to a Wi Fi router and then display He...

Page 260: ... in the setup menu 6 On the Wi Fi setting screen select the SSID displayed on the camera The device name selected in step 4 If the SSID is not displayed it may be displayed after the Wi Fi function is turned off and on When you need to change the connected device follow the on screen message to change the setting Connecting to a Smartphone Bluetooth Connection Android Android 5 0 or higher equippe...

Page 261: ...Cancelling Pairing 1 Select the menu 2 Select the smartphone you want to delete Select the camera device name for which to delete the pairing information from the Camera registered list On the camera Setup Bluetooth Bluetooth ON On your smartphone Setup Bluetooth Bluetooth OFF On the camera Setup Bluetooth Bluetooth SET Delete On your smartphone is displayed on the recording screen during Bluetoot...

Page 262: ...lect the SSID displayed on the camera 3 Start Image App When the connection confirmation screen is displayed on the camera select Yes to connect For first time connection only Connecting to a Smartphone Wi Fi connection Connecting Without Entering a Password On the camera Setup Wi Fi Wi Fi Function New Connection Remote Shooting View On your smartphone At the time of purchase Wi Fi Password is set...

Page 263: ... displayed Select OK to proceed 3 Use the Image App to scan the QR code displayed on the screen of the camera To enlarge the QR code press MENU SET on the camera 4 Install the profile If a pass code is set on the smartphone you need to enter it 5 Press the home button to close the browser 6 Turn on the Wi Fi function in the smartphone s setting menu 7 On the Wi Fi setting screen select the SSID di...

Page 264: ... 2 On the Wi Fi setting screen select the SSID displayed on the camera 3 Enter the password displayed on the camera into the smartphone For first time connection only 4 Start Image App To change the connection method follow the steps below or On the camera Setup Wi Fi Wi Fi Function New Connection Remote Shooting View On your smartphone Changing the Wi Fi connection method Setup Wi Fi Wi Fi Functi...

Page 265: ...re described on P295 to connect the camera to the smartphone 2 Start Image App 1 Set the camera to Recording Mode Press the shutter button halfway to return to recording mode 2 Select the camera s menu items to terminate the Wi Fi connection You can also terminate the connection by pressing Wi Fi on the camera 3 On the smartphone close Image App On the camera On your smartphone On the camera On yo...

Page 266: ...hone The camera automatically turns on allowing it to make a Wi Fi connection automatically iOS devices Depending on the connection status of the smartphone you may need to change the connected device on the Wi Fi setup screen Follow the on screen message on the smartphone to change the setting Wireless connectivity required Support for Bluetooth Low Energy Indicates that the function can be used ...

Page 267: ...attery to drain Remote shooting Wireless connectivity required If the camera is already connected to the smartphone via Bluetooth select Remote operation iOS devices If you need to change the connected device on the Wi Fi setup screen follow the on screen message to change the setting 1 Select 2 Record an image The recorded images are saved in the camera Some settings are not available Setup Wi Fi...

Page 268: ...ct Shutter Remote Control 3 Take pictures About B Bulb You can perform B Bulb recording by setting the shutter speed to B Bulb in Manual Exposure Mode Up to 30 minutes This function is useful when you take pictures of stars in the night sky or a night scene since the shutter can be kept open from start of recording to end of recording Operate the smartphone 1 Press to start recording Press and hol...

Page 269: ...switch is set to ON The live view image of the camera cannot be monitored on the smartphone When the camera turns off after Sleep Mode is activated during recording you can reselect Shutter Remote Control on the smartphone to turn it on again The following settings are required Remote Wakeup ON Auto Transfer OFF The camera cannot be turned on by using Shutter Remote Control Setup Bluetooth Returni...

Page 270: ...s stored in the camera select LUMIX To play back the image 2 Touch the image to enlarge it When you play a motion picture image quality differs from that of the actual recorded motion picture In addition depending on the smartphone or conditions of use the image quality may deteriorate or the sound may skip during motion picture or picture playback To save the image or upload it on a social media ...

Page 271: ...camera will enter a mode where it can automatically transfer images and will be displayed on the recording screen If it is not displayed images cannot be transferred automatically Check the status of the Wi Fi connection to the smartphone 5 Take pictures on the camera Every time you take a picture it is automatically sent to a specified device While sending a file is displayed on the recording scr...

Page 272: ... storage status For example if you replace the card before turning on the camera again the files may not be resent If the number of files that did not get delivered is large it may not be possible to resend all of the files An OS version of Android 7 0 or higher or iOS 10 0 or higher is required to save pictures in RAW format Depending on the smartphone or its OS version pictures in RAW format may...

Page 273: ...The camera performs recording while writing the location information Setup Bluetooth Location Logging ON When appears translucent Location information is not acquired so data cannot be written Positioning with the GPS on the smartphone may not be possible if the smartphone is in a location such as a building or a bag Move the smartphone to a location where positioning performance can be optimised ...

Page 274: ...ng in World Time which are all located in the Setup menu of the camera with the corresponding settings of a smartphone 1 Make a Bluetooth connection to the smartphone P260 2 Select the camera s menu Automatically setting the clock Wireless connectivity required Setup Bluetooth Auto Clock Set ON Bluetooth MENU ...

Page 275: ...bining motion pictures by operating a smartphone 1 Connect to a smartphone P262 2 Operate the smartphone Editing motion pictures recorded with Snap Movie Wireless connectivity required If the camera is already connected to the smartphone via Bluetooth select Remote operation iOS devices Depending on the connection status of the smartphone you may need to change the connected device on the Wi Fi se...

Page 276: ...Function Yes Pictures displayed using the Wi Fi function cannot be output in 4K resolution To output them in 4K resolution connect the camera and TV with an HDMI micro cable P300 When a TV is connected to the camera the TV screen may temporarily return to the status before the connection Pictures are displayed again on the TV if you take or play back pictures The Effect and Sound settings for slid...

Page 277: ...r or iOS 10 0 or higher is required 4 Excluding 4K motion pictures Some images may not be played back or sent depending on the device For details about playback of images refer to the operating instructions for the destination device or the Web service Setup Wi Fi Wi Fi Function New Connection Send Images While Recording or Send Images Stored in the Camera Destination JPEG RAW MP4 1 AVCHD 1 2 4K B...

Page 278: ...ings while sending pictures Setup Wi Fi Wi Fi Function Yes Since the camera gives priority to recording sending may take longer during the recording If you turn off the camera or terminate the Wi Fi connection before the transmission is completed unsent files will not be resent You may not be able to delete files or use the playback menu while sending Not available in these cases If you set Time L...

Page 279: ... these cases Images recorded with another device and images modified or edited on a PC may not be sent Size Resize the image to send Original Auto Change M S or VGA You can set this to Auto if the destination is Web service It changes the image size according to the status of the destination File Format Destination Smartphone PC JPG RAWiJPG RAW Delete Location Data Destination Cloud Sync Service W...

Page 280: ...k 1 Turn on the Wi Fi function 2 Select the wireless access point 3 Start Image App When connecting with WPS Connection in Direct 1 Start Image App Refer to the operating instructions for your smartphone for information about whether it supports WPS When connecting with Manual Connection in Direct 1 Turn on the Wi Fi function 2 Select the SSID that matches the one displayed on the screen of this u...

Page 281: ...work or Direct and connect P292 293 3 Select a printer you want to connect 4 Select pictures and then print The procedure for selecting pictures is the same as the one for when the USB connection cable is connected P310 To terminate the connection press You can also terminate the connection by pressing Wi Fi Setup Wi Fi Wi Fi Function New Connection Send Images Stored in the Camera Printer Not ava...

Page 282: ...end setting press DISP P279 A Wireless access point B Home AV device Setup Wi Fi Wi Fi Function New Connection Send Images While Recording or Send Images Stored in the Camera AV device 5 When Send Images While Recording has been selected Take pictures P278 When Send Images Stored in the Camera has been selected Select the picture P279 Sending may fail depending on the operational status of the AV ...

Page 283: ... PC P305 2 Create a folder that receives images with PHOTOfunSTUDIO For details refer to the operating instructions of PHOTOfunSTUDIO PDF For Windows Supported OS Windows 10 Windows 8 1 Windows 8 Windows 7 Example Windows 7 1 Select a folder you intend to use for receiving then right click 2 Select Properties then enable sharing of the folder For details refer to the operating instructions of your...

Page 284: ...ctures P278 When Send Images Stored in the Camera has been selected Select the picture P279 Folders sorted by sent date will be created in the destination folder and images will be saved there If the screen for a user account and password entry appears enter the one you set on your PC When the computer name NetBIOS name for Mac contains a space blank character etc it may not be recognised In that ...

Page 285: ...s camera If sending images fails a report email outlining the failure will be sent to the email address registered with LUMIX CLUB Images may contain personal information that can be used to identify the user such as a title the time and date when the images was taken and the location where the image was taken Check this information before uploading images to web services Panasonic assumes no resp...

Page 286: ...lect and register the cloud storage service you want to use in Web service link settings Follow the on screen instructions to operate 1 Select the menu 2 Select Via Network and connect P292 3 Select a web service 4 Check the send settings and select Set To change the send setting press DISP P279 Registering the WEB service to LUMIX CLUB When sending images to web service Setup Wi Fi Wi Fi Function...

Page 287: ...send another image To change the send setting press DISP P279 To terminate the connection press MENU SET or operate other controls to exit the playback screen You can also terminate the connection by pressing Wi Fi P258 To change the settings for sending images or web service Terminate the Wi Fi connection and follow step 1 and onwards again You can also change the send settings by pressing Wi Fi ...

Page 288: ...res transferred images for 30 days up to 1000 pictures Be aware that images will be deleted automatically in the following cases When over 30 days have passed since the transfer Images may be deleted even within 30 days if downloaded to all of the specified devices When the number of images exceeds 1000 This applies depending on the Cloud Limit P279 setting Setup Wi Fi Wi Fi Function New Connectio...

Page 289: ...tering information 4 Enter a password Enter any combination of 8 to 16 characters and numbers for the password For information on how to enter characters refer to P64 5 Check the login ID and select OK Be sure to make a note of the login ID and password The login ID 12 digit number will be displayed automatically When logging in to the LUMIX CLUB with a computer you only need to enter the numbers ...

Page 290: ...e same login ID on the camera and your smartphone is convenient for sending images on the camera to other devices or web services When either the camera or the smartphone has acquired the login ID 1 Connect the camera to the smartphone P262 2 From the Image App menu set the common login ID A screen for setting a common login ID may be displayed after the camera and the smartphone are connected Whe...

Page 291: ...delete confirmation screen The message is displayed Select Next 3 Select Yes on the confirmation screen for deleting the LUMIX CLUB account The message is displayed Select Next To continue without deleting the account select No The login ID will be deleted 4 Select OK Check the LUMIX CLUB terms of use Setup Wi Fi Wi Fi Setup LUMIX CLUB Terms of use Deleting your login ID LUMIX CLUB account Setup W...

Page 292: ...and send destination is selected When a screen similar to the one below is displayed select the connection method Wireless access point Via Network P293 Makes a connection via a wireless access point Direct P295 Connects your device and the camera directly Select a destination from History Select a destination from Favorite Connection is made using the same settings as the previous time P296 MENU ...

Page 293: ...te the WPS function and whether it is supported Via Network WPS Push Button Save push button type wireless access point that is compatible with Wi Fi Protected Setup with a WPS mark Press the wireless access point WPS button until it switches to WPS mode e g WPS PIN code Register a PIN code type wireless access point with a WPS mark that supports Wi Fi Protected Setup 1 Select the wireless access ...

Page 294: ...reen displayed in step 1 of From List select Manual Input 2 Enter the SSID of the wireless access point you are connecting to then select Set For information on how to enter characters refer to P64 3 Select the network authentication type 4 When an option other than No Encryption is selected Enter the encryption key From List WPA2 PSK Supported encryption methods TKIP AES WPA2 WPA PSK No Encryptio...

Page 295: ...device to WPS mode You can wait longer for a connection by pressing DISP on this unit WPS PIN code 1 On the camera select WPS PIN code 2 Enter the PIN code of the device into this camera Manual Connection Enter the SSID and password displayed on the camera The password will not be displayed when Wi Fi Password is set to OFF and the device to be connected is set to Smartphone Select the SSID to con...

Page 296: ...onnection by pressing DISP Register to favourite 1 Select the menu 2 Select the item you wish to register and press 1 3 Enter a registration name For information on how to enter characters refer to P64 A maximum of 30 characters can be entered A two byte character is treated as two characters Connect to Wi Fi Using Previously Saved Settings Setup Wi Fi Wi Fi Function Select a destination from Hist...

Page 297: ...r frequently used connection settings to Favourites Performing Reset Network Settings deletes data registered in History and Favourites If the device you want to connect to smartphone etc is connected to a wireless access point other than the camera you cannot connect the device to the camera using Direct Change the Wi Fi settings of the device you want to connect to so that the access point to be...

Page 298: ...workgroup To send images to a PC a connection to the same workgroup as the destination PC is required The default setting is WORKGROUP 1 Press MENU SET 2 Enter the workgroup of the connecting PC For information on how to enter characters refer to P64 To reset to the default setting press DISP You can change the name SSID of this unit 1 Press DISP 2 Enter the desired device name For information on ...

Page 299: ...set Network Settings in the Setup menu Displays the MAC address and IP address of this unit A MAC Address is a unique address that is used to identify network equipment IP address refers to a number that identifies a PC connected to a network such as the Internet Usually the addresses for homes are automatically assigned by the DHCP function such as a wireless access point Example 192 168 0 87 Wi ...

Page 300: ...otion picture select AUTO Connect the camera and a 4K compatible TV with an HDMI micro cable and display the playback screen P301 The TV input will switch automatically and the playback screen will be displayed when you set VIERA Link to ON and connect to a VIERA Link compatible TV Refer to P303 for details Read the operating instructions for the TV Watching on a PC To play back 4K motion pictures...

Page 301: ...o Cables that do not comply with the HDMI standards will not work High Speed HDMI micro cable Type D Type A plug up to 2 m 6 6 feet long Depending on the Aspect Ratio black bands may be displayed on the top and bottom or the left and right of the pictures Change the screen mode on your TV if the picture is displayed with the top or bottom cut off Check the HDMI Mode Play P234 To play back 24p moti...

Page 302: ...Ratio in the Rec menu is fixed to 16 9 If the camera is connected to an external monitor or TV that supports 4K motion picture using the following settings will cause the angle of view to become even narrower than usual 4K 100M 30p 4K 100M 25p 4K 100M 24p in Rec Quality 4K Live Cropping When is selected for the AF Mode or during MF Assist the enlarged display is not output Ex Tele Conv motion pict...

Page 303: ... automatic linked operations Not all operations are possible VIERA Link is a unique Panasonic function built on an HDMI control function using the standard HDMI CEC Consumer Electronics Control specification Linked operations with HDMI CEC compatible devices made by other companies are not guaranteed When using devices made by other companies that are compatible with VIERA Link refer to the operat...

Page 304: ... of recognising a mass storage device Windows support Windows 10 Windows 8 1 Windows 8 Windows 7 Mac support OS X v10 5 to v10 11 macOS 10 12 to 10 14 AVCHD motion pictures may not be imported correctly when copied as files or folder When using Windows import AVCHD motion pictures with PHOTOfunSTUDIO When using Mac you can copy motion pictures recorded in AVCHD using iMovie Note however that it ma...

Page 305: ...for download Download expiration April 2024 https panasonic jp support global cs soft download d_pfs10ae html This Site is English only Operating environment Refer to the operating instructions for PHOTOfunSTUDIO PDF file for details about the operating environment required to use the playback and editing functions for 4K motion pictures and the picture cropping function for 4K photos PHOTOfunSTUD...

Page 306: ...to the Help or the Ichikawa Soft Laboratory s support website Windows 10 8 1 8 7 This software allows you to edit motion pictures with ease Check the site below to download and install the software http loilo tv product 20 For more information about the operating environment of and how to use LoiLoScope download the LoiLoScope manual available for download at the website LoiLoScope is not compatib...

Page 307: ...ge in the Setup menu in advance the camera will be automatically connected to the PC without displaying the USB Mode selection screen A message about charging may be displayed Wait until the display disappears 3 Copy the images to a PC using PHOTOfunSTUDIO Do not delete or move copied files or folders in Windows Explorer When viewing in PHOTOfunSTUDIO you will not be able to play back or edit Copy...

Page 308: ... For Windows A drive LUMIX is displayed in Computer For Mac A drive LUMIX is displayed on the desktop Card DCIM Still motion pictures 1 Folder number 2 Colour space P sRGB _ AdobeRGB 3 File number 4 JPG Still pictures RW2 Pictures in RAW files MP4 MP4 Motion pictures 4K burst file AVCHD Motion pictures in AVCHD AVCHD DCIM 100XXXXX 101XXXXX 999XXXXX PXXX0001 JPG PXXX0002 JPG PXXX1000 JPG PRIVATE ...

Page 309: ...C Storage and then press MENU SET If you set the USB Mode to PC Storage in the Setup menu the USB Mode selection screen will not be displayed and the camera will automatically connect to the recorder A message about charging may be displayed Wait until the display disappears 3 Operate the recorder to copy See the operating instructions for the recorder about the details about copying and playing b...

Page 310: ...ming of the terminal if it is plugged in obliquely or in wrong direction Do not connect devices to incorrect terminals Doing so may cause malfunction Do not use any other USB connection cables except the supplied one A USB CHARGE socket B USB connection cable supplied Do not disconnect the USB connection cable while å Cable disconnect prohibit icon is displayed May not be displayed depending on th...

Page 311: ... camera and the printer are connected the alarm beeps If this happens during printing stop printing at once If not printing disconnect the USB connection cable Before removing or inserting the card turn off the camera and disconnect the USB connection cable Otherwise damage may be caused to the recorded data Some printers can print directly from the card removed from the camera For details refer t...

Page 312: ...s of the printer You can use Text Stamp in the Playback menu to stamp date and time on pictures Printing date without using Text Stamp In store printing Only recording date can be printed Order date printing at a store The characters entered using the following menus cannot be printed at a store Age and Name in Face Recog or Profile Setup Location in Travel Date Title Edit Printing at home When us...

Page 313: ... while pressing it in the direction indicated by arrow 1 Keep the Hot Shoe Cover out of reach of children to prevent swallowing When using other commercially available external flashes without communication functions with the camera It is necessary to set the exposure on the external flash If you want to use the external flash in Auto Mode use an external flash that allows you to set the aperture ...

Page 314: ...same as the Fn button Fn1 If you attach an external flash you can use the following functions even when recording with the flash Aperture Bracket Focus Bracket You can set the aperture value the shutter speed and the ISO sensitivity on the camera even when attaching the external flash If you record at close range with a wide angle light from the flash may be blocked by the lens darkening the lower...

Page 315: ...not recording a motion picture to prevent erroneous operation Settings ON OFF Setup Battery Use Priority BODY The battery in the camera is used first BG The battery in the Battery Grip is used first When the battery in the Battery Grip is used is displayed on the screen When the cover for the Battery Grip connector is difficult to remove move the corner of the camera with a groove towards the cent...

Page 316: ...Special Mic When the Stereo Shotgun Microphone DMW MS2 optional is attached you can set the microphone sound pickup range in Special Mic 1 Attach the Stereo Shotgun Microphone to the camera 2 Turn on the camera 3 Select the menu 4 When MANUAL is selected Press 2 1 to select a range and press MENU SET External Microphone optional Motion Picture Special Mic STEREO Allows stereo recording of sound ov...

Page 317: ...open the built in flash If the noises are recorded when you use an AC adaptor optional use a battery When a stereo microphone VW VMS10 optional is used Special Mic is fixed to STEREO When Special Mic is set to LENS AUTO S SHOTGUN or MANUAL Sound Output in the Motion Picture menu is fixed to REC SOUND When Special Mic is set to MANUAL you can use the Fn button function Mic Directivity Adjust Press ...

Page 318: ...Flash Mode P162 Flash P164 167 Extra Tele Conversion when recording motion pictures P154 Recording format Recording quality P171 Snap Movie P176 Aspect Ratio P194 Picture size P194 Extra Tele Conversion when taking still pictures P154 Image size Panorama Settings Image effect filter adjustment display P90 199 Image effect filter setting P199 Loop Recording P124 P C1 1 EXPS EXPS WL 50p 50p SNAP 4SE...

Page 319: ...m P221 AFS AFF AFC MF AFS BKT AFL LOW STAR 3 Name 2 P227 Number of days that have passed since the departure date 3 P229 Age 2 P227 Location 3 P229 Current date and time Travel destination setting 3 P229 Exposure metre P223 Focal distance display P157 Step zoom P157 4 AF area P102 Spot metering target P201 Centre marker display P221 Self timer P143 Sound Rec level display P179 Sound Rec Level Limi...

Page 320: ...able pictures P33 r20 Maximum number of pictures that can be taken continuously P120 Available recording time 1 P33 BKT AWB AWBc AWBw 1 1 R 8m30s 6 Touch tab P219 Touch zoom P158 Touch Shutter P53 Touch AF P53 Touch AE P54 Peaking P220 Fn button P60 P180 Colour P69 Defocus control function P69 92 Brightness P69 92 Type of defocus Miniature Effect P89 One point colour P89 Position of the light sour...

Page 321: ...P162 Flash P164 166 AWB 0 0 0 98 ISO AUTO OFF L 4 3 AFS AFS 1 60 F3 5 Fn C1 1 EXPS EXPS ISO AUTO 0 0 WL 3 Single P118 Burst P119 4K Photo P122 Post Focus P133 Self timer P143 Focus Mode P95 107 š Ø AF Mode P97 A Quality P195 Aspect Ratio P194 Picture size P194 Wi Fi Bluetooth P256 Fn button setting P60 4 Photo Style P196 VÐîÑ White Balance P115 Intelligent Dynamic Range Control P202 Metering Mode ...

Page 322: ...Stacking P136 Aspect Ratio P194 Picture size P194 Recording format Recording quality P171 F3 5 F3 5 F3 5 60 60 60 0 0 AWB AWB AWB 1 98 1 98 1 98 200 00 200 200 9pic pic 9 pic L 4 3 3 3 8m30s L 4 3 50p Snap Movie P176 High speed video P181 A Quality P195 Battery indication P26 Power is being supplied P25 Battery Grip P314 1 98 Picture number Total pictures Connected to Wi Fi Number of group picture...

Page 323: ...3 12 Others 1 h hour m minute s second 2 It is displayed in order of Title Location Name Baby1 Baby2 Pet Name Face Recog 4 Name 2 P225 227 Location 2 P229 Title 2 P243 Age P225 227 5 Recording information ...

Page 324: ... F3 5 10 00 1 DEC 2019 R Y B G 3 5 200 100 0001 ISO ISO 0 60 F3 5 10 00 1 DEC 2019 4 5 200 100 0001 ISO ISO 0 10 00 1 DEC 2019 F3 5 5500K G M A B 1 60 5 5 200 100 0001 ISO ISO 0 60 F3 5 10 00 1 DEC 2019 1 Recording information basic 2 Recorded date and time World Time P228 3 100 0001 Folder File number P308 4 Recording information advanced 5500 White Balance Colour Temperature P116 Intelligent Dyn...

Page 325: ...ken Insert a different card Insufficient SD card write speed for motion picture 4K photo or Post Focus recording Use an SD card of a supported Speed Class P32 If the recording stops even when you are using an SD card that meets the specified Speed Class rating the data writing speed of the SD card is getting slow We recommend backing up data and formatting P33 Depending on the type of card recordi...

Page 326: ...adio waves from other devices may block the connection to a wireless access point Check the status of other devices that are connected to the wireless access point as well as the status of other wireless devices Radio waves from the wireless access point are getting weak Perform the connection closer to the wireless access point Depending on the wireless access point connection may be automaticall...

Page 327: ... so new folders cannot be created Back up any necessary data before formatting the card P33 After formatting execute No Reset in the Setup menu to reset the folder number to 100 P236 Turn off and on the camera If the message is displayed even when doing this several times contact the dealer Some pictures cannot be deleted This picture cannot be deleted Cannot be set on this picture A folder cannot...

Page 328: ...ckly Turn the camera off frequently such as by using Economy P231 In high ambient temperatures or if the camera is used for continuous recording the temperature of the camera will rise To protect the camera against a rise in temperature after is displayed recording will be stopped and the following functions will not be available for a time Wait until the camera cools down 4K PHOTO Post Focus Moti...

Page 329: ... Priority set to RELEASE P216 Is AF Lock P110 set where it is not appropriate If there are fingerprints or dirt on the lens the focus may be set to the lens and as a result the subject may not be brought into focus The shutter speed will become slower and the stabiliser function may not work properly when recording in dark places In these cases use a tripod and the self timer when recording Try th...

Page 330: ...hen recording under fluorescent or LED lighting fixture etc increasing the shutter speed may introduce slight changes to brightness or colouring These are a result of the characteristics of the light source and do not indicate a malfunction When recording subjects in extremely bright locations or recording under fluorescent lighting LED lighting fixture mercury lamp sodium lighting etc the colouri...

Page 331: ... recommend checking focus with MF Assist before recording This camera records motion pictures in 4 2 0 8 bit so luminance and colour unevenness or noise may appear in areas such as blue skies people s skin and white walls We recommend performing trial recording in advance and editing and checking post production images before proceeding to actual recording Folders and images processed on a PC cann...

Page 332: ...r on the monitor viewfinder when a same image is displayed for a long period of time but it does not affect the recorded images Change the on screen images frequently by using Economy P231 Eye Sensor function P42 or turning off the screen light P49 This is a characteristic of this unit s monitor and this is not a malfunction This is characteristic of the viewfinder of the camera and not a malfunct...

Page 333: ...e metal surface Wireless access point Confirm that the connected wireless access point can be used Confirm the radio wave conditions of the wireless access point Move the camera closer to the wireless access point Change the location and angle of the wireless access point Depending on the wireless access point the radio wave may not be displayed even though it is present Turn off and then on the w...

Page 334: ...ormation login ID user name email address password is correct Is the size of the image too large Reduce the image size at Size P279 and then send Transmit after dividing the motion picture with Video Divide P253 It may take longer time to transmit when distance to the wireless access point is far Transmit closer to the wireless access point File format of the motion picture that can be sent differ...

Page 335: ... the USB connection cable and then connect again Pictures cannot be printed using a printer that does not support PictBridge Set to PictBridge PTP in USB Mode P233 If the printer has trimming or borderless printing functions cancel these settings before printing Refer to the operating instructions for your printer Depending on the photo studio images recorded with their aspect ratio set to 16 9 ca...

Page 336: ...215 lights red to make it easier to focus on a subject Reselect the language from the menu using the following procedure During use the camera may get warm but this does not affect performance or quality When the camera is left for a long time the clock may reset Reset the clock P39 Others When I shake the camera I hear a rattling sound from the camera When I shake the camera I hear a rattling sou...

Page 337: ...battery or disconnect AC adaptor Then reinsert the battery or reconnect AC adaptor and turn this unit on Do not use this unit near radio transmitters or high voltage lines If you record near radio transmitters or high voltage lines the recorded pictures and or sound may be adversely affected Always use the supplied cords and cables If you use optional accessories use the cords and the cables suppl...

Page 338: ...The camera has a dust reduction function that will blow off the dirt and dust that have affixed to the front of the image sensor This function will function automatically when the camera is turned on but if the dirt is particularly noticeable from the Setup menu perform Sensor Cleaning Removing dirt on the image sensor The image sensor is very precise and delicate so be sure to observe the followi...

Page 339: ...r entering the camera To protect the lens contact points A do not do the following These may cause a malfunction Touch the lens contact points Soil the lens contact points Place the lens with its mount surface facing down To improve the dust and splash resistant performance of the interchangeable lens H FS12060 H FSA14140 a lens mount rubber is used in the mount The lens mount rubber will leave sc...

Page 340: ...ot allow battery terminals to come into contact with metal objects such as necklaces hairpins etc This can cause short circuiting or heat generation and you may be badly burned if you touch a battery The CHARGE lamp may blink under the influence of static electricity or electromagnetic wave depending on the charging environment This phenomenon has no effects on charging If you use the battery char...

Page 341: ... sure to pay special attention to the privacy likeness rights etc of a subject and take your own responsibility when you use the Silent Mode or use functions such as writing the location information and changing the shutter noise etc Disclaimer Information including personal information may be altered or vanish due to erroneous operation effect of static electricity accident malfunction repair or ...

Page 342: ...y be damaged or lost if the camera breaks down due to inappropriate handling Panasonic will not be liable for any damage caused due to loss of recorded data Make sure the tripod is stable when the camera is attached to it When using a tripod or unipod removal of the battery may not be possible Make sure that the screw on the tripod or unipod is not at an angle when attaching or removing the tripod...

Page 343: ... be intercepted by a third party We strongly recommend that you set an encryption to maintain information security Do not use the camera in areas with magnetic fields static electricity or interference Do not use the camera in areas with magnetic fields static electricity or interference such as near microwave ovens These may cause the interruption of the radio waves Using the camera near devices ...

Page 344: ... AVCHD Progressive logo are trademarks of Panasonic Corporation and Sony Corporation Dolby Dolby Audio and the double D symbol are trademarks of Dolby Laboratories HDAVI Control is a trademark of Panasonic Corporation Adobe is a trademark or registered trademark of Adobe Systems Incorporated in the United States and or other countries Pentium is a trademark of Intel Corporation in the U S and or o...

Page 345: ...om DynaComware Corporation DynaFont is a registered trademark of DynaComware Taiwan Inc QR Code is a registered trademark of DENSO WAVE INCORPORATED Other names of systems and products mentioned in these instructions are usually the registered trademarks or trademarks of the manufacturers who developed the system or product concerned This product is licensed under the AVC Patent Portfolio License ...

Page 346: ...tion points in accordance with your national legislation By disposing of them correctly you will help to save valuable resources and prevent any potential negative effects on human health and the environment For more information about collection and recycling please contact your local authority Penalties may be applicable for incorrect disposal of this waste in accordance with national legislation...

Reviews: