


131
5. 4K Photo and Drive Settings
• Set [HDMI Mode (Play)] to either [AUTO] or a setting with a resolution of [4K/25p].
When connecting to a TV that does not support 4K motion picture, select [AUTO].
• If you display 4K burst files on a TV connected to the camera, they will be displayed on the 4K
burst playback screen.
• Depending on the TV to be connected, 4K burst files may not be played back correctly.
∫
Skips to the marked positions
When [
] is touched on the slide view screen or 4K burst playback screen, the marker
operation screen appears and you can skip to the marked positions. Touch [
] to
return to the original operation.
Auto Marking function
The camera automatically sets markers on scenes in which a face or the movement of a
subject is detected.
(Example: At the scene when a vehicle passes by, a balloon bursts, or a person turns
around)
• Up to 10 markers are displayed for each file.
• In the following cases, markers may not be set by the Auto Marking function depending on the
recording conditions and the status of subjects.
– The camera is moving because of panning or jitter
– The movement of a subject is slow/small
– The subject is small
– A face is not facing front
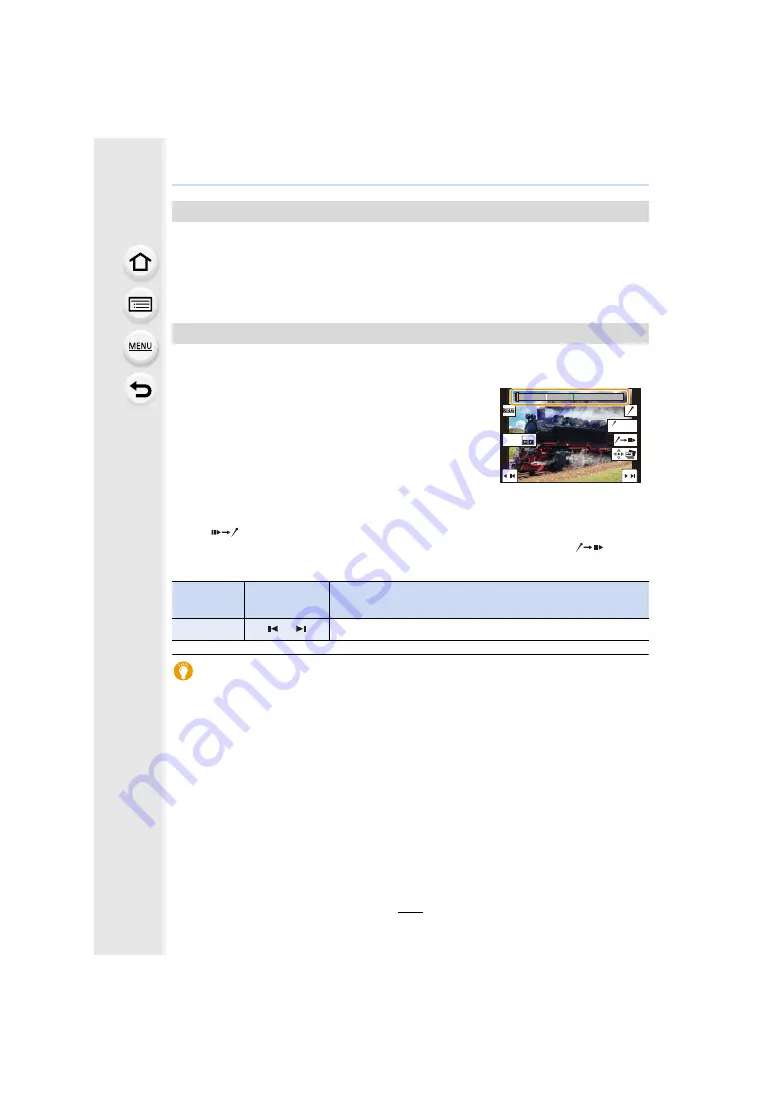
Selecting and saving pictures on the TV screen
Marker
When selecting and saving pictures from a 4K burst file,
you can select pictures easily by skipping between
marked positions.
Two types of markers are available.
White marker:
This is manually set during recording or playback.
Green marker:
This is automatically set by the camera during recording.
(Auto Marking function)
Marker operation screen
Button
operation
Touch
operation
Description of operation
2
/
1
/
Moves to the previous/next marker.
Fn1
AUTO
MODE


