42
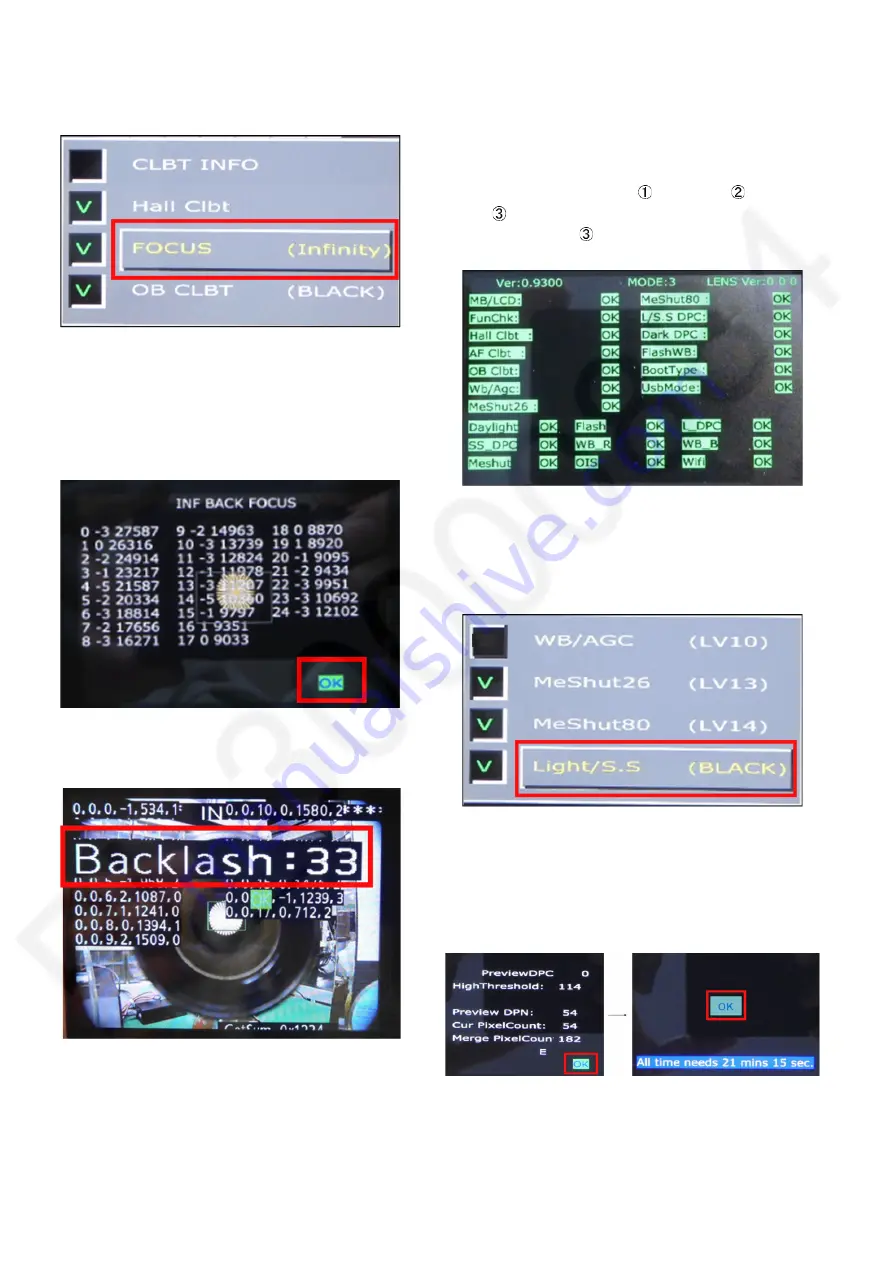
2. Execute Calibration.
2-1) Choose “FOCUS” by Cursor key, and press “Play-
back”.
2-2) Change the flag status of “Disable” from 00001 to
00000 by Cursor key (Left / Right), and then press “Menu/
Set”.
2-3) Press “Menu/Set”, and select “OK”, and press
“Menu/Set” again to start checking.
2-4) When calibration finishes, the screen will show the
result “OK” or “NG”.
(Even if “Backlash” character is displayed as shown bel-
low, it is no problem to finish adjustment because of fac-
tory use only.)
2-5) Press “Playback” to return to calibration menu.
9.4.10. Light / S.S / Preview Calibration
1. Setting the DSC.
1-1) Set the battery to the camera.
1-2) Insert the SD memory card containing the “Enable
Test.txt” into the camera.
1-3) Turn off the power.
1-4) Continue pushing ”
W KEY” +“
MENU/SET”
+”
Playback” at the same time during several seconds.
* Please press "
Playback " last.
It starts in the state of “Engineer Mode” automatically.
1-5) Press “Playback” to enter selection menu.
1-6) Turn the DSC to the usual distance and brightness in
photography.
2. Execute Calibration.
2-1) Choose “Light/S.S” by Cursor key, and press “Play-
back”.
2-2) Change the flag status of “Disable” from 00001 to
00000 by Cursor key (Left / Right), and then press “Menu/
Set”.
2-3) Press “Menu/Set”, and select “OK”, and press
“Menu/Set” again to start checking.
2-4) When calibration finishes, the screen will show the
result “OK” or “NG”.
2-5) Press “Playback” to return to calibration menu.
* Carrying out this adjustment after 25 minutes after
power ONis recommended.
* Although this adjustment takes about 10 to 20 minutes,
you may neglect it in the meantime.


