background image

Introduction

For assistance, please visit http://www.panasonic.com/phonehelp

13

For best performance

Base unit location/avoiding noise

The base unit and other compatible 
Panasonic units use radio waves to 
communicate with each other.
For maximum distance and noise-free 
operation, we recommend the following:

L

Placing the product away from electrical 
appliances.

L

Placing the base unit in a HIGH and 
CENTRAL location with no obstructions 
such as walls.

L

Raising the antennas vertically.

L

If you use the handset near a microwave 
oven which is being used, noise may be 
heard. Move away from the microwave 
oven and closer to the base unit.

L

If you use the handset near another 
cordless phone’s base unit, noise may 
be heard. Move away from the other 
cordless phone’s base unit and closer to 
your base unit.

Environment

L

Keep the product away from electrical 
noise generating devices, such as 
fluorescent lamps and motors.

L

The product should be kept free from 
excessive smoke, dust, high 
temperature, and vibration.

L

The product should not be exposed to 
direct sunlight.

L

Do not place heavy objects on top of the 
product.

L

When you leave the product unused for 
a long period of time, unplug the product 
from the power outlet.

L

The product should be kept away from 
heat sources such as heaters, kitchen 
stoves, etc. It should not be placed in 
rooms where the temperature is less 
than 5 °C (41 °F) or greater than 40 °C 
(104 °F). Damp basements should also 
be avoided.

L

The maximum calling distance may be 
shortened when the product is used in 
the following places: Near obstacles 
such as hills, tunnels, underground, near 
metal objects such as wire fences, etc.

L

Operating the product near 5.8 GHz 
electrical appliances may cause 
interference. Move away from the 
electrical appliances.

Routine care

L

Wipe the outer surface of the product 
with a soft moist cloth. Do not use 
benzine, thinner, or any abrasive 
powder.

TG5761_5766_5767.book  Page 13  Thursday, April 13, 2006  6:01 PM

Summary of Contents for KX-TG5766

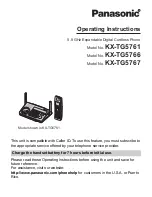
Page 1: ...Instructions before using the unit and save for future reference For assistance visit our website http www panasonic com phonehelp for customers in the U S A or Puerto Rico Charge the handset battery for 7 hours before initial use Operating Instructions 5 8 GHz Expandable Digital Cordless Phone Model No KX TG5761 Model No KX TG5766 Model No KX TG5767 Model shown is KX TG5761 ...

Page 2: ...g Answering Calls Making calls 24 Answering calls 25 Useful features during a call 26 Phonebook Handset phonebook 29 Base Unit Speed Dialer Base unit speed dialer 35 Caller ID Service Using Caller ID service 36 Caller list 38 Programming Programmable settings 40 Customizing handset ringer tone and display 47 Voice Mail Service Using Voice Mail service 52 Multi unit Operation Intercom 55 Transferri...

Page 3: ...3 Introduction Thank you for purchasing a Panasonic cordless telephone We recommend keeping a record of the following information for future reference Attach your purchase receipt here Serial No Date of purchase found on the bottom of the base unit Name and address of dealer ...

Page 4: ...ptor refer to the included operating instructions Important L Features and operations indicated by monochrome display models are for KX TG5761 KX TG5767 users and KX TGA570 accessory handset users only L Features and operations indicated by color display models are for KX TG5766 users and KX TGA571 accessory handset users only L For differences between the monochrome display handset KX TGA570 and ...

Page 5: ...istance please visit http www panasonic com phonehelp 5 KX TG5767 1 For operations related to this USB adaptor refer to its operating instructions included with this unit Monochrome display handset USB adaptor 1 KX TGA575 ...

Page 6: ... 2 soft keys and joystick middle soft key By pressing a soft key you can select the feature shown directly above it on the display Middle soft key The joystick can be used to select the center soft key icon by pressing down on the center of the joystick 2 Using the navigator key The handset navigator key can be used to navigate through menus and to select items shown on the display by pressing V o...

Page 7: ...ions related to this USB adaptor refer to the operating instructions included with the USB adaptor 2 KX TG5767 includes this USB adaptor Refer to the included operating instructions Trademark L Skype is a registered brand or trademark of Skype technology in the United States and or other countries Handsets and other devices max 8 5 8 GHz expandable digital cordless handset KX TGA570 Monochrome dis...

Page 8: ...eature refer to the help section of the GIGARANGE USB Utility software If you have not installed the GIGARANGE USB Utility software refer to the included Installation Guide for GIGARANGE USB Utility for details 3 Requires the 5 8 GHz expandable cordless camera KX TGA573 Feature KX TGA570 KX TGA571 Page Description Same handset supplied with KX TG5761 KX TG5767 Same handset supplied with KX TG5766 ...

Page 9: ...lows you to install USB Adaptor Utility on a compatible computer No Accessory item Order number Quantity KX TG5761 KX TG5766 KX TG5767 1 AC adaptor for base unit PQLV207Z 1 1 1 2 Telephone line cord PQJA10075Z 1 1 1 3 Battery HHR P105 1 1 1 4 Handset cover 1 PQYNTG5771SR 1 1 1 5 Audio cable PQJA10165Z 1 1 1 6 USB cable PQJA10166Z 2 or PQJA10177Z 1 7 CD ROM PQJKTG5776Z 3 1 PQJKTGA575Z 4 1 8 5 8 GHz...

Page 10: ...included with KX TG5766 and KX TGA571 contains the GIGARANGE USB Utility Allows you to use your computer to Add edit erase and copy phonebook entries Send images stored in your computer to your phone Send melodies stored in your computer to your phone L To install the GIGARANGE USB Utility software in your computer refer to the Installation Guide for GIGARANGE USB Utility for installation details ...

Page 11: ...tlets and extension cords This can result in the risk of fire or electric shock 10 Never push any objects through slots in the product This may result in the risk of fire or electric shock Never spill any liquid on the product 11 To reduce the risk of electric shock do not disassemble the product Take the product to an authorized service center when service is required Opening or removing covers m...

Page 12: ...r skin The electrolyte may be toxic if swallowed L Exercise care when handling the battery ies Do not allow conductive materials such as rings bracelets or keys to touch the battery ies otherwise a short circuit may cause the battery ies and or the conductive material to overheat and cause burns L Charge the battery ies provided or identified for use with the product only in accordance with the in...

Page 13: ...ectrical noise generating devices such as fluorescent lamps and motors L The product should be kept free from excessive smoke dust high temperature and vibration L The product should not be exposed to direct sunlight L Do not place heavy objects on top of the product L When you leave the product unused for a long period of time unplug the product from the power outlet L The product should be kept ...

Page 14: ...d or floor mounted AC outlet Do not connect the AC adaptor to a ceiling mounted AC outlet as the weight of the adaptor may cause it to become disconnected L The unit will not work during a power failure We recommend connecting a corded telephone to the same telephone line or to the same telephone jack using a Panasonic T adaptor page 10 If you subscribe to a DSL service Please attach a noise filte...

Page 15: ...owers the product you have purchased Please call 1 800 8 BATTERY 1 800 822 8837 for information on how to recycle this battery Battery charge Place the handset on the base unit for 7 hours before initial use While charging the charge indicator on the handset lights in amber When the battery is fully charged the indicator lights in green L Model shown is KX TG5761 KX TG5767 Note L If you want to us...

Page 16: ...onger you leave the handset off the base unit the less time you may actually talk using the handset L After the handset is fully charged displaying Charge completed it may be left on the base unit without any ill effect on the battery L The battery level may not be displayed correctly after you replace the battery In this case place the handset on the base unit and let charge for 7 hours Battery i...

Page 17: ...it A Antenna B Speaker C VM Voice Mail D Charge contacts E TONE F PAUSE REDIAL G FLASH CALL WAIT H MUTE I SP PHONE Speakerphone SP PHONE indicator J MIC Microphone K Navigator key V L AUTO PROGRAM M CONF Conference N HOLD O IN USE indicator P TRANSFER INTERCOM A A C B D E F G H I K L M N P O J ...

Page 18: ... with KX TG5761 KX TG5767 Handset A Speaker B Soft keys C Headset jack Audio jack D C TALK E Navigator key V F s SP PHONE G TONE H FLASH CALL WAIT I Microphone J Charge contacts K Charge indicator Ringer indicator Message indicator L Receiver M Display N OFF O PAUSE REDIAL P HOLD INTERCOM A K L M N O B C D E F G H I P J ...

Page 19: ...ck Audio jack D C TALK E Joystick L V Push the joystick up or down L Push the joystick left or right L Middle soft key Push the center of joystick F s SP PHONE G TONE H FLASH CALL WAIT I Microphone J Charge indicator Ringer indicator Message indicator K Receiver L Display M OFF N PAUSE REDIAL O HOLD INTERCOM P USB port Q Charge contacts A B C D E F G H I J K L B M N O P Q ...

Page 20: ...767 KX TGA570 L Each menu icon on the left changes to the one on the right when selected Displayed item Meaning 2 The date and time need to be set w Within range of the base unit Handset has no link to base unit out of range of base unit handset is not registered to base unit or no power on base unit W Voice enhancer is on 1 1 2 Battery level S Line is in use When flashing a call is on hold When f...

Page 21: ...5766 and KX TGA571 support this feature After 1 minute of inactivity the handset enters screen saver mode if the handset is not on the base unit or charger The display is turned off in order to preserve the life of the battery To cancel screen saver mode To use the handset when it is in screen saver mode first press OFF to turn the display on again Menu icon Menu feature Voice Mail Ringer setting ...

Page 22: ...middle soft key i 1 2 0 2 Select the desired setting 3 SAVE i OFF 1 Press MENU middle soft key then press 1 2 0 2 Press or V to select the desired setting 3 Press SAVE then press OFF Handset V Monochrome display models KX TG5761 KX TG5767 KX TGA570 Press up or down on the handset navigator key Color display models KX TG5766 KX TGA571 Push the joystick up or down Handset Monochrome display models K...

Page 23: ...The default setting is Tone Tone For tone dial service Pulse For rotary pulse dial service 1 MENU middle soft key i 1 2 0 2 Select the desired setting i SAVE i OFF Date and time Set the correct date and time 1 MENU middle soft key i 1 0 1 2 Enter the current month day and year by selecting 2 digits for each Example August 15 2006 0 8 1 5 0 6 3 Enter the current hour and minute 12 hour clock format...

Page 24: ...he receiver press C Adjusting the receiver speaker volume Press or V repeatedly while talking Making a call using the redial list The last 10 phone numbers dialed are stored in the redial list 1 REDIAL 2 Press or V to select the desired number 3 C Note L The caller s name is not stored in the redial list when calling back from the caller list Erasing a number in the redial list 1 REDIAL 2 Press or...

Page 25: ...ering calls When a call is being received the ringer indicator on the handset and the IN USE indicator on the base unit flash rapidly Using the handset 1 Lift the handset and press C or s L You can also answer the call by pressing any button except joystick navigator key or OFF Any key talk feature 2 When you finish talking press OFF Note L You can change the ringer indicator light color page 45 a...

Page 26: ...conds if the caller hangs up before you answer the call another person answers the call using another phone connected to the same line Useful features during a call HOLD button This feature allows you to put an outside call on hold 1 Press HOLD during an outside call L To transfer the call to the base unit or another handset continue from step 2 Transferring calls page 57 2 Press HOLD again L To r...

Page 27: ...ing tone Please contact your telephone service provider for details and availability of this service in your area Press CALL WAIT to answer the 2nd call after the tone L To switch between calls press CALL WAIT Temporary tone dialing for rotary pulse service users You can temporarily switch the dialing mode to tone when you need to access touch tone services for example answering services telephone...

Page 28: ... This feature allows the handset and base unit to join an existing outside call To join the conversation press C when the other extension is on an outside call To join the conversation press SP PHONE when the handset is on an outside call Note for handset and base unit L A maximum of 4 parties including 1 outside party can join a conversation using 3 extensions Call privacy Call privacy allows you...

Page 29: ...ome display models KX TG5761 KX TGA570 1 C right soft key 2 ADD 3 Enter the name max 16 characters page 31 i OK 4 Enter the phone number max 32 digits i OK L If you do not need to assign the ringer ID and light up ID go to step 11 5 Set Ringer ID i SELECT 6 Select the desired item 7 SELECT 8 Select the desired ringer ID page 37 i OK 9 Set Light up ID i SELECT 10 Select the desired light up ID page...

Page 30: ...0 Select the desired light up ID page 37 i OK 11 Set Picture ID i SELECT 12 Select the desired item 13 SELECT 14 Select the desired picture ID page 37 i OK 15 SAVE LTo add other items repeat from step 3 16 OFF Note L In step 2 you can also press MENU i New entry i SELECT instead of pressing ADD L To assign a melody in Custom ring as ringer ID you can record it from an audio device page 47 or copy ...

Page 31: ...ted on the same dial key first press to move the cursor to the next space Editing correcting a mistake Press or to move the cursor to the character or number you want to erase then press CLEAR Enter the appropriate character or number Note L Press and hold CLEAR to erase all characters or numbers Finding and calling a handset phonebook item Phonebook items can be searched for alphabetically by scr...

Page 32: ...lect the desired item 4 Press C or CALL to dial the phone number Editing items in the handset phonebook 1 C right soft key i SEARCH 2 Find the desired item page 31 i EDIT 3 Select the information you want to edit To change the name or phone number Select the name or phone number i SELECT i Edit the information page 31 i OK To change the ringer ID Select the current ringer ID i SELECT i Select the ...

Page 33: ... your PIN in the phonebook as one phonebook item press PAUSE to add pauses after the number and PIN as necessary page 24 L If you have rotary or pulse service you need to press before pressing C in step 1 to change the dialing mode temporarily to tone Copying handset phonebook items You can copy one or all of the phonebook items from the handset to the phonebook of a compatible Panasonic handset K...

Page 34: ...m page 31 i MENU 3 Copy i SELECT 4 Select the handset to copy to i SEND L To continue copying another item Yes i SELECT i Find the desired handset phonebook item i SEND 5 Press OFF after the long beep Copying all items 1 C right soft key 2 MENU 3 Copy all items i SELECT 4 Select the handset to copy to i SEND 5 Press OFF after the long beep ...

Page 35: ...s a phone number the old number will be erased L We recommend you make a note of which phone numbers are stored in which dial keys PAUSE button for PBX long distance service users A pause is sometimes required when making calls using a PBX or long distance service For example if you need to dial the line access number 9 when making outside calls with a PBX In step 2 press 9 PAUSE then enter the ph...

Page 36: ...while you were out You can view the number of missed calls by pressing CID left soft key Note L If you press CID then press OFF without viewing all missed calls in the caller list Missed call disappears from the display When you receive another new call it is displayed again Call Waiting Caller ID display If you subscribe to both Caller ID and Call Waiting with Caller ID services the 2nd caller s ...

Page 37: ... phonebook page 29 You can assign a different indicator color to each handset phonebook item When a call is received from a caller stored in the handset phonebook the assigned indicator color flashes after Caller ID information is displayed Picture ID Color display models only Important L Only KX TG5766 and KX TGA571 support this feature This feature can help you identify who is calling by using d...

Page 38: ... Format of the Edited Number Next time when someone calls from the same Area Code caller information will be customized by the unit as follows When the call is being received the Caller ID number will be displayed in the same Format as the Edited Number After the call is ended the telephone number of the caller when reviewed from the Caller list will be displayed in the same Format as the Edited N...

Page 39: ...ook 1 CID left soft key 2 Select the desired item L To edit the number press EDIT repeatedly until the phone number is shown in the desired format 3 SAVE 4 Continue from step 3 Editing items in the handset phonebook page 32 Erasing selected caller information 1 CID left soft key 2 Select the desired item 3 ERASE i Yes i SELECT i OFF Erasing all caller information 1 CID left soft key 2 ERASE i Yes ...

Page 40: ...ress V or to select the desired menu i SELECT L If there are sub menu s press or V to select the desired item i SELECT Example To access the handset ringer volume setting Press V or to select i SELECT Then press or V to select Ringer volume i SELECT 3 Press or V to select the desired setting L This step may vary depending on the feature being programmed 4 SAVE i OFF Monochrome display models KX TG...

Page 41: ... time 1 23 Time adjustment 1 Initial setting Auto Intercom 56 Talking CallerID 36 Caller ID edit LCD contrast Key tone Auto talk 25 Set base unit Talking CallerID 1 36 Set tel line Set dial mode 1 23 Set flash time 1 Set line mode 1 Registration HS registration 59 Deregistration 59 Set date time Date and time 1 23 Time adjustment 1 Change language 23 Handset name 49 Customer support 44 Main menu S...

Page 42: ...you do not need to program the same item using another handset Main menu Sub menu 1 Sub menu 2 Page Voice Mail Store VM access 1 52 VM tone detect 1 52 Message alert 54 Ringer setting Ringer volume Ringer tone Tone Melody 47 Custom ring 47 Custom ring Record 47 List 48 Memory status 50 Ring color Display setting Wallpaper Turn off 50 Set picture 50 Memory status 50 Appearance LCD contrast Set date...

Page 43: ...Caller ID edit Key tone Auto talk 25 Set base unit Talking CallerID 1 36 Set tel line Set dial mode 1 23 Set flash time 1 Set line mode 1 Registration HS registration 59 Deregistration 59 Set date time Date and time 1 23 Time adjustment 1 Change language 23 Handset name 49 Customer support 44 Main menu Sub menu 1 Sub menu 2 Page ...

Page 44: ...e wrong code press OFF then start again from step 1 Feature Feature code Setting code System setting 1 Page Auto talk 2 2 0 0 1 On 0 Off 25 Auto Intercom 2 7 3 1 On Ringer On 2 On Ringer Off 0 Off 56 Caller ID edit Caller ID number auto edit 2 1 4 1 On 0 Off 38 Change language Display language 1 1 0 1 English 2 Español 23 Custom ring Customized ringer tone for handset 1 6 6 47 Customer support 3 6...

Page 45: ... pressing any keys including confirmation tones and error tones LCD contrast Display contrast 1 4 5 1 6 Level 1 6 3 Message alert 3 4 0 1 On 0 Off 54 Ring color Ringer indicator color 2 3 5 1 Color1 2 Color2 3 Color3 4 Multicolor Ringer tone Handset 1 6 1 47 Ringer volume Handset 1 6 0 1 6 Level 1 6 6 0 Off Set dial mode 1 2 0 1 Pulse 2 Tone r 23 Set flash time 5 1 2 1 1 700 ms 2 600 ms 3 400 ms 4...

Page 46: ... not light properly when another phone connected to the same line is in use you need to change the line mode to A 7 This feature allows the unit to automatically adjust the date and time setting when caller information is received To use this feature set the date and time first Color display models only KX TG5766 KX TGA571 1 If System setting column is checked you do not need to program the same i...

Page 47: ...t ringer tone the ringer continues to sound for several seconds if the caller hangs up before you answer the call another person answers the call using another phone connected to the same line L The preset song Demo1 in this product is used with the permission of 2005 Speed Crazy L The preset song Demo2 in this product is used with the permission of 2005 M ZoNE Co Ltd Recording melodies from an au...

Page 48: ... Disconnect the audio cable from the handset Note L Monochrome display models KX TG5761 KX TG5767 KX TGA570 The total recording time is about 90 seconds L Color display models KX TG5766 KX TGA571 The total recording time is about 7 minutes The recording time may decrease depending on the size of images and melodies already stored in the handset Assigning a customized ring to the handset 1 MENU mid...

Page 49: ...inger ID page 37 the ringer ID assignment is canceled and the handset ringer tone page 47 is used instead of that song Changing handset name Each handset can be given a customized name Bob Kitchen etc this is useful when you make intercom calls between handsets The default setting is Handset 1 to Handset 8 You can also select whether or not the handset name is displayed in standby mode The default...

Page 50: ...lpaper1 and Wallpaper2 in this product are used with permission of 2005 Digital Archive Japan Inc L The preset pattern Wallpaper3 in this product is used with permission of 2005 MIXA Co Ltd Memory status Color display models only Important L Only KX TG5766 and KX TGA571 support these features You can confirm the amount of handset memory used for your images and melodies The images and melodies are...

Page 51: ...melody was assigned to certain callers as ringer ID page 37 the ringer ID assignment is canceled and the handset ringer tone page 47 is used instead of that song L If the erased image was selected for the wallpaper the sample picture Wallpaper1 is used instead of that image L If the erased image was assigned to handset phonebook items the picture ID assignment is canceled Handset Handset To erase ...

Page 52: ...he phone stops ringing your unit will check the phone line to see if new Voice Mail messages have been recorded Turn this feature off when you do not subscribe to Voice Mail service your telephone service provider does not send Voice Mail tones your phone is connected to a PBX If you are not sure which setting is required consult your telephone service provider Turning VM tone detection on off The...

Page 53: ...U middle soft key i VM 2 Follow the prerecorded instructions 3 Press OFF when finished 1 VM L If the base unit beeps 3 times the Voice Mail access number has not been stored Store the number page 52 2 Follow the prerecorded instructions 3 Press SP PHONE when finished Note for handset and base unit L If the handset or base unit still indicates there are new messages even after you have listened to ...

Page 54: ...ecorded messages in the Voice Mail system The default setting is Off 1 MENU middle soft key i 3 4 0 2 Select the desired setting i SAVE i OFF Note L While message alert feature is on battery operating time is shortened page 16 L If you have new messages and message alert feature is on the message indicator does not indicate battery charge status page 15 The indicator slowly flashes blue until you ...

Page 55: ... KX TGA575 is registered to the base unit its extension number is not displayed on the handset L If a cordless camera KX TGA573 is registered to the base unit its extension number is not displayed on the monochrome display models KX TG5761 KX TG5767 KX TGA570 1 INTERCOM 2 To page a specified handset enter its extension number 1 8 To page all handsets press 0 L The destination unit s beeps for 1 mi...

Page 56: ...aging all handsets or when receiving a transferred call Answering an intercom call using auto intercom 1 When you are paged by the base unit or another handset speak into the microphone L To switch to the receiver press C 2 To end the intercom press OFF Note L Auto intercom cannot be used when all handsets are being paged by the base unit your handset is receiving a transferred outside call Monito...

Page 57: ...uring an outside call press INTERCOM to put the call on hold 2 To page a specified handset enter its extension number 1 8 To page all handsets press 0 L Even if you call all handsets only the handset user who answers first can take the transferred call 3 Wait for the paged party to answer L If the paged party does not answer press INTERCOM to return to the outside call 4 To complete the transfer p...

Page 58: ...ss HOLD To resume the conference press CONF 1 During an outside call press INTERCOM to put the call on hold 2 To page a specified handset enter its extension number 1 8 To page all handsets press 0 3 Wait for the paged party to answer 4 When the paged party answers press CONF to make a conference call L To leave the conference press SP PHONE The other parties can continue the conversation L To put...

Page 59: ...al handset See page 7 for information on the available models and extension numbers Start from step 2 Deregistering a handset 1 MENU middle soft key i 1 3 1 2 3 3 5 i OK Deregistering other devices The base unit can cancel the registration of a registered device KX TGA573 KX TGA575 page 7 Deregistering the cordless camera KX TGA573 Important L Before deregistering confirm the cordless camera s ext...

Page 60: ...605 1277 Headset optional Connecting a headset to the handset allows hands free phone conversations We recommend using the Panasonic headset noted on page 10 L Headset shown is KX TCA86 L Handset shown is KX TGA570 Wall mounting optional By purchasing the optional wall mounting adaptor PQKL10078Z1 you can mount the base unit on a wall Belt clip optional By purchasing the optional belt clip PQKE104...

Page 61: ...ill be retained in the base unit To register an additional handset erase the unnecessary handset number using the base unit Press and hold INTERCOM until the IN USE indicator flashes i Press and hold the handset s extension number 1 8 that you want to cancel delete from the base unit until a beep sounds Failed L The handset you tried to copy phonebook items to is in use L The handset you tried to ...

Page 62: ... base unit s AC adaptor is plugged in L Raise the base unit antennas L The handset s registration may have been canceled Re register the handset page 59 Phonebook Memory full L There is no space to store new items in the phonebook Erase unnecessary items page 33 Please lift up and try again L A handset button was pressed while the handset was on the base unit or charger Lift the handset and press ...

Page 63: ...ected page 14 L Disconnect the unit from the telephone line and connect a known working telephone If the working telephone operates properly contact our service personnel to have the unit repaired If the working telephone does not operate properly contact your telephone service provider Problem Cause solution While programming the handset starts to ring L A call is being received Answer the call a...

Page 64: ...h DSL service we recommend connecting a noise filter between the base unit and the telephone line jack Contact your DSL provider for details The handset and base unit do not ring L The ringer volume is turned off Adjust it page 26 45 I cannot make a call L The dialing mode may be set incorrectly Change the setting page 23 L The base unit or another handset is in use Try again later I cannot redial...

Page 65: ...Disconnect the other equipment and try again L The caller requested not to send caller information page 36 L If a call is being transferred to you the caller information is not displayed L Generally caller information is displayed from the 2nd ring The handset or base unit does not announce the displayed caller names L The handset or base unit s ringer volume is turned off Adjust it page 26 45 L T...

Page 66: ... CWID you must first contact your telephone service provider and subscribe to the desired service After subscribing you may need to contact your telephone service provider again to activate this specific service even if you already subscribed to both Caller ID and Call Waiting with Caller ID services CWID I cannot access the caller list L Someone is viewing the caller list from another handset Pro...

Page 67: ...roducts approved after July 23 2001 the REN for the product is part of the product identifier that has the format US AAAEQ TXXXX The digits represented by are the REN without a decimal point e g 03 is a REN of 0 3 If this equipment causes harm to the telephone network the telephone company will notify you in advance that temporary discontinuance of service may be required But if advance notice isn...

Page 68: ...e harmful interference and 2 this device must accept any interference received including interference that may cause undesired operation Privacy of communications may not be ensured when using this phone CAUTION Any changes or modifications not expressly approved by the party responsible for compliance could void the user s authority to operate this device NOTE This equipment has been tested and f...

Page 69: ...e requirements the base unit must be installed and operated with its antenna located 20 cm 8 inches or more between antenna and all person s body excluding extremities of hands wrist and feet The handset may be carried and operated with only the optional specific belt clip Other non tested belt clips or similar body worn accessories may not comply and must be avoided The product must not be colloc...

Page 70: ...C 40 C 41 F 104 F Frequency 5 76 GHz 5 84 GHz Dimensions Approx height 55 mm x width 230 mm x depth 140 mm 25 32 inches x 91 16 inches x 51 2 inches Mass Weight Approx 410 g 0 90 lb Power consumption Standby Approx 2 1 W Maximum Approx 5 2 W Power output 200 mW max Power supply AC adaptor 120 V AC 60 Hz Dimensions Approx height 156 mm x width 49 mm x depth 35 mm 61 8 inches x 115 16 inches x 13 8 ...

Page 71: ...d there will be no charge for labor During the Parts Limited Warranty period there will be no charge for parts You must mail in your product prepaid during the Limited Warranty period This Limited Warranty excludes both parts and labor for batteries antennas and cosmetic parts cabinet This Limited Warranty only applies to products purchased and serviced in the United States or Puerto Rico This Lim...

Page 72: ...er Authorized Servicer or damage that is attributable to acts of God THERE ARE NO EXPRESS WARRANTIES EXCEPT AS LISTED UNDER LIMITED WARRANTY COVERAGE THE WARRANTOR IS NOT LIABLE FOR INCIDENTAL OR CONSEQUENTIAL DAMAGES RESULTING FROM THE USE OF THIS PRODUCT OR ARISING OUT OF ANY BREACH OF THIS LIMITED WARRANTY As examples this excludes damages for lost time lost calls or messages cost of having som...

Page 73: ... hearing or speech impaired users can call 1 877 833 8855 TTY users hearing or speech impaired users can call 1 866 605 1277 Purchase Parts Accessories and Instruction Books online for all Panasonic Products by visiting our Web Site at http www pasc panasonic com or send your request by E mail to npcparts us panasonic com You may also contact us directly at 1 800 332 5368 Phone 1 800 237 9080 Fax ...

Page 74: ...ons 14 Custom ring 47 Customer support 44 D Date and time 23 Deregistration 59 61 Dialing mode 23 Display Contrast 45 Language 23 E Error messages 61 F Flash 27 Flash time 45 Four way conference 28 58 H Handset locator 55 Handset name 49 Headset optional 60 Hold 26 I Installation Base unit 14 Handset 15 Intercom 55 J Joystick 6 K Key tone 44 L Light up ID 37 Line mode 45 M Making calls 24 Memory s...

Page 75: ...Tone 27 Transferring calls 57 Troubleshooting 63 TTY 10 60 73 U USB adaptor 5 7 USB cable 9 10 V VE Voice Enhancer 28 VM Voice Mail 52 VM Voice Mail tone detect 52 Voice Mail access number 52 Volume Base unit ringer 26 Base unit speaker 25 Handset receiver 24 Handset ringer 45 Handset speaker 24 W Wall mounting 10 60 Wallpaper 50 Warranty 71 ...

Page 76: ... Do not send your unit to Panasonic Consumer Electronics Company listed below or to executive or regional sales offices These locations do not repair consumer products Panasonic Consumer Electronics Company Division of Panasonic Corporation of North America One Panasonic Way Secaucus New Jersey 07094 Panasonic Puerto Rico Inc San Gabriel Industrial Park Ave 65 de Infantería Km 9 5 Carolina Puerto ...

Reviews: