background image

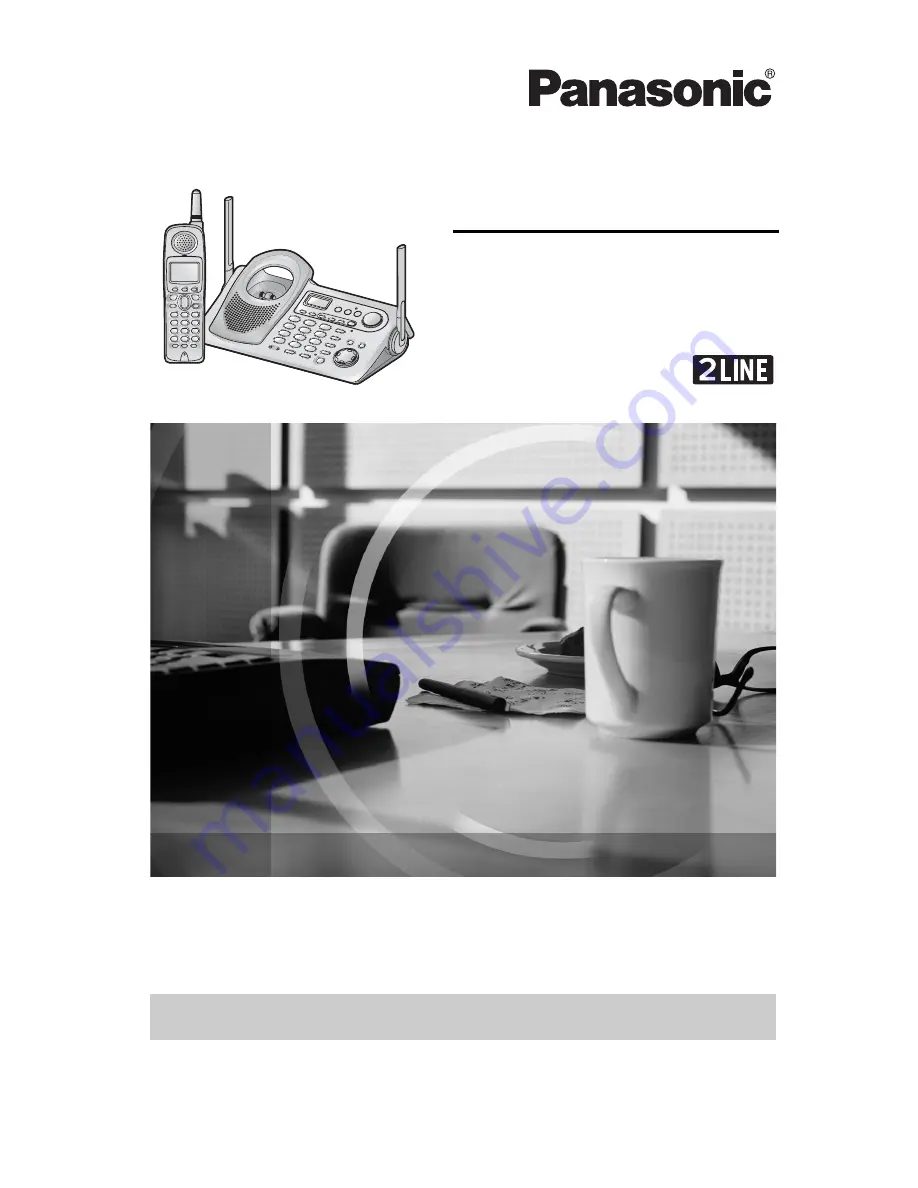
5.8 GHz Digital Cordless Answering System

Operating Instructions

Model No.

  KX-TG5480

Pulse-or-tone dialing capability

The unit is Caller ID compatible. To display the caller’s name and phone number, 
you must subscribe to Caller ID service.

PLEASE READ BEFORE USE AND SAVE.

Panasonic World Wide Web address:  http://www.panasonic.com

for customers in the USA or Puerto Rico

Charge the battery for 6 hours before initial use.

Summary of Contents for KX-TG5480

Page 1: ...capability The unit is Caller ID compatible To display the caller s name and phone number you must subscribe to Caller ID service PLEASE READ BEFORE USE AND SAVE Panasonic World Wide Web address http www panasonic com for customers in the USA or Puerto Rico Charge the battery for 6 hours before initial use ...

Page 2: ... 605 1277 Caller ID and Call Waiting Service where available are telephone company services After subscribing to Caller ID this phone will display a caller s name and phone number Call Waiting Caller ID which displays a second caller s name and phone number while the user is on another call requires a subscription to both Caller ID and Call Waiting with Caller ID services CWID AAC Adaptor p 11 Ord...

Page 3: ...ve oven which is being used noise may be heard from the receiver or the speaker Move away from the microwave oven and closer to the base unit If you use the handset near another cordless phone s base unit noise may be heard Move away from the other cordless phone s base unit and closer to your base unit Away from electrical appliances such as a TV personal computer or another cordless phone In a H...

Page 4: ...ng the Other Line During a Conversation 39 Caller ID Service 40 Using the Caller List 41 Viewing the Caller List 41 Calling Back from the Caller List 42 Editing the Caller s Phone Number 43 Caller ID Number Auto Edit 44 Storing Caller Information in the Phone Book 45 Erasing Caller Information 45 Phone Book 46 Storing Names and Numbers 46 Dialing from the Phone Book 47 Chain Dial 49 Editing an Ite...

Page 5: ...sferring a Call to the Answering System 73 Remote Operation from a Touch Tone Phone 74 Remote Code 75 Voice Menu 76 Direct Remote Operation 77 Wall Mounting 78 Belt Clip 81 Optional Headset 81 Direct Commands 82 If the Following Appear on Your Display 84 Important Safety Instructions 90 FCC and Other Information 91 Specifications 94 Warranty 95 Index 97 Answering System Useful Information Troubles...

Page 6: ... ON Button and Indicator p 65 Antenna p 3 Antenna p 3 Speaker Charge Contacts p 16 TONE Button p 59 REDIAL PAUSE Button p 37 58 LOCATOR INTERCOM TRANSFER Button and Indicator p 52 CONF Conference Button p 56 CHARGE Indicator p 15 IN USE Indicator p 32 HOLD Button p 37 SP PHONE Speakerphone Button and Indicator p 36 LINE Buttons p 36 Navigator Key B d p 8 FLASH CALL WAIT Button p 59 60 MUTE Button ...

Page 7: ...ack side Speaker Headset Jack p 81 TALK Button p 32 Speakerphone Button p 32 MENU Button p 17 Microphone p 32 Charge Contacts p 16 Antenna Display p 9 OFF Button p 17 32 HOLD INTERCOM Button p 34 52 REDIAL PAUSE Button p 33 58 Soft Keys p 8 Receiver FLASH CALL WAIT Button p 59 60 Navigator Key d B p 8 Ringer Message Alert Indicator p 31 38 TONE Button p 59 ...

Page 8: ...ons such as and Throughout these Operating Instructions the handset navigator key is indicated by the arrows d and B Throughout these Operating Instructions the base unit navigator key is indicated by the arrows d B and How to use the soft keys navigator keys Handset soft keys 3 soft keys are used to select functions displayed directly above each key Functions displayed above each key will change ...

Page 9: ... The battery icon indicates battery strength p 15 6 The display shows the dialed number call status programming options phone book items Caller ID information etc 7 The icons on the bottom line indicate the functions of the corresponding soft keys which are located directly below the display p 8 z Off invisible The line is free On The line is being used Flashing A call is on hold on the handset or...

Page 10: ...you turn the Answering System on p 65 the selected volume level while you are adjusting the speaker volume p 28 36 when PROGRAM is pressed to store a phone number p 51 when your greeting message or memo message was not recorded correctly p 27 72 5 and or will be displayed when selecting the line s a to record the greeting message p 27 b to turn the Answering System on p 65 c to play back messages ...

Page 11: ...ling mounted AC outlet as the weight of the adaptor may cause it to become disconnected If your unit is connected to a PBX which does not support Caller ID you cannot access Caller ID services This unit will not function during a power failure We recommend connecting a standard telephone to the same telephone line or to the same telephone jack using the Panasonic KX J66 T adaptor We recommend conn...

Page 12: ...rd Connect the telephone line cord s to the base unit If your unit is connected to a telephone line with DSL service see page 14 To connect to a 2 line telephone jack 4 Wire Telephone Line Cord with GREEN Plugs 2 Line Telephone Jack RJ14C GREEN Plug ...

Page 13: ...e line telephone jacks If you use the unit as a single line telephone only 2 Wire Telephone Line Cord with TRANSPARENT Plugs 4 Wire Telephone Line Cord with GREEN Plugs GREEN Plug TRANSPARENT Plug LINE 2 LINE 1 Single Line Telephone Jacks RJ11C 2 Wire Telephone Line Cord with TRANSPARENT Plugs TRANSPARENT Plug LINE 1 Single Line Telephone Jack RJ11C ...

Page 14: ...this connection please purchase the Panasonic T adaptor KX J42 To order call the accessories telephone number on page 2 12 Wire Telephone Line Cord with TRANSPARENT Plugs 24 Wire Telephone Line Cord with GREEN Plugs N Connecting 2 single line telephone jacks LINE 2 LINE 1 2 1 Ex DSL line is LINE 2 TRANSPARENT Plug GREEN Plug 2 Line Telephone Jack RJ14C TRANS PARENT Plug Noise Filter Plug Noise Fil...

Page 15: ...16 Close the cover and charge the handset for 6 hours Battery Charge Place the handset on the base unit for 6 hours before initial use The unit beeps once the CHARGE indicator lights and Charging is displayed When the battery is fully charged Charge completed is displayed if there are no new calls in the Caller List Battery strength You can confirm the battery strength on the handset display Batte...

Page 16: ... on the handset will be shortened Actual battery performance depends on a combination of how often the handset is in TALK mode and how often it is in Standby mode Clean the charge contacts of the handset and the base unit with a soft dry cloth once a month Clean more often if the unit is subject to grease dust or high humidity Otherwise the battery may not charge properly If the battery is fully c...

Page 17: ...r error beeps will sound Make sure the handset and base unit are not being used The handset must be operated near the base unit and while off the base unit 1 Press MENU The main menu is displayed p 18 2 Scroll to the desired item by pressing d or B 3 Press the soft key to select the desired item 4 If the item has a sub menu select the menu item p 18 Repeat steps 2 and 3 until the desired item is d...

Page 18: ...LCD contrast Key tone Auto talk Set flash time Set line mode Registration Message alert Set dial mode Line selection Change language Main menu Sub menu I Message play Phone book Initial setting Sub menu II Ringer setting Date and time Voice enhancer Number of rings Remote code Recording mode Recording time Caller ID edit Set tel line Set base unit Line selection Incoming call Ringer volume Ringer ...

Page 19: ...0 If you enter a wrong number press the soft key or or press B or d to move the cursor to the incorrect number Enter the correct number 4 Select AM or PM by pressing 5 Press the soft key The date and time are set and E disappears from the base unit display If the handset beeps 3 times the date and time were not set correctly Start again from step 3 6 Press OFF The date and time may be incorrect af...

Page 20: ... soft key To change from Spanish to English press the soft key The display changes to the selected language You can also select the display language by pressing d or B 5 When Spanish is selected press the soft key then press OFF When English is selected press the soft key then press OFF 1 Press MENU 2 Scroll to Initial setting by pressing d or B then press the soft key 3 Scroll to Set tel line by ...

Page 21: ...ion is incorrect Set line mode to A Each line has its own setting 1 Press MENU 2 Scroll to Initial setting by pressing d or B then press the soft key 3 Scroll to Set tel line by pressing d or B then press the soft key 4 Scroll to Set line mode by pressing d or B then press the soft key 5 Press d Line1 or B Line2 to select the line 6 Select A or B by pressing d or B 7 Press the soft key To select t...

Page 22: ... levels of LCD contrast The factory preset is level 3 1 Press MENU 2 Scroll to Initial setting by pressing d or B then press the soft key 3 Scroll to Auto talk by pressing d or B then press the soft key 4 Select On or Off by pressing d or B 5 Press the soft key then press OFF 1 Press MENU 2 Scroll to Initial setting by pressing d or B then press the soft key 3 Scroll to LCD contrast by pressing d ...

Page 23: ... displayed You can also adjust each line s ringer volume while the line is ringing Press d or B while the handset is ringing 1 Press MENU 2 Scroll to Ringer setting by pressing d or B then press the soft key 3 Press the soft key at Ringer volume 4 Press d Line1 or B Line2 to select the line 5 Select the desired volume by pressing d or B The volume will change and ring The number of steps indicates...

Page 24: ...ther line by pressing LINE SELECT until LINE 1 or LINE 2 is announced The selected line or is displayed Do not select both lines You can not set the ringer for both lines at the same time 2 To set the ringer volume to high preset medium or low press d or B To increase volume press B To decrease volume press d To change the ringer tone press or p 26 To stop ringing press STOP To turn the ringer off...

Page 25: ...ther person answers the call using another phone connected on the same line If LINE 1 and LINE 2 have different ringer patterns and both lines receive calls simultaneously both ringers will ring alternately Handset ringer tone 1 Press MENU 2 Scroll to Ringer setting by pressing d or B then press the soft key 3 Scroll to Ringer tone by pressing d or B then press the soft key 4 Press d Line1 or B Li...

Page 26: ...se unit will not ring Press d or B to turn the ringer on To stop ringing press STOP You can also select the ringer tone by pressing 1 to 8 1 to 4 Bell ringer patterns 5 to 8 Melody patterns To change the ringer volume press B or d p 24 step 2 1 Press MENU 2 Scroll to Initial setting by pressing d or B then press the soft key 3 Scroll to Set base unit by pressing d or B then press the soft key 4 Sc...

Page 27: ... name and or number Sorry I cannot take your call Please leave a message after the beep Thank you 1 To record a common greeting for both lines press LINE SELECT repeatedly until LINE 1 and LINE 2 is announced is displayed To record a greeting for either line individually press LINE SELECT repeatedly until LINE 1 or LINE 2 is announced or is displayed 2 Press GREETING REC To record greeting press R...

Page 28: ...greeting see below Pre recorded greeting If you do not record a greeting p 27 one of 2 greetings will be played when a call is received depending on the caller s recording time p 29 To review the pre recorded greeting select the line s by pressing LINE SELECT then press GREETING CHECK A pre recorded greeting will be played as follows N When the recording time is set to 1 minute 2 minutes or 3 minu...

Page 29: ... or B then press the soft key 5 Press d Line1 or B Line2 to select the line 6 Select the recording time by pressing d or B You can also select the recording time by pressing 1 2 3 or 0 Greeting only 7 Press the soft key To select the other line repeat from step 4 8 Press OFF If you select Greeting only for the line s the unit will answer a call with the greeting message and then hang up The unit w...

Page 30: ...n also select the number of rings by pressing 0 Toll saver or 2 to 7 7 Press the soft key To select the other line repeat from step 4 8 Press OFF Toll saver When you call a line to which Toll saver has been set from a remote location the number of rings will tell you if there are any new messages If the unit answers on the 2nd ring there is at least 1 new message If the unit answers on the 4th rin...

Page 31: ...ge alert indicator This indicator will flash rapidly when a call is received whether this feature is on or off Battery operating time may be shortened when using this feature p 16 1 Press MENU 2 Scroll to Initial setting by pressing d or B then press the soft key 3 Press the soft key at Set answering 4 Scroll to Recording mode by pressing d or B then press the soft key 5 Select the recording mode ...

Page 32: ... up press OFF or place the handset on the base unit The line status icons and show the status of each line p 9 While using the handset the IN USE indicator lights on the base unit To have a hands free phone conversation 1 Press s A free line is automatically selected and the line is displayed To change the line selection see page 62 SP phone is displayed 2 Dial a phone number The dialed number is ...

Page 33: ... To increase volume press B To decrease volume press d The display shows the current volume setting If you try to increase decrease volume when it is at the maximum minimum level the handset will beep 3 times To redial the last number dialed 1 Press C s or a line soft key or 2 Press REDIAL PAUSE Hands free Digital Duplex Speakerphone For best performance please note the following Talk alternately ...

Page 34: ...ystem see page 73 2 Press HOLD INTERCOM again Hold and the line are displayed To return to the call press the line soft key or that is flashing The base unit user can also take the call by pressing the line button that is flashing If another phone is connected on the same line p 11 you can also take the call by lifting its handset If a call is kept on hold for 6 minutes an alarm tone will start to...

Page 35: ...Panasonic s Voice Enhancer Technology clarifies the voice of the person you are talking to reproducing a more natural sounding voice that is easier to hear and understand Voice Enhancer Technology can be turned on or off The factory preset is OFF Depending on the condition and quality of your telephone line this feature may emphasize existing line noise If it becomes difficult to hear turn this fe...

Page 36: ... If you try to increase decrease volume when it is at the maximum minimum level the base unit beeps 3 times The level is displayed on the base unit 1 Press SP PHONE The SP PHONE indicator lights A free line is automatically selected and the line button lights To change the line selection see page 63 You can select a line by pressing a line button that does not light instead of pressing SP PHONE 2 ...

Page 37: ... by pressing the line soft key or If another phone is connected on the same line p 11 you can also take the call by lifting its handset If a call is kept on hold for 6 minutes an alarm tone will start to sound After 4 additional minutes on hold the call will be disconnected How the line buttons indicate the line status The line buttons indicate the status of each line as follows Light off The line...

Page 38: ...e is automatically selected To change the line selection see page 62 You can also answer a call by pressing the called line soft key or You can also answer a call by pressing any button except d B or OFF 2 To hang up press OFF or place the handset on the base unit 1 Press SP PHONE The called line is automatically selected To change the line selection see page 63 You can also answer a call by press...

Page 39: ...e using LINE 1 Press HOLD INTERCOM 2 times to put the first call LINE 1 on hold flashes on the display 2 Press the other line soft key to make or answer a second call To hold the second call press HOLD INTERCOM 2 times 3 To return to the first call LINE 1 press the line soft key for the first call LINE 1 The second call is terminated 1 Ex If you are using LINE 1 Press HOLD to put the first call LI...

Page 40: ...yed Depending on radio communications with the base unit the handset may not display Caller ID information immediately after the first ring If your unit is connected to a PBX which does not support Caller ID you cannot access Caller ID service Name display service may not be available in some areas For further information please contact your telephone company If you subscribe to both Caller ID and...

Page 41: ...k the display will only show the phone number If you do not press any buttons for 60 seconds the unit will exit the Caller List The handset display will show the number of calls you missed Press d or B to review calls logged in the Caller List You can also press the soft key then press the soft key Caller Identification to enter the Caller List After viewing the missed call entries missed calls wi...

Page 42: ...edit the number before dialing p 43 Ex You may have to delete 1 and the area code If a phone number is not displayed in the caller information you cannot call that caller back from the Caller List 1 Press d or B to enter the Caller List 2 Scroll to the desired caller by pressing d or B 3 Press C or s OR Press the soft key then press a line soft key or If the line selection is Auto p 62 and you pre...

Page 43: ...he number is rearranged into one of 3 patterns F G H 1 The order in which patterns F H are displayed depends on how the telephone number is displayed in step 2 5 To call the edited number press C s or a line soft key or If the line selection is Auto p 62 the indicated line will be selected by pressing C or s If the indicated line is already being used select the other line by pressing the line sof...

Page 44: ...cently edited area codes will be automatically edited You can turn this feature on or off using the handset The factory preset is ON To turn on or off Caller ID Number Auto Edit feature If you fail to reach your destination when making a call the phone number you dialed might have an incorrect pattern Edit the phone number with another pattern p 43 When this feature is turned off the unit will sti...

Page 45: ... repeatedly until the number is shown in the desired format p 43 step 4 4 Press the soft key again If there is no name information for the caller Enter name will be displayed You can enter a name by performing the following steps 1 enter the name p 47 2 press d and 3 press the soft key If a name is not required press d then press the soft key To continue storing other items repeat from step 2 To e...

Page 46: ...Press the soft key then press the soft key C The display will show the number of stored items 2 Press the soft key 3 Enter a name of up to 16 characters with the dialing buttons 0 to 9 p 47 then press d To move the cursor press the soft key or If a name is not required press d then go to step 4 4 Enter a phone number of up to 32 digits To delete a digit press the soft key To erase all of the digit...

Page 47: ...t key to delete the character Each time you press the soft key a character is erased To erase all characters press and hold the soft key 3 Enter the correct character Dialing from the Phone Book Keys Characters Keys Characters 1 1 6 m n o M N O 6 2 a b c A B C 2 7 p q r s P Q R S 7 3 d e f D E F 3 8 t u v T U V 8 4 g h i G H I 4 9 w x y z W X Y Z 9 5 j k l J K L 5 0 0 Space Moves the cursor to the...

Page 48: ...ntil the first item under F is displayed If there are no items beginning with the character you selected the first item in the next alphabetical index will be displayed 3 Press d repeatedly until the desired name is displayed Index table 2 Scroll to the desired item To scroll down press d To scroll up press B 3 Press C or s OR Press the soft key then press a line soft key or The phone number is di...

Page 49: ...umber and your PIN when storing in the phone book p 46 1 Search and dial from the phone book 1 800 012 3456 Calling card access number The voice guidance may be announced 2 Search and dial from the phone book 1234 Calling card PIN 3 Search and dial from the phone book 1 555 012 3456 Destination Number If you have rotary or pulse service you need to press before pressing MENU in step 1 to change th...

Page 50: ...e number press d then go to step 6 To delete a digit press the soft key To delete all of the digits press and hold the soft key 6 Press the soft key To continue editing other items repeat from step 2 7 Press OFF 1 Press the soft key then press the soft key C 2 Scroll to the desired item by pressing d or B To search for the item by initial see page 48 3 Press the soft key To cancel erasing press th...

Page 51: ...ed in which memory locations To erase a stored number 1 Press PROGRAM then press AUTO 2 Press the memory station number 0 to 9 for the phone number to be erased A long beep sounds and the phone number is erased Dialing a Stored Phone Number Speed dial numbers stored in the base unit can only be dialed from the base unit 1 Press PROGRAM The IN USE indicator flashes and is displayed 2 Enter a phone ...

Page 52: ...handset will ring for 1 minute To stop paging press SP PHONE or LOCATOR INTERCOM TRANSFER 2 When the paged party answers talk into the MIC 3 To disconnect the intercom press SP PHONE or LOCATOR INTERCOM TRANSFER The indicator lights go out During an intercom call If you have difficulty hearing while using the speakerphone on the handset or base unit decrease the speaker volume by pressing d If an ...

Page 53: ...d the LOCATOR INTERCOM TRANSFER indicator flashes 1 Press C s or HOLD INTERCOM You can also answer a page by pressing any button except d B or OFF 2 To disconnect the intercom press OFF 1 Press SP PHONE or LOCATOR INTERCOM TRANSFER 2 To disconnect the intercom press SP PHONE or LOCATOR INTERCOM TRANSFER The ringer volume for intercom calls follows the higher level of the 2 lines When the ringer vo...

Page 54: ...n hold 2 To page the base unit press 0 3 Wait for the paged party to answer then you can announce the transfer If the paged party does not answer press the line soft key or that is flashing to return to the outside call 2 Base unit Press SP PHONE or LOCATOR INTERCOM TRANSFER to answer the page 3 Handset To complete the transfer press OFF 1 Base unit 1 During a call press LOCATOR INTERCOM TRANSFER ...

Page 55: ...er for the handset press the line soft key or to return to the outside call for the base unit press the line button that is flashing to return to the outside call If the paged party does not answer within 60 seconds after you hang up your phone will ring and the call will be returned to your phone You may speak to the caller again by pressing the line soft key or on the handset or the line button ...

Page 56: ...both lines on hold press HOLD To talk with only one caller press the line button To resume both lines press CONF You cannot call another user to make a conference call To join the conference call with the handset or base unit press either line soft key or on the handset or either line button on the base unit One more extension can join the conference call 1 During a call press HOLD INTERCOM 2 time...

Page 57: ... the call on hold can resume the full conference by pressing the soft key on the handset or CONF on the base unit Call Share This feature allows the base unit or the handset to join an existing outside call To prevent the base unit from joining your conversation turn the Call Privacy feature on p 58 A maximum of 4 parties including 1 or 2 outside parties can join a conversation To join a conversat...

Page 58: ...ll 2 Press 2 to select 2 Privacy on PRIVACY is displayed when this feature is turned on To turn this feature off press 2 to select 2 Privacy off in step 2 In step 2 you can also select 2 Privacy on or 2 Privacy off by pressing d or B then pressing the soft key While the Call Privacy feature is turned on other users cannot join the conversation Call Privacy will turn off after you hang up the call ...

Page 59: ... the first call on the same line is put on hold the Answering System is handling a call on the same line or you are having a conference call on both lines If this function does not operate properly consult your telephone company for details Call Waiting Caller ID display If you subscribe to both Caller ID and Call Waiting with Caller ID services CWID when a second call is received on the same line...

Page 60: ... 700 ms The setting should stay at 700 ms unless pressing FLASH CALL WAIT fails to pick up the Call Waiting call If PBX functions do not work correctly consult your PBX supplier for the correct settings 1 Press MENU 2 Scroll to Initial setting by pressing d or B then press the soft key 3 Scroll to Set tel line by pressing d or B then press the soft key 4 Scroll to Set flash time by pressing d or B...

Page 61: ...eparately for the handset and base unit Handset incoming call tone Base unit incoming call tone 1 Press MENU 2 Scroll to Ringer setting by pressing d or B then press the soft key 3 Scroll to Incoming call by pressing d or B then press the soft key 4 Select On Off or 2 by pressing d or B 5 Press the soft key then press OFF 1 Press MENU 2 Scroll to Initial setting by pressing d or B then press the s...

Page 62: ...ne will be selected If the Auto Talk feature is turned on p 22 the unit will select the ringing line when you lift the handset off the base unit to answer the call Line 1 Line 1 will be selected Line 2 Line 2 will be selected You can select any line by pressing a line soft key or on the handset or a line button on the base unit regardless of this setting Handset line selection 1 Press MENU 2 Scrol...

Page 63: ...t base unit by pressing d or B then press the soft key 4 Scroll to Line selection by pressing d or B then press the soft key 5 Select Line1 Line2 or Auto by pressing d or B 6 Press the soft key then press OFF 1 Press MENU 2 Scroll to Initial setting by pressing d or B then press the soft key 3 Scroll to Key tone by pressing d or B then press the soft key 4 Select Off or On by pressing d or B 5 Pre...

Page 64: ...base unit 1 Handset Press MENU 2 Handset Scroll to Initial setting by pressing d or B then press the soft key 3 Handset Scroll to Registration by pressing d or B then press the soft key 4 Base unit Press and hold LOCATOR INTERCOM TRANSFER for 3 seconds The CHARGE indicator flashes After the CHARGE indicator starts flashing the rest of the procedure must be completed within 1 minute 5 Handset 1 Pre...

Page 65: ...ce Memory full when you press ANSWER ON GREETING REC or MEMO and after playing back messages or recording a message You can also turn on the Answering System remotely from the handset p 70 or an outside phone p 77 If you subscribe to Caller ID p 40 Caller ID information automatically adjusts the date and time when a call is received provided you have already set the date and time manually p 19 The...

Page 66: ...nly the first call can be monitored To answer a call while monitoring press the called line button on the base unit or press the called line soft key or on the handset To turn the incoming call monitoring feature off When the base unit is not in use press d repeatedly until 0 is displayed Make sure the Answering System is turned on OR While monitoring press d repeatedly until 0 is displayed If the...

Page 67: ... messages are played back When there are no new messages the unit announces No new messages All message playback then plays back all messages When there are no messages the unit announces No messages To play back messages for the desired line s 1 Press LINE SELECT repeatedly until the unit announces the desired line s The selected line s and or will be displayed 2 Press MESSAGE The unit announces ...

Page 68: ...ey 1 Press the soft key When there are new messages flashes If there are only old messages is displayed but will not flash 2 Press the soft key The unit beeps then announces the number of new messages Only new messages are played back To switch from the speaker to the receiver press C To switch back to the speaker press s When there are no new messages the unit announces No new messages All messag...

Page 69: ...alled line soft key or For playback start again from the beginning after hanging up At the end of the last message End of final message is heard The unit will announce the remaining recording time if it is less than 10 minutes If you hear Memory full after playback erase unnecessary messages p 71 When memo messages are played p 72 MEMO is displayed If 65 or more new messages have been recorded the...

Page 70: ...1 Press the soft key The unit stops playback If you need to edit the phone number to call back see page 44 2 Press the line soft key or The unit dials the phone number OR Press C or s The unit dials the phone number using the called line To adjust the speaker volume To increase press B To decrease press d You can also adjust the receiver volume on the handset To repeat a message Base unit Press Ha...

Page 71: ...ng all messages You can erase all caller messages and all memo messages in one operation The greeting message s will not be erased If the Answering System was turned on for only one of the 2 lines only caller messages for that line and memo messages are erased Caller messages recorded for the other line are not erased If you want to erase caller messages only for the desired line s select the line...

Page 72: ...ourself If you record for over 3 minutes in step 2 the unit will stop recording If is displayed 6 beeps sound and Your message was not recorded Record your message again is announced start again from step 1 1 Press the soft key then press the soft key 2 Press 5 to erase all messages Wait until No messages is heard While erasing messages alarm tones will be heard All messages for the line s and mem...

Page 73: ... be recorded in the Caller List p 41 if the transferred call is an incoming call If you set the caller s recording time to Greeting only p 29 the caller cannot leave a message 1 Press HOLD INTERCOM during a call The call is put on hold 2 Press 9 to hang up the call The caller will hear the greeting p 27 then he or she can leave a message after the beep Interrupting remote operation If another user...

Page 74: ... during playback After selecting the line s messages for the line s will be played Memo messages will not be played Call your unit from a touch tone phone Enter the remote code p 75 during or after the greeting The unit will announce the number of new messages caller messages for the line s for which the Answering System is turned on plus memo messages The new messages will be played To listen to ...

Page 75: ...t remote code is 11 If you do not program your own remote code you can use 11 To confirm the remote code repeat steps 1 to 4 The remote code is displayed When finished press OFF 1 Press MENU 2 Scroll to Initial setting by pressing d or B then press the soft key 3 Press the soft key at Set answering 4 Scroll to Remote code by pressing d or B then press the soft key 5 Enter a 2 digit remote code 00 ...

Page 76: ...or your call will be heard and the call will be disconnected Press 1 to play back all messages Press 2 for other functions All Message Playback All recorded messages are played back At the end of the last message End of final message is heard Press 1 to play back new messages Press 2 for other functions New Message Playback Only new messages are played back At the end of the last message End of fi...

Page 77: ...nter the remote code for other options Skipping the greeting After calling your unit press during the greeting The unit skips the rest of the greeting and you can start recording your message after the long beep 4 Plays back new messages 5 Plays back all messages 1 Repeats the current message If pressed within the first 5 seconds of playback the previous message will be played 2 Skips the current ...

Page 78: ... phone plate 1 Connect the AC adaptor 2 Tuck the telephone line cord inside the wall mounting adaptor A Connect the telephone line cord B 3 Insert the hooks on the wall mounting adaptor into the holes A and B on the base unit To Power Outlet 1 2 A B A B ...

Page 79: ... 7262 4 Adjust the adaptor to hold the base unit then push it in the direction of the arrow until it clicks into place 5 Connect the telephone line cord Mount the unit then slide it down Raise the antennas 6 To charge the handset battery Place the handset on the base unit The unit beeps once and the CHARGE indicator lights ...

Page 80: ...Wall Mounting 80 To remove the wall mounting adaptor While pushing down the RELEASE LEVERS A remove the adaptor B 2 1 1 RELEASE LEVERS ...

Page 81: ...sation Please use only a Panasonic KX TCA60 KX TCA86 KX TCA88 KX TCA88HA KX TCA91 KX TCA92 or KX TCA98 headset To order call the accessories telephone number on page 2 Connecting an optional headset Open the headset jack cover and insert the headset plug into the headset jack as shown below Headset sold separately Model shown here is KX TCA86 To switch to the speakerphone while using the headset P...

Page 82: ...0 1 1 6 Level 1 6 p 22 Key tone 0 2 1 On 0 Off p 63 Auto talk 0 3 1 On 0 Off p 22 Caller ID Number Auto Edit 0 4 1 On 0 Off p 44 Set dial mode 0 5 1 1 Pulse 2 Tone p 20 Set flash time Line 1 0 5 2 1 1 700 ms 2 600 ms 3 400 ms 4 300 ms p 60 Line 2 0 5 2 2 5 250 ms 6 110 ms 7 100 ms 8 90 ms Set line mode Line 1 0 5 3 1 1 A 2 B p 21 Line 2 0 5 3 2 Line selection Handset 0 5 5 0 Auto 1 Line 1 2 Line 2...

Page 83: ...rresponding pages Change language 0 8 1 English 2 Spanish p 20 Message alert 0 1 On 0 Off p 31 Ringer tone Base unit Line 1 0 1 1 1 4 Tone pattern 1 4 5 8 Melody pattern 1 4 p 26 Line 2 0 1 2 Incoming call tone Base unit 0 2 1 On 2 2 times 0 Off p 61 Line selection Base unit 0 5 0 Auto 1 Line 1 2 Line 2 p 63 Ringer volume Base unit Line 1 0 6 1 1 Low 2 Medium 3 High 0 Off p 24 Line 2 0 6 2 Handset...

Page 84: ... handset button was pressed while the handset was on the base unit Lift the handset and press the button again Busy The called base unit is in use The base unit user is using the line s Wait until the line status icon goes out Error When you tried to re register the handset the handset and base unit could not link for some reason such as interference from electrical appliances Move the handset and...

Page 85: ...er feature p 35 If the unit is connected to a telephone line with DSL service you may hear noise from the receiver or speaker during conversations We recommend connecting a noise filter contact your DSL service provider to the telephone line between the base unit and the telephone line jack The base unit handset does not ring The ringer volume is turned off Set to high medium or low p 23 24 The ha...

Page 86: ...telephone company to subscribe If your unit is connected to any additional telephone equipment such as Caller ID box or wireless telephone jack disconnect the unit from the equipment and plug the unit directly into the wall jack If the unit is connected to a telephone line with DSL service the unit may not display caller s name and or phone number properly We recommend connecting a noise filter co...

Page 87: ...umber The handset display exits the Caller List or phone book Do not pause for over 60 seconds while searching The Ringer Message Alert indicator flashes slowly when the handset is not ringing and in use The Message Alert is turned on and new messages have been recorded Turn the Message Alert off p 31 or listen to the new messages p 67 68 74 You cannot have a conversation using the headset Make su...

Page 88: ... unit Press each button firmly The Answering System is off Turn it on p 65 When you play back messages or turn on the Answering System the base unit and handset announce the wrong day and time The date and time may be set incorrectly Set the date and time again p 19 Caller ID information is not displayed during message playback p 70 Caller ID information will not be displayed if a message is recor...

Page 89: ... and fully charge it Recharge battery is displayed 3 flashes or the handset beeps intermittently Fully charge the battery p 15 16 Charge for 6 HRS and 4 are displayed and the handset does not work The battery has been discharged Fully charge the battery p 15 16 You charged the battery fully but Recharge battery is still displayed and or 3 continues to flash or Charge for 6 HRS and 4 are displayed ...

Page 90: ...t in the risk of fire or electric shock 10 Never push any objects through slots in this unit This may result in the risk of fire or electric shock Never spill any liquid on the unit 11 To reduce the risk of electric shock do not disassemble this unit Take the unit to an authorized servicenter when service is required Opening or removing covers may expose you to dangerous voltages or other risks In...

Page 91: ...ssible FCC and Other Information This equipment complies with Part 68 of the FCC rules and the requirements adopted by the ACTA On the bottom of this equipment is a label that contains among other information a product identifier in the format US ACJ If requested this number must be provided to the telephone company Registration No found on the bottom of the unit Ringer Equivalence No REN 0 2B A p...

Page 92: ...UMBERS 1 Remain on the line and briefly explain to the dispatcher the reason for the call 2 Perform such activities in the off peak hours such as early morning or late evenings This device complies with Part 15 of the FCC Rules Operation is subject to the following two conditions 1 This device may not cause harmful interference and 2 this device must accept any interference received including inte...

Page 93: ...0 C 104 F Allow 10 cm 4 clearance around the unit for proper ventilation Avoid excessive smoke dust mechanical vibration shock or direct sunlight Medical consult the manufacturer of any personal medical devices such as pacemakers or hearing aids to determine if they are adequately shielded from external RF radio frequency energy The unit operates in the frequency range of 5760MHz to 5840MHz and th...

Page 94: ...nsumption Standby Approx 2 7 W Maximum Approx 6 5 W Frequency 5 76 GHz 5 84 GHz Dimensions H x W x D Approx 107 mm x 251 mm x 135 mm 4 7 32 x 9 7 8 x 5 5 16 Mass Weight Approx 520 g 1 15 lb N Dialing Mode Tone DTMF Pulse N Operating Environment 5 C 40 C 41 F 104 F Specifications are subject to change without notice Energy Star As an ENERGY STAR Participant Panasonic has determined that this produc...

Page 95: ...Call Center at 1 800 211 PANA 7262 When shipping the unit carefully pack include all accessories and send it prepaid adequately insured and preferably in the original carton Include a letter detailing the complaint and provide a day time phone number where you can be reached IF REPAIR IS NEEDED DURING THE LIMITED WARRANTY PERIOD THE PURCHASER WILL BE REQUIRED TO FURNISH A SALES RECEIPT PROOF OF PU...

Page 96: ...equests by visiting our Web Site at http www panasonic com consumersupport or contact us via the web at http www panasonic com contactinfo You may also contact us directly at 1 800 211 PANA 7262 Monday Friday 9 am 9 pm Saturday Sunday 10 am 7 pm EST For hearing or speech impaired TTY users TTY 1 877 833 8855 For hearing or speech impaired TTY users TTY 1 866 605 1277 Purchase Parts Accessories and...

Page 97: ...t viewing 41 Calling back from the Caller List 42 Chain dial 49 CID Caller ID 40 Clarity booster 35 CONF Conference 56 Conference calls 56 D Date and time 19 Dialing mode 20 Direct commands 82 83 Displays 9 Display language 20 E Erasing messages 71 Erasing all messages 71 Error messages 84 F FCC and other information 91 FLASH button 60 Flash time 60 Function menu Direct commands 82 83 Function men...

Page 98: ... Redial list 34 Registration 64 Remote code 75 Remote operation handset 68 Remote operation touch tone phone 74 Ringer off 23 24 38 Ringer tone 25 26 Ringer volume 23 24 Rotary service tone dialing 59 S Safety instructions 90 Shipping product for service Back cover Soft keys 8 Speed dialer 51 Specifications 94 SP phone base unit 36 SP phone handset 32 T Toll saver 30 Transferring a call 54 73 Trou...

Page 99: ......

Page 100: ...sumer Electronics Company listed below or to executive or regional sales offices These locations do not repair consumer products For your future reference Serial No Date of purchase found on the bottom of the unit If you need assistance with setup or operation please call 1 800 211 PANA 7262 For hearing or speech impaired TTY users TTY 1 877 833 8855 Name and address of dealer Panasonic Consumer E...

Reviews: