5.
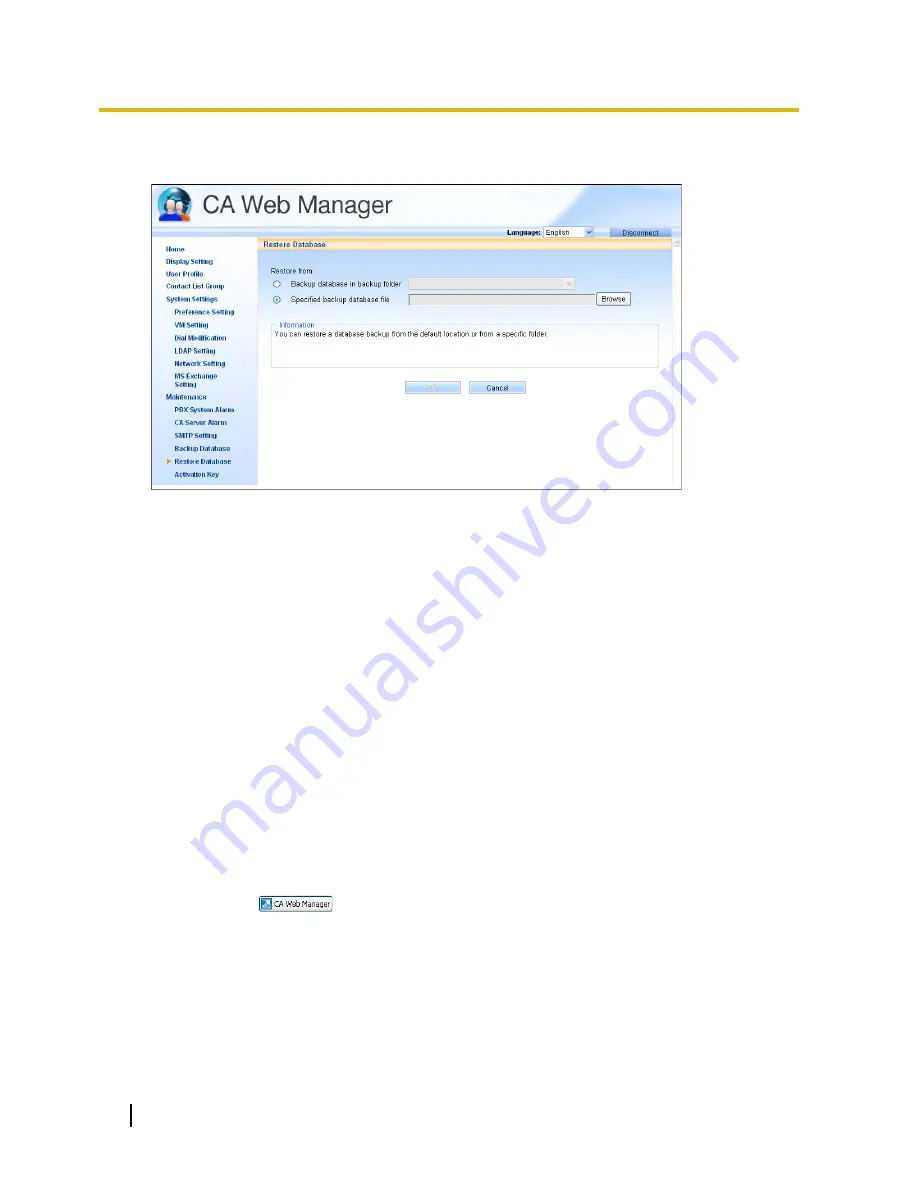
Log in to CA Web Manager for a server set in step 4. Navigate to
Restore Database
, select
Specified
backup database file
, and specify the location of the backup file created in step 1.
6.
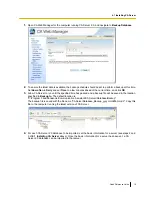
Once the file is specified, click
OK
to restore and upgrade the database to use with the latest version of
CA Server. A confirmation message will appear and CA Server will restart. Repeat this process for each
CA Server 2.0 database from another computer you want to upgrade and add to the latest version of CA
Server, for up to a total of 4 servers.
4.2 Starting CA Web Manager
When using a computer other than the computer running CA Server
1.
Start a Web browser program.
2.
In the browser’s address bar, enter the CA Server’s IP address and port number for CA Web Manager
using the following format:
http://[IP address of the computer running CA Server]:[Web manager port number specified in CA
Server setup]
For example, if the IP address of the computer running CA Server is [10.155.0.1] and the specified Web
manager port number is [8080], the address entered would be the following:
http://10.155.0.1:8080
If you are unsure of the IP address of the computer running CA Server, contact your network’s
administrator.
When using the computer running CA Server
The following methods are available:
–
Click the server’s
icon in the server selection window.
–
Double-click the CA Server icon in your computer’s task tray.
–
Right-click the CA Server task bar icon and choose
Open CA Web Manager
.
–
Manually enter the CA Web Manager address into your Web browser, as outlined above.
Logging in to CA Web Manager
Once you access CA Web Manager, a login prompt will appear. Enter the Administrator password and the
main menu appears. From this menu, you can access the features of CA Web Manager.
20
Quick Reference Guide
4.2 Starting CA Web Manager


