background image

8. Help

48

8.3.5 Copying

8.3.6 Using an answering machine (KX-FP207 only)

8.3.7 Answering machine (KX-FP218 only)

Problem

Cause & Solution

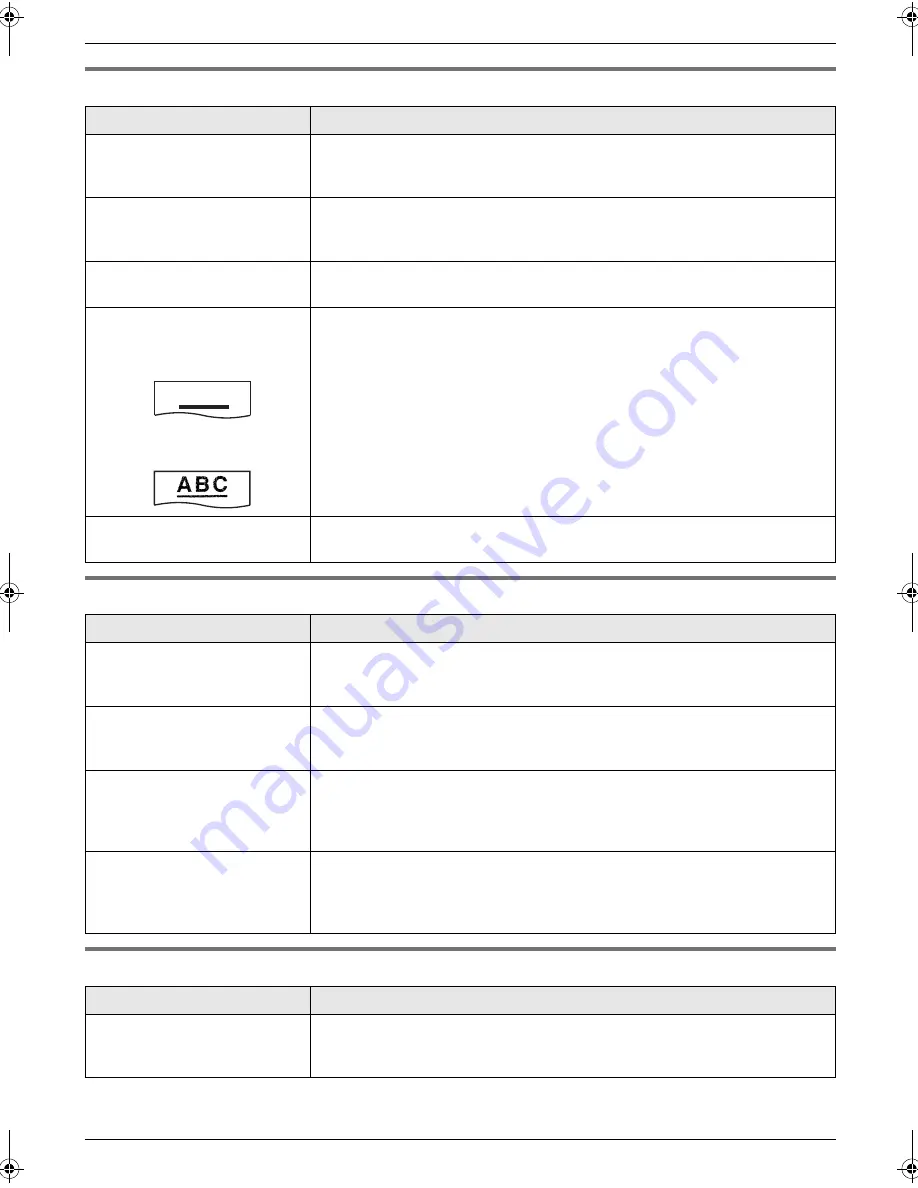
The unit will not make a copy.

L

The ink film is empty. Replace the ink film with a new one (page 8).

L

You cannot make a copy during programming.

L

You cannot make a copy during a telephone conversation.

A black line, white line or 
smudge appears on the 
copied document.

L

The scanner glass or rollers are dirty with correction fluid, etc. Clean them 
(page 52). Please do not insert a document before correction fluid has dried 
completely.

The copied image is 
distorted.

L

Adjust the width of the document guides to fit the actual size of the 
document.

The printing quality is poor.

Please do not reuse the ink film!
Please use genuine Panasonic replacement film. Refer to page 6 for further 
details.

L

The thermal head is dirty. Clean it (page 53).

L

Some paper has instructions recommending which side to print on. Try 
turning the recording paper over.

L

You may have used paper with a cotton and/or fibre content that is over 
20%, such as letterhead or resume paper.

Original

Copy

Documents or recording 
paper frequently misfeed.

L

Clean the document feeder rollers, recording paper feeder and rubber flap 
(page 52).

Problem

Cause & Solution

I cannot receive documents 
automatically.

L

Your greeting message on the answering machine is too long. Shorten the 
message. Record a message up to 10 seconds long.

L

The answering machine rings too many times. Set to 1 or 2 rings.

I cannot receive voice 
messages.

L

Check if the answering machine is turned ON and connected to the unit 
properly (page 27).

L

Set the number of rings on the answering machine to 1 or 2.

I pressed the remote access 
code to access the answering 
machine remotely, but the line 
was disconnected.

L

The code may include “#” which is used for certain features provided by 
telephone companies. Change the code on the answering machine to 
another number which does not include “#”.

Callers complain that they 
cannot send a document.

L

There is no room left in memory of your answering machine to record voice 
messages. See the operating instructions of the answering machine and 
erase unnecessary messages.

L

You set the answering machine to only give a greeting message.

Problem

Cause & Solution

I cannot listen to messages 
from a remote location.

L

Press the remote operation ID (code) correctly and firmly (feature #11 on 
page 36).

L

The unit is not in TAM/FAX mode. Change to TAM/FAX mode (page 33).

A B C

FP207-218FX-PFQX2515ZA-en.book  Page 48  Friday, June 30, 2006  11:58 AM

Summary of Contents for KX-FP207FX

Page 1: ... units are compatible with Caller ID To use this feature you must subscribe to the appropriate service of your service provider Operating Instructions Compact Plain Paper Fax Model No KX FP207FX Compact Plain Paper Fax with Digital Answering System Model No KX FP218FX This pictured model is KX FP207 ...

Page 2: ...onformity for the relevant Panasonic products described in this manual are available for download by visiting http www doc panasonic de Contact Panasonic Services Europe a Division of Panasonic Marketing Europe GmbH Panasonic Testing Centre Winsbergring 15 22525 Hamburg Germany Note L The suffix in the model number will be omitted in these instructions L Most figures shown in these operating instr...

Page 3: ...ged or frayed B If liquid has been spilled into the unit C If the unit has been exposed to rain or water D If the unit does not work normally by following the operating instructions Adjust only controls covered by the operating instructions Improper adjustment may require extensive work by an authorised service centre E If the unit has been dropped or physically damaged F If the unit exhibits a di...

Page 4: ...uct please contact your local authorities or dealer and ask for the correct method of disposal For Best Performance For best performance Environment L Keep the unit away from electrical noise generating devices such as fluorescent lamps and motors L The unit should be kept free from dust high temperature and vibration L The unit should not be exposed to direct sunlight L Do not place heavy objects...

Page 5: ... 4 Broadcast transmission 22 Receiving Faxes 4 5 Selecting the way to use your fax machine 23 4 6 Receiving a fax manually Auto answer OFF 24 4 7 Receiving a fax automatically Auto answer ON 25 4 8 Using the unit with an answering machine KX FP207 only 27 4 9 Receive polling retrieving a fax placed on another fax machine 27 4 10 Junk fax prohibitor preventing fax reception from undesired callers 2...

Page 6: ... transportation of the unit 1 2 Accessory information Replacement film 1 Model No Part No KX FA52E 30 m 2 rolls Each roll will print about 90 A4 sized pages 1 To ensure the unit operates properly we recommend using the Panasonic replacement film The ink film is not reusable Do not rewind and use the ink film again 1 Telephone line cord 2 Handset 3 Handset cord 4 Paper tray 5 Paper support 6 Starte...

Page 7: ...nsferring extension calls L The recall time can be changed feature 72 on page 40 J CALLER ID L To use Caller ID features page 17 K STOP L To stop an operation or programming session L To erase a character number page 14 Press and hold to erase all characters numbers L BROADCAST L To send a document to multiple parties page 22 M PRINT REPORT L To print reference lists and reports page 54 N MENU L T...

Page 8: ...k film roll into the front left slot of the unit 2 and the white gear of the ink film roll into the rear left slot of the unit 3 L The ink film is safe to touch and will not rub off on your hands like carbon paper 1 Document guides 2 Paper tray 3 Metal recording paper guide 4 Paper support 5 Recording paper exit 6 Recording paper entrance 7 Microphone KX FP218 only 8 Front cover 9 Document entranc...

Page 9: ...tion of the arrow until the ink film is tight 5 and at least one layer of ink film is wrapped around the blue core 6 6 Close the back cover securely by pushing down on the dotted area at both ends 7 7 Close the front cover securely 3 2 4 5 Correct Incorrect 6 Tight 1 turn No ink film is wrapped around the blue core Slack Crease Reverse 7 ...

Page 10: ...et cord 1 1 7 Paper tray Pull up the metal recording paper guide 1 then install the paper tray 2 L Make sure the arrows on the paper tray and the unit match 1 8 Paper support Hold open the paper support 1 then insert the ends into the holes on the paper tray 2 1 2 1 1 2 ...

Page 11: ...mation on recording paper 1 Fan the paper to prevent paper jams 2 Insert the paper gently print side down 1 L Do not force the paper into the paper tray L If the paper is not inserted correctly remove all of the installed paper and re install it gently Otherwise the paper may jam Note L Remove all of the installed paper before adding paper Correct Slant 1 ...

Page 12: ...akers which generate an intense magnetic field L If any other device is connected to the same telephone line this unit may disturb the network condition of the device L If you use the unit with a computer and your internet provider instructs you to install a filter 5 please connect it as follows 1 Telephone line cord L Connect to a single telephone line jack 2 Power cord L Connect to a power outle...

Page 13: ...or B Speaker volume While using the monitor speakerphone press A or B Initial Programming 2 3 Date and time 1 MENU i 0 1 i SET D 01 M 01 Y 06 TIME 00 00 2 Enter the current date month year hour minute by selecting 2 digits for each Press repeatedly to select AM PM or 24 hour clock format Example 10 August 2006 10 15PM 12 hour clock format 1 Press 1 0 0 8 0 6 1 0 1 5 D 10 M 08 Y 06 TIME 10 15 2 Pre...

Page 14: ...move the cursor to the next space and press 5 3 times LOGO BIL L To switch between uppercase or lowercase letters Pressing the button will change the letter input to uppercase or lowercase alternately 1 Press 2 2 times LOGO B 2 Press 4 3 times LOGO B I 3 Press LOGO B i 4 Press 5 3 times LOGO Bi l To correct a mistake Press or to move the cursor to the incorrect character and make the correction L ...

Page 15: ... NO 2 Enter your fax number up to 20 digits L To enter a press L To enter a space press L To enter a hyphen press R L To erase a number press STOP 3 SET 4 Press MENU to exit To correct a mistake Press or to move the cursor to the incorrect number and make the correction L To erase all of the numbers press and hold STOP SET R STOP MENU ...

Page 16: ...isplay the desired item i MENU 3 L If you do not need to edit the name skip to step 5 4 Edit the name For further details see the storing procedure on page 16 5 SET L If you do not need to edit the telephone number skip to step 7 6 Edit the telephone number For further details see the storing procedure on page 16 7 SET 3 4 Erasing a stored item 3 4 1 Erasing a specific item 1 PHONEBOOK 2 Press A o...

Page 17: ...207 FAX ring count feature 06 on page 35 and TEL FAX ring count feature 78 on page 40 For KX FP218 TAM FAX ring count feature 06 on page 35 FAX ring count feature 06 on page 35 and TEL FAX ring count feature 78 on page 40 L The name display service may not be available in some areas For further information please contact your telephone company 3 6 1 How Caller ID is displayed The calling party s n...

Page 18: ...CALLER ID 2 Press B to search from the recently received caller information L If you press A the display order will be reversed 3 Press MONITOR KX FP207 SP PHONE KX FP218 or lift the handset to return the call L To send a fax insert the document FACE DOWN and press FAX START To change the way caller information is displayed Press CALLER ID repeatedly after step 2 Example SAM LEE 11 20 20 Jul b 134...

Page 19: ...18 or lift the handset to call back the edited number L The unit will start dialling automatically L To send a fax insert the document FACE DOWN and press FAX START L To store the number in the phonebook follow from step 3 of the storing procedure below 3 9 Erasing caller information 3 9 1 Erasing all caller information 1 Press MENU repeatedly to display CALLER SETUP i SET L CALL LIST ERASE will b...

Page 20: ...ert the first 10 pages of the document Add the other pages up to 10 at a time on top of the previously inserted pages while the last page is being fed into the unit Pre dialling a fax number 1 Enter the fax number 2 Insert the document 3 FAX START Sending from memory Quick scan feature To use this feature activate feature 34 page 38 beforehand 1 Insert the document 2 Enter the fax number i FAX STA...

Page 21: ...ne to copy the original document onto A4 or letter sized paper then sending the copied document 4 3 Sending a fax using the phonebook and one touch dial Before using this feature store the desired names and telephone numbers into the phonebook page 16 and one touch dial page 16 1 Adjust the width of the document guides to fit the actual size of the document 2 Insert the document up to 10 pages FAC...

Page 22: ...ress A or B repeatedly to display the desired item you want to erase L To cancel erasing press STOP 4 SET i SET i STOP 4 4 4 Sending the same document to pre programmed parties 1 Insert the document FACE DOWN 2 If necessary press A or B repeatedly to select the desired resolution page 20 3 BROADCAST L After transmission the unit will automatically print a report Broadcast sending report Note L If ...

Page 23: ...ically If a fax calling tone is detected the fax machine will receive the fax automatically 4 5 2 Use only as a fax FAX ONLY mode Your situation You have a separate telephone line just for faxes Setup Set the fax machine to FAX ONLY mode page 25 by pressing AUTO ANSWER repeatedly L The AUTO ANSWER indicator turns ON Note L Make sure feature 77 is set to FAX ONLY page 40 beforehand KX FP218 only Ho...

Page 24: ...d the fax machine will receive a fax automatically 4 6 Receiving a fax manually Auto answer OFF Note L By default the unit reduces the size of the received document to 92 when printing See feature 36 on page 38 for details 4 6 1 Activating TEL mode 1 Make sure feature 73 is set to TEL page 40 beforehand 2 Press AUTO ANSWER repeatedly to display the TEL MODE L The AUTO ANSWER indicator turns OFF No...

Page 25: ... ring You may answer the call L Callers will hear a ring back tone different from the one generated by the telephone company L An extension telephone will not ring at this time To answer the call with the extension telephone lift the handset and press 0 default auto disconnection code while the fax machine is ringing B If you do not answer the call the unit will activate the fax function L Some fa...

Page 26: ...ering machine may continue answering the call depending on the type of an extension telephone Press STOP on the fax machine to talk with the calling party Receiving a voice message and fax document in one call The caller can leave a voice message and send a fax document during the same call Inform the caller of the following procedure beforehand 1 The caller calls your unit L The answering machine...

Page 27: ...e will receive a fax automatically Receiving a voice message and fax document in one call The caller can leave a voice message and send a fax document during the same call Inform the caller of the following procedure beforehand 1 The caller calls your unit L The answering device will answer the call 2 The caller can leave a message after the greeting message 3 The caller presses 9 pre selected fax...

Page 28: ... do not wish to receive faxes from them 1 Press MENU repeatedly to display JUNK FAX PROH 2 Press repeatedly to display JUNK LIST SET i SET 3 Press A or B repeatedly to display the item you wish to prevent the fax reception from i SET 4 Press STOP to exit the program To display the junk fax prohibitor list 1 Press MENU repeatedly to display JUNK FAX PROH 2 Press repeatedly to display JUNK LIST DISP...

Page 29: ...e default setting is OFF L If the document exceeds the memory capacity copying of the exceeded document will be cancelled and this feature will be turned OFF automatically To stop copying Press STOP 5 1 1 More copying features To enlarge a document 1 Insert the document 2 COPY i 3 Press A repeatedly to select 150 or 200 i START L The unit will enlarge the centre of the upper part of the document T...

Page 30: ...e Making 2 copies of a 4 page original document Note L The unit will store the documents into memory while collating the copies If memory becomes full while storing the unit will only print out the stored pages Collated pages Uncollated pages 4 3 2 1 4 3 2 1 1 1 2 2 3 3 4 4 ...

Page 31: ... If you change the setting to 60 seconds we recommend that you tell the caller in your TAM FAX greeting message to press 9 before starting the fax transmission If you change the setting from 60 seconds to 16 seconds your current greeting message will be deleted The pre recorded greeting message will be played when a call is received L If you change the maximum recording time of incoming messages t...

Page 32: ...temporarily Press STOP L If you press PLAYBACK within 1 minute the unit will resume playing the rest of the messages Voice time day stamp During playback the unit will announce the day of the week and time that each message was recorded If you subscribe to Caller ID service During playback you can call back the displayed name or number using the unit 1 Press MENU during playback L The unit stops p...

Page 33: ... a remote command within 10 seconds Note L When you press a key press firmly 1 If pressed within the first 5 seconds of a message the previous message will be played 2 To resume operation press a command key within 10 seconds otherwise the marker message recording will start Recording a marker message After playing back the messages you can leave an additional message 1 Wait for 3 beeps indicating...

Page 34: ...atures Features Summary 7 1 Programming 1 MENU 2 Press and the 2 digit code 3 Press the desired command to display the desired setting L This step may be slightly different depending on the feature 4 SET 5 To exit programming press MENU MENU SET ...

Page 35: ... will be printed only when a fax transmission fails Changing the ring count in FAX ONLY mode KX FP207 only 0 6 1 1 2 2 default 3 3 4 4 5 5 6 6 7 7 8 8 9 9 Changing the ring count in FAX ONLY mode KX FP218 only 0 6 1 1 2 2 default 3 3 4 4 5 5 6 6 7 7 8 8 9 9 Note L Set feature 77 to FAX ONLY page 40 beforehand Changing the ring count in TAM FAX mode KX FP218 only 0 6 0 TOLL SAVER 2 2 default 3 3 4 ...

Page 36: ...eration ID L To deactivate the remote operation feature press 3 SET i MENU Setting the dialling mode 1 3 If you cannot make calls change this setting according to your telephone line service 1 PULSE For rotary pulse dial service 2 TONE default For tone dial service Setting the ringer tone 1 7 1 TONE 1 default 2 TONE 2 3 TONE 3 Feature Feature code Selection ...

Page 37: ...d the document Note L Calling charges may be higher than usual Sending a fax at a specified time 2 5 This feature allows you to take advantage of low cost calling hours offered by your telephone company This feature can be set up to 24 hours in advance of the desired time 0 OFF default 1 ON To send a document 1 Insert the document 2 If necessary press A or B repeatedly to select the desired resolu...

Page 38: ...ing paper the unit can reduce the document and print it Select the desired reduction rate 1 72 2 86 3 92 default 4 100 Setting Recording paper size Original document size 100 A4 Letter 92 default A4 A4 86 A4 A4 72 A4 Legal Note L The information of the sending party is printed on the top of each page Therefore even if the original document is the same size as the recording paper the document will ...

Page 39: ...M FAX mode page 26 activate this feature and program the code 0 OFF 1 ON default 1 MENU i 4 9 2 Press 1 to select ON i SET 3 Enter your code from 2 to 4 digits using 0 9 and L The default code is 0 4 SET i MENU Changing the recording time for your TAM FAX greeting message KX FP218 only 5 4 1 16s default Maximum recording time is 16 seconds 2 60s Maximum recording time is 60 seconds See page 31 for...

Page 40: ...u to hear connecting tones fax tone ring back tone and busy tone You can use those tones to confirm the status of the other party s machine 0 OFF Deactivates this feature 1 ON default You will hear connecting tones Note L If the ring back tone continues the other party s machine may not be a fax machine or may have run out of paper Check with the other party L The connecting tone volume cannot be ...

Page 41: ...vanced features to their default settings 8 0 0 NO default 1 YES To reset the advanced features 1 MENU i 8 0 2 Press 1 to select YES i SET i SET i MENU L The ECM setting feature 68 on page 39 will not be reset Feature Feature code Selection ...

Page 42: ...arty s fax machine Check with the other party JUNK FAX PROH REJECT L The junk fax prohibitor feature of this unit rejected fax reception MEMORY FULL L The memory is full of received documents due to a lack of recording paper a lack of ink film or a recording paper jam Install paper page 11 install ink film page 8 or remove the jammed paper page 50 NO DOCUMENT L The document was not fed into the un...

Page 43: ...are stored in memory due to a lack of recording paper a lack of ink film or a recording paper jam Install paper page 11 install ink film page 8 or remove the jammed paper page 50 You will lose all faxes in memory if the power is removed Check with power connected FAX MEMORY FULL L The memory is full of received documents due to a lack of recording paper a lack of ink film or a recording paper jam ...

Page 44: ...e other party s fax machine is busy or has run out of recording paper Try again REMOVE DOCUMENT L The document is jammed Remove the jammed document page 51 L Press STOP to eject the jammed paper TRANSMIT ERROR L A transmission error occurred Try again L If you send a fax overseas try the following Use the overseas transmission mode feature 23 on page 37 Add 2 pauses at the end of the telephone num...

Page 45: ... a full page L Turn OFF the following features Sending report feature 04 on page 35 Journal report feature 22 on page 37 Caller ID list feature 26 on page 37 During programming I cannot enter the code or ID number L All or part of the numbers are the same as another code or ID Change the number remote operation ID feature 11 on page 36 fax activation code feature 41 on page 38 auto disconnection f...

Page 46: ...ar there may be something wrong with the other party s machine L Adjust the scan contrast using feature 58 page 39 The other party complains that black lines white lines or smudges appear on their received document L The scanner glass or rollers are dirty with correction fluid etc Clean them page 52 Please do not insert a document before correction fluid has dried completely Documents frequently m...

Page 47: ...activated during fax reception Connect the unit to a line that does not have these services I cannot receive documents by pressing 9 on an extension telephone L You must set remote fax activation to ON feature 41 on page 38 beforehand L You may have changed the remote fax activation code from 9 default setting Verify the remote fax activation code feature 41 on page 38 L The memory is full of rece...

Page 48: ...frequently misfeed L Clean the document feeder rollers recording paper feeder and rubber flap page 52 Problem Cause Solution I cannot receive documents automatically L Your greeting message on the answering machine is too long Shorten the message Record a message up to 10 seconds long L The answering machine rings too many times Set to 1 or 2 rings I cannot receive voice messages L Check if the an...

Page 49: ...tored L If any fax documents are stored in the memory they will be lost When power is restored a power down report will be printed stating which documents in memory have been erased The other party complains that they cannot leave a voice message L The recording time is set to GREETING ONLY Select 1 MINUTE 2 MINUTES or 3 MINUTES feature 10 on page 35 L The memory is full Erase unnecessary messages...

Page 50: ...ay beforehand otherwise the paper may misfeed or jam 1 Open the front cover 1 push the green button 2 then open the back cover 3 2 Remove the jammed recording paper 4 3 Turn the blue gear 5 in the direction of the arrow until the ink film is tight 6 and at least one layer of ink film is wrapped around the blue core 7 2 1 3 4 Correct Incorrect 5 6 7 Tight 1 turn No ink film is wrapped around the bl...

Page 51: ... 11 9 1 2 When the recording paper was not fed into the unit properly The display will show the following CHECK PAPER Remove the recording paper and straighten Insert the paper then press SET to clear the message 9 2 Document jams 1 Open the front cover Remove the jammed document carefully 1 2 Close the front cover securely Note L Do not pull out the jammed paper forcibly before opening the front ...

Page 52: ...een button 2 then open the back cover 3 3 Clean the document feeder rollers 4 and rubber flap 5 with a cloth moistened with isopropyl rubbing alcohol and let all parts dry thoroughly Clean the scanner glass 6 with a soft dry cloth Caution L Do not use paper products such as paper towels or tissues 4 Clean the recording paper feeder roller 7 with a cloth moistened with isopropyl rubbing alcohol and...

Page 53: ...ne line cord 2 Open the front cover 1 push the green button 2 then open the back cover 3 3 Remove the ink film 4 4 Clean the thermal head 5 with a cloth moistened with isopropyl rubbing alcohol and let it dry thoroughly Caution L To prevent a malfunction due to static electricity do not use a dry cloth and do not touch the thermal head directly 5 Re install the ink film and close the covers see st...

Page 54: ... width A4 202 mm Transmission speed 1 KX FP207 Approx 12 s page ECM MMR 2 KX FP218 Approx 8 s page ECM MMR 2 Scanning density Horizontal 8 pels mm Vertical 3 85 lines mm standard resolution 7 7 lines mm fine photo resolution 15 4 lines mm super fine resolution Photo resolution 64 levels Scanner type Contact Image Sensor Printer type Thermal Transfer on plain paper Data compression system Modified ...

Page 55: ...r weight 64 g m2 to 80 g m2 Note for recording paper L Do not use the following types of paper Paper with cotton and or fibre content that is over 20 such as letterhead paper or paper used for resumes Extremely smooth or shiny paper or paper that is highly textured Coated damaged or wrinkled paper Paper with foreign objects attached such as tabs or staples Paper which has dust lint or oil stains P...

Page 56: ...ure 10 35 Character entry 14 Cleaning 52 Connecting tone Feature 76 40 Connections 12 Copy 29 Collation 29 Enlarge Reduce 29 D Date and time Feature 01 13 Delayed transmission Feature 25 37 Dialling mode Feature 13 36 Display Contrast Feature 39 38 Error messages 43 Document size 21 E ECM selection Feature 68 39 Error messages 42 Extension telephone 25 F Fax activation code Feature 41 38 Fax numbe...

Page 57: ...LY Feature 06 35 TAM FAX Feature 06 26 35 TEL FAX Feature 78 40 Ringer tone Feature 17 36 S Scan contrast Feature 58 39 Sending faxes Broadcast 22 From memory 20 Manually 20 One touch 21 Phonebook 21 Sending report Feature 04 20 SETUP LIST 54 Storing Broadcast 22 One touch 16 Phonebook 16 T TAM FAX mode 23 26 TEL FAX ring count Feature 78 40 TEL mode 23 24 Toll saver 26 V Voice guidance Feature 47...

Page 58: ...58 Notes ...

Page 59: ...59 Notes ...

Page 60: ...606CJO PFQX2515ZA CM0606CJ0 0682 Panasonic Communications Malaysia Sdn Bhd PLO No 1 Kawasan Perindustrian Senai KB No 104 81400 Senai Negeri Johor Darul Ta zim Malaysia Manufacturer Global web site http panasonic net ...

Reviews: