9. Programmable Features
76
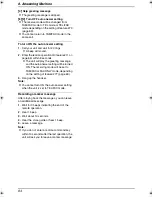
6.
Select
“
On
”
or
“
Off
”
(default), then press
{>}
.
7.
Press
{ih}
.
Note:
L
When the night mode is turned ON,
“
[N]
”
is
displayed.
L
Set the receiving mode to TEL mode.
Setting the start and end time for night
mode
1.
Press
{j
/OK
}
.
2.
Select
“
Handset Setup
”
, then press
{>}
.
3.
Select
“
Ringer Setup
”
, then press
{>}
.
4.
Select
“
Night Mode
”
, then press
{>}
.
5.
Select
“
Start/End
”
, then press
{>}
.
6.
Enter the desired hour and minute you wish
to start this feature by selecting 2 digits for
each.
L
If you use 12-hour time entry, select
“
AM
”
or
“
PM
”
by pressing
{*}
repeatedly
before entering the time.
7.
Enter the desired hour and minute you wish
to end this feature by selecting 2 digits for
each.
L
If you use 12-hour time entry, select
“
AM
”
or
“
PM
”
by pressing
{*}
repeatedly
before entering the time.
8.
Press
{j
/OK
}
.
9.
Press
{ih}
.
Setting the ring delay for night mode
This setting allows the handset to ring during
night mode if the caller waits long enough. After
the selected delay time has passed, the handset
will ring. If you select
“
No Ringing
”
, the
handset will not ring during night mode.
1.
Press
{j
/OK
}
.
2.
Select
“
Handset Setup
”
, then press
{>}
.
3.
Select
“
Ringer Setup
”
, then press
{>}
.
4.
Select
“
Night Mode
”
, then press
{>}
.
5.
Select
“
Ring Delay
”
, then press
{>}
.
6.
Select
“
30 sec.
”
or
“
60 sec.
”
, then press
{>}
.
7.
Press
{ih}
.
Note:
L
Delayed ring will not sound if this feature is
set either to
“
90 sec.
”
or
“
120 sec.
”
. This
is because the base unit detects an incoming
call prior to handset.
Selecting categories to bypass night mode
1.
Press
{j
/OK
}
.
2.
Select
“
Handset Setup
”
, then press
{>}
.
3.
Select
“
Ringer Setup
”
, then press
{>}
.
4.
Select
“
Night Mode
”
, then press
{>}
.
5.
Select
“
Select Category
”
, then press
{>}
.
6.
Press the desired category numbers, then
press
{j
/OK
}
.
L
The selected category number will flash.
L
To cancel a selected category number,
press the number again. The number will
stop flashing.
7.
Press
{ih}
.
9.5.5 Display setup
Selecting the standby mode display
“
Base Number
”
: The current base unit number
is displayed.
“
Handset Number
”
: The current handset
number is displayed.
“
Off
”
(default): Only the current date and time
are displayed.
1.
Press
{j
/OK
}
.
2.
Select
“
Handset Setup
”
, then press
{>}
.
3.
Select
“
Display Setup
”
, then press
{>}
.
4.
Select
“
Standby Display
”
, then press
{>}
.
5.
Select the desired setting, then press
{>}
.
6.
Press
{ih}
.
Note:
L
If
“
Base Number
”
is selected and the
current base unit number is 2,
“
-2-
”
is
displayed.
L
If
“
Handset Number
”
is selected and the
current handset number is 2,
“
[2]
”
is
displayed.
Changing the display language
1.
Press
{j
/OK
}
.
2.
Select
“
Handset Setup
”
, then press
{>}
.
3.
Select
“
Display Setup
”
, then press
{>}
.
4.
Select
“
Select Language
”
, then press
{>}
.
5.
Select the desired language, then press
{>}
.
6.
Press
{ih}
.
Note:
L
If you select a language you cannot read,
press
{ih}
,
{j
/OK
}
, press
{e}
2 times,
FC238FX-PFQX2261ZA_en.book Page 76 Monday, June 20, 2005 1:30 PM
Summary of Contents for KX-FC238FX
Page 112: ...110 Notes ...
Page 113: ...111 Notes ...


