background image

Thank you for purchasing this Panasonic product.


This manual is intended for products manufactured from May 2013 and beyond.


Before operating this product, please read the instructions carefully and save this manual 

for future use.


Before using this product, be sure to read “Read this first!” (

 pages 3 to 8).

Model No.

  ET-YFB100G

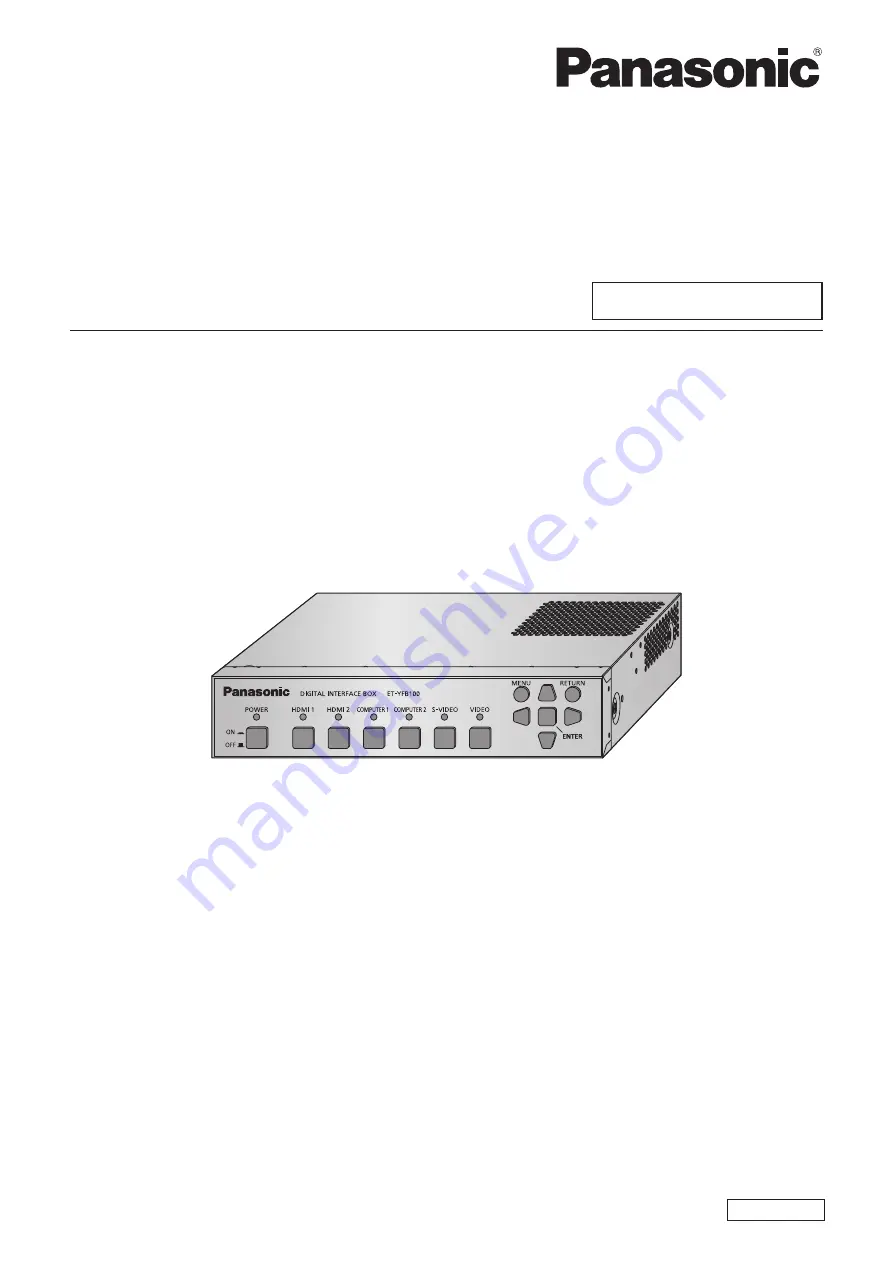
Digital Interface Box  

Commercial Use

Operating Instructions

Functional Manual

ENGLISH

TQBH0279-2

Summary of Contents for ET-YFB100G

Page 1: ...2013 and beyond Before operating this product please read the instructions carefully and save this manual for future use Before using this product be sure to read Read this first pages 3 to 8 Model No ET YFB100G Digital Interface Box Commercial Use Operating Instructions Functional Manual ENGLISH TQBH0279 2 ...

Page 2: ...h is manufactured and sold by Ricoh Company Ltd Other names company names or product names used in these operating instructions are the trademarks or registered trademarks of their respective holders Please note that the operating instructions do not include the and TM symbols Illustrations in these operating instructions Note that illustrations of the digital interface box and screens may differ ...

Page 3: ...se the accessory cord in such situations fire may result CAUTION To assure continued compliance follow the attached installation instructions which include using the provided power cord and shielded interface cables when connecting to computer or peripheral device If you use serial port to connect PC for external control of projector you must use a commercial RS 232C serial interface cable with fe...

Page 4: ...d and used in accordance with the instructions may cause harmful interference to radio communications However there is no guarantee that interference will not occur in a particular installation If this equipment does cause harmful interference to radio or television reception which can be determined by turning the equipment off and on the user is encouraged to try to correct the interference by on...

Page 5: ...ectrical shock if the cut off plug is inserted into any 13 amp socket If a new plug is to be fitted please observe the wiring code as shown below If in any doubt please consult a qualified electrician WARNING THIS APPLIANCE MUST BE EARTHED IMPORTANT The wires in this mains lead are coloured in accordance with the following code Green and Yellow Earth Blue Neutral Brown Live As the colours of the w...

Page 6: ...t place heavy objects on top of it or wrap it into a bundle Ask an Authorized Service Center to carry out any repairs to the power cord or AC adaptor that might be necessary Completely insert the power plug into the wall outlet the power connector into the AC adaptor terminal and the AC adaptor plug into the device terminal If the plug is not inserted correctly electric shocks or overheating will ...

Page 7: ...remodel or disassemble the device High voltages can cause fire or electric shocks z z For any inspection adjustment and repair work please contact an Authorized Service Center Do not allow metal objects flammable objects or liquids to enter inside of the device Do not allow the device to get wet Doing so may cause short circuits or overheating and result in fire electric shock or malfunction of th...

Page 8: ...vice in a place which is not strong enough to take its full weight or on top of a surface which is sloped or unstable Failure to observe this will cause the device to fall down or tip over the device and severe injury or damage could result If installing the device to the underside of a table be careful to choose a location where it will not be susceptible to impact from legs etc Mount screws bein...

Page 9: ...onnected to a DIGITAL LINK compatible projector The light weight and compact size body is achieved that can be easily attached to the rack or the underside of the tabletop of the meeting desk Both the projector and the interface box can be operated by using the remote control of the projector 1 Even the interface box is installed at a separate place from the viewing location switching the input si...

Page 10: ... operation 26 Switching the input 26 Displaying the On screen menu main menu 26 Settings On screen menu navigation 27 Navigating through the menu 27 Main menu 28 Sub menu 28 INPUT SELECT menu 29 Switching the input 29 PICTURE menu 30 SYSTEM SELECTOR 30 CLAMP POSITION 30 DIGITAL CINEMA REALITY 31 POSITION menu 32 SHIFT 32 CLOCK PHASE 32 OVER SCAN 32 ASPECT 33 INPUT RESOLUTION 34 LANGUAGE menu 35 Ch...

Page 11: ...tistic occurs often take a sufficient anti static measure before start using z z When the interface box is used at a location where static electricity occurs often such as on a carpet communications of the DIGITAL LINK and the wired LAN are disconnected more often In that case remove static electricity and the noise source that may cause problems with an antistatic mat and re connect the DIGITAL L...

Page 12: ...3 8FJK Set leg 4 TBLX3014 Set leg screw 4 Mounting bracket screw for securing AC adaptor 1 XSB3 6FJK Mounting bracket for securing AC adaptor 1 TENC5824 Attention z z After unpacking the interface box discard the power cord cap and packaging material properly z z For missing accessories consult your dealer z z Store small parts in an appropriate manner and keep them away from small children Note z...

Page 13: ... the desk 2 3 1 4 3 6 4 5 7 2 Front and lateral sides Rear and bottom sides About your interface box Control panel 4 2 3 1 5 6 7 8 9 10 11 1 Power indicator Turns to green when the power is on Lights off when the power is turned off 2 POWER button Turns on off the power 3 Input terminal indicator Turns to green when it is selected 4 HDMI 1 button Switches the input to HDMI 1 5 HDMI 2 button Switch...

Page 14: ...terface box can be connected to the projector compatible to DIGITAL LINK or the twisted pair cable receiver For twisted pair cable receivers of other manufacturers of which the operation has been verified with the DIGITAL LINK compatible projector and the digital interface box refer to Panasonic website http panasonic net avc projector Note that the verification for devices of other manufacturers ...

Page 15: ...ount the interface box using brackets Right side Left side Rack mount screw hole Table underside mount screw hole Torque 0 8 0 2 N m Supplied screws Flat head Phillips screw M3 Mounting on the rack 1 Attach the supplied rack mounting bracket z z Fix the rack mounting bracket to the rack mount screw holes on both sides of the interface box with supplied flat head Phillips screws 3 pcs Securely tigh...

Page 16: ...box is attached to the table underside excessive force may be applied to the mounting section on the table underside which may cause damage of the table or deformation of the interface box 3 Fix to the underside of the tabletop by using the commercially available screws or wood screws 4 pcs z z Check that the tabletop is strong enough to bear the weight of the interface box z z Securely tighten th...

Page 17: ...ble or the shelf z z When inverting the interface box pay close attention not to drop or tumble z z Mount the interface box without applying excessive force so the buttons indicators and connecting terminals do not get damaged z z Pay attention to tips of the screws at the bottom side of the interface box for not to get hurt z z Be careful that the weights of the cables and the AC adaptors connect...

Page 18: ...the screen to randomly wobble or wafture In this case a time base corrector TBC must be connected z z The interface box accepts video signals S video signals analog RGB signals synchronous signals are TTL level and digital signals z z Some computer models are not compatible with the interface box z z Refer to List of compatible signals page 48 for the input image signals that can be used for the i...

Page 19: ...e HDMI standard is used the image may be interrupted or may not be displayed properly z z The interface box can connect to an external device which has a DVI terminal with the HDMI DVI conversion cable However troubles may occur in some devices such as the images are not properly displayed z z AUDIO IN SELECT setting is not correct troubles such as no sound is output may occur page 38 z z The inte...

Page 20: ...th each device and commercially available shielded cables z z The positions of the SERIAL IN and LAN terminals are close each other Therefore when connecting cables to both terminals removing the cable connected to the LAN terminal may be difficult When removing the cable connected to the LAN terminal remove the cable connected to the SERIAL IN terminal beforehand Note z z When connecting to the S...

Page 21: ...If the work is not properly conducted the cable transmission characteristics do not meet and the images and sounds may be interrupted or become unstable z z Use the cable that conforms with the following conditions Compatible to the CAT5e or a higher standard Shield type including the connector Straight wire connection Single wire z z When installing the cable confirm that the cable specification ...

Page 22: ... the operation has been verified with the digital interface box refer to Panasonic website http panasonic net avc projector Note that the verification for devices of other manufacturers has been made for the items set by Panasonic Corporation and not all the operations have been verified For operation or performance problems caused by the devices of other manufacturers contact the respective manuf...

Page 23: ...ace box i Hook the nails a of the mounting bracket for securing AC adaptor to two holes at the bottom surface of the interface box Turn the AC adaptor plug vertically or horizontally according to the condition ii Attach the mounting bracket as to cover the AC adaptor plug and fix with the supplied mounting bracket screw for securing AC adaptor Securely tighten the screws a i ii Connecting the plug...

Page 24: ...ower 1 Connect the power plug to an outlet 2 Press the POWER button to turn on the power z z Confirm that the power indicator is lighted on in green 3RZHU LQGLFDWRU 32 5 EXWWRQ Note z z If connecting a sound system to the AUDIO OUT terminal you may hear noise from the external sound system when you turned off on the interface box In this case turn off on the interface box with the sound system tur...

Page 25: ...r to the operating instructions of the external devices 2 Press the DIGITAL LINK button on the remote control of the projector or press the input selection button of the projector body to select the DIGITAL LINK input z z The operation method may vary depending on the projector 3 Press the HDMI 1 button the HDMI 2 button the COMPUTER 1 button the COMPUTER 2 button the S VIDEO button or the VIDEO b...

Page 26: ...or changes to the DIGITAL LINK and the input select menu of the interface box is displayed 2 Press on the remote control to select the input and press the enter button z z This operation can be also performed by using the DIGITAL LINK button on the remote control The setting will change as follows each time you press the button HDMI 1 HDMI 2 COMPUTER 1 VIDEO S VIDEO COMPUTER 2 Displaying the On sc...

Page 27: ...utton is pressed when the menu screen is displayed the screen returns to the previous screen z z The remote control may not have the return button depending on the DIGITAL LINK compatible projector model connected to the interface box z z Some items cannot be adjusted and some functions cannot be used depending on the signal to be input to the interface box The menu items that cannot be adjusted o...

Page 28: ...tem is displayed and you can set and adjust items in the sub menu INPUT SELECT Details page 29 PICTURE Sub menu item Factory default Page SYSTEM SELECTOR AUTO 30 CLAMP POSITION 24 1 30 DIGITAL CINEMA REALITY ON 31 1 Depends on the input signal Note z z The factory default settings may vary depending on the picture mode z z Sub menu items and factory default settings are displayed differently depen...

Page 29: ...tion of the menu screen Switching the input An input terminal for the image can be selected z z Press to select an input terminal and press the ENTER button to set HDMI 1 Switches to HDMI 1 input HDMI 2 Switches to HDMI 2 input COMPUTER 1 Switches to COMPUTER 1 input COMPUTER 2 Switches to COMPUTER 2 input S VIDEO Switches to S VIDEO input VIDEO Switches to VIDEO input ...

Page 30: ...r movie based input signals Select from AUTO RGB or YPBPR Note z z Refer to List of compatible signals page 48 for compatible signals When using HDMI IN 1 terminal or HDMI IN 2 terminal z zDuring 480i 576i 480p or 576p signal input Select from AUTO RGB or YCBCR z zWhen using other movie based input signals Select from AUTO RGB or YPBPR Note z z Refer to List of compatible signals page 48 for compa...

Page 31: ... 625i 576i 1125 1080 60i 1125 1080 50i S video signal and video signal 1 Press to select DIGITAL CINEMA REALITY 2 Press or the ENTER button z z The DIGITAL CINEMA REALITY individual adjustment screen is displayed 3 Press to switch DIGITAL CINEMA REALITY z z The setting will change as follows each time you press the button ON OFF ON Enables DIGITAL CINEMA REALITY OFF Disables DIGITAL CINEMA REALITY...

Page 32: ...lines 1 Press to select CLOCK PHASE 2 Press or the ENTER button z z The CLOCK PHASE individual adjustment screen is displayed 3 Press to adjust z z Adjustment value will change between 0 and 31 Adjust so that the amount of interference is at a minimum Note z z Optimal value may not be achieved if the output from the input computer is unstable z z When dot clock frequency of projecting signals is 1...

Page 33: ...box in places such as cafes or hotels to display programs for a commercial purpose or for public presentation note that changing the aspect ratio to change the screen pictures may be an infringement of the rights of the original copyright owner for that program under copyright protection laws z z In AUTO setting when an identification signal for the aspect ratio is included in the input signal the...

Page 34: ...K terminal Input signal Projection screen INPUT RESOLUTION You can adjust to achieve an optimal image when there is a flickering image or smeared outlines 1 Press to select INPUT RESOLUTION 2 Press the ENTER button z z The INPUT RESOLUTION screen is displayed 3 Press to select TOTAL DOTS DISPLAY DOTS TOTAL LINES or DISPLAY LINES then press to adjust it z z Values corresponding to the input signal ...

Page 35: ...You can select the language of the on screen display z z Press to select a language and press the ENTER button to set PICTURE INPUT SELECT ET YFB100 DIGITAL INTERFACE BOX POSITION LANGUAGE OPTION FRANÇAIS ENGLISH 中文 日本語 z z Various menus settings adjustment screens control button names etc are displayed in the selected language z z French English Chinese and Japanese can be selected LANGUAGE menu ...

Page 36: ...displayed 3 Press to select an item and press to change the setting CLOSED CAPTION Sets whether a closed caption is displayed or not z z The setting will change as follows each time you press the button OFF ON OFF Does not display a closed caption ON Displays a closed caption MODE Sets the closed caption mode z z The setting will change as follows each time you press the button CC1 CC2 CC4 CC3 CC1...

Page 37: ... to the selected video input terminal With this function the power consumption of the interface box and the projector can be reduced 1 Press to select NO SIGNAL SLEEP 2 Press to switch NO SIGNAL SLEEP z z The setting will change as follows each time you press the button 10MIN 20MIN OFF 30MIN 10MIN Stops output of the signal when no signal is input for 10 minutes 20MIN Stops output of the signal wh...

Page 38: ...OUT SELECT in step 3 5 Press to switch AUDIO OUT SELECT DIGITAL LINK AUDIO OUT OFF DIGITAL LINK The sound is output to the DIGITAL LINK terminal AUDIO OUT The sound is output to the AUDIO OUT terminal OFF The sound is not output AUDIO IN SELECT Sets the audio input for each video input terminal 4 Select AUDIO IN SELECT in step 3 5 Press the ENTER button z z The AUDIO IN SELECT screen is displayed ...

Page 39: ...esolution automatically 1920x1200 Outputs in WUXGA 1 920 x 1 200 dot standard 1920x1080 Outputs in 1080p 1 920 x 1 080 dot standard 1280x800 Outputs in WXGA 1 280 x 800 dot standard 1024x768 Outputs in XGA 1 024 x 768 dot standard 4 Press the ENTER button Note z z When set to AUTO the output resolution varies depending on the input signal 720 1080 signals Outputs the image as it is 480 576 signals...

Page 40: ... and then turn on the POWER button of the interface box 1 Press to select INITIALIZE ALL 2 Press the ENTER button z z After data has been initialized the unit will need to be restarted is displayed 3 Press to select OK 4 Press the ENTER button z z Initialization has been completed Please restart the digital interface box is displayed 5 Press the POWER button to turn off the power 6 Press the POWER...

Page 41: ...loth z z When removing dirt and dust do not drop them inside the interface box z z If the dirt is persistent soak the cloth with water and squeeze firmly Wipe with the wet cloth and finish with a dry cloth z z When cleaning do not use benzene thinner solvent such as alcohol or household cleaners When these materials are used for cleaning ripping of the paint or discoloration may occur z z When usi...

Page 42: ... LINK connected The buttons on the control panel do not operate z z Isn t the external control enabled 47 The image does not display correctly z z Is the SYSTEM SELECTOR selection set correctly 30 z z Is there a problem with the video tape or other image sources z z Is a signal which is not compatible with the interface box being input 48 Image from a computer does not appear z z Is the cable too ...

Page 43: ...tire screen when HDMI signals are input from a computer Perform the following two steps z z Adjust the aspect ratio of screens output by a computer to suit projector pixels aspect ratio Example If projector produces images of 1024 dots x 768 dots 4 3 set computer resolution to 800 x 600 4 3 z z Set Aspect to Full page 33 ...

Page 44: ...ing Instructions of the using projector The interface box cannot be controlled from this terminal Connection DIGITAL LINK compatible projector The twisted pair cable receiver of other manufacturer Names of the DIGITAL LINK terminals may be different for each manufacturer Not DIGITAL LINK compatible projector Control computer Hub Control computer Hub When connecting to the DIGITAL LINK compatible p...

Page 45: ...UHFHLYHU RI RWKHU PDQXIDFWXUHU 1DPHV RI WKH 7 1 WHUPLQDOV PD EH GLIIHUHQW IRU HDFK PDQXIDFWXUHU 1RW 7 1 FRPSDWLEOH SURMHFWRU RPSXWHU KHQ FRQQHFWLQJ WR WKH 7 1 FRPSDWLEOH SURMHFWRU KHQ FRQQHFWLQJ WR WKH SURMHFWRU WKDW LV QRW 7 1 FRPSDWLEOH 6XE SLQ PDOH 6XE SLQ IHPDOH 6XE SLQ PDOH RPPXQLFDWLRQ FDEOH RPSXWHU 6XE SLQ PDOH RPPXQLFDWLRQ FDEOH Pin assignments and signal names D Sub 9 pin female Outside v...

Page 46: ... 3 4 NC NC 4 5 5 6 NC NC 6 7 7 8 8 9 NC NC 9 Control commands When controlling the projector from a computer the following commands are available Projector control command Command Control contents Parameter Remarks IIS INPUT selection DL1 VID DL1 SVD DL1 PC1 DL1 PC2 DL1 HD1 DL1 HD2 VIDEO S VIDEO COMPUTER1 COMPUTER2 HDMI1 HDMI2 Note z z The control commands are available only when the DIGITAL LINK ...

Page 47: ... Remote control panel in another location Pin assignments and signal names D Sub 9 pin Outside view Pin No Signal name Open H Short L 1 5 6 9 1 GND GND 2 3 HDMI 1 Other HDMI 1 4 HDMI 2 Other HDMI 2 5 COMPUTER 1 Other COMPUTER 1 6 COMPUTER 2 Other COMPUTER 2 7 VIDEO Other VIDEO 8 S VIDEO Other S VIDEO 9 Enable disable Front panel control External control Attention z z When controlling make sure to ...

Page 48: ...40 x 400 37 9 85 1 31 5 R H VGA70 640 x 400 31 5 70 1 25 2 R H VGA VGA60 640 x 480 31 5 59 9 25 2 R H 3 3 VGA67 640 x 480 35 0 66 7 30 2 R H VGA73 640 x 480 37 9 72 8 31 5 R H 3 3 VGA75 640 x 480 37 5 75 0 31 5 R H 3 3 VGA85 640 x 480 43 3 85 0 36 0 R H SVGA SVGA56 800 x 600 35 2 56 3 36 0 R H 3 3 SVGA60 800 x 600 37 9 60 3 40 0 R H 3 3 SVGA72 800 x 600 48 1 72 2 50 0 R H 3 3 SVGA75 800 x 600 46 9...

Page 49: ... 0 R H 3 3 1 Signals that show formats are as follows V Video S S video R RGB Y YCBCR YPBPR H HDMI 2 VESA CVT RB Reduced Blanking compatible Note z z The i at the end of the resolution indicates an interlaced signal z z When interlaced signals are connected flickering may occur on the projected image Corresponding 3D signals list The 3D signals corresponding to the interface box are the HDMI signa...

Page 50: ...i Horizontal 15 75 kHz Vertical 60 Hz 625i 576i Horizontal 15 63 kHz Vertical 50 Hz 525p 480p Horizontal 31 5 kHz Vertical 60 Hz 625p 576p Horizontal 31 25 kHz Vertical 50 Hz 750 720 60p Horizontal 45 0 kHz Vertical 60 Hz 750 720 50p Horizontal 37 5 kHz Vertical 50 Hz 1125 1080 60i Horizontal 33 75 kHz Vertical 60 Hz 1125 1080 50i Horizontal 28 13 kHz Vertical 50 Hz 1125 1080 25p Horizontal 28 13 ...

Page 51: ...480 dot to WUXGA 1 920 x 1 200 dot SERIAL IN terminal 1 set D Sub 9 p for external control RS 232C compatible AUDIO IN terminal 1 set M3 stereo mini jack 0 5 V rms input impedance 22 kΩ or higher AUDIO OUT terminal 1 set M3 stereo mini jack variable 0 V rms to 2 0 V rms output impedance 2 2 kΩ or lower LAN terminal 1 set RJ 45 network connection PJLink compatible 10Base T 100Base TX DIGITAL LINK t...

Page 52: ...ensions 52 ENGLISH Dimensions 8QLWV PP URQW URQW When mounting on the rack 210 8 9 32 465 1 18 5 16 8 55 11 32 25 31 32 247 2 9 23 32 482 2 18 31 32 250 9 27 32 44 1 23 32 31 75 1 1 4 Units mm Front Front ...

Page 53: ...Dimensions ENGLISH 53 When mounting to the underside of the tabletop of the desk 8QLWV PP URQW URQW When mounting on the desk or the shelf 8QLWV PP URQW URQW ...

Page 54: ...erminal indicator 13 Installation precautions 11 L LANGUAGE 28 35 LAN terminal 14 List of compatible signals 48 M Main body 13 Main menu 28 MENU button 13 27 Menu item 28 N Navigating through the menu 27 NO SIGNAL SLEEP 37 O On screen menu 27 OSD DESIGN 36 OPTION 28 36 OUTPUT RESOLUTION 39 OVER SCAN 32 P PICTURE 28 30 POSITION 28 32 POWER button 13 24 Power cord 23 Power indicator 13 Precautions f...

Page 55: ...otential negative effects on human health and the environment which could otherwise arise from inappropriate waste handling Please contact your local authority for further details of your nearest designated collection point Penalties may be applicable for incorrect disposal of this waste in accordance with national legislation For business users in the European Union If you wish to discard electri...

Reviews: