


3.10 Starting Multi-Function
Station
[Start]
A
[All Programs]
A
[Panasonic]
A
the
unit’s name
A
[Multi-Function Station]
R
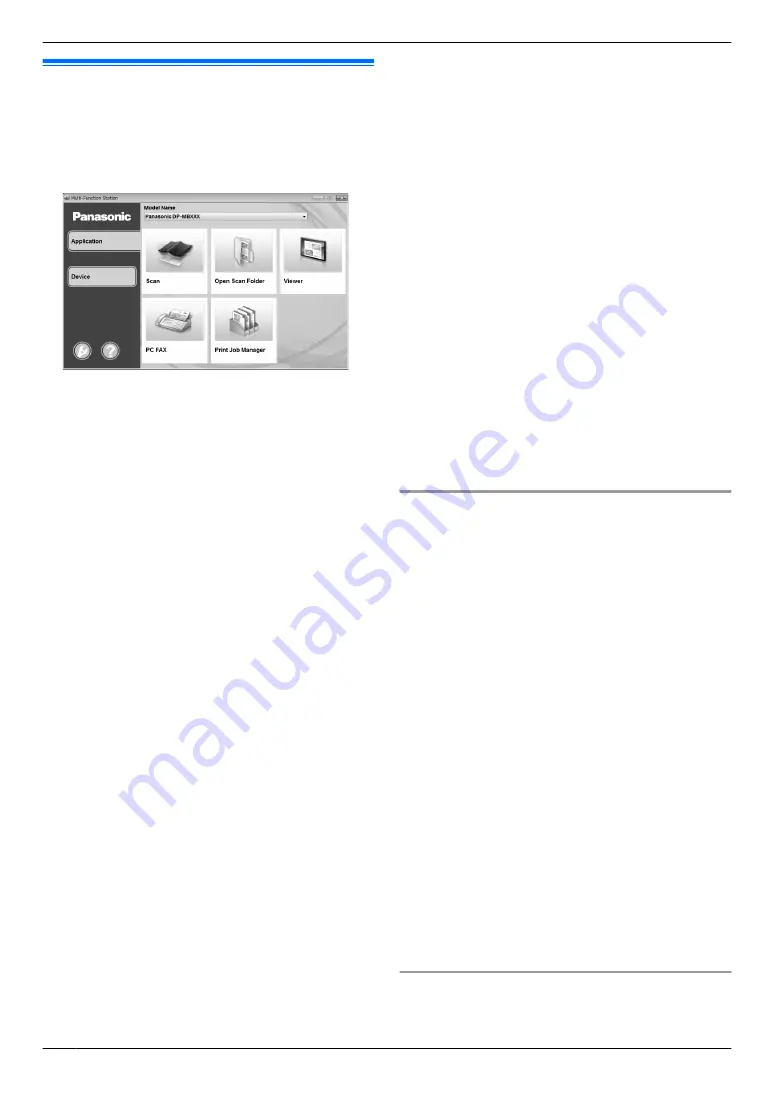
Multi-Function Station will appear.
[Application]
–
R
To scan and display the scanned images.
R
To scan and create an image file.
R
To scan and send by email.
R
To scan and convert an image into editable text
data using OCR software.
–
[Open Scan Folder]
R
To display the folder where the scanned image
will be saved.
–
[Viewer]
R
To start the Quick Image Navigator (page 44).
–
[PC FAX]
R
To send a document created on the computer as
a fax message (page 64).
R
To display a fax document received on the
computer (page 65).
–
[Print Job Manager]
R
To manage the secure print jobs (page 103) and
the proof print jobs (page 104).
[Device]
–
R
To program the features.
R
To store, edit or erase items in the address book.
R
To view items in the journal report or Caller ID list.
R
To store caller information into address book.
R
To store or erase items for broadcast
transmission.
R
To use CSV format (Comma Separated Values
format) to import or export the address book.
–
[Wireless LAN Setting]
R
To start the wireless LAN setting tool (page 29).
–
[Device Monitor]
R
To start the Device Monitor (page 100).
–
[Device List]
R
To start Device List.
–
[Configuration Web Page]
R
To start the configuration web page (page 93).
R
To change the general settings.
R
To change the settings for scanning.
[Help]
R
For detailed instructions on Multi-Function Station.
R
To view operating instructions.
R
To display Support Web Page.
R
To display information about Multi-Function Station.
Note:
R
You can confirm if the unit is connected to your
computer by using Device Monitor (page 100).
R
Computer features (printing, scanning, etc.) may not
function properly in the following situations:
– When the unit is connected to a computer that
was custom-built by the user.
– When the unit is connected to the computer via a
PCI card or other expansion card.
– When the unit is connected to another piece of
hardware (such as a USB hub or interface
adapter) and not connected directly to the
computer.
To change the settings
You can change the settings for Multi-Function Station
beforehand.
1.
Select
[Settings]
from Multi-Function Station.
2.
Click the desired tab and change the settings.
A
[OK]
[General]
–
[Launcher display setting]
: To select the display
type of the launcher.
–
[OCR Path]
: To select the OCR software.
–
[PC name list up on device]
: To select whether or
not your computer name is displayed on the unit.
–
[PC name]
: The computer name that will be
displayed on the unit.
R
Assign a unique name for the
[PC name]
to avoid
errors, or the scanned image may be sent to the
incorrect computer.
*1 Displayed only when the unit is connected to the
LAN.
[Scan]
–
[Save to]
: To select the folder where the scanned
image will be saved.
–
[File Prefix]
: To specify the prefix to be appended to
the file name (up to 16 characters).
–
[Viewer][File][Email][OCR][Custom]
: To change
scanning settings for Multi-Function scan application.
To select the default Email software
The default Email software is used when using scan to
email (page 42).
28
3. Preparation
Summary of Contents for DP-MB251CX
Page 149: ...WPS PIN Feature 583 24 Z Zoom hold Feature 468 83 149 18 Index ...
Page 150: ...150 Notes ...
Page 151: ...151 Notes ...
Page 152: ...PNQX7203ZA DC1114HH0 CD ...


