background image

VQT3C15

12

Turning on/off the unit

Press [POWER

Í

].

The unit is turned off when [POWER

Í

] is pressed again.

Press [POWER

Í

] for approx. 0.5 seconds to turn on the 

unit when the battery pack and the remote control are used.

The power is shut off if the screen is closed while the power 
is “On”.

When the “Automatic Standby (No Action)” is set to “On” 
(initially set to “On”), the unit will be turned off automatically 
after 15 minutes 
(5 minutes when the battery pack is used) when it is in 
stopped status (

>

29).

The startup will take time. The operation related to startup of 
the unit after turning on this unit can be quickened by setting 
the initial setup “Quick Start” (

>

29) to “On” (initially set to 

“Off”). (The power consumption will increase)

You may hear operational sounds when the unit is turned on, 
but this is due to the initialization of the pickup unit, and it is 
not a malfunction.

After opening the LCD screen and pressing [POWER

Í

] for 

the 1st time, a screen for the basic settings will appear.

Follow the on-screen instructions and make 
the settings with [

3

,

4

] and [OK].

“On-screen Language” (

>

28), “Picture Quality Mode” (

>

13) 

and “Quick Start” (

>

29) are set.

You can perform this setup anytime by selecting “Easy 
Setting” in the Player Settings menu. (

>

29)

You can also change this setting individually. (

>

13, 28, 29)

The unit is turned off automatically after set time has passed.

Switch by pressing the [OFF TIMER].

It will switch every time it is pressed.

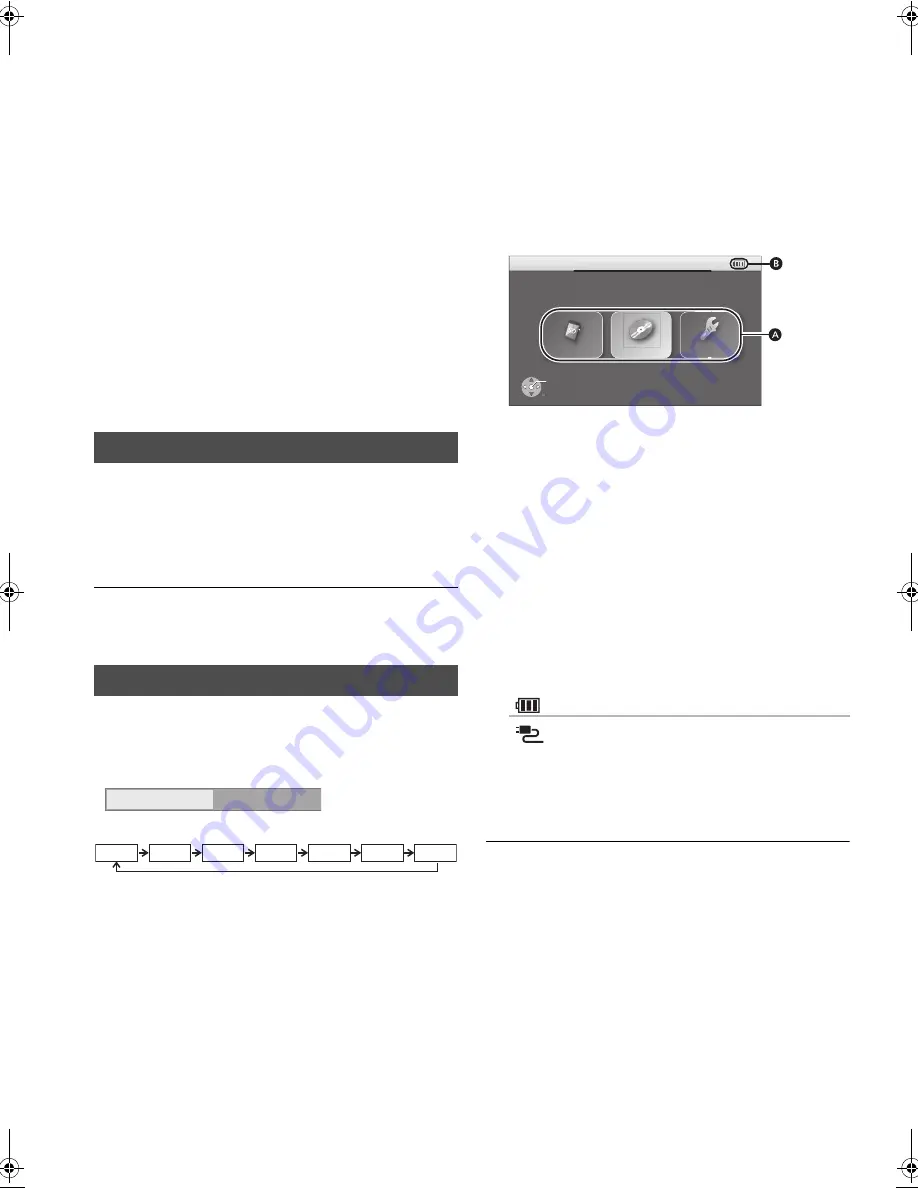
Showing FUNCTION 
MENU

Some functions of this unit can be operated from FUNCTION 
MENU.

Press [

3

,

4

,

2

,

1

] to select the item and 

press [OK].

When multiple contents are recorded, select the types of 
contents or the title.

If there are any other items, repeat these steps.

A

Items

B

Icon

To show the FUNCTION MENU screen

Press [FUNCTION MENU].

FUNCTION MENU also appears by pressing [SUB MENU] 
and selecting “FUNCTION MENU”.

Items to be displayed may vary with the media.

Easy Setting

Turn the unit off automatically

Off Timer

0 : 30

e.g., 30 min.

Off

1:00

0:30

2:00

3:00

6:00

12:00

!

SD 
“Photos” (

>

18)

“Videos (AVCHD)” (

>

14)

“Videos (MPEG-2)” (

>

14)

!

Disc
“Videos” (

>

14)

“Photos” (

>

18)

“Music (MP3)” (

>

20)

“Videos (AVCHD)” (

>

14)

!

Setup
“Player Settings” (

>

26)

“LCD Menu” (

>

13)

“SD Card Management” (

>

17)

Remaining battery charge (

>

11)

Using the AC adaptor

ャㄍㄖノㄓ㄂ㄚチュㄊㄔ㄄チヱㄍ㄂ㄚㄆㄓ

ュリヴヤ

Disc

Setup

SD

OK

RETURN

e.g.,

DMP-B200P&PC-VQT3C15_eng.book  12 ページ  2010年12月22日 水曜日 午後6時2分

Summary of Contents for DMP-B200

Page 1: ...roduct For optimum performance and safety please read these instructions carefully Before connecting operating or adjusting this product please read the instructions completely Please keep this manual...

Page 2: ...er cord connected directly to it To completely disconnect power from the unit unplug the power cord from the AC power outlet RISK OF ELECTRIC SHOCK DO NOT OPEN CAUTION WARNING TO REDUCE THE RISK OF FI...

Page 3: ...te Product Identification Marking is located on the bottom of units AC adaptor This AC adaptor operates on AC between 110 V and 240 V But In the U S A and Canada the AC adaptor must be connected to a...

Page 4: ...shooting guide 34 Specifications 38 Licenses 39 Glossary 40 Limited Warranty ONLY FOR U S A AND PUERTO RICO 42 Limited Warranty ONLY FOR CANADA 43 Index Back Cover Accessories Please check and identif...

Page 5: ...or stickers to discs This may cause disc warping rendering it unusable Do not write on the label side with a ball point pen or other writing instrument Do not use record cleaning sprays benzine thinne...

Page 6: ...c Operation and sound quality of CDs that do not conform to CD DA specifications copy control CDs etc cannot be guaranteed CD User recorded media Type of media and logo Formats Indicated as BD RE Vers...

Page 7: ...latest information on the following website http panasonic jp support global cs This site is in English only This unit is compatible with SD Memory Cards that meet SD Card Specifications FAT12 and FA...

Page 8: ...the volume 14 11 Show the sub menu 12 Selection OK 13 Headphone terminal 3 5 mm stereo mini jack 14 Switch the media to playback It will switch every time it is pressed 15 Playback 14 16 Stop 15 17 Sk...

Page 9: ...19 Turn the unit off automatically 12 20 Change the screen settings 13 21 Change the setup of this unit 26 Insert the button type battery supplied 1 Pull out the holder 2 Insert the battery and return...

Page 10: ...g to be used for a long time disconnect the AC power supply cord from the household AC outlet This unit can be used in places without an AC outlet such as outdoors by attaching the supplied battery pa...

Page 11: ...ith a vehicle that has a 24 V battery This is a special negative grounded Car DC Adaptor Using this Car DC Adaptor with a plus grounded car can cause malfunction and lead to fire 1 Connect the car DC...

Page 12: ...s and make the settings with 3 4 and OK On screen Language 28 Picture Quality Mode 13 and Quick Start 29 are set You can perform this setup anytime by selecting Easy Setting in the Player Settings men...

Page 13: ...rt playing when they are loaded with the unit turned on About discs with a cartridge jDVD RAM DVD R Remove the disc from the cartridge and set the disc in the tray Cartridge discs cannot be used jPlac...

Page 14: ...depending on the way the file was made or the state of this unit playing stopped etc Set Subtitle in Media 24 MKV video files that do not display Text do not contain subtitle text If the subtitle tex...

Page 15: ...when the unit is turned on BD V On BD Video discs including BD J 40 the resume play function does not work MKV MPEG2 The position is cleared if the unit is turned off Press again or 1 PLAY to restart...

Page 16: ...It is also possible to display with the following procedures 1 Press SUB MENU 2 Select Other Functions with 3 4 and press OK 3 Select Audio with 3 4 and press OK BD V DVD V You can change the audio ch...

Page 17: ...BD Video Secondary Audio is set to On 27 The playback method determined by the disc will take priority so it may not play back in the manner specified with this unit When the secondary video is turned...

Page 18: ...Long Normal or Short When a still picture with a large number of pixels is played the display interval may become longer Even if the setting is changed the display interval may not become shorter To...

Page 19: ...atus with 3 4 and press OK 3 Press 2 1 to select Off Date Shooting date or Details and press OK A Number of the still picture in the folder total numbers of the still pictures in the folder To exit th...

Page 20: ...ic list is displayed Press SUB MENU 2 Press 3 4 to select Select Folder and press OK 3 Press 3 4 to select a folder and press OK You cannot select folders that contain no compatible tracks To return t...

Page 21: ...MI or similar the name of input may be different depending on the connected device 2 Start playback on this unit Video and audio are output from the connected device Notice To turn off the display of...

Page 22: ...er turning off power to the television When the unit is connected to a Panasonic TV VIERA that supports HDAVI Control 2 or later and other device supports VIERA Link the unit is turned off if the powe...

Page 23: ...is displayed 12 When the AC adaptor is connected while the unit is turned off the unit will automatically turn on For details please refer to the TV user manual Keep the screen of this unit opened If...

Page 24: ...n the subtitle on off and select the language 25 Language DVD VR Only discs that contain subtitle on off information Turn the subtitle on off MKV Turn the subtitle on off and select Text or the subtit...

Page 25: ...3 4 and adjust it with 2 1 Contrast Increases the contrast between light and dark parts of the picture j7 to i7 Brightness Brightens the picture 0 to i15 Sharpness Adjusts the sharpness of the edges...

Page 26: ...e language from the menu screen 14 Enter a code 29 with the numbered buttons when you select Other Menu Language Choose the language for disc menus BD V DVD V Some discs start in a certain language de...

Page 27: ...eeze for a moment Audio On Off Auto Dolby D Dolby D Dolby TrueHD DTS Select whether Dolby Digital Dolby Digital Plus Dolby TrueHD or DTS Digital Surround is output in Bitstream or PCM format Not makin...

Page 28: ...me black Only when connecting with an HDMI cable TV Aspect right is set to 16 9 and HDMI Resolution right is set to any mode other than 480p Off TV Aspect HDMI Function Settings 4 3 Pan Scan Video rec...

Page 29: ...ECO charge Charging of the battery pack will be controlled to 80 when set to On and therefore prevent exhaustion of the battery pack On Off Yes No Yes No Abkhazian 6566 Afar 6565 Afrikaans 6570 Alban...

Page 30: ...o output Dolby D Dolby D Dolby TrueHD DTS Bitstream 1 1 When the connected equipment is not supported with these audio formats the audio is output as Dolby Digital bitstream DTS Digital Surround bitst...

Page 31: ...ames of artists JPEG File format JPEG Extension Files must have the extension jpg or JPG Picture resolution between 34k34 and 8192k8192 pixels sub sampling is 4 2 2 or 4 2 0 Reference JPEG conforming...

Page 32: ...X mp3 006XXXX mp3 007XXXX mp3 008XXXX mp3 009XXXX mp3 001XXXX mp3 002XXXX mp3 Root Folder A Folder B Folder C P0000010 mkv P0000011 mkv P0000012 mkv P0000003 mkv P0000004 mkv P0000005 mkv P0000001 mkv...

Page 33: ...U582 You are recharging in a location that is too hot or too cold Recharge at normal temperature i5 to i35 oC i41 to i95 oF ERROR U583 The battery pack is not compatible with this unit Use a battery...

Page 34: ...e battery pack 11 Cannot charge or the CHARGE indicator fails to light The charging time increases when the temperature is too hot or too cold and charging may not be possible under some circumstances...

Page 35: ...e unit is connected with an HDMI cable Played back image is distorted or does not play back correctly AVCHD High definition video transfer rate of 18 Mbps or faster cannot be played back correctly if...

Page 36: ...again Picture may not be seen when more than 4 devices are connected with HDMI cables Reduce the number of connected devices Video is not output in high definition Confirm that the HDMI Resolution in...

Page 37: ...can only be changed during scenes where different angles are recorded The resume play function does not work The memorized position is cleared in the following instances j is pressed several times jTh...

Page 38: ...WkDkH excluding protrusions and battery 238 mm W k188 3 mm D k52 7 mm H 9 3 8qk7 13 32qk2 1 16q Mass including battery Approx 1376 g 48 52 oz without battery Approx 1143 g 40 30 oz Operating temperatu...

Page 39: ...nd Sony Corporation SDXC Logo is a trademark of SD 3C LLC DVD Logo is a trademark of DVD Format Logo Licensing Corporation This product incorporates the following software 1 the software developed ind...

Page 40: ...ss audio encoding technology BD Video supports up to 7 1 channel output Original audio cannot be output from this unit Dynamic range Dynamic range is the difference between the lowest level of sound t...

Page 41: ...film director on a small screen as a secondary video Progressive Interlace The video signal standard of NTSC has 480 interlaced i scan lines whereas progressive p scanning uses twice the number of sc...

Page 42: ...other than a Factory Service Center or other Authorized Servicer or damage that is attributable to acts of God THERE ARE NO EXPRESS WARRANTIES EXCEPT AS LISTED UNDER LIMITED WARRANTY COVERAGE THE WARR...

Page 43: ...ion set up adjustments misadjustment of consumer controls improper maintenance power line surge lightning damage modification introduction of sand humidity or liquids commercial use such as hotel offi...

Page 44: ...4p 25 28 Panasonic Consumer Electronics Company Division of Panasonic Corporation of North America One Panasonic Way Secaucus New Jersey 07094 http www panasonic com Panasonic Canada Inc 5770 Ambler D...

Reviews: