background image

25

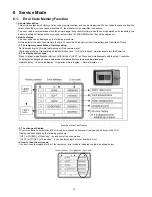
4. Turn the drive gear to the indicated by arrow fully.

5. Push the drive unit to the indicated by arrow from lens

side, and then remove the unit of drive/direct frame unit,
1st lens frame/2nd lens frame move unit from the fixed
frame unit.

6. Push the 1st lens frame unit to the indicated by arrow

from lens side, and then remove the unit of 1st lens
frame/2nd lens frame move unit from the drive/direct
frame unit.

8.4.2.

Removal of the Direct Frame

Summary of Contents for DMC-FX07EB

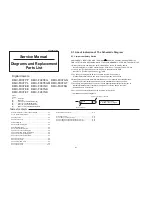
Page 1: ...607021CE B26 Digital Camera DMC FX07PP DMC FX07PL DMC FX07EB DMC FX07EE DMC FX07EF DMC FX07EG DMC FX07EGM DMC FX07GC DMC FX07GD DMC FX07GK DMC FX07GN DMC FX07GT DMC FX07SG Vol 1 Colour S Silver Type K Black Type N Gold Type only EE GC GK GT SG R Red Type only PP EF EG EGM P Pink Type only GC GK GN GT SG A Blue Type only PP EB EE EF EG EGM ...

Page 2: ... S A and Canadian Market 9 3 4 How to Define the Model Suffix NTSC or PAL model 10 4 Specifications 12 5 Location of Controls and Components 13 6 Service Mode 14 6 1 Error Code Memory Function 14 6 2 Confirmation of Firmware Version 17 7 Service Fixture Tools 18 7 1 Service Fixture and Tools 18 7 2 When Replacing the Main PCB 19 7 3 Service Position 19 8 Disassembly and Assembly Instructions 20 8 ...

Page 3: ...exposed to shock hazards 1 2 Leakage Current Cold Check 1 Unplug the AC cord and connect a jumper between the two prongs on the plug 2 Measure the resistance value with an ohmmeter between the jumpered AC plug and each exposed metal lic cabinet part on the equipment such as screwheads connectors control shafts etc When the exposed metal lic part has a return path to the chassis the reading should ...

Page 4: ...rging Procedure 1 Refer to the disassemble procedure and Remove the necessary parts unit 2 Put the insulation tube onto the lead part of Resistor ERG5SJ102 1kΩ 5W an equivalent type of resistor may be used 3 Put the resistor between both terminals of capacitor on FLASH TOP PCB for approx 5 seconds 4 After discharging confirm that the capacitor voltage is lower than 10V using a voltmeter Fig F1 ...

Page 5: ...vices 4 Use only an antistatic solder removal device Some solder removal devices not classified as antistatic ESD protected can generate electrical charge sufficient to damage ES devices 5 Do not use freon propelled chemicals These can generate electrical charges sufficient to damage ES devices 6 Do not remove a replacement ES device from its protective package until immediately before you are rea...

Page 6: ...g must not be used until a replacement cover is obtained A replacement fuse cover can be purchased from your local Panasonic Dealer If the fitted moulded plug is unsuitable for the socket outlet in your home then the fuse should be removed and the plug cut off and disposed of safety There is a danger of severe electrical shock if the cut off plug is inserted into any 13 ampere socket If a new plug...

Page 7: ...shita Battery Industrial Co Ltd It must never be subjected to excessive heat or discharge It must therefore only be fitted in requirement designed specifically for its use Replacement batteries must be of same type and manufacture They must be fitted in the same manner and location as the original battery with the correct polarity contacts observed Do not attempt to re charge the old battery or re...

Page 8: ...8 NOTE Above caution is applicable for a battery pack which is for DMC FX07 series as well ...

Page 9: ...older it should be well molten and mixed with the original lead free solder Remove the remaining lead free solder on the PCB cleanly for soldering of the new IC Since the melting point of the lead free solder is higher than that of the normal lead solder it takes the longer time to melt the lead free solder Use the soldering iron more than 70W equipped with the temperature control after setting th...

Page 10: ...el What is the difference is that the INITIAL SETTINGS data which is stored in Flash ROM mounted on Main PCB 3 4 1 Defining methods To define the model suffix to be serviced refer to the nameplate which is putted on the bottom side of the Unit NOTE After replacing the MAIN PCB be sure to achieve adjustment The adjustment instruction is available at software download on the Support Information from...

Page 11: ...Select the area with pressing UP DOWN of Cross key and then press the RIGHT of Cross key The only set area is displayed and then press the RIGHT of Cross key after confirmation The unit is powered off automatically Confirm the display of PLEASE SET THE CLOCK in English when the unit is turned on again Step 6 CONFIRMATION The display shows PLEASE SET THE CLOCK when turn the Power on again When the ...

Page 12: ...12 4 Specifications ...

Page 13: ...13 5 Location of Controls and Components ...

Page 14: ...setting Set the mode dial to Normal picture mode Red camera mark While keep pressing Optical Image Stabilizer Button and UP of Cross key simultaneously turn the Power on 2 The display of error code Press Optical Image Stabilizer Button MENU and LEFT of Cross key simultaneously with the step 1 condition The display is changed as shown below when the above buttons is pressed simultaneously Normal di...

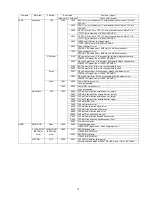
Page 15: ...coder detect error Focus 0001 HP Low detect error Focus encoder always Low detect error FP9802 35 signal line or IC6001 VENUS 3 0002 HP High detect error Focus encoder always High detect error FP9802 34 signal line or IC6001 VENUS 3 Lens 1801 0000 Power ON time out error Lens drive system 1802 0000 Power OFF time out error Lens drive system Adj History OIS 1900 2000 OIS adj Yaw direction amplitude...

Page 16: ...ime out Communication between Lens system and IC6001 VENUS 3 0002 Camera task invalid code error IC6001 VENUS 3 0100 File time out error in recording motion image IC6001 VENUS 3 0200 File data send error in recording motion image IC6001 VENUS 3 0300 Single or burst recording brake time out Operation Power on 3B00 0000 FLASHROM processing early period of camera during movement Zoom Zoom 3C00 0000 I...

Page 17: ... 2 Confirm the version Set the mode dial to Playback and then press DISPLAY to switch to LCD with indication Fig A Press Optical Image Stabilizer and DOWN of Cross key simultaneously No need to keep pressing The version information is displayed on the LCD with light blue colour letters Fig B CAUTION The version information does not display if the LCD has switched to LCD with indication already In ...

Page 18: ...18 7 Service Fixture Tools 7 1 Service Fixture and Tools The following Service Fixture and tools are used for checking and servicing this unit ...

Page 19: ... PCB 1 Be sure to discharge the capacitor on FLASH TOP PCB Refer to HOW TO DISCHARGE THE CAPACITOR ON FLASH TOP PCB The capacitor voltage is not lowered soon even if the AC Cord is unplugged or the battery is removed 2 Be careful of the high voltage circuit on FLASH TOP PCB 3 DO NOT allow other parts to touch the high voltage circuit on FLASH TOP PCB No Parts No Connection Form 1 RFKZ0363 FP9001 M...

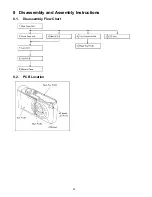
Page 20: ...20 8 Disassembly and Assembly Instructions 8 1 Disassembly Flow Chart 8 2 PCB Location ...

Page 21: ...Case Unit Fig D4 3 Screws C Tripod Fixing Plate 2 Locks C Front Case Unit 4 Top Operation Unit Fig D5 PS8001 Connector Top Operation Unit 5 Flash Top P C B Fig D6 2 Screws D 4 Locking tabs Top Operation Unit Power knob P8001 Connector Flash Cover Flash Top P C B 6 Main P C B Fig D7 PP9001 Connector Main P C B 7 Lens Unit Fig D8 FP9801 Flex FP9802 Flex 1 Locking tab Lens Unit 8 Sub P C B Fig D9 1 S...

Page 22: ...22 Fig D2 8 3 2 Removal of the LCD Unit Fig D3 8 3 3 Removal of the Front Case Unit Fig D4 8 3 4 Removal of the Top Operation Unit Fig D5 ...

Page 23: ...23 8 3 5 Removal of the Flash Top P C B Fig D6 8 3 6 Removal of the Main P C B Fig D7 8 3 7 Removal of the Lens Unit Fig D8 ...

Page 24: ...e and or assemble under the condition of the CCD is being mounted Disassembling procedures for the CCD unit refer to item 8 6 2 Take care that the dust and dirt are not entered into the lens In case of the dust is putted on the lens blow off them by airbrush 3 Do not touch the surface of lens 4 Use lens cleaning KIT BK VFK1900BK 5 Apply the grease VFK1829 to the point where is shown to Grease appl...

Page 25: ...nd then remove the unit of drive direct frame unit 1st lens frame 2nd lens frame move unit from the fixed frame unit 6 Push the 1st lens frame unit to the indicated by arrow from lens side and then remove the unit of 1st lens frame 2nd lens frame move unit from the drive direct frame unit 8 4 2 Removal of the Direct Frame ...

Page 26: ...26 8 4 3 Removal of the 2nd Lens Frame Move Unit 8 5 Assembly Procedure for the Lens 8 5 1 Phase alignment of the Direct Frame and Drive Frame Unit ...

Page 27: ...27 8 5 2 Phase alignment of the Drive Direct Unit and Fixed Frame Unit 8 5 3 Assembly for the 1st Lens Frame Unit 8 5 4 Assembly for the Zoom Motor Unit Master Frange Unit and 2nd Lens Frame Move Unit ...

Page 28: ...28 ...

Page 29: ...ove the CCD unit except for replacing 8 7 The Applyment of Grease Method The grease apply point of lens unit are as follows Apply grease additionally in the specified position if necessary Lead screw Grease VFK1850 Furoyl type Amount of apply 2 4 mg Guide pole Grease VFK1829 Amount of apply 2 4 mg ...

Page 30: ...ccess to TSN Website at Support Information from NWBG VDBG PAVC NOTE After adjustments have been terminated make sure to achieve INITIAL SETTINGS NOTE There is no LCD adjustment in this model There is no CCD Black scratch compensation adjustment BKI in this model Replaced Part Adjustment Item Main P C B VENUS IC6001 Flash ROM IC6002 Lens Part Excluding CCD CCD Unit Camera Section OIS hall element ...

Page 31: ...CD Panel with your hand When cleaning the lens use air Blower to blow off the dust When cleaning the LCD Panel dampen the lens cleaning paper with lens cleaner and the gently wipe the their surface Note The Lens Cleaning KIT VFK1900BK Only supplied as 10 set Box is available as Service Aid ...

Page 32: ... FX07GC DMC FX07GD DMC FX07GK DMC FX07GN DMC FX07GT DMC FX07SG Name of Signal OFTR FEP This signal is connected to the FEP schematic diagram Circuit name being connected 6 Use the parts number indicated on the Replacement Parts List 7 Indication on Schematic diagrams 5 The voltage being indicated here may be include observational error deviation due to internal resistance and or reactance of equip...

Page 33: ...onic circuit tester high impedance with the chassis taken as standard Therefore there may exist some errors in the voltage values depending on the internal impedance of the DC circuit tester REF No PIN No POWER ON IC8001 1 0 IC8001 2 0 IC8001 3 5 IC8001 4 0 IC8001 5 0 Q8009 1 3 8 Q8009 2 3 8 Q8009 3 0 Q8009 4 0 Q8009 5 3 8 Q8009 6 3 8 ...

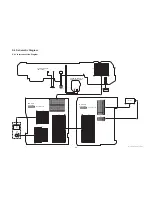
Page 34: ...001 MOTOR DRIVE OIS DRIVE PRE PROCESS IC6001 VENUS 3 CAMERA PROCESS J PEG COMP EX PANDS MEDIA I F USB I F MAIN MICROPROCESSOR FLASH TOP OPERATION UNIT X9101 32 768kHz IC1001 POWER SHUTTER IC9101 SYSTEM IC IC6002 FLASH ROM 4Mbit ZOOM OIS CONTROL LENS DRIVE LCD DRIVE 1 2 5 7 MEGA PIX DIGITAL AV OUT TERMINAL IC4001 LCD DRIVE COLOR LCD PANEL 2 5 PANEL 28mm 102mm IC7101 GYRO SENSOR X Y IC5001 AUDIO AMP...

Page 35: ... CHG LV 10 D3V 11 D3V 12 SHUTTER 1 13 SHUTTER 0 14 POWER ON L 15 D GND 16 THERMO 17 BATT 18 BATT 19 BATT 20 BATT 21 BATT 22 BATT 23 BATT 24 BATT 25 NC 26 MODE DIAL 27 KEY IN1 28 NC 29 5V 30 AF LED K 31 SP 32 SP 33 NC 34 UNREG 35 UNREG 36 NC 37 UNREG GND 38 UNREG GND 39 FRAME GND 40 FRAME GND P8002 1 BATT 2 BATT 3 THERMO MIC GND 1 MIC IN 2 MIC REG 3 A GND 4 FLASH TRG 5 STB PWM OUT 6 OIS SW 7 8 9 10...

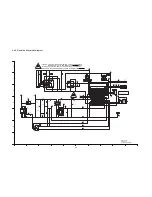
Page 36: ...A 5 6 A 0 1 5A59 1 5A59 A A A 0 1 10 A4 4 0 0 0 VVGPVKQP 176 QP V QPPGEV YKVJ 0Q QH 5 6Q 2 5CHGV KUVCPEG YKVJ KIJ 8QNVCIG KPG 5 766 4A 5 766 4A 219 4A10A 5641 A64 56 A A 8 56 A29 A176 2 41 5 2 2 4 2 5 5 64 456 2 64 A 64 5 10 5 0 18 5 5 5 5 A 0 8 5 8 A 0 CAUTION FOR CONTINUED PROTECTION AGAINST FIRE HAZARD ATTENTION POUR UNE PROTECTION CONTINUE LES RISQUES D INCENDIE N UTILISERQUE DES FUSIBLE DE MÉ...

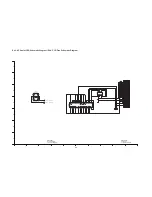
Page 37: ...8 8 4 8 4 8 8 8 8 8 8 8 8 57 57 8 8 8 8 8 4 8 4 8 8 8 8 8 8 57 57 4 4 4 10A 10A A6 4 1 8 8 8 8 8 8 8 4 8 4 0 0 0 8 8 8 8 8 8 8 8 8 4 8 4 8 8 8 8 8 5 8 5 4 26 57 59 6 56 6 56 8 8 57 57 81 8 8 0 0 8 8 A 0 A 0 A 0 A 0 7 4 176 7 4 57 5 DMC FX07 CCD Flex Schematic Diagram DMC FX07 AF Assist LED Schematic Diagram 10 9 8 7 6 5 4 3 2 1 G F E D C B A ...

Page 38: ...12 16 17 18 19 20 23 30 31 32 33 34 35 A4 COIL COIL D1 F11 F12 F1 F2 F3 F4 DC SOLENOID SHUTTER SHUTTER UNIT E POSITIVE VOLTAGE LINE DMC FX07 LENS FLEX SCHEMATIC DIAGRAM TO SUB SUB CN CIRCUIT FP9802 FMAP FMAN FMBN FMBP ZENC2_LED ZENC2 D3V ZENC1_LED ZENC1 DCM DCM DCM DCM SHUT2 SHUT2 SHUT1 SHUT1 IRIS2 IRIS2 IRIS1 IRIS1 YDR YDR XDR XDR YV YHO YV YHO XV XHO XV XHO FHP LED FHP D3V ZHPLED ZHP NC B C3 B2 ...

Page 39: ...S 8 S5 Print Circuit Board S5 1 Flash Top P C B 4 6 6 6 6 4 4 4 4 4 4 4 4 4 4 4 4 3 3 25 2 2 4 6 6 6 5 5 5 5 5 4 6 6 DMC FX07 Flash Top P C B 10 9 8 7 6 5 4 3 2 1 G F E D C B A Foil Side Component Side ...

Page 40: ... 9 S5 2 AF Assist LED P C B S5 3 CCD Flex P C B 6 4 4 4 4 3 6 6 6 DMC FX07 CCD Flex P C B DMC FX07 AF Assist LED P C B 10 9 8 7 6 5 4 3 2 1 G F E D C B A Foil Side Component Side Foil Side Component Side ...

Page 41: ...ENS FLEX P C B Pin 39 Pin 1 FOCUS MOTOR UNIT A2 A B B3 ZOOM ENCODER 2 B1 B2 C C3 ZOOM ENCODER 1 C1 C2 ZOOM MOTOR UNIT D1 D D2 A3 A1 A4 OIS UNIT F F4 F1 F7 F10 F6 F5 F3 F2 F8 F9 F11 F12 E4 E3 E2 E1 SHUTTER UNIT E G3 G1 G2 FOCUS ENCODER G H3 H1 H2 ZOOM ENCODER H ...

Page 42: ... of this assembly in production it will no longer be available All resistors are in OHMS K 1 000 OHMS All capacitors are in MICRO FARADS uf P uuF Components identified with the mark have the special characteristics for safety When replacing any of these components use only the same type 2 IMPORTANT SAFETY NOTICE 3 Unless otherwise specified 4 The marking RTL indicates the retention time is limited...

Page 43: ... S K N P Ref No Part No Part Name Description Pcs Remarks Ref No Part No Part Name Description Pcs Remarks P C B LIST VEP58029A FLASH TOP P C B 1 RTL E S D VEP59032A AF ASSIST LED P C B 1 RTL E S D VEK0K42 CCD UNIT 1 E S D INDIVIDUAL PARTS C8003 F2A2F9500001 E CAPACITOR 300V 95U 1 ET8003 VSQ1235 EARTH SPRING 1 ELEC COMPONENTS S 12 ...

Page 44: ...106M C CAPACITOR CH 6 3V 10U 1 C8010 ECJ0EB1A104K C CAPACITOR CH 10V 0 1U 1 D8002 B0HCMP000006 DIODE 1 E S D D8003 MA2YF8000L DIODE 1 E S D ET8001 K4BC01D00001 EARTH TERMINAL 1 ET8002 K4BC01D00001 EARTH TERMINAL 1 F8001 ERBSE1R25U FUSE 32V 1 25A 1 IC8001 C0ZBZ0000914 IC 1 E S D L8001 G5F1A0000021 TRIGGER COIL 1 M8001 L0CZAA000001 MICROPHONE UNITS 1 P8001 K1KA02B00236 CONNECTOR 2P 1 P8002 K4ZZ03000...

Page 45: ...2A AF ASSIST LED P C B 1 RTL E S D 23 VGQ8795 FLASH COVER 1 24 VGU0A62 POWER KNOB 1 25 VYQ3750 MIC DAMPER 1 26 F2A2F9500001 E CAPACITOR 300V 95U 1 C8003 27 VSQ1235 EARTH SPRING 1 ET8003 28 ML 421S ZT BATTERY 1 MBI Z9101 29 VGQ9125 GASKET 1 30 VGQ8798 PCB SPACER 1 31 VMP8579 TRIPOD 1 32 VMP8581 SIDE ORNAMENT R 1 33 VYK1X06 FRONT CASE UNIT 1 SILVER 33 VYK1X07 FRONT CASE UNIT 1 BLACK 33 VYK1X18 FRONT...

Page 46: ...210 VYQ3509 BATTERY PROTECTION CASE U 1 EXCEPT PP 216 VQT1A77 O I SOFTWARE 1 EB GN 211 K1HA08CD0007 USB CABLE 1 EXCEPT PP ENGLISH 212 K1HA08CD0008 A V CABLE 1 EXCEPT PP 216 VQT1A76 O I SOFTWARE 1 EF 213 VPF1100 BAG POLYETHYLENE 1 EB EF EE GD GN GK GT FRENCH 213 VPF1132 BAG POLYETHYLENE 1 EGM EG PL GC SG 216 VQT1A75 O I SOFTWARE 1 EGM 214 VQT0Y82 INSTRUCTION BOOK 1 EB SPANISH PORTUGUESE ENGLISH SWE...

Page 47: ...39 S CD ROM 1 PP 306 VPF1214 SD CARD BAG POLYETHYLENE 1 PP 307 VPK3162 PACKING CASE 1 PP S 307 VPK3180 PACKING CASE 1 PP K 307 VPK3188 PACKING CASE 1 PP R 307 VPK3184 PACKING CASE 1 PP A 308 VPN6442 CUSHION 1 PP 310 VYQ3509 BATTERY PROTECTION CASE U 1 PP 311 K1HA08CD0007 USB CABLE 1 PP 312 K1HA08CD0008 AV CABLE 1 PP 313 VPF1100 BAG POLYETHYLENE 1 PP 314 VQT0Y69 INSTRUCTION BOOK 1 PP ENGLISH SPANIS...

Page 48: ...S 17 17 20 B1 B2 14 27 26 19 23 18 25 24 15 1 15 B9 B3 44 21 B10 32 33 114 B13 B12 B11 113 112 110 101 105 102 103 104 100 B101 B102 B103 B104 B106 37 41 39 38 36 35 42 11 3 5 6 12 2 30 B7 1 31 B8 34 B4 B5 B6 10 13 8 9 7 4 28 29 B105 47 48 106 B107 ...

Page 49: ...acking Parts and Accessories Section 1 S 18 205 214 215 216 213 202 204 203 206 208 200 207 201 DMC FX07EB GC SG DMC FX07 EE EF EG EGM GC SG DMC FX07GN DMC FX07GK GT DMC FX07GD 212 211 210 223 221 222 219 220 ...

Page 50: ...S7 3 Packing Parts and Accessories Section 2 S 19 305 314 315 316 313 310 302 311 304 303 306 308 300 307 312 301 ...

Reviews: