background image

4

5

CQ-RD153/RD143/RD133N

CQ-RD153/RD143/RD133N

1

E

N

G

L

I

S

H

2

E

N

G

L

I

S

H

CQ-RD133N

CQ-RD133N

CQ-RD133N

CD-C

D

IS

P

SP

CD-C

DI

SP

TRACK

TUNE

LO

UD

MUTE

DISC

SCAN

REPEAT

RANDOM

1

2

3

4

APM

B

A

N

D

PW

R

VOL

/ P

US

H

SE

L

BA

N

D

PW

R

VOL

/ P

US

H

SE

L

5

MUTE

PW

R

Panasonic

welcomes you to their constantly growing family of electronic products owners.

We endeavor to give you the advantages of precise electronic and mechanical engineering, manufac-
tured with carefully selected components, and assembled by people who are proud of the reputation their
work has built for our company. We know this product will bring you many hours of enjoyment, and after
you discover the quality, value and reliability we have built into it, you too will be proud to be a member of
our family.

Precautions

Volume Level

For your driving safety, keep the volume level low enough to be aware of road
and traffic conditions.

Car Washing

To avoid electrical shorts which may cause fire, or other damage, do not
expose this product (including the speakers and tape) to water or excessive
moisture.

Car Ventilation

If your car is parked for several hours in direct sunlight, the temperature
inside the car may become very high. It is advisable to drive the car and give
the interior a chance to cool down before switching the unit on.

Power Supply

This product is designed to be used in a car having a 12-Volt negative ground
battery system. 

Tape Mechanism

Keep magnets, screwdrivers and other metallic objects away from the tape
mechanism and tape head.

Service

This product is made of precision parts. Do not attempt to disassemble or
adjust any parts. For repair, please consult your nearest authorized
Panasonic Service Centre.

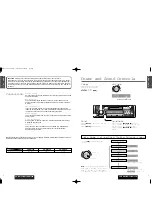
Loudness

Press and hold 

[MUTE](LOUD)

for more

than 2 seconds to enhance bass and tre-

ble tones at low or medium volume.

Press and hold 

[MUTE](LOUD)

again to

cancel.

Volume Level (0 to 40)

Power and Sound Controls

Power

Turn the key in the igni-

tion until the accessory

indicator lights.

Power on :

Press 

[PWR]

.

Volume

Mute 

Press 

[MUTE]

to mute the sound com-

pletely.

Press 

[MUTE]

again to cancel.

Note:

If no operation takes place for

more than 5 seconds in the audio

mode (2 seconds in Volume mode),

the display returns to regular

(Left / Right: 1 to 15) 

(Front / Rear: 1 to 15) 

: c e n t r e

Audio Mode (Volume/Bass/Treble/Balance/Fader)

1 Push 

[SEL]

to select the audio

mode. 

Regular Mode

Volume

Bass

Treble

Balance

Fader

Illumination Colors

Features

Model

CQ-RD153N

Red/Blue

CQ-RD143N

A m b e r

CQ-RD133N

Green

Note: 

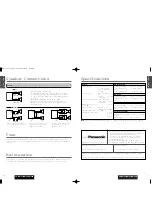
This operating instruction manual is for three models CQ-RD153N, CQ-RD143N and CQ-RD133N. The

differences between three models are listed below.

Down

Up

2 Turn to

1 Push to

Summary of Contents for CQ-RD133N

Page 1: ...st u deze instructie alstublieft zorgvuldig door voor u dit product in gebruik neemt en bewaar deze handleiding voor later gebruik Läs igenom denna bruksanvisning noga innan produkten tas i bruk Spara bruksanvisningen för Bedienungsanleitung Manuel d instructions Gebruiksaanwijzing Bruksanvisning Manuale di istruzioni Manual de Instrucciones Instrukcja ob ugi Bedienungsanleitung Manuel d instructi...

Page 2: ...ata Systeem 68 Cassettespeler 72 Contenuto Pag Precauzioni 104 Comandi di alimentazione e del suono 105 Radio 106 Ricezione RDS Radio Data System 108 Riproduttore a cassette 112 Indice Página Precauciones 124 Alimentación y controles del sonido 125 Radio 126 Recepción RDS sistema de datos radiofónicos 128 Reproductor de casetes 132 Obs uga zmieniacza CD 154 Montazæ 156 Zabezpieczenie przed kradzie...

Page 3: ...e the car and give the interior a chance to cool down before switching the unit on Power Supply This product is designed to be used in a car having a 12 Volt negative ground battery system Tape Mechanism Keep magnets screwdrivers and other metallic objects away from the tape mechanism and tape head Service This product is made of precision parts Do not attempt to disassemble or adjust any parts Fo...

Page 4: ...k tuning to find a sta tion a page 6 Preset Station Setting Up to 5 stations each can be saved in the FM1 FM2 FM3 and AM LW MW preset station memories q Band Caution To ensure safety never attempt to preset stations while you r Mono Local Selection MONO LOC MONO Noise is significantly decreased when weak signals are received from an FM broadcast station e Manual Tuning Higher frequency Lower frequ...

Page 5: ...re available when receiving RDS stations PS Display Program Service name The name of station is dis played instead of the fre quency CT Service Clock Time When receiving an RDS sta tion the CT Clock Time service automatically adjusts the time NO CT is displayed in areas where CT service is not available The clock is not adjustable by hand AF Mode Default AF mode is active AF ON Press AF on the mai...

Page 6: ...ample news rock classical music etc CQ RD133N CQ RD133N CQ RD133N C D C DISP SP C D C DISP TRACK TUNE LO UD MUTE DISC SCAN REPEAT RANDOM 1 2 3 4 APM BAND P W R VOL P U S H S E L BAND P W R VOL P U S H S E L 5 TRACK TUNE 1 2 3 4 5 PTY Mode PTY ON Take either following two Press PTY to switch PTY mode on Press DISP to select PTY mode PTY OFF Take either following two Press PTY again to switch PTY mo...

Page 7: ...ress f softly f Rewind To cancel press a softly Play Side Change Press a and f at the same time Top Side Bottom Side Notes on Cassette Tape Tape Slack Use a pencil or similar object to take up the slack as shown If a loose tape is used this may Notes To maintain your cassette player in top condition avoid using tapes that are longer than 90 minutes C 90 If you insert into the unit a cassette with ...

Page 8: ...se c DISC No Appears on the display when the compact disc is dirty or inverted The next available compact disc will be selected automatically Appears on the display when compact disc is scratched The next available compact disc will be selected automatically Error Display Messages Appears on the display when the unit stops operating for some reason Press the reset switch on the CD changer Appears ...

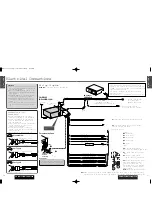
Page 9: ...de 4 Be sure to connect the battery lead yel low to the positive terminal of the battery or fuse block BAT terminal 5 Insulate all exposed wires to prevent short circuiting 182 mm 53 mm 30 or less Fire Wall of Car Hex Nut Option Rear Support Strap Option w Mounting Bolt q Mounting Collar Tapping Screw Option 3 mmø a Using the Rear Support Strap Rubber Cushion Option w Mounting Bolt q Mounting Coll...

Page 10: ...contacts on the face plate or on the main unit since this may result in poor electrical contacts CQ RD133N C D C D C DISP C D VOL P U S H S E L This unit is equipped with a removable face plate Removing this face plate makes the radio totally inoperable Place Removable Face Plate into Case q Switch off the power of the unit w Remove the removable face plate a page 18 e Gently press the bottom of t...

Page 11: ...ow After connection insulate the por C C BATTERY 15A ACC C C BATTERY 15A ACC ACC C C ISO A B Standard ISO Car Type A Car Type B BATTERY 15A A7 IGN or ACC switched 12 V sup Red Yellow Yellow Red Red Yello Yellow Red Red Yellow Red Yello A4 12 V Battery Permanent sup A7 12 V Battery Permanent sup A4 No connection A A 1 Fuse e Power and Speaker Connector 3 2 A5 This lead can be used as either Amp Rel...

Page 12: ...igned and manufactured to ensure the minimum of maintenance Use a soft cloth for routine exterior cleaning Never use benzine thinner or other solvents L R L R L R L R Right Wrong White White w black stripe Chassis Gray w black stripe Gray Chassis Use ungrounded speaker only The maximum speaker input should be 45 W or more If used with the optional power amplifier the speak er input should be highe...

Reviews: