S
E
T
S
E
T
PWR
PWR
BAND
BAND
BAND
FACE
FACE
S
S•A
S•A
DISP
DISP
DIM
DIM
DIM
MENU
MENU
MENU
RET
RET
1
1
2
2
2
3
3
3
4
4
5
5
5
6
6
6
7
7
8
8
8
0
0
9
9
#
#
MUTE
MUTE
SCAN
SCAN
DIMMER
DIMMER
RANDOM
RANDOM
NUMBER
NUMBER
REPEAT
REPEAT
RETURN
RETURN
SOURCE
SOURCE
VOL
VOL
Car Audio
Car Audio
Selects a band.
(page 26)
Returns to the previous
display in the menu setting
mode.
(page 35)
Adjusts the sound volume.
(page 25)
to
BAND
FACE
S
•
A
DISP
MENU
1
2
3
7
8
0
9
MUTE
5
SCAN
DIM
DIMMER
4
RANDOM
#
NUMBER
6
REPEAT
RET
RETURN
PWR
SOURCE
VOL
S
E
T
BAND
BAND
Enters the menu setting mode.
Returns to the regular mode
during menu play setting.
(page 35)
MENU
MENU
RET
RET
RETURN
RETURN
PWR
PWR
SOURCE
SOURCE
Changes the display.
(page 26)
Changes the dimmer
level. (page 45)
FACE
FACE
S
•
A
S
•
A
DISP
DISP
DIM
DIM
DIMMER
DIMMER
Selects the display
color. (page 41)
Selects the Spectrum
Analyzer display
pattern. (page 45)
#
#
NUMBER
NUMBER
0
0
9
9
5
5
SCAN
SCAN
4
4
RANDOM
RANDOM
6
6
REPEAT
REPEAT
MUTE
MUTE
VOL
VOL
S
E
T
S
E
T
Selects (vertically) or adjusts an operation
or item.
Adjusts the clock. (page 25)
Selects the preset number. (page 27)
Selects the folder. (page 29)
Selects the disc. (page 36)
Selects (horizontally) or adjusts an operation
or item.
Determines an operation or item.
(Hour/minute/preset/folder/disc)
(Track/file/tune)
(Set)
Muting or attenuation.
(page 25)
Switches on/off the power.
(page 24)
Selects a source.
(page 24)
Pause CD playing.
(page 29)
Adjusts the clock.
(page 25)
Re-scrolls the display.
(page 30)
Enters the number input mode.
(page 31)
Memorizes broadcast stations
[1]
to
[6].
(page 27)
Selects the preset number.
(page 27)
Selects the track/disc/file/folder.
(page 31)
Random play
(page 35)
Scan play
(page 30)
Repeat play
(page 35)
Disc
Random play
(page 39)
Disc
Scan play
(page 37)
Disc
Repeat play
(page 39)
Folder
Random play
(page 35)
Folder
Scan play
(page 30)
Folder
Repeat play
(page 35)
Selects or searches frequency/track/file.
(page 26)
Sets the Super High Definition Bass sound.
(Press and hold for more than 2 seconds.)
(page 25)
Enters the AUDIO menu setting.
(Press.) (page 43)
E
N
G
L
I
S
H
2
CQ-HX1083/1003W
21
E
N
G
L
I
S
H
1
CQ-HX1083/1003W
20
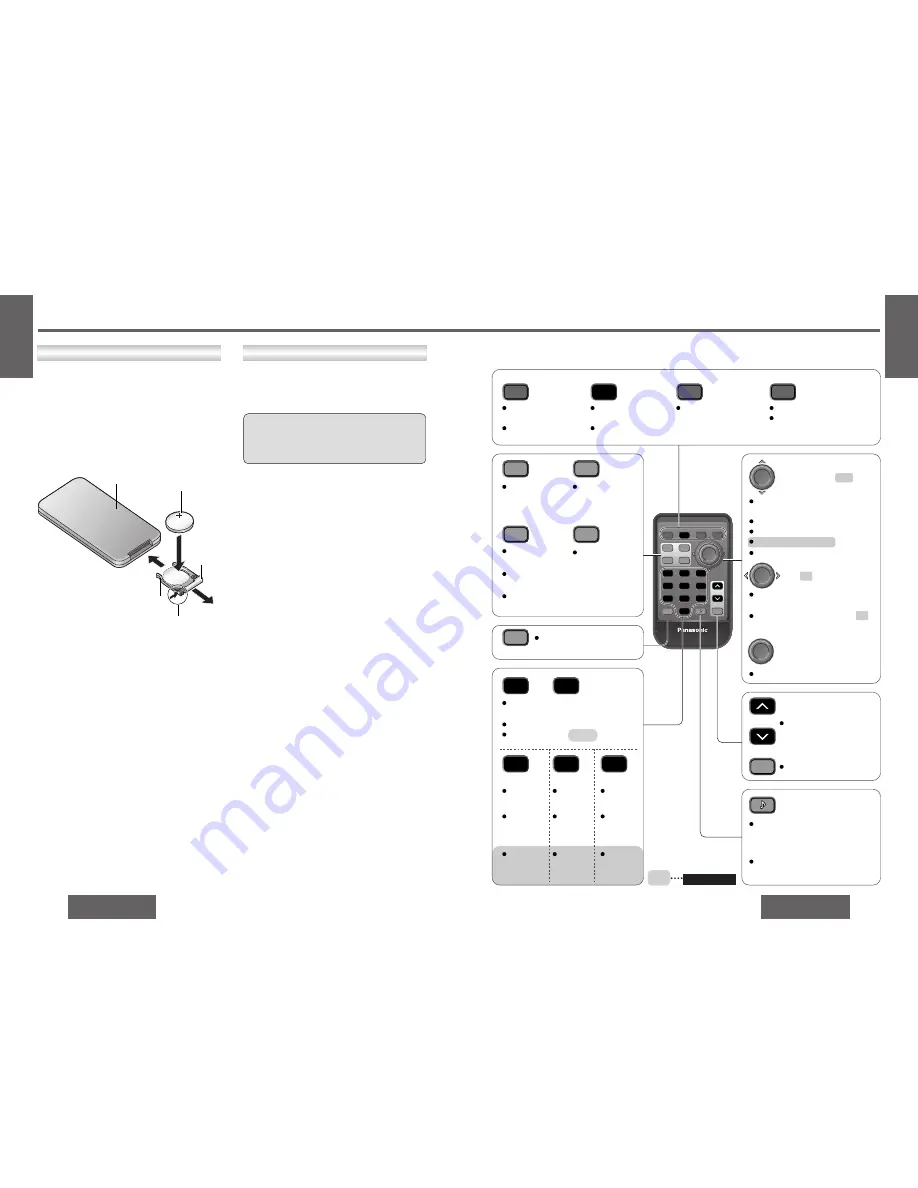
Point the remote control unit at the main unit’s sensor.
(page 22)
Name of Controls Functions
(Remote Control Unit)
1
2
3
Lithium battery
(CR2025)
Back side
Position B
Position A
Battery holder
1
Remove the battery holder.
Pull the battery holder by the position B while
pushing position A in the direction indicated by
the arrow.
2
Install the battery on the battery holder.
3
Insert the battery holder back into its original
position.
Battery Installation
≥
Remove and dispose of an old battery immediately.
≥
Do not disassemble or short the battery. Do not
throw a battery into a fire.
≥
Keep batteries away from children to avoid the
risk of accidents.
≥
Be careful to observe proper local disposal rules
when you dispose of batteries.
Caution:
≥
Improper use of batteries may cause overheat-
ing, an explosion or ignition, resulting in injury
or a fire. Battery leakage may damage the unit.
Battery Notes
≥
Battery type: Panasonic lithium battery (CR2025)
(included)
≥
Battery life: Approximately 6 months with nor-
mal use (at room temperature)
Remote Control Unit Preparation
CQ-HX1083W


