

Quickstart Guide
Thank you for purchasing this Visual Land
Player. Please read through the user
manual in order to understand the
functions of your new player.
Adding Your Files to the Player
When connected to a PC, the player acts
as a standard USB-Disk drive, supporting
Windows
98SE/ME/2000/XP/Vista.
Once your player is detected, you simply
drag and drop or cut and paste the files
that you wish to save to the player’s internal
memory.
Charging the Player
Your player can be charged through either
a USB wall charger or by being directly
connected to the computer. Please note
that charging times vary between these
two methods, the wall charger is the
quicker method.
NOTE: Make sure that your player is in the
“ON” position in order for charging to take
place.
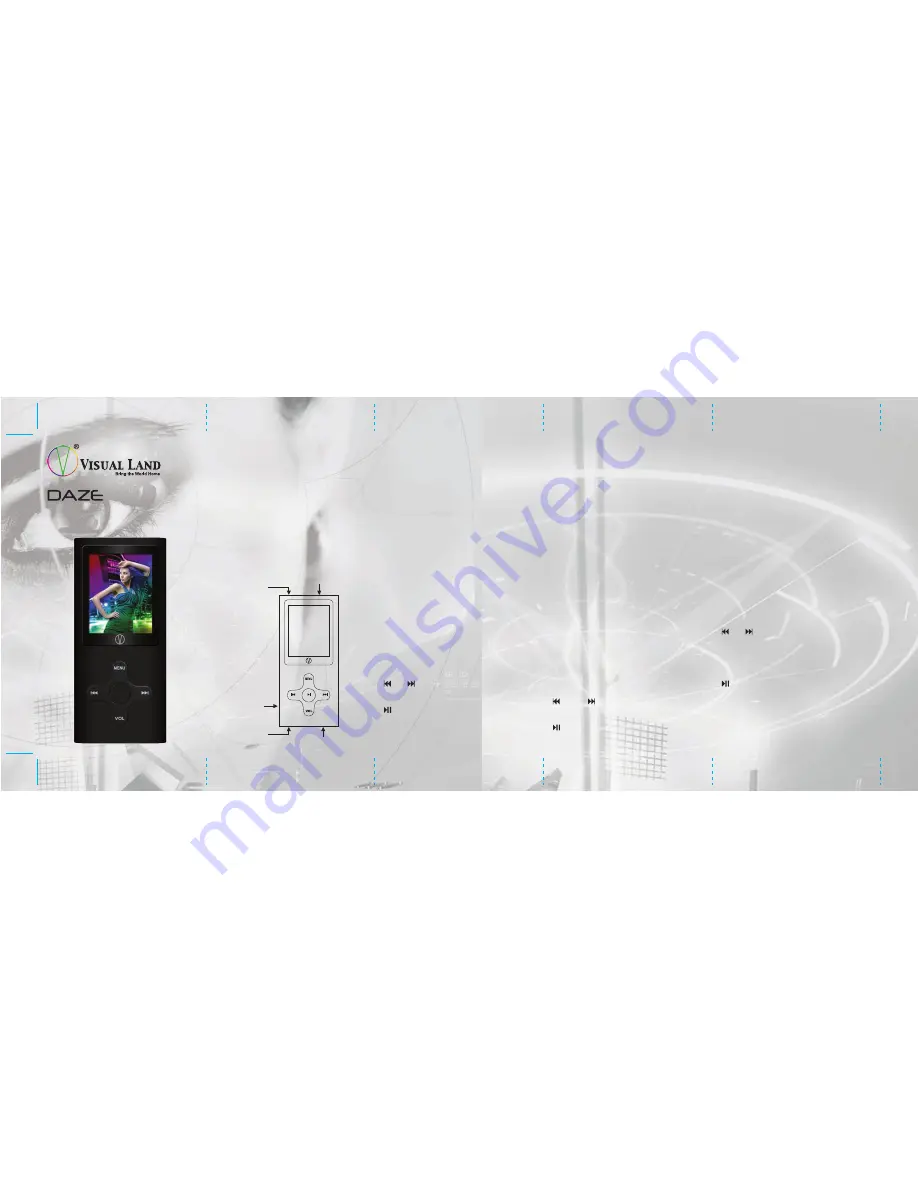
Buttons
To access the various functions of the
player, simply hold down or press the player
buttons as described below:
MENU: Enter sub menus or select options.
Holding down the menu button will let you
return to the main menu.
and : Scroll through your music, video
and other options.
VOL: Adjust the volume.
: Start and stop music or videos. Holding
down this button will shutdown the player.
GENERAL OVERVIEW
Video Playback
MP3/WMA Playback
Jpeg Picture Viewer
Voice Recording
Various Playback Modes
Multiple Language Support
•
•
•
•
•
•
BASIC FEATURES:
Turning on the Player
To turn on the player, simply switch the
player to the “ON” position. The on/off
switch is located on the top left of the
player. If your player is already switched on,
hold down the play button.
Main Menu
Below are the sub menu’s that can be found
on your player’s main menu:
Music: Listen to your music files
Movie: Plays the videos you have saved
Record:
Record
with
the
built-in
microphone
Voice: Plays your recordings
Photo: Displays your pictures
Setup: Change the settings on your player
E-Book: Read text files
To select an option from the main menu,
scroll to the option and press the MENU
button. To enter the sub menus, press the
menu button after selecting an option from
the main menu.
Music
To Enter the Music Sub Menu, press the
MENU button once, to select any options
while in the Music Sub Menu, also press
the MENU button.
and : Scroll through your music
selection.
VOL: Allows you to enter the volume menu.
: Starts and pauses your music
Changing Folder/Playback Functions
While music playback is stopped, press
the MENU button once, this will take you to
the folder select option. The MENU button
is used to select any folder and or song you
wish to playback. While music is playing,
pressing the MENU button will take you to
the playback options menu. You can
change the repeat options and equalizer
settings. Use the MENU button to select
options.
Movie
NOTE: In order to view your video files, you
must first convert the file and movie size.
Please see the section titled “Video
Conversion” for more information.
To Enter the Movie Sub Menu, press the
MENU button once, to select any options
while in the Music Sub Menu, also press
the MENU button.
and : Scroll through your video files.
VOL: Press once to enter the menu, then
using the scroll buttons to raise or lower
the volume, find your desired setting, and
press VOL again to exit. You can only enter
this menu when a video is not playing.
: Start and pause your video.
Sub Menu
You can select a folder to play or delete
files from the sub menu by pressing MENU
once while music is not playing.
Power Switch
Headphone
Jack
Speaker
(Back)
USB Port
Mic


