DVD menu
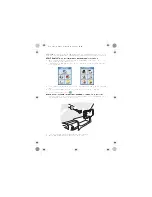
Touching the screen during DVD playback displays Short menu 1.
Select [NEXT PAGE] and [PREV PAGE] to switch between screens.
Short menu 1
This menu can be used for DVD
playback operations.
Short menu 2
This menu can be used for DVD menu
operations, etc.
Short menu 3
This menu can be used for DVD
playback-related settings.
[MOVE BUTTONS]:
Switches touch key display positions.
[<<Off]:
Temporarily hides the touch keys.
[DIRECT TOUCH]:
Turns on or off the direct touch
function, for touching DVD menu items
directly to select them. If the function
is turned off, the cursor keys are
displayed.
[DISPLAY]:
Adjusts tone.
[TOP MENU]/[Menu]:
Displays the disc menu
(Refer to the instructions provided
with the disc being played for how to
operate).
[HIDE BUTTONS]:
Hides the touch keys.
[
]:
Fast reverse
[
]:
Stop
[
]:
Pause
[
]:
Play
[
]:
Fast forward
[SETUP]:
Displays the Setup menu.
[SEARCH]:
Inputs the title number to cue the title.
[RETURN]:
Moves to a predetermined position on
the disc and starts playback from that
position.
[Audio]:
Switches the audio language.
[SUB-TITLES]:
Switches the subtitle language.
[Angle]:
Switches the angle.
Disc operation (DVD)
Fast forward/Fast reverse
Press and hold
.
Fast forward or fast reverse
continues while the button is
pressed.
: fast forward.
: fast reverse.
Release to return to normal
playback.
Depressing [
] or [
]
from Short menu 1 will also
cause fast forward/reverse.
Select chapter/title
Chapter selection
Press
.
Press
to play from the
next chapter.
Press
to play the
currently playing chapter from
the beginning. Press twice or
more to play the preceding
chapter.
Title selection
1
Select [SEARCH] from Short
menu 3.
2
Enter the title number and
select [Enter].
Playback starts from the input
title number.
DVD operation screen
When the source is switched to DVD, the DVD operation screen is displayed
automatically.
To display the DVD operation screen manually, press
while DVD is the
source.
Disc insert (CD/DVD)
1
Press
.
2
Select [Disc].
The monitor opens.
If there is a disc inside, it is
ejected automatically.
3
Insert a disc.
The monitor closes automatically.
Disc operation (common)
Disc eject (CD/DVD)
1
Select [Disc] on the
Open/Tilt/Eject screen.
The monitor opens and the
disc is ejected.
2
Remove the CD/DVD.
Select [Close] to close the
monitor.
Pressing
also closes the
monitor.
PLAY
This screen can be operated while the vehicle is in motion. It is convenient for
watching DVD video on the rear monitor. (
System Upgrade Guidebook)
Switches the aspect
ratio
Displays the DVD
playback screen
Playing time
Title No.
Chapter No.
The DVD Hint screen
The DVD Hint screen is displayed when
a DVD is inserted. It presents a simple
explanation of DVD operation.
Check the explanation, then
select [OK].
The DVD Hint screen
disappears.
Note:
Once [OK] is selected, the DVD Hint
screen will not be displayed again
until the engine stops. It appears
again after the engine is restarted or
the key is turned to ACC ON.
English
English
16
17
17
16


