13
Getting Started
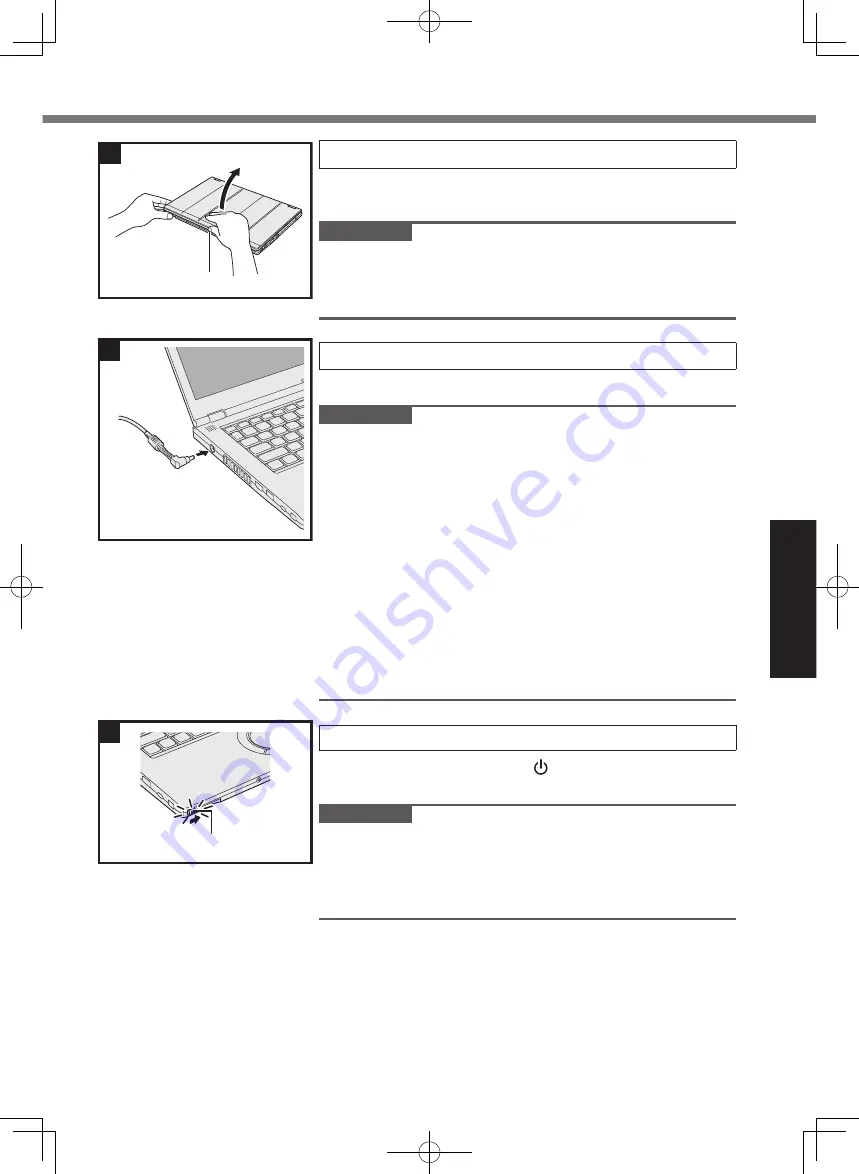
2 Open the display.
Hold the side of the computer with either of your hands and
then hold and lift the (A) part to open the display.
IMPORTANT
●
Do not open the display wider than necessary (160° or
more), and do not apply excessive pressure to the LCD. Do
not open or close the display holding the edge of the LCD
segment.
3 Connect the AC adaptor.
The battery charging starts automatically.
IMPORTANT
●
Do not disconnect the AC adaptor until the first-time opera
-
tion procedure is completed.
●
Do not connect any peripheral device (including wired LAN
cable) except the battery pack and AC adaptor until the “6
Restart the computer.” procedure is completed.
●
Handling the AC adaptor
Problems such as sudden voltage drops may arise during
periods of thunder and lightning. Since this could adversely
affect your computer, an uninterruptible power source (UPS)
is highly recommended unless running from the battery
pack alone.
●
When the DC plug is not connected to the computer, dis-
connect the AC cord from your AC wall outlet.
●
Do not apply hot air released from the ventilation hole (ex-
haust) to the cable.
4 Turn on the computer.
Slide and hold the power switch (B) until the power indicator
lights.
IMPORTANT
●
Do not turn the power switch on/off repeatedly.
●
Do not slide and hold the power switch for 4 seconds or
longer or repeatedly slide the switch.
●
Once you turn off the computer, wait for 10 seconds or more
before you turn on the computer again.
A
2
3
4
B


