


Setting Sound
22
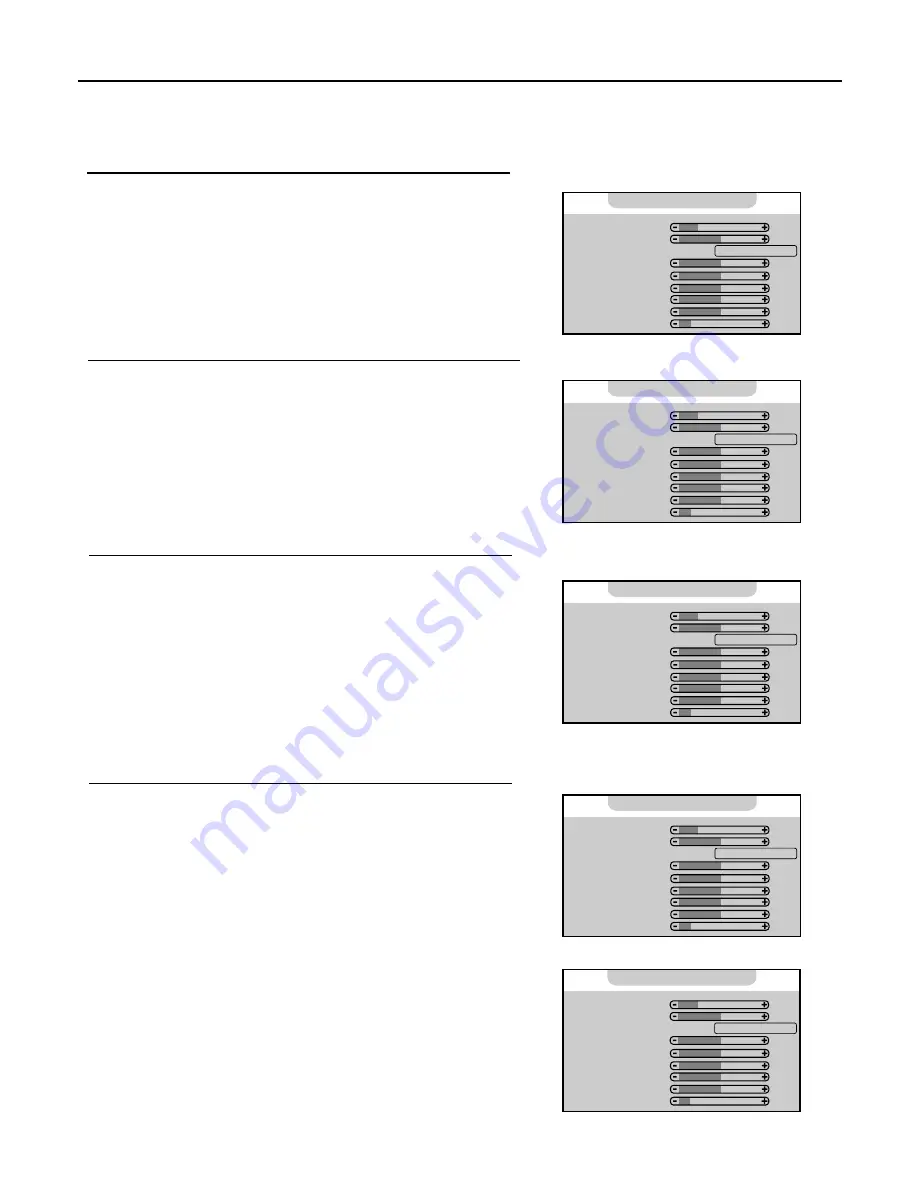
Adjusting the Volume
You may quickly adjust the volume by using
or
VOLUME-
. The unit also allows you to adjust volume
through OSD menu as follows.
Press
MENU
to display the menu main page.
Push
ENTER
(Up/Down) repeatedly to display
Audio
menu page.
Press
ENTER
to access.
The
Volume
item will be highlighted automatically.
Push
ENTER
(Left/Right) to adjust the volume.
Press
MENU
to exit.
Adjusting the Sound Balance
Repeat steps 1~3 in [
Adjusting the Volume
].
Push
ENTER
(Down) repeatedly to select
Balance
item.
Push
ENTER
(Right) to decrease the left speaker volume;
Push
ENTER
(Left) to decrease the right speaker volume.
Press
MENU
to exit.
Adjusting the Headphone Volume
Repeat steps 1~3 in [
Adjusting the Volume
].
Push
ENTER
(Down) repeatedly to select
HP Volume
item.
Push
ENTER
(Left/Right) to adjust the headphone volume.
Press
MENU
to exit.
Adjusting Equalizer
The unit provides a Five-Band Equalizer for you to enjoy a high-quality sound. You may select the preset sound
effects according to different situations or customise the sound effect by yourself.
Repeat steps 1~3 in [
Adjusting the Volume
].
Push
ENTER
(Down) repeatedly to select
Equalizer
item.
Push
ENTER
(Left/Right) to select.
There are three preset sound effects (
Live
,
Pop
and
Rock
) for your
choice according to different situations or you may customise the
sound effect as follows.
Push
ENTER
(Down) repeatedly to select
120Hz, 500Hz, 1.5KHz,
5KHz
or
10KHz
.
Push
ENTER
(Left/Right) to adjust according preference.
Press
MENU
to exit.
Note:
You may quickly select the preset sound effects by using the
S.MODE
button.
4
5
5
6
1
2
3
1
2
3
4
1
2
3
4
1
2
3
4
34
0
Custom
0
0
0
0
0
20
1. Volume
2. Balance
3. Equalizer:
4. 120 Hz
5. 500 Hz
6. 1.5 kHz
7. 5 kHz
8. 10 kHz
9. HP Volume
Audio
34
0
Custom
0
0
0
0
0
20
1. Volume
2. Balance
3. Equalizer:
4. 120 Hz
5. 500 Hz
6. 1.5 kHz
7. 5 kHz
8. 10 kHz
9. HP Volume
Audio
34
0
Custom
0
0
0
0
0
20
1. Volume
2. Balance
3. Equalizer:
4. 120 Hz
5. 500 Hz
6. 1.5 kHz
7. 5 kHz
8. 10 kHz
9. HP Volume
Audio
34
0
Custom
0
0
0
0
0
20
1. Volume
2. Balance
3. Equalizer:
4. 120 Hz
5. 500 Hz
6. 1.5 kHz
7. 5 kHz
8. 10 kHz
9. HP Volume
Audio
34
0
Custom
0
0
0
0
0
20
1. Volume
2. Balance
3. Equalizer:
4. 120 Hz
5. 500 Hz
6. 1.5 kHz
7. 5 kHz
8. 10 kHz
9. HP Volume
Audio


