background image

Zire™ 72 

Handheld

113

CHAPTER 16

Customizing Your Handheld

Changing the screen fonts

0

1

Open the Select Font dialog box:

a.

Open an application

.

b.

Open the menus


.

c. Select Options, and then select Font.

2

Tap the font style you want to use, and then select OK.

Done

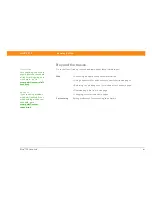
Small

Small bold 

Large bold

Large 

Summary of Contents for Zire 72

Page 1: ......

Page 2: ...nd user for permanent storage and or use Such additional license may be obtained from MPEG LLC See www mpegla com for additional details This product includes technology owned by Microsoft Corporation...

Page 3: ...ring information 10 Using menus 15 Using the 5 way navigator 16 Handheld do s and don ts 18 Beyond the basics 19 Chapter 2 Synchronizing Your Handheld with Your Computer 20 Why synchronize information...

Page 4: ...arm 40 Beyond the basics 41 Chapter 6 Managing Your Tasks 42 Creating a task 43 Organizing your tasks 44 Marking a task complete 45 Beyond the basics 46 Chapter 7 Writing Memos 47 Creating a memo 48 V...

Page 5: ...rd 72 Transferring music from a CD to an expansion card 74 Playing music on your handheld 78 Beyond the basics 79 Chapter 12 Connecting Wirelessly to Other Devices 80 What can I do with the built in B...

Page 6: ...eb page 106 Beyond the basics 107 Chapter 16 Customizing Your Handheld 108 Setting the date and time 109 Preventing your handheld from turning on by accident 111 Changing the screen fonts 112 Changing...

Page 7: ...urn to the original view Click an entry in the Table of Contents or Index to go directly to that section of the guide If you link to a page in the guide click Previous View or depending on your versio...

Page 8: ...es throughout this guide Cue at the bottom of a page that means the procedure continues on the next page Cue that signals the end of the procedure You re done A step that you must follow otherwise you...

Page 9: ...the topic being described may include a pointer to more information Key Term A technical term related to the topic being described The term may appear in this guide or only on your handheld User Guide...

Page 10: ...digital photo albums play games and read eBooks Insert expansion cards sold separately to listen to music to capture videos or to enjoy useful reference software and more Benefits of your Zire 72 han...

Page 11: ...te Input area Lets you enter info with Graffiti 2 writing or open the onscreen keyboard Brightness icon Lets you adjust the brightness of your handheld s display 5 way navigator Helps you move around...

Page 12: ...our handheld on or off and lets you turn Keylock on if active Indicator light Lets you know the charging status when your handheld is attached to the power adapter and notifies you when alert messages...

Page 13: ...c and other audio applications Voice Memo button Records a voice memo when you press and hold this button Stylus Lets you enter information on your handheld To use the stylus slide it out of the slot...

Page 14: ...n creating voice memos Reset button Resets your handheld if it freezes stops responding Power connector Lets you connect your handheld to the power adapter so you can charge it Mini USB connector Lets...

Page 15: ...anage your schedule from lunch with a friend to weekly meetings to annual events like holidays to extended events like conferences and vacations Even color code your schedule by category Camera Captur...

Page 16: ...ebPro Browse your favorite sites on the web Internet connection required Prefs Customize your handheld s sound levels colors security and more RealOne Carry your music with you on expansion cards sold...

Page 17: ...xpansion card sold separately create playlists This is the desktop companion for the music application on your handheld Windows only Windows Media Player Works with the palmOne Media desktop applicati...

Page 18: ...button to turn on your handheld and to open the application for that button Using the Home screen Turn on your handheld tap Home and tap an application icon such as Note Pad Did You Know You can reass...

Page 19: ...that you can use to write directly on the screen With only a few minutes of practice you can learn to use Graffiti 2 writing and help is always only a tap away 0 1 Go to the Home screen and select Qu...

Page 20: ...1 Open an entry a Open an application b Select a record or tap New 2 Tap one of the following to open an onscreen keyboard ABC Opens the letter keyboard 123 Opens the number keyboard Continued Key Te...

Page 21: ...on 3 Tap the characters to enter text numbers and symbols and then select Done Done Tip When a keyboard is open you can tap abc 123 or Int l to open any of the other keyboards Backspace Return Tab Cap...

Page 22: ...llation Windows only you can choose to synchronize with Microsoft Outlook If you do info from Contacts Calendar Tasks and Memos is synchronized with Outlook Other info such as photos and notes is sync...

Page 23: ...loring Your Handheld Zire 72 Handheld 14 MAC ONLY Double click the Palm Desktop icon in the palmOne folder on your computer and then click the icons in the launch bar to access the various application...

Page 24: ...you know how to use them in all your applications 0 1 Open an application 2 Tap Menu to open the menus 3 Tap a menu and then tap a menu item Done Tip You can also open the handheld menus by tapping t...

Page 25: ...ht or Left Scrolls to the next or previous application category Select Inserts the selection highlight When the selection highlight is present Up Down Right or Left Scrolls to the next icon in the cor...

Page 26: ...wn Scrolls an entire screen of entries as long as there s nothing highlighted Hold down to accelerate the scrolling Select Inserts the selection highlight When the selection highlight is present Up or...

Page 27: ...it dirty For general cleaning use a soft damp cloth If the screen becomes dirty use a soft cloth moistened with a diluted window cleaning solution Use only 3 5 mm stereo headphones in your handheld s...

Page 28: ...application information Categories Organizing your applications and information by filing them into categories Privacy Keeping information private by turning on security options Sharing Beaming inform...

Page 29: ...t information that has been entered or updated in one place your handheld or your computer is automatically updated in the other No need to enter information twice Benefits of synchronizing Quickly en...

Page 30: ...nized with Palm Desktop software You can insert the CD at any time to choose synchronization with Outlook if you did not do so during the initial installation Install applications With just a few clic...

Page 31: ...synchronization If you want to synchronize applications other than the presets see the section on choosing which applications to synchronize in the User Guide on the web You can synchronize more than...

Page 32: ...When synchronization is complete a message appears at the top of your handheld screen and you can disconnect your handheld from the cable Be patient synchronization may take some time Done Key Term H...

Page 33: ...information for a specific application Switching back to the cable if you have been synchronizing information using Bluetooth technology Receiving information on your handheld from an outside source...

Page 34: ...tless answer to the storage dilemma When one card becomes full simply use another card To enjoy some aspects of your handheld such as listening to music and capturing video clips you need to use expan...

Page 35: ...use the included RealOne software to listen to music on your handheld Back up info Make a copy of your important information for safe keeping in case your handheld becomes damaged or is stolen Add ga...

Page 36: ...the card into the expansion slot with the label side facing the front of the handheld 2 Push the card in with your thumb until you hear the confirmation tone No confirmation tone Check the Sounds Ale...

Page 37: ...CHAPTER 3 Expanding Your Handheld Zire 72 Handheld 28 Removing an expansion card 0 1 Push lightly against the card with your thumb 2 Slide the card out of the expansion slot Done Push...

Page 38: ...tify its contents Installing and Removing Adding applications from your computer to an expansion card and installing other files such as photos videos or music Sharing Exchanging applications and info...

Page 39: ...anize contact information You can easily share info with other handhelds and dial phone numbers or send text messages directly from a contact entry using your handheld s built in Bluetooth technology...

Page 40: ...it Tap the scroll arrows to move to the next page Continued Tip If the first character you enter in the Last Name or Company field is an asterisk or similar symbol that record always appears at the t...

Page 41: ...t select Done That s it Your handheld automatically saves the contact Make sure you have a current backup Synchronize often Tip To learn about capturing and downloading photos to your handheld see pal...

Page 42: ...can easily scroll to the contact you want 3 Select the contact to open it Done Tip You can also press Right on the navigator or tap the Quick Look Up icon at the top of the screen to open the Quick Lo...

Page 43: ...eiving handheld model not all information may be sent correctly 3 Wait for the Beam Status dialog box to indicate that beaming is complete Done Tip You can create a contact with your own information a...

Page 44: ...ct Categories Organizing contacts by type and sorting them Information Transferring contact information from other applications such as databases spreadsheets and other organizer software Privacy Keep...

Page 45: ...ents and spot schedule conflicts You can view your calendar by day week or month or as an agenda list that combines your list of tasks with your appointments Benefits of Calendar Track current future...

Page 46: ...ap the date 3 Tap the line next to the time the appointment begins and enter a description Continued Key Term Event The name for an entry in the Calendar application including appointments birthdays r...

Page 47: ...nt ends d Select OK That s it Your handheld automatically saves the appointment Make sure you have a current backup Synchronize often Tip To enter reminders holidays anniversaries and other events tha...

Page 48: ...the Calendar application button 2 Tap the icons in the lower left corner to see four different Calendar views Done Tip Press the Calendar application button repeatedly to cycle through the Agenda View...

Page 49: ...pick list and select Minutes Hours or Days d Enter how many minutes hours or days before the event you want the alarm to sound and then select OK Done Did You Know If you set your alarm sounds in Worl...

Page 50: ...time days start and end by setting preferences Storing extra information about an event by adding a note Erasing old appointments by purging them Categories Organizing events by type and color coding...

Page 51: ...how they manage to do it all busy people usually say I make lists The Tasks application on your handheld is the perfect place to make a list of the things you need to do Benefits of Tasks Set priorit...

Page 52: ...t a date from the calendar That s it Your handheld automatically saves the task Make sure you have a current backup Synchronize often Tip If no task is currently selected you can create a new task by...

Page 53: ...the pick list in the upper right to select Due Today Last 7 Days Next 7 Days or Past Due Category Displays tasks that are assigned to the selected category Tap the pick list in the upper right to sel...

Page 54: ...hat you ve completed it 0 1 Go to the Home screen and select Tasks 2 Select the check box on the left side of the task Done Tip You can set Task Preferences to record the date that you finish your tas...

Page 55: ...ack completion dates and which alarm sound plays Storing extra information about a task by adding a note Privacy Keeping tasks private by turning on security options E mail Sending tasks as attachment...

Page 56: ...ing information that is meaningful to you but does not fall into one of these categories From meeting notes to recipes and favorite quotations Memos provides a quick and easy way to enter store and sh...

Page 57: ...o a new line in the memo c Select Done That s it Your handheld automatically saves the memo Make sure you have a current backup Synchronize often Did You Know You can create as many memos as you want...

Page 58: ...memo and then select Done Done Tip The Memos list shows the first line of each memo so make sure that first line is something you will recognize Did You Know You can connect your handheld to a portab...

Page 59: ...egories and sorting them Privacy Keeping memos private by turning on security options Sharing Beaming memos to other Palm OS handheld users Sending memos to other Bluetooth devices using the Bluetooth...

Page 60: ...t do with a piece of paper and a pencil Note Pad gives you a place to draw freehand and take notes in your personal handwriting which is even faster and more flexible than creating a memo on your hand...

Page 61: ...en keyboard c Select Done That s it Your handheld automatically saves the note Make sure you have a current backup Synchronize often Tip You can change the color of the pen and paper background From t...

Page 62: ...Select the note a Select Done to display the Note Pad list b Select the note you want to view or edit 3 Read or edit the note and then select Done Done Tip You can clear the screen completely while ed...

Page 63: ...te by turning on security options Sharing Beaming notes to other Palm OS handheld users Sending notes to other Bluetooth devices by using Bluetooth technology on your handheld E mail Sending notes as...

Page 64: ...to record and play back notes agenda items and other important thoughts directly on your handheld Record client meeting notes on the way to the office then send them to your assistant via e mail to tr...

Page 65: ...you have finished recording release the Voice Memo button A tone indicates that recording has stopped 3 Select Done That s it Your handheld automatically saves the voice memo Make sure you have a cur...

Page 66: ...e memo title The voice memo begins to play after a few seconds b Press Right or Left on the navigator to listen to the next or previous voice memo 3 When you have finished listening to all voice memos...

Page 67: ...y Keeping voice memos private by turning on security options Sharing Exchanging voice memos with other palmOne handheld users by beaming them Sending voice memos to other Bluetooth devices by using Bl...

Page 68: ...photos and videos You can keep your favorite photos right on your handheld select a photo as the background for your Home screen and the Agenda View in Calendar even add a photo to a Contacts entry Be...

Page 69: ...card in MPEG 1 and ASF MPEG 4 file format To view videos that are in other formats convert them to a format that your handheld can play On Windows use the palmOne Media desktop to do the conversion t...

Page 70: ...Select photo mode if it is not already selected b Move the handheld until the picture you want appears on the screen c Select the shutter button or press Select on the navigator d Select Save Done Tip...

Page 71: ...our handheld 0 1 Press the Camera button 2 Capture the video a Select video mode if it is not already selected b Move the handheld until the image you want to capture appears on the screen c Select th...

Page 72: ...hite Resolution Select a higher resolution if you want a clearer picture however a higher resolution creates a larger file size when you save the photo or video Save to Photos only Select whether to s...

Page 73: ...specify a new naming system for photos and videos default is photo_mmddyy_xxx and then enter the new auto name Digital zoom Photos only Select Disabled if you do not want to be able to zoom in when ta...

Page 74: ...urn to the selection screen Done Tip If the camera is open you can open the palmOne Media application by tapping the View Photos button on the left of the screen or by pressing the Camera application...

Page 75: ...e an album a Tap the pick list in the upper right corner and select Edit Albums b Select New enter the name of the new album and select OK c Select OK on the Edit Albums screen Continued Tip You can o...

Page 76: ...hoto with a plus sign to the left to remove it from the album d Select Done 4 Move photos within albums a Tap the pick list in the upper right corner and select the album in which you want to move pho...

Page 77: ...y You can also share photos and videos using any of the following methods Attach a photo or video to an e mail message Create a multimedia message containing photos Beam a photo or video to other Palm...

Page 78: ...e pick list in the upper right corner and select the album containing the photos and or videos you want to send b Select the photo or video you want to send c Open the menus d Select Media and then se...

Page 79: ...our desktop computer Deleting photos and videos Sending photos from the palmOne Media desktop application via e mail Sharing Beaming photos and videos to other Palm OS handheld users E mail Sending ph...

Page 80: ...d then listen through the built in speaker or stereo headphones sold separately You need to purchase an SD or MultiMediaCard expansion card to save your music files and play them on your handheld Bene...

Page 81: ...dheld a Connect your handheld to the HotSync cable b Insert an expansion card into your handheld 2 Select the MP3 files you want to transfer a From My Computer or Windows Explorer select the MP3 files...

Page 82: ...select your username and click OK 3 Synchronize your handheld with your computer Be patient transferring music to an expansion card can take several minutes Done Tip You can also use a card reader ac...

Page 83: ...er to convert and transfer the files WINDOWS ONLY 0 1 Access the CD from RealOne Player on your computer a Double click the RealOne Player icon on your computer desktop b Insert the CD into your compu...

Page 84: ...r library a Click Save Tracks b Follow the onscreen instructions to select and copy tracks Continued Tip If you want to select only a few songs click Deselect All and then click the check box next to...

Page 85: ...c Connect your handheld to the HotSync cable Do not tap the HotSync icon 4 Select the songs you want to transfer a In RealOne Player on your computer click Devices b If necessary double click Palm Ha...

Page 86: ...d is on and that RealOne Mobile Player is open If it is a green Connected light appears in the lower left corner on your computer b In the toolbar below the Connected light click Transfer When the tra...

Page 87: ...t a song from the list 3 When you ve finished listening tap the Stop button Done Tip For tips on using RealOne Mobile Player open the Options menu and select Help Did You Know RealOne Mobile Player co...

Page 88: ...which songs to play and the order to play them in Removing songs from an expansion card User Guide For everything you need to know about your handheld all that s in this guide and much more go to www...

Page 89: ...wer of Bluetooth technology It helps you easily set up wireless connections to a number of devices so you can enjoy the convenience of cable free connectivity Benefits of your handheld s built in Blue...

Page 90: ...lt in Bluetooth technology to set up connections to devices within approximately 30 feet of your handheld What types of connections can I make With Bluetooth technology you can make connections using...

Page 91: ...er Bluetooth devices will see when they try to connect to your handheld By default it is the username you use during synchronization but you can change it c Tap the Discoverable pick list and select Y...

Page 92: ...displays all Bluetooth phones within range Select the phone you want select Next and then select Next again c If the phone you want does not appear on the Connection Setup screen select Find More If t...

Page 93: ...ct Done and then select No You have finished setup b Select Next 6 Begin network setup a Tap the pick list select Yes or No and then select Next If you select Yes go to step 7 If you select No go to s...

Page 94: ...account c Tap the Password box enter your account password and select OK This is the password you use to access your dial up account it is not your passkey d Select Next and then select Done Done See...

Page 95: ...il application or the web browser 2 Verify Bluetooth status a Draw the Graffiti 2 writing Command stroke and select the Bluetooth indicator to open the Bluetooth settings screen You can tap the indica...

Page 96: ...st and select the service that you want to use to connect to the Internet b Select Connect You are now ready to send and receive e mail messages or to browse the web Key Term Service Way of connecting...

Page 97: ...b Select Launch HotSync Manager in step 4 c Select HotSync to synchronize your handheld with your computer Done Tip To launch HotSync Manager on your computer in step 2 of the onscreeninstructions se...

Page 98: ...ur Bluetooth phone by means of the infrared port on your handheld Using Phone Link Updater to download the most recent phone drivers and list of supported GSM GPRS carriers Setting the Bluetooth optio...

Page 99: ...an attach files such as photos to e mail messages as well as Microsoft Word or Excel files created in Documents to Go on your handheld or receive any of these file types as attachments to view and edi...

Page 100: ...an e mail account on your handheld you must do the following Install the VersaMail software Insert the CD and follow the onscreen instructions for installing extra software If you do not already have...

Page 101: ...ou will also synchronize e mail leave the check box deselected e Select Next 4 Enter the account username and password a Enter the username you use to access your e mail b Select the Password box ente...

Page 102: ...list on the Account Setup screen this screen is already filled in If not enter the names of the incoming and outgoing mail servers a Enter your e mail address b Enter the names of your mail servers c...

Page 103: ...elect Messages to download entire messages e Select OK f When downloading is complete select OK 3 In the Inbox select the message to read it Done Tip If you selected the Synchronize Only Account check...

Page 104: ...n between recipient names d In the Subject field enter the subject of your e mail In the area below the Subject line enter the text of your e mail e Select Send Done Tip If you selected the Synchroniz...

Page 105: ...Automatically retrieving e mail on your handheld Automatically trying to resend messages that weren t sent the first time Customizing your Inbox display options such as message summary view and font s...

Page 106: ...sold separately And if you need more than text alone to express yourself use multimedia messaging to give your message multisensory impact by adding an image photo or sound file Benefits of Messages...

Page 107: ...st select Lookup and select the name from the screen d In the area below the To line enter the text of your message e Select Send Done Before You Begin Before you can send and receive text and multime...

Page 108: ...the list If the name does not appear on the list select one of the Lookup options and select the name from the screen d In the area below the To line enter the subject of your message Continued Key T...

Page 109: ...ew Slide b Use the tools on the left of the screen to create your image Pencil Draw the image you want on the blank slide Line tool Choose the pencil s line style Color wheel Choose the pencil s color...

Page 110: ...a Take the photo you want using the built in camera c Select Done 5 OPTIONAL Add a sound file a From the toolbar on the left of the screen choose the audio tool b Select the file you want c Select Don...

Page 111: ...eiving Text and Multimedia Messages Sending a multimedia message 6 OPTIONAL Add text to your message a Select Add a caption b Enter the text you want tap OK and then select Done 7 Select Send Done Tip...

Page 112: ...ing and reading text messages 0 1 Go to the Home screen and select Messages 2 Select Get to retrieve messages from your mobile phone 3 Read a message a Select the message to open it b Read the message...

Page 113: ...meeting or Thanks Replying to forwarding and deleting messages you receive Setting preferences for receiving messages Hearing an alert when you receive a message Customizing Setting preferences for co...

Page 114: ...uying gifts Now you can take the web with you almost anywhere you go Make an Internet connection through your mobile phone and palmOne Web Pro opens the entire web to you Benefits of Web Pro Carry the...

Page 115: ...nly used in web addresses If Web Pro recognizes the address that you are entering it automatically completes the address c Select Go Done Before You Begin To browse the web you must set up a connectio...

Page 116: ...ng to a web page you just visited or to your home page Downloading a file from a web page Changing your start and home pages Customizing Setting preferences for connecting to a network User Guide For...

Page 117: ...ts and screen colors on your handheld by using preferences and menus And preference settings can help extend the life of your handheld s battery Benefits of customizing Access applications quickly Con...

Page 118: ...select a city in your time zone No nearby city Select Edit List and do steps b c b Tap Add c Select a city in your time zone and then select OK select OK again and then select Done Continued Tip You...

Page 119: ...date a Tap the Set Date box b Tap the arrows to select the current year c Tap the current month d Tap the current date 4 Set the time a Tap the Set Time box b Tap the hour and minute boxes and then t...

Page 120: ...always remains off Automatic Keylock turns on automatically when you turn off your handheld or when your handheld goes to sleep Manual Keylock turns on when you hold down the power button until the sy...

Page 121: ...d 112 Changing the screen fonts In many applications you can change the font style to make text easier to read There are four font styles available in applications that let you change the font style S...

Page 122: ...ur Handheld Changing the screen fonts 0 1 Open the Select Font dialog box a Open an application b Open the menus c Select Options and then select Font 2 Tap the font style you want to use and then sel...

Page 123: ...for both screens or make them different 0 1 Open the Display Options dialog box a Go to the Home screen or press the Calendar application button b Open the menus c Select Options and then select Disp...

Page 124: ...screen b Select Prefs c Select Digitizer 2 Tap the targets on the screen as precisely as possible and then select Done You need to tap at least three targets maybe more if you don t tap carefully Don...

Page 125: ...lent or All Off in step 2 select Done If you selected Custom in step 2 tap the System Sound Game Sound and Alarm Sound pick lists and select the volume level for each sound then select Done Done Tip Y...

Page 126: ...Handheld 117 Changing screen colors Choose a new set of text and background colors for all your applications 0 1 Open Color Theme Preferences a Go to the Home screen b Select Prefs c Select Color Them...

Page 127: ...writing area and creating shortcuts for entering text Reassigning the application buttons on the front of your handheld so that they open the applications you choose Protecting your information by tu...

Page 128: ...installation This will transfer all your information from the old software to the new software 4 Synchronize your new handheld with your new desktop software 5 If any third party applications do not...

Page 129: ...eed to recharge my handheld A battery gauge appears at the top of the Home screen Check the gauge periodically to see if your handheld needs to be recharged If the battery becomes low a message appear...

Page 130: ...kmark next to it If not click it If you don t see the HotSync Manager icon click Start on the Windows taskbar and then select Programs Go to the Palm Desktop program group and select HotSync Manager C...

Page 131: ...he information or applications on your handheld Use the tip of the stylus or similar object without a sharp tip to gently press the reset button inside the hole on the back panel of your handheld If a...

Page 132: ...fic applications Troubleshooting synchronization problems Solving problems with beaming and communication settings Maintaining Performing a hard reset if a soft reset does not unfreeze your handheld U...

Page 133: ...s encouraged to try to correct the interference by one or more of the following measures Reorient or relocate the receiving antenna Increase the separation between the equipment and receiver Connect t...

Page 134: ...using Equipment Regulations Operation is subject to the following two conditions a this device may not cause any interference and b this device must accept any interference including interference that...

Page 135: ...Freq IEC 61000 4 5 1995 Surge Immunity 1 2 50uSec 2kV peak Common Mode 1kV peak Differential Mode EN61000 4 6 1996 Conducted Immunity 150kHz 80MHz 3V RMS 1kHz 80 AM IEC 61000 4 11 1994 100 Voltage Di...

Page 136: ...uwing Bij dit produkt zijn batterijen geleverd Wanneer deze leeg zijn moet u ze niet weggooien maar inleveren als KCA Uwaga Intrinsic Safety Warning Warning Explosion Hazard Substitution of components...

Page 137: ...o docking stations is susceptible to entry of ESD Devices that you carry with you such as your handheld build up ESD in a unique way because the static electricity that may have built up on your body...

Page 138: ...an natural fibers like cotton The rapidity with which you touch connect or disconnect electronic devices While you should always take appropriate precautions to discharge static electricity if you are...

Page 139: ...s 3 alerts See alarms aligning screen 115 anniversaries 38 application buttons described 6 location of 2 not responding 111 opening applications with 9 reassigning 118 application icons 6 120 applicat...

Page 140: ...turning off 121 Bluetooth icon 6 Bluetooth indicator 86 Bluetooth radio 6 Bluetooth technology 80 81 bold fonts 113 bookmarks 107 brightness control 2 Brightness icon 2 browsing the web 81 86 105 buil...

Page 141: ...categorizing 35 deleting 35 entering in e mail addresses 95 keeping private 35 locating 33 Contacts application additional information for 35 addressing e mail from 95 customizing 35 opening 31 overvi...

Page 142: ...5 70 web pages 106 do s and don ts 18 documentation vii viii ix 7 19 24 29 35 41 46 50 54 58 70 79 89 96 104 107 118 123 Documents to Go application 8 21 downloading e mail 94 files 107 photos 32 60 d...

Page 143: ...g contacts 33 font styles 112 113 fonts changing 112 113 customizing e mail 96 formats audio files 71 multimedia file types 60 setting 118 text messaging and 99 formatting information 118 forwarding m...

Page 144: ...2 owner 111 receiving from outside sources 24 saving 120 security options for 118 sharing 3 19 29 storing 26 synchronizing 20 23 121 transferring to CPU 22 updating 20 21 infrared port See IR port inp...

Page 145: ...ional information for 104 attaching photos to 100 101 automatically resending 95 96 color coding 96 connection types for 81 creating multimedia 7 68 97 deleting 104 forwarding 103 104 getting 103 rece...

Page 146: ...21 onscreen keyboard See keyboard Open URL dialog box 106 Open URL icon 106 opening alternative keyboards 12 applications 6 9 16 118 handheld 122 handheld menus 15 Home screen 9 HotSync Manager 88 Not...

Page 147: ...tion 104 107 setting text messaging 104 Prefs icon 7 preinstalled applications 6 Previous View icon Acrobat Reader vii printing Getting Started Guide vii prioritizing tasks 43 privacy settings calenda...

Page 148: ...cure Digital input output SDIO 26 security options calendar 41 contacts 35 handheld 19 84 118 memos 50 notes 54 tasks 46 voice memos 58 Security settings 111 Select a Color Theme dialog box 117 Select...

Page 149: ...ting tasks 43 marking completed tasks 45 opening 43 organizing tasks 44 overview 42 securing contents 46 Tasks icon 7 technical assistance ix 19 58 79 89 96 104 107 telephone numbers See phone numbers...

Page 150: ...ion additional information for 58 opening 56 overview 55 playing messages from 57 Voice Memo button 4 7 56 Voice Memo list 57 voice memos 4 56 volume 57 116 W warnings 126 warranty 122 web addresses 1...

Reviews: