USERS MANUAL |
13
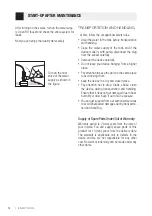
The treatment device must not be supplied with hot water.
Otherwise, all filters will be damaged and the device will be out
of warranty.
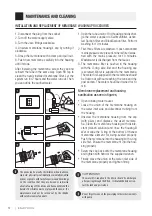
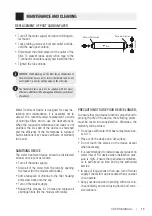
Turn off the water supply and open drinking wa-
ter faucet.
Loose tubing unions at inlet and outlet and dis-
card the used post-carbon.
Disconnect the union placed at the outlet of the
filter. To prevent leaks, apply teflon tape to the
T-connector on water supply and install the filter.
Tighten the tube unions.
REPLACEMENT OF POST CARBON FILTER
WARNING: FLOW marking on the filter shows thedirection of
the water outlet. Ensure not to insert it backwards and do not
over-tighten T-connector and the union on the other side.
PRECAUTIONS TO USE YOUR DEVICE LONGER;
To ensure that your device functions properly and to
prolong the life of the device, the following points-
must be taken into consideration. Otherwise, the
warranty will be voided.
Do not use with water that has temperature abo-
ve 40 ˚C.
Place or fix the device on a flat surface.
Do not touch the valves on the device except
when necessary.
It is recommended to install pressure reducer on
water inlet of RO device when installation pres-
sure is high. -Ensure that periodical maintenan-
ce is performed on time and by the authorized
service.
In case of long periods of non-use, turn off water
supply. Follow start-up procedure when you want
to re-operate.
Keep your device clean by wiping with a wet clo-
th periodically and avoid using harsh and corro-
sive cleaners.
Water Treatment Device is designed for easy ins-
tallation and maintenance. It is essential not to
exceed the recommended replacement periods
of cartridge filters and to use the deviceproperly.
When the required maintenance and repair is not
provided, the life span of the device is shortened
and the efficiency of the membranes is reduced.
Such situations may cause certificate of warranty
to be void.
SANITISING DEVICE
The water treatment device should be disinfected
at least once a year as follows;
Turn off the water supply.
Drain all of the water from the tank by opening
the faucet (for the models with tanks).
Add a teaspoon of chlorine to the filter housing
and screw back onto the cap.
Turn on the water supply.
Repeat this process for 2 times and replace all
cartridge filters (for the models with tanks).
Water outlet direction
Water inlet direction
Flow
T Connector


