background image

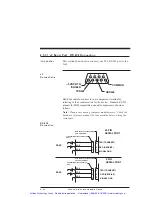
Parameter

Setup

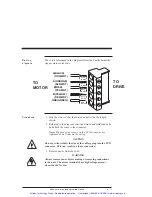
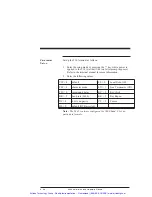
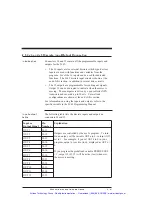
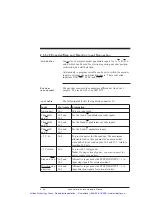
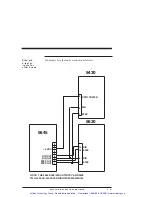
Set up the T10 terminal as follows:

1. Enter the setup mode by pressing the “.” key while power is

applied to the T10 (wait until the two letter prompt appears).
Refer to the terminal manual for more information.

2. Enter the following values:

VW = 4

default

LE = 0

Local Echo OFF

TM = 0

character mode

EN = 1

Line Terminator (CR)

TD = 0

turnaround delay

KC = 2

Key Click

BR = 2

baud rate (9600)

KR = 1

Key Repeat

DF = 4

8 bits, no parity

CU = 2

Cursor

HS = 0

default (DTR asserted)

Note: The 5645 is always configured for 9600 baud, 8 bit, no
parity data formats.

2 - 26

5645 Installation and Hardware Manual

Artisan Technology Group - Quality Instrumentation ... Guaranteed | (888) 88-SOURCE | www.artisantg.com

Summary of Contents for 5645

Page 1: ...l service in house repair center WE BUY USED EQUIPMENT Sell your excess underutilized and idle used equipment We also offer credit for buy backs and trade ins www artisantg com WeBuyEquipment REMOTE INSPECTION Remotely inspect equipment before purchasing with our interactive website at www instraview com LOOKING FOR MORE INFORMATION Visit us on the web at www artisantg com for more information on ...

Page 2: ...nual AUTOMATION TECHNOLOGY GROUP MOTION TECHNOLOGY DIVISION 110 Fordham Road Wilmington MA 01887 508 988 9800 Fax 508 988 9940 Part 903 564501 04 List Price 25 U S July 1997 Rev E Artisan Technology Group Quality Instrumentation Guaranteed 888 88 SOURCE www artisantg com ...

Page 3: ...2 5 3 J3 Serial Port Connection 2 19 2 5 4 J4 and J5 Discrete Input Output Connection 2 27 2 5 5 J6 Encoder Step and Direction Input Connection 2 34 2 5 6 J7 Step and Direction Output Connection 2 38 2 6 Setting the Switches 2 42 2 6 1 Setting Up Functions Using Switch S1 2 43 2 6 2 Setting Up Serial Address Using Switch S2 2 48 3 Powering Up the 5645 Microstep Indexer Drive 3 1 3 1 Testing the In...

Page 4: ...Interface Fault 3 11 Appendix A Specifications A 1 Appendix B Order Number and Ordering Information B 1 Appendix C Series Parallel Connections C 1 Index 5645 Hardware and Installation Manual Rev E Artisan Technology Group Quality Instrumentation Guaranteed 888 88 SOURCE www artisantg com ...

Page 5: ...20 kHz chopper frequency Internal power supplies operate from the 120 volt ac input The main motor supply consists of a full wave bridge rectifier into a capacitive input filter with in rush current limiting Shunt regulator circuitry protects the drive by removing energy from the supply if the dc bus voltage exceeds 200 volts This feature protects the circuitry from excessive voltage that may be g...

Page 6: ...ep pulse occurs Current sets the output current supplied to the motor The available RMS current settings are 5 6 7 5 and 8 amps Indexer features The indexer circuitry provides programmable motion control and allows flexible interfacing to the application Pacific Scientific StepperBASIC programming language with over 100 instructions combines the ease of the programming language BASIC with sophisti...

Page 7: ... include X Y tables and slides Packaging machinery Feed to length Labeling machines 1 2 System Diagram The following diagram shows an installation of the drive in a typical system Your installation may vary from this configuration Typical components used with the 5645 include Motor Computer or terminal External switches Selection and installation guidelines for these components are described in Ch...

Page 8: ... OUTPUT 11 OUTPUT 10 OUTPUT 9 OUTPUT 8 OUTPUT 7 I O RTN INPUT 16 INPUT 15 INPUT 14 INPUT 13 INPUT 12 INPUT 11 INPUT 10 INPUT 9 1 N C 2 INPUT 1 3 INPUT 2 4 INPUT 3 5 INPUT 4 6 INPUT 5 7 INPUT 6 8 INPUT 7 9 INPUT 8 I O RTN OUTPUT 1 OUTPUT 2 10 11 12 I O RTN 17 OUTPUT 6 16 OUTPUT 5 15 OUTPUT 4 14 OUTPUT 3 13 1 5 VDC RTN 2 TXD 232 3 RXD 232 4 5 VDC 6 TXD 7 TXD 8 RXD 9 RXD 5 COMMON 120 230 VAC 50 60 HZ...

Page 9: ...all set up test with simple commands and troubleshoot the 5645 Refer to the StepperBASIC Programming Manual for programming instructions and reference 5645 Installation and Hardware Manual 1 5 Artisan Technology Group Quality Instrumentation Guaranteed 888 88 SOURCE www artisantg com ...

Page 10: ...g list A label located on the side of the unit identifies the unit by model number serial number and date code Inspection procedure Inspect the unit for any physical damage that may have been sustained during shipment If you find damage either concealed or obvious contact your buyer to make a claim with the shipper Do this as soon as possible after receipt of the unit Storing the unit Store the 56...

Page 11: ...ng This is of special concern at high speed and with low inductance motors The motor case temperature should not exceed 100 degrees C If you need help in selecting a motor contact your local Pacific Scientific distributor for sizing and motor compatibility assistance 2 2 1 Selecting System Components Introduction Match your 5645 unit to your other components Serial communications interfaces The 56...

Page 12: ...intended to be operated with open collector type circuitry These inputs can be polled under software control Six of the 16 inputs can be pre defined for specific functions LIMIT START STOP JOG and mechanical HOME SWITCH General outputs 12 open collector discrete outputs under software control Each output can sink a maximum of 50 milliamperes Maximum off voltage is 12 volts One of the 12 outputs ca...

Page 13: ...volts above to 160 volts below earth ground potential For additional safety benefits an isolation transformer may be used WARNING The circuits in the 5645 are a potential source of severe electrical shock Follow the safety guidelines to avoid shock Safety guidelines To avoid possible personal injury whenever you are working with the 5645 Do not power up the unit without the cover on and the chassi...

Page 14: ...r Installation Cabinet selection Select a standard 8 inch 205 mm deep or greater NEMA National Electrical Manufacturers Association enclosure appropriate for industrial applications CAUTION The internal cabinet temperature should not exceed 50o C 60o C with derating If the cabinet is ventilated by filtered or conditioned air make sure to prevent the accumulation of dust and dirt on the unit s elec...

Page 15: ...0 0 10 0 28 DIA 0 625 DIA 0 10 0 45 0 45 1 76 1 4 20 GROUND STUD 1 24 MTG 0 40 0 28 TYP 6 00 1 00 MIN FOR ALL OTHER CONNECTORS 1 70 MIN FOR J3 SIDE VIEW FRONT VIEW MATING CONNECTOR CLEARANCE 0 30 0 75 10 25 12 50 11 75 MTG J3 J5 J4 J1 J2 J7 J6 2 6 5645 Installation and Hardware Manual Artisan Technology Group Quality Instrumentation Guaranteed 888 88 SOURCE www artisantg com ...

Page 16: ...1 50 MTG 10 16 7 11 TYP 152 40 25 40 MIN FOR ALL OTHER CONNECTORS 43 18 MIN FOR J3 SIDE VIEW FRONT VIEW MATING CONNECTOR CLEARANCE 7 62 19 05 260 35 317 50 298 45 MTG J3 J5 J4 J1 J2 J7 J6 5645 Installation and Hardware Manual 2 7 Artisan Technology Group Quality Instrumentation Guaranteed 888 88 SOURCE www artisantg com ...

Page 17: ...the three slots refer to the dimensions figure using a 1 4 20 or 10 M6 metric equivalent bolt Power dissipation for cabinet The 5645 dissipates power causing cabinet heating Power dissipation is determined by a number of factors such as output current motor winding impedance input step rates and idle current reduction The 5645 is factory preset for 5 amps phase current and idle current reduction e...

Page 18: ...t common wiring practices and should prove satisfactory in the majority of applications CAUTION Non standard applications local electrical codes special operating conditions and system configuration wiring needs take precedence over the information included here Therefore you may need to wire the driver differently than described here Noise pickup reduction Use shielded and twisted cabling for the...

Page 19: ...2 OUTPUT 11 OUTPUT 10 OUTPUT 9 OUTPUT 8 OUTPUT 7 I O RTN INPUT 16 INPUT 15 INPUT 14 INPUT 13 INPUT 12 INPUT 11 INPUT 10 INPUT 9 1 N C 2 INPUT 1 3 INPUT 2 4 INPUT 3 5 INPUT 4 6 INPUT 5 7 INPUT 6 8 INPUT 7 9 INPUT 8 I O RTN OUTPUT 1 OUTPUT 2 10 11 12 I O RTN 17 OUTPUT 6 16 OUTPUT 5 15 OUTPUT 4 14 OUTPUT 3 13 1 5 VDC RTN 2 TXD 232 3 RXD 232 4 5 VDC 6 TXD 7 TXD 8 RXD 9 RXD 5 COMMON 120 230 VAC 50 60 H...

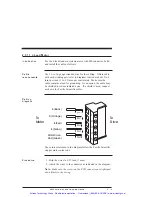
Page 20: ...g connector supplied with the unit is ELFH05110 Making your own cable If you need to build the cable refer to the appropriate subsection as follows To build the cable for motor type Refer to Section 4 lead 2 5 1 1 8 lead series 2 5 1 2 8 lead parallel 2 5 1 3 Pacific Scientific cable If the motor cable is purchased from Pacific Scientific install as follows The Pacific Scientific order number is S...

Page 21: ...o the unit The motor terminals have high voltage present when the 5645 is On 2 Plug the mating connector firmly into the 5645 3 Plug the other mating connector into the motor and screw down the retaining collar 4 Reconnect power to the 5645 5 Pin PCD ELFH05100 SPC XXX J1 5 Pin MS Connector MOTOR MOTOR PHASES A B CASE GND A B 1 2 3 4 5 1 2 3 4 5 A B C D E 2 12 5645 Installation and Hardware Manual ...

Page 22: ... shield is used connect as shown for Pacific Scientific cables Cabling diagram The colors referenced in the diagram follow the Pacific Scientific stepper motor color code Procedure 1 Strip the wires to 0 27 inch 7 mm 2 Attach the wires to the connector as indicated in the diagram Note Make sure the screws on the PCD connector are tightened down firmly to the wiring 1 2 3 4 5 To Drive To Motor A Bl...

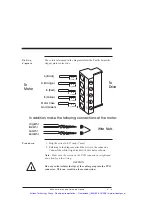
Page 23: ...ating connector into the motor 7 Switch On the 5645 2 5 1 2 8 Lead Motor Series Connected Introduction For an 8 lead motor to be wired in series build and install the cable as follows Cable requirements Use 16 to 14 gauge stranded wire for the cabling Obtain cable with each winding pair see diagram twisted at about 3 to 4 turns per inch 1 to 1 5 turns per centimeter Make sure the cable contains a ...

Page 24: ...tightened down firmly on the wiring CAUTION Do not pre tin solder the tips of the cables going into the PCD connector This can result in a loose connection 1 2 3 4 5 To Drive To Motor A Black A Orange B Red B Yellow Motor Case Gnd Green In addition make the following connections at the motor Wire Nuts Org Wht Blk Wht Yel Wht Red Wht 27 in 7 mm 27 in 7 mm 27 in 7 mm 27 in 7 mm 27 in 7 mm 5645 Insta...

Page 25: ...Lead Motor Parallel Connected Introduction For an 8 lead motor to be wired in parallel build and install the cable as follows Cable requirements Use 16 to 14 gauge stranded wire for the cabling Obtain cable with each winding pair see diagram twisted at about 3 to 4 turns per inch 1 to 1 5 turns per centimeter Make sure the cable contains a lead for grounding As an option the cable may be shielded ...

Page 26: ...TION Do not pre tin solder the tips of the cables going into the PCD connector This can result in a loose connection 3 Remove power from the 5645 WARNING Always remove power before making or removing connections to the unit The motor terminals have high voltage present when the 5645 is On TO DRIVE TO MOTOR A BLACK ORG WHT 1 27 in 7 mm 27 in 7 mm 27 in 7 mm 27 in 7 mm 27 in 7 mm 2 3 4 5 B RED YEL W...

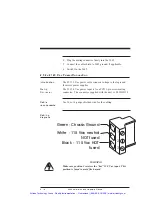
Page 27: ...nput is for a PCD 3 pin screw mating connector The connector supplied with the unit is ELFH03110 Cable requirements Use 16 to 14 gauge shielded wire for the cabling Cabling diagram WARNING Make sure position 3 receives the hot 120 V ac input This position is fused to avoid fire hazard 1 2 3 Green Chassis Ground White 115 Vac neutral NOT fused Black 115 Vac HOT fused 2 18 5645 Installation and Hard...

Page 28: ...terface of your unit You can configure to control single or multiple 5645s Single and multi unit control For controlling a single 5645 use RS 232 communications DIP switch S2 must be set to Address 31 for RS 232 Communications as described in Section 2 6 2 For controlling multiple 5645s RS 422 or RS 485 communications permits a single PC to host from 1 to 31 5645s each requiring a unique address r...

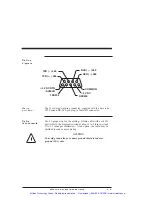
Page 29: ...5 5 V dc J3 4 5 volt dc output Note The total 5 Vdc current from pins J3 4 J6 8 and J7 7 must be less than 450 mA 5 V Common J3 5 Common serial port interface Txd 485 J3 6 RS 485 transmitter output from 5645 Txd 485 J3 7 Rxd 485 J3 8 RS 485 transmitter input to 5645 Rxd 485 J3 9 2 20 5645 Installation and Hardware Manual Artisan Technology Group Quality Instrumentation Guaranteed 888 88 SOURCE www...

Page 30: ...diagram twisted at about 3 to 4 turns per inch 1 to 1 5 turns per centimeter As an option the cable may be shielded to reduce noise pickup CAUTION To avoid ground loops connect ground shield to indexer ground J3 1 only TXD 485 RXD 485 COMMON RXD232 TXD232 5 VDC RTN SHIELD 5 VDC TXD 485 RXD 485 6 7 8 9 1 2 3 4 5 5645 Installation and Hardware Manual 2 21 Artisan Technology Group Quality Instrumenta...

Page 31: ... manual for your machine before wiring the serial port RS 232 Connection 25 PIN SERIAL PORT TXD TRANSMIT TXD TRANSMIT RXD RECEIVE RXD RECEIVE SIGNAL GND J3 5 J3 5 J3 2 J3 2 J3 3 25 PIN SERIAL PORT CONNECTOR ON PC OR TERMINAL 9 PIN SERIAL PORT CONNECTOR ON PC OR TERMINAL 25 PIN SERIAL MATING CONNECTOR DB 25 9 PIN SERIAL MATING CONNECTOR DB 9 J3 3 2 3 3 2 3 2 2 3 7 5 5 7 SIGNAL GND 5645 5645 9 PIN S...

Page 32: ...s described in Section 2 6 2 RS 485 RS 422 connections to J3 are shown below A multidrop interconnection diagram showing multiple axes connected to a single host is also included Diagram RS 485 TXD RS 485 TXD RS 485 RXD RS 485 RXD COMMON MULTIDROP MASTER SUPPORTING RS 422 RS 485 5645 1 5645 2 RS 485 TXD RS 485 TXD RS 485 RXD RS 485 RXD COMMON 5 9 8 7 6 5 9 8 7 6 J3 J3 6 1 2 3 4 5 7 8 9 5645 Instal...

Page 33: ... 422 RS 232 to RS 422 adapter RS 232 to RS 485 RS 422 adapters are available from many sources RS 485 RS 422 pin out diagram 5645 5645 5645 J3 J3 J3 2 14 5 17 9 8 7 6 5 9 8 7 6 5 9 8 7 6 5 7 7 3 2 PC TXD POWER JACK RS 232 TO RS 422 ADAPTOR 25 SOCKET MALE 25 SOCKET FEMALE B B MODEL 422 RETURN 12 VDC PC RXD PC COMMON 2 24 5645 Installation and Hardware Manual Artisan Technology Group Quality Instrum...

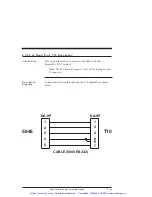
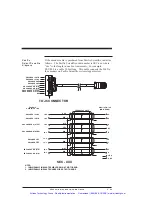
Page 34: ... T10 terminal requires a DA 9P 9 pin plug in male D connector Connection Diagram Connections between the 5645 and the T10 terminal are shown below DA 9P 1 1 2 3 9 3 2 4 8 5 7 DA 9P CABLE 5600 RS232 T10 5645 5645 Installation and Hardware Manual 2 25 Artisan Technology Group Quality Instrumentation Guaranteed 888 88 SOURCE www artisantg com ...

Page 35: ...lowing values VW 4 default LE 0 Local Echo OFF TM 0 character mode EN 1 Line Terminator CR TD 0 turnaround delay KC 2 Key Click BR 2 baud rate 9600 KR 1 Key Repeat DF 4 8 bits no parity CU 2 Cursor HS 0 default DTR asserted Note The 5645 is always configured for 9600 baud 8 bit no parity data formats 2 26 5645 Installation and Hardware Manual Artisan Technology Group Quality Instrumentation Guaran...

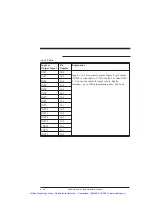
Page 36: ...d of this section For information on using the inputs and outputs refer to the specific variable in the 5645 Programming Manual Input output table The following table lists the discrete inputs and outputs on connectors J4 and J5 Input or Output Signal Pin Number Explanation OUT 1 J4 11 Outputs are controlled by the user s program To turn On an output set the variable OUTn to 0 to turn it Off set t...

Page 37: ...can use inputs to signal events display messages go to other programming lines and so on INP2 J4 3 INP3 J4 4 INP4 J4 5 INP5 J4 6 INP6 J4 7 INP7 J5 8 INP8 J5 9 INP9 J5 1 INP10 J5 2 INP11 J5 3 INP12 J5 4 INP13 J5 5 1NP14 J5 6 1NP15 J5 7 INP16 J5 8 2 28 5645 Installation and Hardware Manual Artisan Technology Group Quality Instrumentation Guaranteed 888 88 SOURCE www artisantg com ...

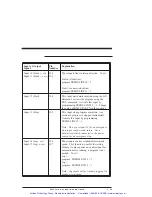
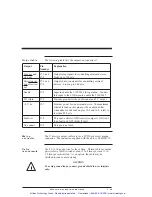
Page 38: ...gress is stopped immediately Activate this input by programming PREDEF INP13 1 Note Do not use input 13 for an emergency stop to prevent personal injury Use a hard wired switch connected to the power source for an emergency stop Input 14 Jog cw Input 15 Jog c cw J5 6 J5 7 These inputs control rotation direction and speed This function is useful for testing because it only requires an enable signal...

Page 39: ...4 10 J4 17 J5 9 J5 16 These pins provide the ground for the input and output signals Mating connector The J4 and J5 discrete I O cables are for a PCD 17 pin screw mating connector The connectors supplied with the unit ELFH17110 Cable requirements Use 22 to 14 gauge wire for the cabling CAUTION To avoid ground loops connect ground shield to user interface only 2 30 5645 Installation and Hardware Ma...

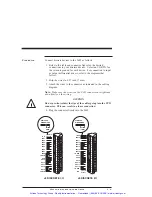
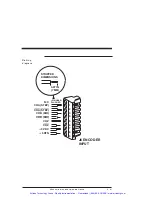
Page 40: ...CAUTION Do not pre tin solder the tips of the cables going into the PCD connector This can result in a loose connection 4 Plug the connector firmly into the 5645 STRIPPED DIMENSIONS STRIPPED DIMENSIONS 27 IN 7 MM 27 IN 7 MM PIN HOLE PLUGGED PIN HOLE PLUGGED N C INP9 INP1 INP10 1 1 2 2 3 3 4 4 5 5 6 6 7 7 8 8 9 9 10 10 11 11 12 12 13 13 14 14 15 15 16 16 17 17 INP2 INP11 INP3 INP12 INP4 INP13 INP5 ...

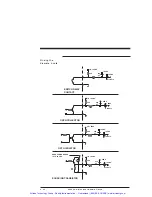
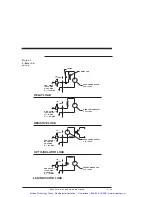
Page 41: ... OPEN COLLECTOR OPTO ISOLATOR SOURCING TRANSISTOR 5VDC 5VDC 5VDC 5VDC 5VDC 5VDC 5VDC 5VDC 74HC14 74HC14 74HC14 74HC14 220K 220K 220K 220K 22K 22K 22K 22K 470 pF 470 pF 470 pF 470 pF 2 32 5645 Installation and Hardware Manual Artisan Technology Group Quality Instrumentation Guaranteed 888 88 SOURCE www artisantg com ...

Page 42: ... MAX V 16V MAX CE I O 5 VDC I O 5 VDC I O 5 VDC I O 5 VDC IN4002 RELAY COIL USER POWER SUPPLY 0 TO 12 VDC USER POWER SUPPLY 0 TO 12 VDC USER POWER SUPPLY 0 TO 12 VDC USER POWER SUPPLY 0 TO 12 VDC RELAY LOAD RESISTIVE LOAD OPTO ISOLATOR LOAD LED INDICATOR LOAD 5645 Installation and Hardware Manual 2 33 Artisan Technology Group Quality Instrumentation Guaranteed 888 88 SOURCE www artisantg com ...

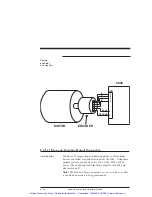
Page 43: ... J6 3 For the A and A quadrature encoder inputs Channel B and B J6 4 and J6 5 For the B and B quadrature encoder inputs Channel Z and Z J6 6 and J6 7 For the Z and Z quadrature inputs 5 V dc J6 8 To provide power for the encoder The maximum allowable load on this pin must be an amount that when added to the load on pins J3 4 and J7 7 totals to less than 450 mA 5 V return J6 9 To provide 5 volt gro...

Page 44: ...NCODER CH Z ENCODER CH Z ENCODER CH Z ENCODER CH Z ENCODER CH B DIR ENCODER CH B DIR ENCODER CH B DIR ENCODER CH B DIR ENCODER CH A STEP ENCODER CH A STEP ENCODER CH A STEP ENCODER CH A STEP N C PHOENIX 9 PIN 5mm CTRS FEEDBACK CABLE MS3116F12 10S MOTOR END G H A NC B E C F D J N C K N C BLK NOTE 1 INDIVIDUALLY INSULATE SHIELD DRAIN AT MOTOR END 2 INDIVIDUALLY INSULATE UNUSE WIRE AT BOTH ENDS WHT B...

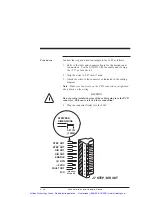
Page 45: ...tor figure for the desired input connections Connect the 5 RTN if using the 5 V dc for the encoder 2 Strip the wires to 0 27 inch 7 mm 3 Attach the wires to the connector as indicated in the cabling diagram Note Make sure the screws on the PCD connector are tightened down firmly on the wiring CAUTION Do not pre tin solder the tips of the cables going into the PCD connector This can result in a loo...

Page 46: ...4 5 6 7 8 9 PIN HOLE PLUGGED CHA STEP CHA STEP CHB DIR CHB DIR CHZ CHZ 5 VDC 5 RTN J6 ENCODER INPUT 0 27 IN 7 MM 5645 Installation and Hardware Manual 2 37 Artisan Technology Group Quality Instrumentation Guaranteed 888 88 SOURCE www artisantg com ...

Page 47: ...ou may control up to two 5645 5630 5445 or 5430 drives The enable input and the fault outputs for the 5645 are also located on J7 Note The Step and Direction outputs are active if the controller is enabled and motion is being commanded MOTOR ENCODER 5645 J6 2 A 3 A 4 B 5 9 8 B 5 Vdc GROUND 2 38 5645 Installation and Hardware Manual Artisan Technology Group Quality Instrumentation Guaranteed 888 88...

Page 48: ...e an amount that when added to the load on pins J3 4 and J6 8 totals to less than 450 mA Fault out J7 8 This open collector NPN transistor output is ON low if no fault and OFF high if fault No connect J7 9 This pin is not used Mating connector The J7 discrete output cables are for a PCD 9 pin screw mating connector The connector supplied with the unit is ELFH09110 Cable requirements Use 22 to 14 g...

Page 49: ...Make sure the screws on the PCD connector are tightened down firmly on the wiring CAUTION Do not pre tin solder the tips of the cables going into the PCD connector This can result in a loose connection 4 Plug the connector firmly into the 5645 STRIPPED DIMENSIONS STEP OUT 1 2 3 4 5 6 7 8 9 STEP OUT DIR OUT DIR OUT ENABLE I O RTN 5 VDC N C PIN HOLE PLUGGED FAULT OUT J7 STEP DIR OUT 0 27 IN 7 MM 2 4...

Page 50: ... DIR DIR OPTO POWER DIR OUT 5 VDC 9 8 7 6 5 4 3 2 1 DIR DIR OUT STEP STEP STEP OUT NOTE THE 5645 STEP DIR OUTPUTS CAN DRIVE TWO 5630 OR 5430 STEP DIR INPUTS MAXIMUM STEP STEP OUT 5645 5645 Installation and Hardware Manual 2 41 Artisan Technology Group Quality Instrumentation Guaranteed 888 88 SOURCE www artisantg com ...

Page 51: ...ration with RS 485 and RS 422 communication as described in section 2 6 2 Setting Up Functions Using Switch S2 Groups of individual switches on switch S1 enable or disable these functions Location The switches are located on the top of the 5645 as shown Note The arrows show the UP switch position referenced in the tables that follow S1 DRIVE CURRENT STEPSIZE S2 SERIAL ADDRESS 2 42 5645 Installatio...

Page 52: ...g Switch S1 Definition The step size sets the amount of rotation per input step You may select from among five step sizes Benefits Selecting a microstep size of 1 5 or smaller results in Higher resolution Smoother low speed operation In some applications ability to operate in low speed resonance region 5645 Installation and Hardware Manual 2 43 Artisan Technology Group Quality Instrumentation Guar...

Page 53: ... the FAULT LED to light 1 2 3 4 5 6 7 8 1 2 3 4 5 6 7 8 1 2 3 4 5 6 7 8 1 1 2 2 3 3 4 4 5 5 6 6 7 7 8 8 To set step size as Move switch SW1 settings to full 200 steps motor rev Default factory setting 1 2 400 steps motor rev 1 5 1 000 steps motor rev 1 25 5 000 steps motor rev 1 125 25 000 steps motor rev 2 44 5645 Installation and Hardware Manual Artisan Technology Group Quality Instrumentation G...

Page 54: ...r delays the switching of the output transistors with respect to the incoming pulse to damp the instability Benefit This feature controls torque at mid range speeds When enabled the motor maintains torque at mid range operation provided the torque load does not exceed motor torque ratings Procedure With the power OFF enable or disable mid range instability by setting switch position 4 as follows 1...

Page 55: ...motor is reduced by approximately 50 If you select a microstep setting and a current of 7 5 or 8 0 amps ICR is automatically enabled even if the switch is not set to enable When ICR is enabled motor stiffness around the holding position is reduced by approximately 50 Benefits The ICR function Reduces motor and drive heating during stand by operation Reduces 5645 power dissipation Procedure With th...

Page 56: ...he power OFF select from among the four current values by setting switch positions 6 7 and 8 as follows 1 2 3 4 5 6 7 8 1 2 3 4 5 6 7 8 1 2 3 4 5 6 7 8 1 2 3 4 5 6 7 8 To set RMS current to Move switch SW1 settings to 5 0 amps 7 1 amps peak Default factory setting 6 0 amps 8 5 amps peak 7 5 amps 10 6 amps peak 8 0 amps 11 3 amps peaK 5645 Installation and Hardware Manual 2 47 Artisan Technology Gr...

Page 57: ...rom the 5645 2 Refer to the table to set the 5645 to the appropriate address Note Addresses 0 to 30 are for RS 422 485 operation Address 31 is for RS 232 operation 1 Each 5645 sub system connected to the multidrop master must have a unique serial address Addresses 0 to 30 are for RS 422 RS 485 operation 2 RS 232 requires that all switches are in the up position address 31 1 OPEN UP CLOSED DOWN 2 3...

Page 58: ... Off On On Off On 25 Off On On Off Off 10 On Off On Off On 26 On Off On Off Off 11 Off Off On Off On 27 Off Off On Off Off 12 On On Off Off On 28 On On Off Off Off 13 Off On Off Off On 29 Off On Off Off Off 14 On Off Off Off On 30 On Off Off Off Off 15 Off Off Off Off On 31 Off Off Off Off Off For RS 232 operation factory default 4 Reconnect power to the 5645 5 Repeat steps 1 through 4 for other 5...

Page 59: ...r terminal to test the basic functionality of the 5645 A computer or terminal is required for complete testing Procedure First connect the computer or terminal by referring to Chapter 1 in the Programming Manual Setting up for Programming use the Terminal Emulator Mode for this test Test your installation as follows WARNING Perform this initial power up with the motor shaft disconnected from the l...

Page 60: ... step size to 1 25 step and enable microstep current boost WARNING Make sure the 120 volt ac power is removed before proceeding 3 Unplug the J1 motor connector 4 Switch On the 120 volt ac power Check that the POWER LED is the only LED On 5 Again switch the power Off 6 Connect the J1 motor connector 7 Switch On the 120 volt ac power Check that the POWER LED is the only LED On If the POWER LED is On...

Page 61: ...type GO VEL enter This moves the motor at the default run speed 6 Type DIR 1 enter This changes the default direction if DIR 0 was the initial setting Repeat Step 5 The motor should run in the reverse direction 7 Continue exercising the unit testing it in your application Getting help If you need further help with your installation contact Pacific Scientific at 508 988 9800 from 8 a m to 5 p m Eas...

Page 62: ...1 ENABLED Drive has received a valid Enable command All internal circuits are enabled and the drive is not faulted If the driver is faulted this LED is off 3 2 2 STEP ACTIVE The Drive has received a step command 3 2 3 POWER FAULT Either an external or internal short or internal power supply problem 3 2 4 OVER TEMP Heatsink temperature over 85 degrees C 3 2 5 mP FAULT Indexer circuitry determines d...

Page 63: ...ion 2 5 2 Apply correct voltage Is 120 V ac applied Replace fuse and retry Is 120 V ac within operational range 98 to 132 V Internal failure Contact Pacific Scientific Are fuses OK see following procedures No Yes No Yes No Yes 5645 Installation and Hardware Manual 3 5 Artisan Technology Group Quality Instrumentation Guaranteed 888 88 SOURCE www artisantg com ...

Page 64: ... cover removed Contact with energized components causes severe shock or burn 2 Remove the 4 phillips head screws located on the sides of the 5645 3 Remove the cover 4 Check the fuses F1 and F2 located by the J1 120 V ac connector Replace open fuses as follows Replace fuse With Bussâ type F1 MDA 20 amp F2 MDL 1 2 amp 5 Replace the cover 3 6 5645 Installation and Hardware Manual Artisan Technology G...

Page 65: ...ED On Set valid step size Refer to section 2 6 1 Are POWER FAULT LED OVERTEMP LED and Microprocessor FAULT LED Off Is the software variable ENABLE 1 Is an enable signal applied correctly No Yes No Yes No Yes Apply enable signal refer to section 2 5 3 to check connection No Yes Is step size setting valid 5645 Installation and Hardware Manual 3 7 Artisan Technology Group Quality Instrumentation Guar...

Page 66: ... rotate the shaft with power and enable applied There should be high resistance Then disable the drive or turn power Off and rotate the motor shaft There should be some resistance but rotation should occur Refer to section 3 2 2 Is ENABLE LED On Refer to section 2 5 1 to check wiring connection Internal failure Contact Pacific Scientific Is step rate below maximum No Yes Yes No Reprogram valid ste...

Page 67: ...ower still connected The motor terminals contain hazardous voltage when power is connected Reapply power POWER FAULT LED goes off Cable or internal failure Contact Pacific Scientific 5645 power fault fixed No Yes No Yes Check cables for shorts Check connections per sections 2 5 1 and 2 5 2 Reconnect cables Reapply power POWER FAULT LED goes off 5645 Installation and Hardware Manual 3 9 Artisan Tec...

Page 68: ...sure drive temperature under operational conditions Lower ambient temperature to below 50 degrees C Check ambient temperature with 5645 On Is the 5645 environment below 50 degrees C 60 degrees derated Internal failure Contact Pacific Scientific Yes Yes No No Is fan On 3 10 5645 Installation and Hardware Manual Artisan Technology Group Quality Instrumentation Guaranteed 888 88 SOURCE www artisantg ...

Page 69: ...AULT LED lights during operation Internal failure Contact Pacific Scientific Troubleshoot as indicated by the other LEDs Remove Power Reapply power LED goes off Yes No 5645 mP fault fixed 5645 Installation and Hardware Manual 3 11 Artisan Technology Group Quality Instrumentation Guaranteed 888 88 SOURCE www artisantg com ...

Page 70: ...acCom Computer fault Troubleshoot per computer manual Check that terminal transmit and receive lines from computer go to receive and transmit lines on indexer drive Internal failure Contact Pacific Scientific 1 Disconnect serial cable 2 Short pins 2 3 refer to 2 5 3 1 3 Type character on keyboard Character displayed No Yes No Yes No Yes 3 12 5645 Installation and Hardware Manual Artisan Technology...

Page 71: ...ientific Motion Technology Division 110 Fordham Road Wilmington MA 01887 Attn Motion Control Repair Department RMA ________ Note Do not ship Pacific Scientific motors to the above address The correct address for motor returns is Pacific Scientific Motor Products Division 4301 Kishwaukee Street Rockford IL 61105 Attn Motor Repair Department RMA _________ Shipment of your 5645 or motor to Pacific Sc...

Page 72: ... current regulated Bus voltage 160 volt dc nominal at 120 volt ac input Rated current Switch selectable 8 0 A RMS 11 3 A peak microstepping nominal 7 5 A RMS 10 6 A peak microstepping nominal 6 0 A RMS 8 5 A peak microstepping nominal 5 0 A RMS 7 1 A peak microstepping nominal 5645 Installation and Hardware Manual A 1 Artisan Technology Group Quality Instrumentation Guaranteed 888 88 SOURCE www ar...

Page 73: ...ut to output lag is less than 270 degrees of the input step pulse period 2 With mid range instability control disabled input to output lag is less than 10 microseconds for all step frequencies Chopper frequency 20 kHz nominal Maximum pulse rate Switch selectable Pulses second full step 40 000 pulses second 1 2 step 80 000 pulses second 1 5 100 000 pulses second 1 25 500 000 pulses second 1 125 500...

Page 74: ...dle current reduction enabled Storage temperature 55 degrees to 70 degrees C Humidity 10 to 90 noncondensing Altitude 5 000 feet 1500 meters Mechanical Power dissipation For an estimate of the power dissipation for use in cabinet cooling requirements use the values shown For an RMS current of amps Use a value of watts 8 0 90 7 5 80 6 0 50 5 0 35 5645 Installation and Hardware Manual A 3 Artisan Te...

Page 75: ...Dimensions Refer to section 2 4 Weight 10 pounds 4 5 kg A 4 5645 Installation and Hardware Manual Artisan Technology Group Quality Instrumentation Guaranteed 888 88 SOURCE www artisantg com ...

Page 76: ...C xxx xxx represents length in feet for example SPC 005 is a cable 5 feet long For lengths over 50 feet contact Pacific Scientific The connectors are MS on the motor end and PCD on the drive end to connect Pacific Scientific motors Encoder Cable SEC xxx xxx represents length in feet for example SEC 010 is a cable 10 feet long For cable lengths over 50 feet contact Pacific Scientific The connectors...

Page 77: ...0 from 8am to 5pm Eastern Standard Time Fax 508 988 9940 Write Pacific Scientific Motion Technology Division 110 Fordham Road Wilmington MA 01887 B 2 5645 Installation and Hardware Manual Artisan Technology Group Quality Instrumentation Guaranteed 888 88 SOURCE www artisantg com ...

Page 78: ...ed characteristics They also affect the current rating in the motor 8 lead motor The 8 lead motor is the most versatile configuration It can be connected by the user in either an 8 lead 4 lead series or parallel or 6 lead configuration BLK WHT BLK WHT ORG ORG RED WHT RED WHT YEL YEL 5645 Installation and Hardware Manual C 1 Artisan Technology Group Quality Instrumentation Guaranteed 888 88 SOURCE ...

Page 79: ...llow Yel B 6 5 Wht Blk Wht Org 7 8 Wht Red Wht Yel 4 lead bipolar parallel 1 5 Blk Wht Org A 3 6 Org Wht Blk A 2 7 Red Wht Yel B 4 8 Yel Wht Red B 6 lead unipolar 1 Black Blk A 3 Orange Org B 2 Red C 4 Yellow Yel D 6 5 Wht Blk Wht Org V 7 8 Wht Red Wht Yel V C 2 5645 Installation and Hardware Manual Artisan Technology Group Quality Instrumentation Guaranteed 888 88 SOURCE www artisantg com ...

Page 80: ...ble Refer to the table below for detailed connection information Connection Terminal Lead Color Driver Connection 6 lead unipolar 1 Black Blk A 3 Orange Org B 2 Red C 4 Yellow Yel D 5 Wht Blk Org V 6 Wht Red Yel V BLK WHT BLK ORG WHT RED YEL ORG RED YEL 5645 Installation and Hardware Manual C 3 Artisan Technology Group Quality Instrumentation Guaranteed 888 88 SOURCE www artisantg com ...

Page 81: ... B 4 Yellow Yel B 5 Wht Blk Org None 6 Wht Red Yel None Note Terminals 7 and 8 are not used 4 lead motor The 4 lead motor is for use only with bipolar drives BLK ORG RED YEL C 4 5645 Installation and Hardware Manual Artisan Technology Group Quality Instrumentation Guaranteed 888 88 SOURCE www artisantg com ...

Page 82: ...lly the same torque will be produced at half the drive current when the windings are in series Doubling the effective number of turns in the windings means that the inductance increases by a factor of four This causes the torque to drop off much more rapidly as speed increases As a result the series mode is only useful at low speeds The maximum shaft power obtainable in series is typically half th...

Page 83: ...e use of one half winding only The current rating of a stepper motor is determined by allowable temperature rise Unless the motor manufacturer s data states otherwise the rating is a unipolar value and assumes both phases of the motor are energized simultaneously Therefore a current of 5 amps means that the motor will accept 5 amps flowing in each half winding Summary As a general rule parallel co...

Page 84: ...ector J1 2 11 J2 2 18 J3 2 20 J4 2 30 J5 2 30 J6 2 36 J7 2 27 Current 1 2 D Definition general drive 1 1 Differential wiring inputs 2 32 outputs 2 33 DIR variable 3 3 Direction inputs 2 24 outputs 1 2 Discrete I O 2 27 cable 2 30 connector 2 30 inputs differential wiring 2 32 outputs differential wiring 2 33 procedure 2 31 Drive current stepsize see S1 switch features 1 1 Dimensions inches 2 6 mil...

Page 85: ...h 2 30 I I O return 2 30 ICR see Idle current reduction Idle current reduction 2 46 setup 2 46 benefits 2 46 definition 2 46 procedure 2 46 Indexer features 1 1 Input Output connections diagram 2 10 Inputs 1 2 differential wiring 2 32 encoder step and direction 2 34 installation 2 31 programmable 2 28 table 2 28 to 2 30 INPx variable 2 28 Inspecting 2 1 Instability frequency 2 31 Installation 2 1 ...

Page 86: ... 36 ground loops 2 36 input table 2 34 PacSci cable 2 35 procedure 2 36 J7 Step and direction outputs 2 38 cable 2 39 connector 2 39 fault output and enable input 2 6 ground loops 2 39 procedure 2 40 Jog 3 2 Jog functionality 2 29 Jog functionality 2 29 L LEDs 3 4 ENABLED 3 3 3 4 3 8 POWER 3 2 3 4 POWER FAULT 3 2 3 3 3 6 3 9 mFAULT 3 4 3 9 Limit functionality 2 29 M Manual how to use 1 4 Memory 1 ...

Page 87: ...1 1 P PacCom ToolKit 3 9 Packing list 2 1 PacSci StepperBASIC 1 1 Phase current reduction 2 32 POWER 3 2 3 4 3 5 Power dissipation cabinet cooling 2 8 idle current reduction 2 46 POWER FAULT 3 2 3 4 3 5 3 6 Power requirement 3 5 Power up 3 1 PREDEF INPx variable 2 29 PREDEF OUT variable 2 27 Predefined outputs 2 27 Programmable inputs 2 28 R RAM battery backed 1 3 Repair procedure 3 13 Replacement...

Page 88: ... 1 Specifications A 1 Start functionality 2 29 Statement SEEK HOME 2 19 Status indicators 1 1 3 4 STEP ACTIVE 3 4 3 8 STEP DIR INPUT variable 2 34 Step and direction outputs cable 2 39 connector 2 39 fault output and enable input 2 6 ground loops 2 39 introduction 1 2 2 27 output table 2 39 procedure 2 40 Step inputs 2 24 Step outputs 1 2 Step set up 2 30 benefits 2 30 definition 2 30 procedure 2 ...

Page 89: ...RMT START 2 29 STEP DIR INPUT 2 34 Variables On Off convention 2 19 Ventilation 2 5 Voltage internal drive 2 4 W Weight 2 8 A 3 Wiring 2 10 I 6 5645 Installation and Hardware Manual Artisan Technology Group Quality Instrumentation Guaranteed 888 88 SOURCE www artisantg com ...

Page 90: ...l service in house repair center WE BUY USED EQUIPMENT Sell your excess underutilized and idle used equipment We also offer credit for buy backs and trade ins www artisantg com WeBuyEquipment REMOTE INSPECTION Remotely inspect equipment before purchasing with our interactive website at www instraview com LOOKING FOR MORE INFORMATION Visit us on the web at www artisantg com for more information on ...

Reviews: