


User’s Manual
14
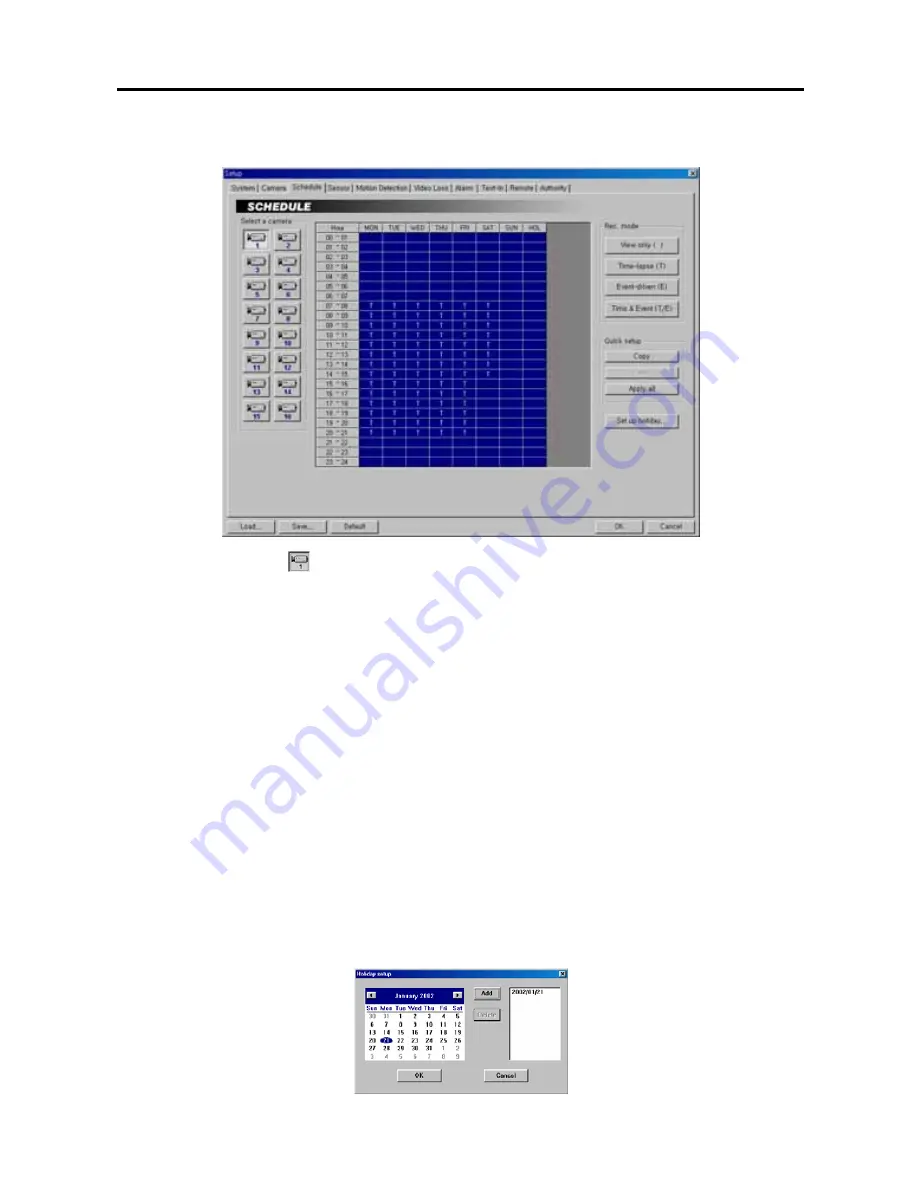
Setting Up Schedules
1.
Click the
Camera
icon.
2.
Move to the hour table, and set the recording schedule for each day (
MON
to
SUN
) and holidays (
HOL
). Select
the hours to record by holding down on the recording start time and dragging to recording finish time. The hour
selection will be made through both hours and days. The cells you select will be filled in blue.
3.
Click the desired recording mode button under the
Rec. mode.
The recording modes are:
View only (
blank
)
,
Time-lapse (T)
,
Event-driven (E)
or
Time & Event (T/E)
. If you click the
Time-lapse
button, a
T
will display
in the selected cells. Nothing displays when selecting
View only
.
NOTE:
The DVR provides four different recording modes.
View only mode
—
No recording will be made during
selected hours.
Time-lapse mode
—
Time-lapse recording will be made during selected hours.
Event mode
—
Event-driven recording will be made during selected hours.
Time & Event mode
—
Time-lapse recording will be
made during selected hours and the DVR will go into the event-driven recording mode during selected hours
when an event occurs.
4.
Use the
Quick setup
to adjust the current settings of the selected camera to another camera. Click the
Copy
button, and select another camera to be scheduled by clicking the camera icon in the same dialog box, and then
click the
Paste
button.
5.
Click the
Apply all
button if you want to adjust the current settings to all cameras.
6.
Click the
Set up holiday...
button to set up holidays. This function compensates for different holidays in
different countries. Click the date in the calendar you want as a holiday, and click the
Add
button. The selected
date will be displayed in the list next to the calendar. If you want to delete a holiday, click the
Delete
button after
selecting the date in the list. Move to other months using the arrow buttons located at the top of the calendar.
You can save your changes by clicking the
OK
button. Selecting
Cancel
exits the
Holiday setup
dialog box
without saving the changes.


