


Quick Guide—Page 4
1.7) Selecting individual speaker zones:
1.8) Adjusting the Volume Controls;
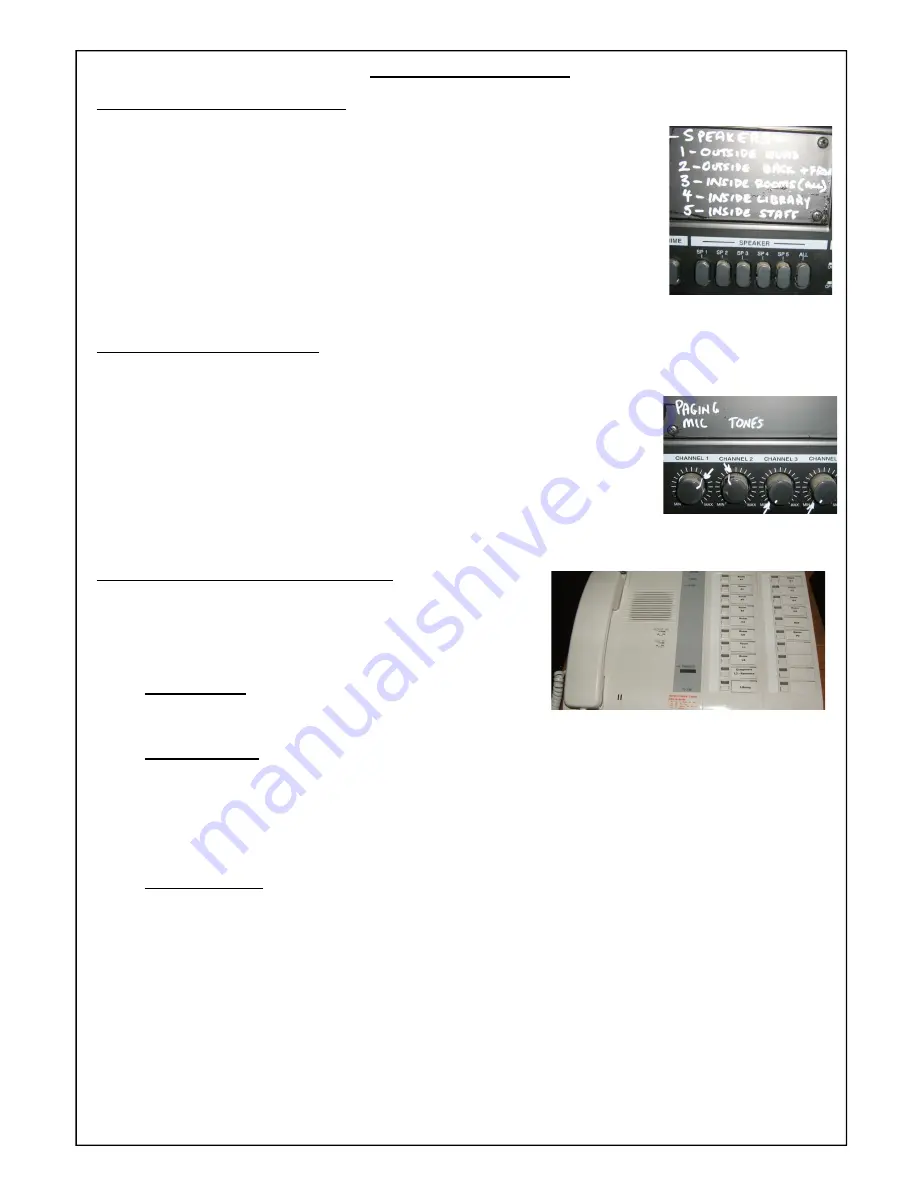
1.9) Using the TCM Intercom (Where installed);
Each button on the intercom corresponds to a handset installed
in a class room. The labels next to the buttons will match up
with a school room map which will have been securely glued to
the wall next to the intercom unit by the installing contractor.
To make a call:
Lift the handset and push the button for the room you wish to
call. You will hear a ring tone until the called party answers.
To receive a call;
When the calling party lifts the handset in the room the master will ring and the light for the calling party will
light. Lift the handset and push the button to talk.
If two or more callers call the master at the same time then each calling room’s light will illuminate. When you
select which one to speak to, any other callers will then receive a busy tone until you complete the first call. If
they remain on the line the unit will “camp on” the next caller and allow you to answer the next call once the
first is finished.
To transfer a call;
Although not recommended, it is possible to manually transfer calls from one room to the next.
a.) Party A calls office.
b.) Office answers call in the normal way.
c.) Party A asks to be transferred to Party B.
d.) Office asks Party A to hold.
e.) Office then presses button for Party B.
f.) Party A will hear busy tone while office calls Party B.
g.) When party B answers, tell them they have a call and press
“Transfer”
button.
h.) Press Party “A” station button.
i.) The three conversations are now joined. A three way conversation can take place.
j.) When the office hangs up, Party A and Party B may continue to talk
k.) System will clear when both parties hang up.
Note : PA Matthews Audio recommends that the intercom unit be switched off and unplugged from the
main termination box during school holidays.
On the amplifier there are six buttons (pictured). Above this the installing
contractor will have written a list of which speakers are controlled by each zone
switch.
Normally the “ALL” switch must be left pushed
IN
so that the bell and other critical
tones are heard clearly throughout the whole school.
However you may isolate zones if necessary. An example might be to make an
announcement on the inside speakers only (during a lock down) or to run a test
using the office speakers without disturbing the rest of the school.
To do this simply press OUT the “ALL” switch and then press IN the switch(es) for
the zones you wish to use.
Remember to press IN the “ALL” switch once you have finished so that the
bell and critical tones will be heard normally afterwards.
The installing contractor will have marked white arrows on the volume controls
when your system was installed. These are “Ideal starting points” for your system.
You can increase or decrease the volume of either the Paging Microphone or the
System Tones. The other (unused) channels should always be left OFF.
Remember that adjusting these controls will affect the volume level of the
entire
system.
The Bell, Tones and Music are
all controlled by one volume control
. If you find that
the (line up) music is too loud we recommend that you re—record the relevant
MP3 music file at a reduced level and re load it onto the system, as turning down
the “Tones” volume control too far may sounds like the Bell and Evacuation tones
too quiet to hear clearly over the whole school.