Page 14
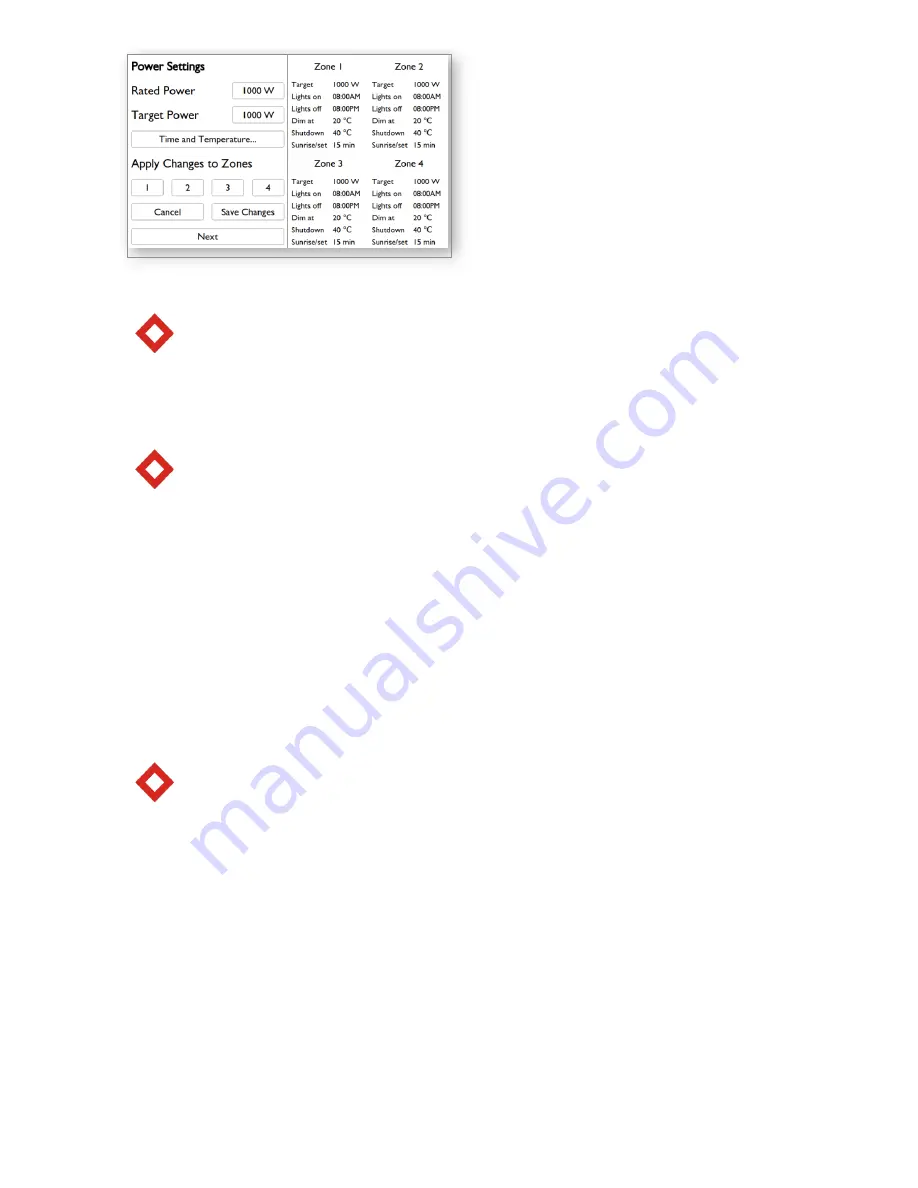
b. Power Settings
i. Settings Area
Note: Settings will only be applied to currently selected zone(s).
1. Rated Power Selection
Navigate to Rated Power with arrow buttons. Press Enter and select Rated Power of your
luminaire(s) (600W/1000W) with up/down arrow buttons. Press Enter to confirm and exit
selection.
Note:
Only 1000W is selectable at present time.
2. Target Power Selection
Navigate to Target Power with Arrow buttons. Press Enter and select Target Power of your
fixture(s) (increments of 25W) with up/down arrow buttons. Press Enter to confirm and exit
selection.
3. Time and Temperature Settings
Navigate to Time and Temperature with Arrow buttons. Press Enter to proceed to Time and
Temperature Settings screen to set your desired lighting schedule as well as zone temperature
limits. Time and Temperature Setting Screen setup shown on page 15.
4. Apply Changes to Zones
Navigate between Zones with Arrow buttons. Press Enter to select Zones (selected zone is
highlighted with gray color) to which you want to apply settings above.
Note: Zone 1 is selected by default (highlighted in green). Select additional zones (will be
highlighted in gray) to apply settings to all selected zones. Zone highlighted in Green is
considered the Master Zone. To apply Power Settings from Master Zone, select additional zones
and press Save Changes. Only Power Settings will be applied. If desired to apply Master Zone
Time and Temperature Settings, the user must enter time and temperature and select save and
then select zones. Press Save Changes to apply and save all settings above. Press Next to finish
setup and continue to Home Screen.
5. Cancel/Save
Navigate to Cancel or Save Changes with arrow buttons. Press Enter to Cancel or Save Changes
to the selected Zones above.
6. Home
Navigate to Home with arrow buttons. Press Enter to go back to Home Screen.
ii. Information Area
This area shows all the settings applied to each separate Zone.


