Electric Chain Saw
5
– Hold the running saw chain about 15 cm
above a suitable surface for some time
(about 10-15 seconds). If the chain is
properly lubricated, the oil sprayed from
the saw chain will form a small trace.
Filling up saw chain oil
NOTICE!
Environmental damage!
Since the saw chain oil can penetrate the
environment during operation, biologically-de-
gradable special vegetable-based saw chain
oils should be used.
– Place the device securely with the tank
cap facing up.
– Before opening, clean the reservoir lid and
fi ller neck, if necessary.
– Slowly open and remove the tank cap.
– Fill in oil gently. Do not spill!
– Check the oil level through the inspection
window.
– Tighten the tank cap by hand.
– If you spill oil, be sure to wipe it off .
Operation
The device has several pieces of safety
equipment which reduce the risk of injury
when working:
Chain catcher
The chain catcher serves to catch a torn saw
chain or one which has jumped out of the
guide. Through regular maintenance of the
saw rail and correct and regular tensioning of
the saw chain, accidents of this type can be
prevented.
The rear hand guard
The rear hand guard serves to protect the
hand against a jumped chain and disturbing
branches and twigs.
Check before starting!
DANGER!
Risk of injury!
The device must only be put into operation if
no faults are found. If any part of the device is
defective, it must be replaced before the next
use.
– Check the safety equipment and the safe
condition of the device.
– Check all parts for their fi rm fi t.
– Check whether there is any leakage.
– Check whether there are visible defects:
broken parts, cracks, etc.
– Check the device for correct chain ten-
sioning.
– Check the function of the chain brake.
Launching the device
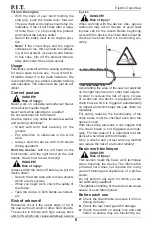
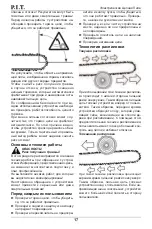
– Move the chain brake lever toward you to
position.
– Unscrew the cover locking knob and re-
move the tensioner cover.
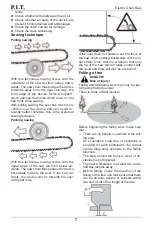
– Slide the saw chain onto the bar so that
the cutting edge points in the direction of
travel of the chain (as indicated by the di-
rection of travel on the chain itself).
– Be careful, the saw chain is sharp.
– To protect your hands, use gloves when
installing the saw chain.
– Slide the free part of the chain onto the
drive sprocket so that the holes in the
chain line up with the teeth of the sprocket.
– Place the tire with the notch on the stud
and align the holes with the tensioner mat-
ing tabs.
– Replace the cover and screw on the pres-
sure handle without tightening it all the
way.
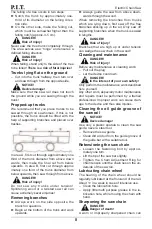
– Turn the ring clockwise to tighten the saw
chain so that when the chain is pulled back
in the middle of the bar, it moves about 4-5
mm without leaving the grooves of the bar
and moves freely by hand.
– Tighten the handle and check the chain
tension again. Repeat the chain tensioning
steps if necessary.
Letting the saw chain run in
During the run in time, retension the saw
chain and rail after a maximum of 5 cuts.
Checking the tensioning of the
saw chain
WARNING!
Risk of injury!
A new saw chain must be retensioned after a
maximum of five cuts. This is normal during
the run in time; the intervals between subse-
quent retensionings will get larger.
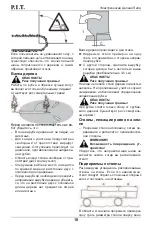
The saw chain is tensioned correctly if it lies
close against the underside of the saw rail
and can be moved easily by hand.
Readjust tension of the saw chain when nec-
essary.
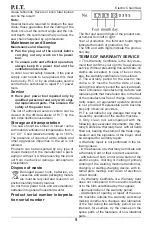
If there is sufficient chain greasing, the oil
spraying off of the saw chain will form a slight
trail.
Checking the chain greasing
NOTICE!
Device damage!
The device cannot be used without suffi cient
chain lubrication. Insufficient lubrication will
shorten the life of the device.
– Check the amount of oil in the tank.
– Start the device.
Si
t


