Battery Charger
5
detected and then charged up with the optimal
charge current depending on battery temperature
and voltage.
In this way, the battery is treated with care and
remains permanently fully charged when it is stored
in the charger.
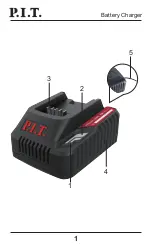
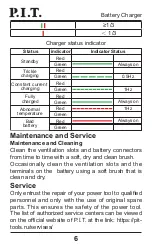
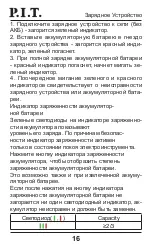
The operation and meaning of the elements of the
indicator of the charger
1. Connect the charger to the mains (without
battery) - the green indicator will light up.
2. Insert the battery into the charger socket the red
indicator will light up, the green one will go out.
3. When the battery is fully charged, the red
indicator will go out, the green indicator will start
blinking.
4. Alternate blinking of green and red indicators
indicates a malfunction of the charger or battery.
Battery charge indicator
The green LEDs on the battery charge indicator
show its charge level. For safety reasons, the
charge indicator is active only when the power tool
is at rest.
Press the battery charge indicator button to display
the battery charge level. This is also possible with
the battery removed.
If no LED indicator lights up after pressing the
battery charge indicator button, the battery is
defective and must be replaced.
Indicator(
, )
Capacity
≥2/3
Summary of Contents for PH20-2.4A
Page 1: ......
Page 2: ...Battery Charger 1 5 1 4 2 3...
Page 13: ...12 8...
Page 14: ...13...
Page 15: ...14 1 2 3 4 5 PH20 2 4A DC 21B 2 4 65...
Page 16: ...15 PH20 2 4A 100 240 50 60 0 45 P I T 20V OnePower...
Page 17: ...16 1 2 3 4 Capacity 2 3...
Page 18: ...17 1 3 1 3 0 5Hz 1Hz 1Hz P I T P I T...
Page 19: ...18 P I T https pittools ru servises 0 40 80...
Page 20: ...19 2 2 2 1 2...
Page 21: ...20 I 3 4 0 4...
Page 22: ...21...
Page 23: ...22...
Page 24: ...23 3 2 2...
Page 25: ...24 5...
Page 30: ......


