background image

LCT-1800

Using the Auto-Levelling function

1   Turn laser on or off by pressing 

the on/off button at the top of 

the unit.

Note:

  Laser can also be turned 

on, in auto-levelling mode 

by using the auto-levelling 

switch.

A red light shown at the top of the unit will indicate that the unit is  

auto-levelling is turned off, or at an angle out of auto-levelling range.
A green light indicates the auto-levelling switch is turned on and 

operating correctly.

2   Press the auto-levelling 

switch up into the on 

position and then press 

the operating mode 

button to achieve the 

desired mode.

Note:

  Ensure the laser is 

level on tripod.

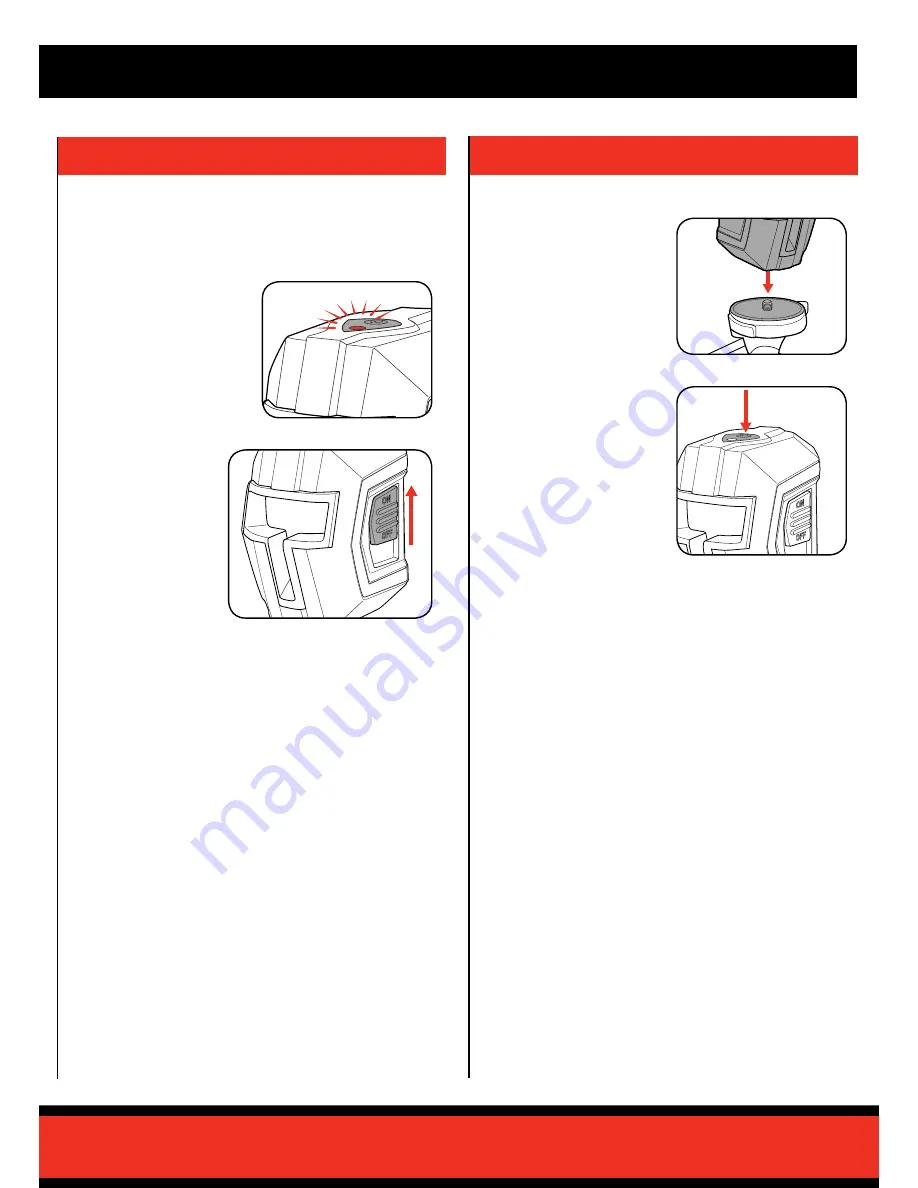
Disabling Auto-Levelling feature to Create an Angled Line

2   Turn the unit on using the on/

off switch, ensuring that the 

auto-levelling switch is in 

off position. Press the on/off 

operating mode button until 

desired laser more achieved.

Note:

  The indicator light will glow 

red, indicating the auto-

levelling feature is in-active.

1   Attach the laser to the tripod 

and adjust the tripod to the 

desired height, angle and tilt.

Summary of Contents for LCT-1800

Page 1: ...ATIONS Battery 3V DC 2 x AA Battery Laser Power Class 2 1mW Laser Width 100 LUX 3mm 5m Approx Run Time 15 Hours Working Range 10m Accuracy 0 5mm m Levelling Time 5s Levelling Range 40 LCT 1800 WHAT S IN THE BOX Cross Line Laser Level Tripod 2 x AA Batteries ozito com au ...

Page 2: ... compartment lid from the laser unit using the tab at the bottom 3 Place the top of the battery lid into the recess in the laser unit and push the lid tab down to secure in place 2 Insert 2 x AA batteries in the correct direction indicated by the embossing inside the battery compartment WARNING Before installing batteries ensure the UNIT IS switched OFF INCLUDING AUTOMATIC LEVELLING SWITCH to prev...

Page 3: ...lease lever then slotting mounting plate into tripod opening Release lever to secure Note Make sure the laser is pointing perpendicular to the angle adjusting handle 7 To remove the laser unit from the mounting plate rotate the unit anti clockwise 6 To remove the laser unit from the tripod lift the quick release lever at the top of the tripod and then raise the laser and mounting plate from the tr...

Page 4: ...e Laser 1 Turn laser on or off by pressing the on off button at the top of the unit 1 Loosen the rotation locking knob by rotating anti clockwise Adjust unit by using the angle adjusting handle Note Secure in place after adjusting by turning the rotation locking knob clockwise Note Laser can also be turned on in auto levelling mode by using the auto levelling switch WARNING ENSURE LASER WINDOW IS ...

Page 5: ...ed on and operating correctly 2 Press the auto levelling switch up into the on position and then press the operating mode button to achieve the desired mode Note Ensure the laser is level on tripod Disabling Auto Levelling feature to Create an Angled Line 2 Turn the unit on using the on off switch ensuring that the auto levelling switch is in off position Press the on off operating mode button unt...

Page 6: ...69 486 New Zealand 0508 069 486 E mail enquires ozito com au SPARE PARTS Warning Read instruction manual mW Milliwatt Recycle battery Do not incinerate Transformer Energy Rating MEPS Ah Amp hour Laser Light Laser Radiation Electrical Emissions Conformity EMC V Volts Hz Hertz ac Alternating current W Watts Direct current dc Do not put in the rubbish Regulatory Compliance Mark RCM Polarity Do not ge...

Page 7: ...00 How To Order Available spare parts can be ordered through the Special Orders Desk at any Bunnings Warehouse If you have any further questions please contact Ozito Customer Service on Australia 1800 069 486 New Zealand 0508 069 486 enquiries ozito com au ...

Page 8: ...hes jewellery or long hair can be caught in moving parts g If devices are provided for the connection of dust extraction and collection facilities ensure these are connected and properly used Use of dust collection can reduce dust related hazards 4 Power tool use and care a Do not force the power tool Use the correct power tool for your application The correct power tool will do the job better and...

Page 9: ...hin the instruction manual If the tool is disassembled or tampered with in any way WARRANTY TO ENSURE A SPEEDY RESPONSE PLEASE HAVE THE MODEL NUMBER AND DATE OF PURCHASE AVAILABLE A CUSTOMER SERVICE REPRESENTATIVE WILL TAKE YOUR CALL AND ANSWER ANY QUESTIONS YOU MAY HAVE RELATING TO THE WARRANTY POLICY OR PROCEDURE OZITO Australia New Zealand Head Office 1 23 Letcon Drive Bangholme Victoria Austra...

Reviews: