07
DEVICE SETUP
2.4 HOST INSTALLATION: MERCURY PRO U.2 DUAL
This section describes the process of installing the OWC U2
Shuttle in the Mercury Pro U.2 Dual. The instructions listed
here will the same or very similar to the ones found in that
product’s assembly manual, located at
www.owc.com/support/manuals
.
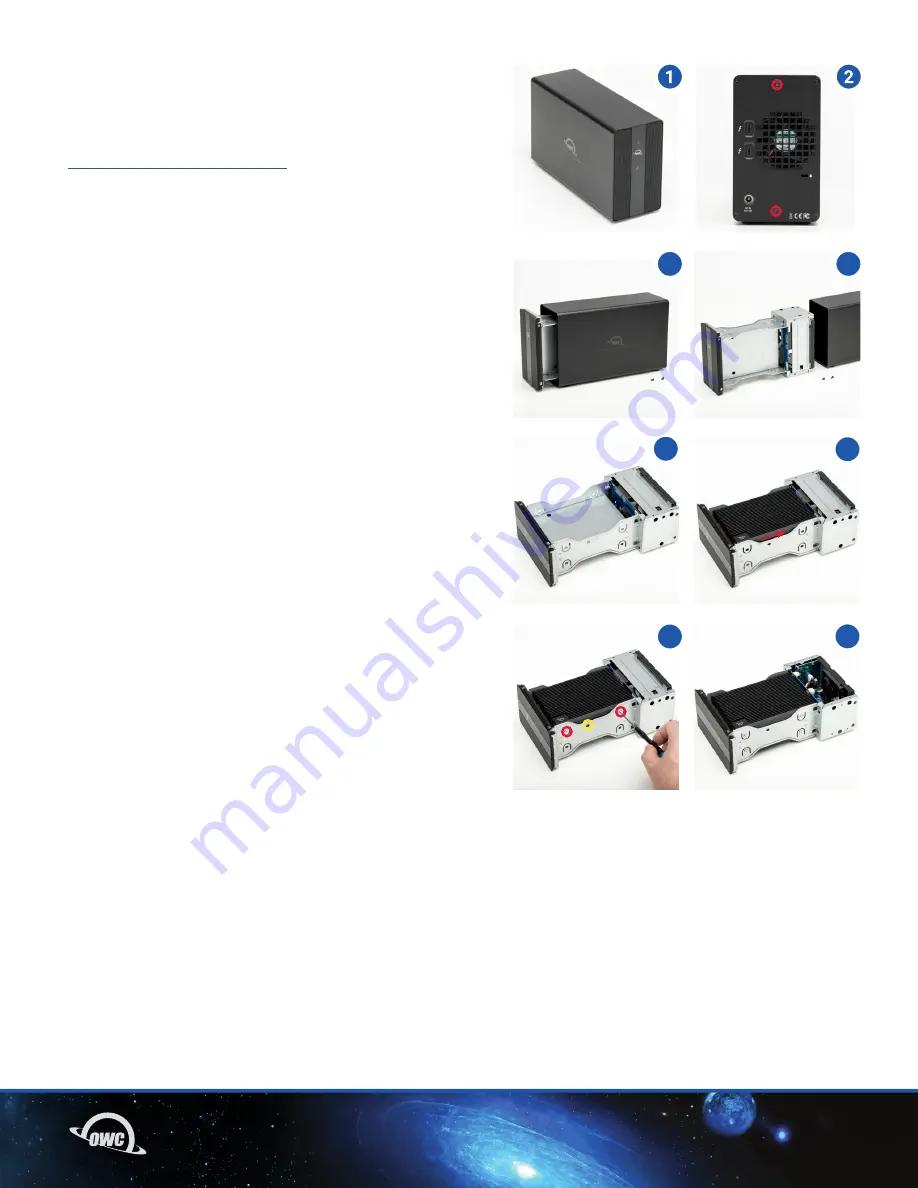
1. Remove Mercury Pro U.2 Dual from its packaging and set
it on a static-free work surface.
2. Remove the two screws highlighted in red from the back
of the enclosure and set them aside.
3. Pull on the front plate of the enclosure so the inner-chassis
slides out (A), then remove it fully (B).
4. Set the inner chassis flat on the work surface.
5. Making sure the connector on the shuttle aligns with
the connector on the inner-chassis, place the shuttle into
the housing. Then, connect the inner-chassis to the U2
Shuttle by sliding it in the direction shown until it is fully
seated. If the device does not seat fully, do not apply more
force. Move it back and try again. As long as the OWC U2
Shuttle is sitting flush in the drive carrier, the connectors
should automatically align.
6. Affix the U2 Shuttle to the inner-chassis at the locations
shown. Note: the hole for a 2.5 inch U.2 drive is circled in
yellow. A total of one screw is required for 2.5 inch drives,
and four screws (two per side) for 3.5 inch drives and the
OWC U2 Shuttle.
7. Once the U2 Shuttle is secured, flip the inner chassis
if needed and repeat Steps 5 and 6 to install another U.2
device or OWC U2 Shuttle.
3a
3
b
5
7
4
6


