background image

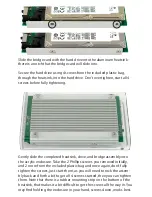
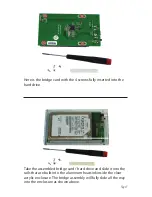
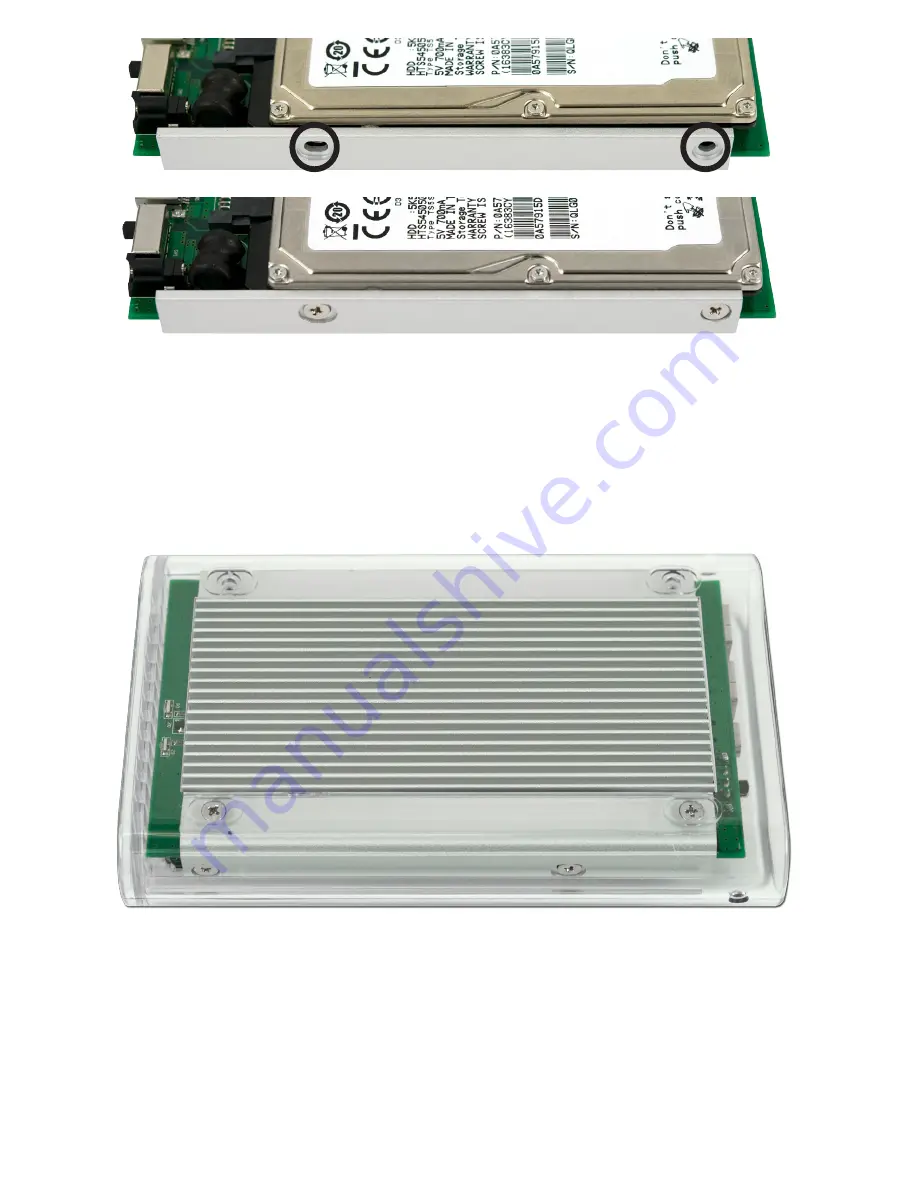
Slide the bridge card with the hard drive into the aluminum heatsink - 

there is a notch that the bridge card will slide into. 


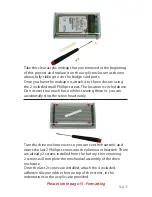
Secure the hard drive using 4 screws from the included plastic bag, 

through the heatsink, into the hard drive. Don’t overtighten, start all 4 

screws before fully tightening.

Gently slide the completed heatsink, drive, and bridge assembly into 

the acrylic enclosure. Take the 2 Phillips screws you removed initially, 

and 2 more from the included plastic bag and once again, don’t fully 

tighten the screws, just start them, as you will need to rock the assem-

bly back and forth a bit to get all 4 screws started, then you can tighten 

them. Note that there is a rubber mounting strip on the bottom of the 

heatsink, that makes it a bit difficult to get the screws all the way in. You 

may find holding the enclosure in your hand, screws down, works best.

Summary of Contents for Mercury On-The-Go

Page 1: ...OWC Mercury On The Go Assembly Manual For PATA and SATA based enclosures...

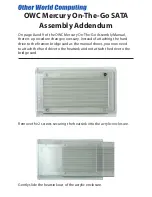
Page 2: ...e change necessary Instead of attaching the hard drive to the firewire bridge card as the manual shows you now need to attach the hard drive to the heatsink and not attach the drive to the bridge card...

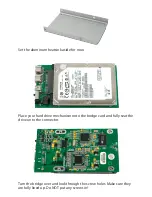
Page 3: ...aside for now Place your hard drive mechanism onto the bridge card and fully seat the drive onto the connector Turn the bridge over and look through the screw holes Make sure they are fully lined up...

Page 4: ...drive and bridge assembly into the acrylic enclosure Take the 2 Phillips screws you removed initially and 2 more from the included plastic bag and once again don t fully tighten the screws just start...

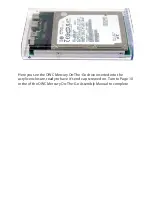
Page 5: ...Here you see the OWC Mercury On The Go drive inserted into the acrylic enclosure ready to have it s end cap screwed on Turn to Page 10 in the of the OWC Mercury On The Go Assembly Manual to complete...

Page 6: ...Memory Upgrades From OWC OWC has the right memory for your computer www macsales com memory All memory from OWC meets or exceeds Apple JEDEC specifications and is backed by a 30 day money back guaran...

Page 7: ...proceeding Discharge any excess static electricity safely before removing any electronic component from a protective anti static bag Tools Required A Phillips P0 screwdriver If you do not own a Philli...

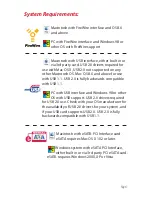
Page 8: ...th USB 1 1 USB 2 0 is fully backwards compatible with USB 1 1 PC with USB interface and Windows 98 or other OS with USB support USB 2 0 drivers required for USB 2 0 use Check with your OS manufacturer...

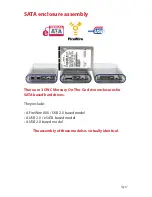
Page 9: ...There are 3 OWC Mercury On The Go drive enclosures for SATA based hard drives They include A FireWire 800 USB 2 0 based model A USB 2 0 eSATA based model A USB 2 0 based model The assembly of these m...

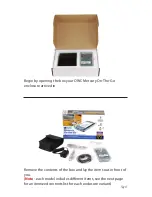
Page 10: ...our OWC Mercury On The Go enclosure arrived in Remove the contents of the box and lay the items out in front of you Note each model includes different items see the next page for an itemized contents...

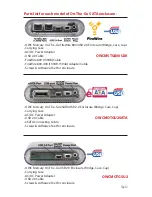
Page 11: ...The Go FireWire 800 USB 2 0 Enclosure Bridge Case Cap Carrying Case AC DC Power Adapter USB 2 0 Cable FireWire 800 1394B Cable FireWire 800 400 1394B 1394A Adapter Cable Screws Adhesive Feet for encl...

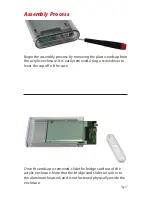
Page 12: ...It is easily removed using a screwdriver to lever the cap off of the case Once the endcap is removed slide the bridge card out of the acrylic enclosure Note that the bridge card slides on rails into...

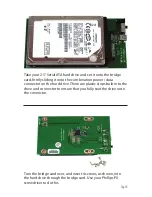
Page 13: ...nation power data connector on the hard drive There are plastic stops built into the drive and connector to ensure that you fully seat the drive onto the connector Turn the bridge card over and insert...

Page 14: ...serted into the hard drive Take the assembled bridge card hard drive and slide it into the rails that are built into the aluminum heatsink inside the clear acrylic enclosure The bridge assembly will f...

Page 15: ...h force while screwing these in you can accidentally strip the screw head easily Turn the drive enclosure over so you can see the heatsink and insert the last 2 Phillips screws into the aluminum heats...

Page 16: ...Mercury On The Go drive enclosures for PATA based hard drives They include A FireWire 800 USB 2 0 based model A FireWire 400 USB 2 0 based model A FireWire 400 based model A USB 2 0 based model The a...

Page 17: ...your OWC Mercury On The Go enclosure arrived in Remove the contents of the box and lay the items out in front of you Note each model includes different items see the next page for an itemized contents...

Page 18: ...400 USB 2 0 Enclosure Bridge Case Cap Carrying Case USB 2 0 Cable eSATA Connecting Cable Screws Adhesive Feet for enclosure OWC Mercury On The Go USB 2 0 Enclosure Bridge Case Cap Carrying Case AC DC...

Page 19: ...line up the pins exactly as shown above There are 4 extra pins that the edge connector does NOT cover they are at the bottom of the bridge card in this picture Fully insert the pins into the connector...

Page 20: ...in the locations circled in red Make sure to fully tighten them Slide the bridge card with the hard drive attached into the clear acrylic enclosure The hard drive slides on silicone rubber rails and c...

Page 21: ...the acrylic enclosure as shown one on each side Fully tighted them Do not exert too much force while screwing these in you can accidentally strip the screw head easily Place the adhesive silicone rubb...

Page 22: ...ss Enter 5 Select Y and press Enter 6 Enter 5 to change the drive 7 Select the drive you want to format 8 Choose 1 and follow the on screen instructions For best compatibility between different Operat...

Page 23: ...rmat the hard drive using the in terface you will most likely be accessing the drive with For Win2000 and WinXP the NTFS file format is recommended If the NTFS file system is used the drive will only...

Page 24: ...nal drive and setup your disk from the 2 list on the left and format using either the Erase tab or the Partition tab It is recommended that you format the hard drive using the in terface you will most...

Page 25: ...Plug the AC Power Adapter into the wall outlet and the OWC Mercury On The Go hard drive 2 Plug in the FireWire USB or eSATA cable into the OWC Mer cury On The Go hard drive 3 Plug the FireWire or USB...

Page 26: ...aturday Live Chat via internet is also available during those times Tech Support 815 338 8685 Customer Service 800 275 4576 International 815 338 8658 24hr Fax 815 338 4332 Customer Service Web addres...

Page 27: ...ive Easily transfer files from computer or notebook back up files or store large file archives on hard drives The Hi Speed USB interface provides for easy installation with its Plug and Play design Ch...

Page 28: ...performing the installation of your hard drives into this drive enclosure Failure to do so can cause damage to your drive mechanisms and or the hard drive enclosure Read this User s Guide carefully a...

Reviews: