


Page 10
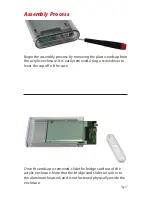
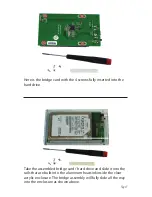
Take the clear acrylic endcap that you removed at the beginning
of this process and replace it on the acrylic enclosure as shown
above, fully sliding it over the bridge card ports.
Once you have the endcap on, attach it to the enclosure using
the 2 included small Phillips screws. The location is circled above.
Do not exert too much force while screwing these in, you can
accidentally strip the screw head easily.
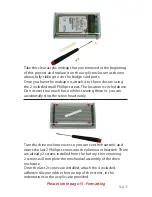
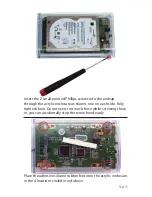
Turn the drive enclosure over so you can see the heatsink, and
insert the last 2 Phillips screws into the aluminum heatsink. There
are already 2 screws installed from the factory, the remaining
2 screws will complete the mechanical assembly of the drive
enclosure.
Once the last 2 screws are installed, attach the 4 included
adhesive silicone rubber feet on top of the screws, in the
indentations in the acrylic case provided.
Please turn to page 15 - Formatting


