background image

Copyrights

Copyright © 2007 Other World Computing All rights reserved. No part of this publication may be reproduced, stored 

in a retrieval system, or transmitted in any form or by any means, electronic, mechanical, photocopying, recording or 

otherwise, without the prior written consent of Other World Computing.

Changes

The material in this document is for information only and subject to change without notice. While reasonable efforts 

have been made in the preparation of this document to assure its accuracy, Other World Computing assumes no liability 

resulting from errors or omissions in this document, or from the use of the information contained herein. Other World 

Computing reserves the right to make changes or revisions in the product design or the product manual without reser-

vation and without obligation to notify any person of such revisions and changes.

FCC Statement:

Warning! Modifications not authorized by the manufacturer may void the user’s authority to operate this device.

NOTE:

 This equipment has been tested and found to comply with the limits for a Class A digital device, pursuant to Part 

15 of the FCC Rules. These limits are designed to provide reasonable protection against harmful interference when the 

equipment is operated in a commercial environment. This equipment generates, uses, and can radiate radio frequency 

energy and, if not installed and used in accordance with the instruction manual, may cause harmful interference to radio 

communications. Operation of this equipment in a residential area is likely to cause harmful interference in which case 

the user will be required to correct the interference at his own expense.

NOTE: 

This equipment has been tested and found to comply with the limits for a Class B digital device, pursuant to 

Part 15 of the FCC Rules. These limits are designed to provide reasonable protection against harmful interference in a 

residential installation. This equipment generates, uses and can radiate radio frequency energy and, if not installed and 

used in accordance with the instructions, may cause harmful interference to radio communications. However, there is no 

guarantee that interference will not occur in a particular installation. If this equipment does cause harmful interference 

to radio or television reception, which can be determined by turning the equipment off and on, the user is encouraged 

to try and correct the interference by one or more of the following measures: 

• Reorient or relocate the receiving antenna.

• Increase the separation between the equipment and receiver.

• Connect the equipment into an outlet on a circuit different from that to which the receiver is connected.

Health And Safety Precautions

• Use proper anti-static precautions while performing the installation of your hard drives into this drive enclosure. Failure 

to do so can cause damage to your drive mechanisms, and / or the hard drive enclosure.

• Read this User’s Guide carefully, and follow the correct procedure when setting up the device.

• Do not open your hard drive or attempt to disassemble or modify it. Never insert any metallic object into the drive to 

avoid any risk of electrical shock, fire, short-circuiting or dangerous emissions. Your hard drive contains no user-service-

able parts. If it appears to be malfunctioning, have it inspected by a qualified Other World Computing Technical Support 

representative.

• Never expose your device to rain, or use it near water, or in damp or wet conditions. Never place objects containing 

liquids on the drive, as they may spill into its openings. Doing so increases the risk of electrical shock, short-circuiting, 

fire or personal injury.

General Use Precautions:

• Do not expose the hard drive to temperatures outside the range of 5° C to 40° C (41° F to 104° F). Doing so may damage 

the drive or disfigure its casing. Avoid placing your drive near a source of heat or exposing it to sunlight (even through a 

window). Inversely, placing your drive in an environment that is too cold or humid may damage the unit.

• Always unplug the hard drive from the electrical outlet if there is a risk of lightning or if it will be unused for an ex

-

tended period of time. Otherwise, there is an increased risk of electrical shock, short-circuiting or fire.

• Use only the power supply shipped with the device.

• Do not use the hard drive near other electrical appliances such as televisions, radios or speakers. Doing so may cause 

interference which will adversely affect the operation of the other products.

• Do not place the drive near sources of magnetic interference, such as computer displays, televisions or speakers. Mag

-

netic interference can affect the operation and stability of your hard drive.

• Do not place heavy objects on top of the drive or use excessive force on it.

• Never use excessive force on your drive. If you detect a problem, consult the Troubleshooting section in this manual.

• Protect your hard drive from excessive exposure to dust during use or storage. Dust can build up inside the device, 

increasing the risk of damage or malfunction.

• Other World Computing recommends the use of normal glass cleaning products to keep the high lustre finish at it’s 

finest with this product. Be sure to not get any moisture inside the holes and if you do, allow time to air dry before use.

 • Do not block the ventilation outlets on the rear of the drive. These help to keep your drive cool during operation. 

Blocking the ventilation outlets may cause damage to your drive and cause an increased risk of short-circuiting or fire.

Copyright ®2007 Other World Computing All Rights Reserved. Other World Computing’s 1 year Limited Warranty is not transferable and subject to limitations.

OWCMANOTGASSY

Summary of Contents for Mercury On-The-Go

Page 1: ...OWC Mercury On The Go Assembly Manual For PATA and SATA based enclosures...

Page 2: ...e change necessary Instead of attaching the hard drive to the firewire bridge card as the manual shows you now need to attach the hard drive to the heatsink and not attach the drive to the bridge card...

Page 3: ...aside for now Place your hard drive mechanism onto the bridge card and fully seat the drive onto the connector Turn the bridge over and look through the screw holes Make sure they are fully lined up...

Page 4: ...drive and bridge assembly into the acrylic enclosure Take the 2 Phillips screws you removed initially and 2 more from the included plastic bag and once again don t fully tighten the screws just start...

Page 5: ...Here you see the OWC Mercury On The Go drive inserted into the acrylic enclosure ready to have it s end cap screwed on Turn to Page 10 in the of the OWC Mercury On The Go Assembly Manual to complete...

Page 6: ...Memory Upgrades From OWC OWC has the right memory for your computer www macsales com memory All memory from OWC meets or exceeds Apple JEDEC specifications and is backed by a 30 day money back guaran...

Page 7: ...proceeding Discharge any excess static electricity safely before removing any electronic component from a protective anti static bag Tools Required A Phillips P0 screwdriver If you do not own a Philli...

Page 8: ...th USB 1 1 USB 2 0 is fully backwards compatible with USB 1 1 PC with USB interface and Windows 98 or other OS with USB support USB 2 0 drivers required for USB 2 0 use Check with your OS manufacturer...

Page 9: ...There are 3 OWC Mercury On The Go drive enclosures for SATA based hard drives They include A FireWire 800 USB 2 0 based model A USB 2 0 eSATA based model A USB 2 0 based model The assembly of these m...

Page 10: ...our OWC Mercury On The Go enclosure arrived in Remove the contents of the box and lay the items out in front of you Note each model includes different items see the next page for an itemized contents...

Page 11: ...The Go FireWire 800 USB 2 0 Enclosure Bridge Case Cap Carrying Case AC DC Power Adapter USB 2 0 Cable FireWire 800 1394B Cable FireWire 800 400 1394B 1394A Adapter Cable Screws Adhesive Feet for encl...

Page 12: ...It is easily removed using a screwdriver to lever the cap off of the case Once the endcap is removed slide the bridge card out of the acrylic enclosure Note that the bridge card slides on rails into...

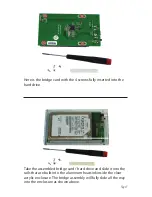
Page 13: ...nation power data connector on the hard drive There are plastic stops built into the drive and connector to ensure that you fully seat the drive onto the connector Turn the bridge card over and insert...

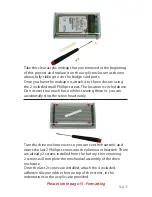
Page 14: ...serted into the hard drive Take the assembled bridge card hard drive and slide it into the rails that are built into the aluminum heatsink inside the clear acrylic enclosure The bridge assembly will f...

Page 15: ...h force while screwing these in you can accidentally strip the screw head easily Turn the drive enclosure over so you can see the heatsink and insert the last 2 Phillips screws into the aluminum heats...

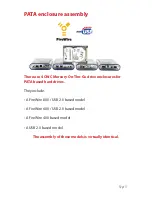
Page 16: ...Mercury On The Go drive enclosures for PATA based hard drives They include A FireWire 800 USB 2 0 based model A FireWire 400 USB 2 0 based model A FireWire 400 based model A USB 2 0 based model The a...

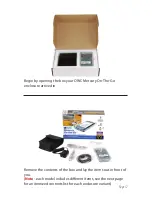
Page 17: ...your OWC Mercury On The Go enclosure arrived in Remove the contents of the box and lay the items out in front of you Note each model includes different items see the next page for an itemized contents...

Page 18: ...400 USB 2 0 Enclosure Bridge Case Cap Carrying Case USB 2 0 Cable eSATA Connecting Cable Screws Adhesive Feet for enclosure OWC Mercury On The Go USB 2 0 Enclosure Bridge Case Cap Carrying Case AC DC...

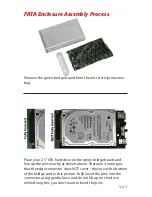
Page 19: ...line up the pins exactly as shown above There are 4 extra pins that the edge connector does NOT cover they are at the bottom of the bridge card in this picture Fully insert the pins into the connector...

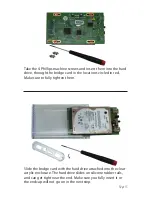
Page 20: ...in the locations circled in red Make sure to fully tighten them Slide the bridge card with the hard drive attached into the clear acrylic enclosure The hard drive slides on silicone rubber rails and c...

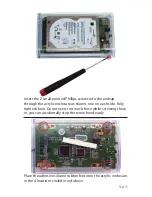
Page 21: ...the acrylic enclosure as shown one on each side Fully tighted them Do not exert too much force while screwing these in you can accidentally strip the screw head easily Place the adhesive silicone rubb...

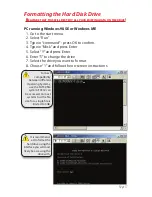
Page 22: ...ss Enter 5 Select Y and press Enter 6 Enter 5 to change the drive 7 Select the drive you want to format 8 Choose 1 and follow the on screen instructions For best compatibility between different Operat...

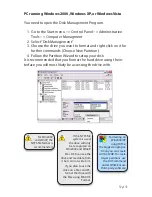
Page 23: ...rmat the hard drive using the in terface you will most likely be accessing the drive with For Win2000 and WinXP the NTFS file format is recommended If the NTFS file system is used the drive will only...

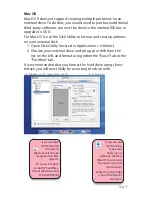
Page 24: ...nal drive and setup your disk from the 2 list on the left and format using either the Erase tab or the Partition tab It is recommended that you format the hard drive using the in terface you will most...

Page 25: ...Plug the AC Power Adapter into the wall outlet and the OWC Mercury On The Go hard drive 2 Plug in the FireWire USB or eSATA cable into the OWC Mer cury On The Go hard drive 3 Plug the FireWire or USB...

Page 26: ...aturday Live Chat via internet is also available during those times Tech Support 815 338 8685 Customer Service 800 275 4576 International 815 338 8658 24hr Fax 815 338 4332 Customer Service Web addres...

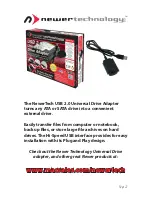
Page 27: ...ive Easily transfer files from computer or notebook back up files or store large file archives on hard drives The Hi Speed USB interface provides for easy installation with its Plug and Play design Ch...

Page 28: ...performing the installation of your hard drives into this drive enclosure Failure to do so can cause damage to your drive mechanisms and or the hard drive enclosure Read this User s Guide carefully a...

Reviews: