④
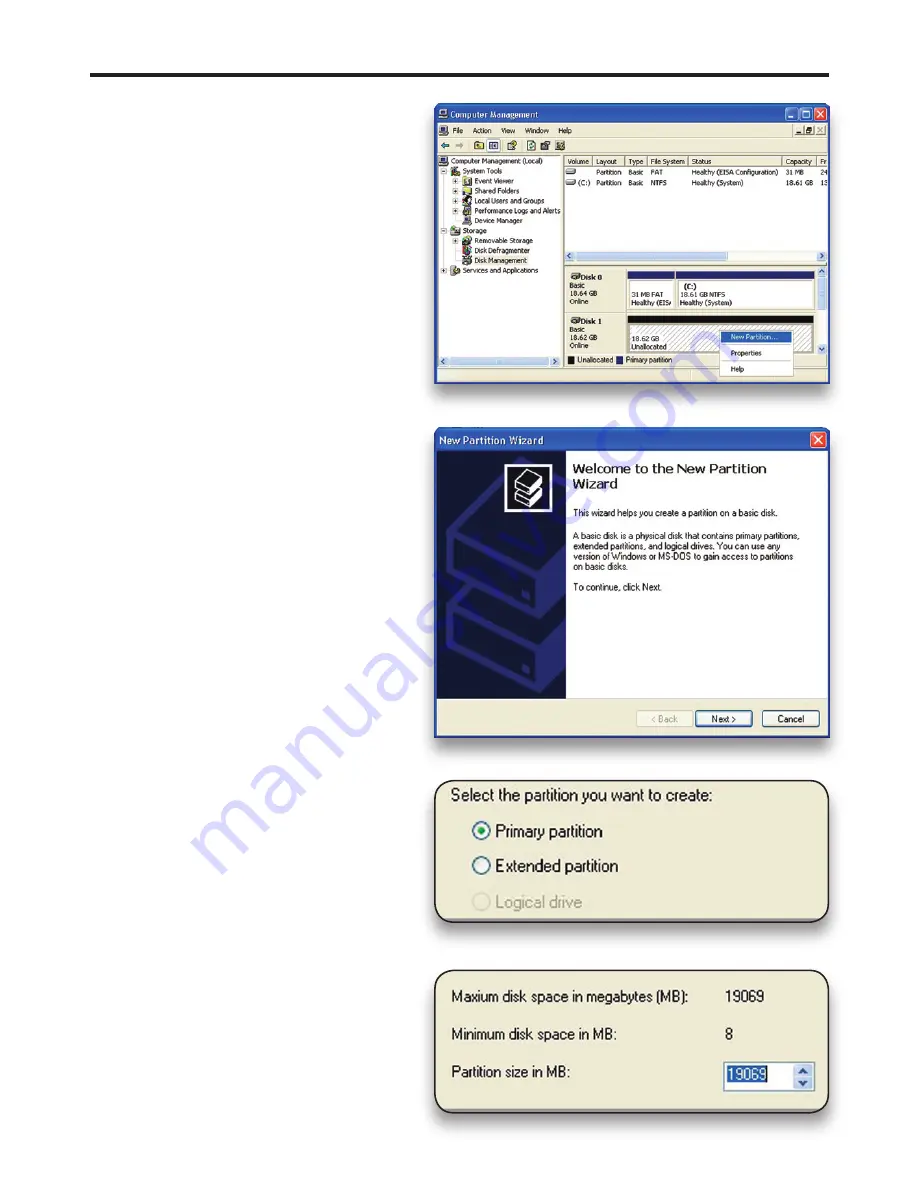
Your drive will appear similar to how
Disk 1 does below. Notice that the space
on the lower right reads as “Unallocated.”
Right click in this space and choose “New
Partition.”
⑤
The “New Partition Wizard” will
launch. Click “Next” to continue.
⑥
Specify your partition type as “Prima-
ry,” and click “Next.”
⑦
The wizard will display the
maximum partition size for your drive.
It is strongly recommended that you
do not change the default value. Click
“Next”
OWC Mercury On-The-Go Pro
Chapter 3 - Formatting


