10400287-002 03/2011
©2010-11 Overland Storage, Inc.
Page 4 of 7
Quick Start Guide
4.
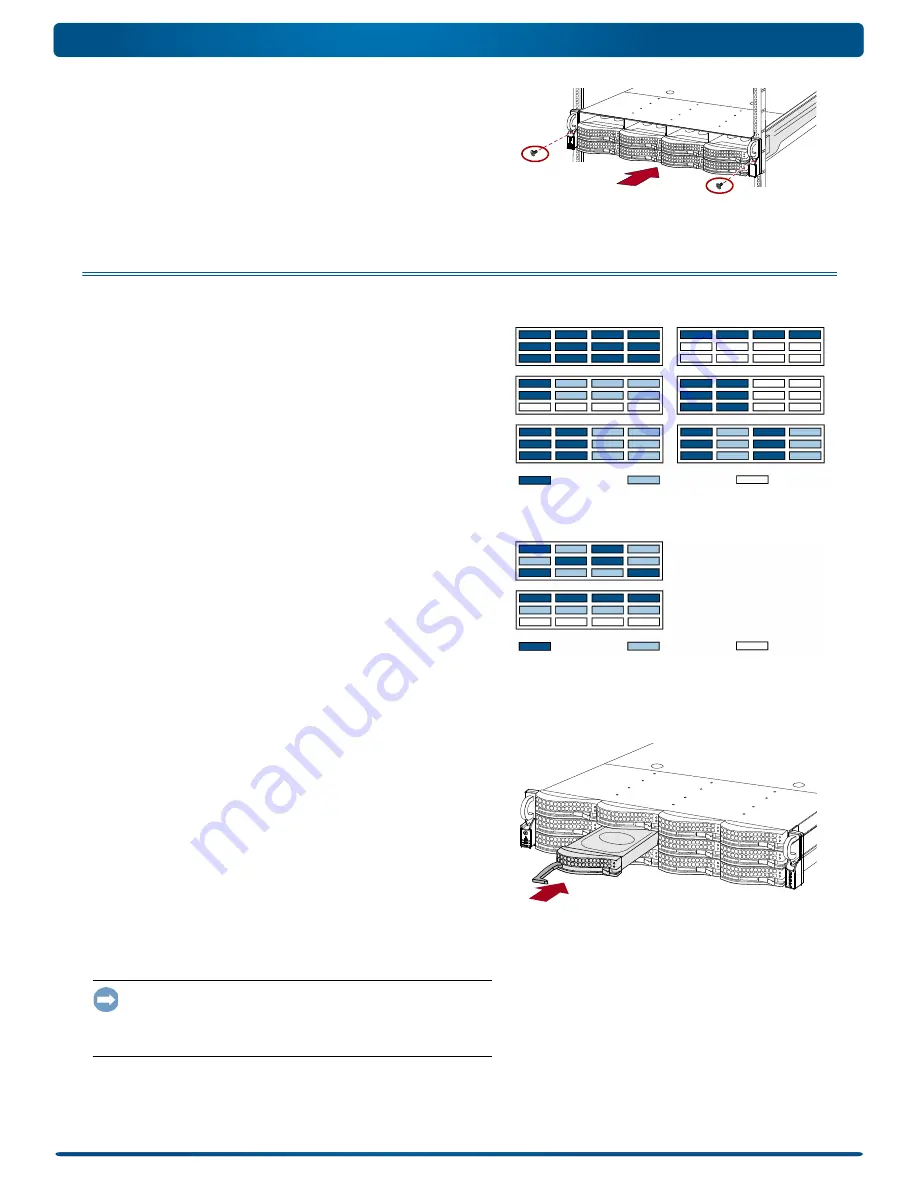
Slide the
unit
in and out a few times to ensure that the
N2000 does not bind.
If binding occurs, verify that the front and rear flanges are
mounted in the correct holes, readjusting the slide
positioning as necessary.
5.
Using the
two
screws
provided, secure the N2000 flanges to
the rack.
Step 3: Install the Drives
As shipped, the first four slots are empty and the remaining slots
have disk drive blanks. Any combination of 4 to 12 SAS and/or
SATA drives can be installed with blank drive carriers filling in
the empty slots. The drive assemblies are sold separately in either
single- or four-packs.
Recommended Drive Configurations
Before adding drive assemblies to a SnapServer N2000, the
following must be observed:
•
Different capacity drives can be installed; however, they
should not be included in the same RAID array, because
capacity usage for all drives in the RAID is limited to the
capacity of the smallest drive member.
•
Drives of different rotational speed (such as, SAS and SATA
drives) can be installed, but they should not be installed in
the same column or be separated from each other by a
column of different rotational speed drives. If you are
combining drives with different speeds, use the figures below
to plan where to place the disk drives.
Install Drives
NOTE: Do not remove the disk drives from their carriers. Doing so
voids the drive warranty.
As shipped, the first four slots are empty and the remaining slots
have disk drive blanks. Once the unit is in the rack, install all
your drives from the drive packs before continuing:
1.
If a
drive blank
is in the slot where you are about to install
a disk drive, remove the blank by pressing the lever release
button and pulling it out.
2.
Remove a
drive assembly
from the packaging.
3.
Press the
button
to release the lever.
4.
Position the
drive assembly
in front of the appropriate
bay
and slide it in until resistance is felt.
5.
Push the
lever
in to lock the assembly in the bay.
6.
Repeat
for
each
remaining drive carrier.
IMPORTANT: To maintain proper airflow and cooling, a drive
assembly or a blank drive carrier must be installed in
every
slot.
Leave drive blanks in any slots not used. No empty slots are allowed. A
minimum of four drives must be installed for proper operation.
Supported Configurations
Rotational Speed A
Rotational Speed B
Blank Disk Drive
Unsupported Configurations
Do not include drives
with different RPMs in
the same column.
Rotational Speed A
Rotational Speed B
Blank Disk Drive


