5
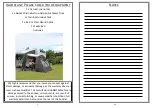
8. Tension the front of the annexe, securing each pegging
point, in order to tension the annexe as much as you
desire. Please be careful to not overtension the fabric; if
it becomes too tight, then release some tension.
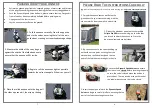
6. Inflate the Oxygen Air Frame until you can give it a
‘good squeeze’; the tube requires room inside for air
to expand, should there be any fluctuations in the
ambient temperature. Don’t be concerned if you do
keep inflating, however, as the Intelligent Frame Relief
Valve will release any excess air above 6PSI.
7. Replace the cap and cover it using the sleeve, in
order to help maintain a neater external aesthetic.
8. Insert the pump nozzle into the Dynamic Speed
Valve and begin to carefully inflate, ensuring that no
part of the fabric have caught anywhere.
6
WARNING: Never unzip the zips on the protective
sleeves whilst the Oxygen Air Frame Tubes are inflated;
this will result in the tube bursting/ballooning out of
the sleeve, causing damage to the tube and sleeve; this
is NOT covered under the warranty!
12. Place any sleeping equipment inside the
annexe inner tent and enjoy your holiday from a
relaxing multi-functional conservatory space!
9. Lay the two berth inner tent inside the annexe, then
starting at the back, begin clipping each plastic ‘c’ clip onto
the designated attachment points on the floor, before
matching the coloured elastic to the coloured loop.
10. Begin working your way around the inner tent, clipping
the toggles into the corresponding elastic loops in the
annexe, until the entire unit is in place. This can be removed
to create extra living/storage space, should you so desire.
11. Secure any remaining pegging points,
guylines and storm straps around the annexe
to ensure that it is securely held in position.


