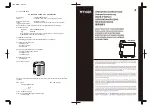
background image

English-6

AUTOMATIC WHITE RICE OR BROWN RICE COOKING FUNCTIONS
If you would like to sauté prior to cooking rice or other ingredients, please refer 

to Sauté Function section. Once you are done sautéing your ingredients, follow 

instructions below.
You may also use Automatic Cook Function without sautéing any ingredients by 

simply following these instructions:
1.  Place rice and water inside inner pot.
2.  Measure raw rice for desired amount with Measuring Cup (180 ml) provided. 

One cup of uncooked rice will make about two cups of cooked rice for a 

maximum of 10 cups (1.8 L) uncooked rice. Add rice to Inner Pot.

  NOTE: Wash rice in a separate bowl, prior to cooking, if desired. For softer 

rice, we suggest preparing rice and water in the Inner Pot and letting soak for 

10 – 20 minutes before cooking.

3.  Using Measuring Cup, add proper amount of water to rice inside inner pot (for 

every cup [180 ml] of raw rice, add 1-1/2 cups of water).

  NOTE: You may need to adjust quantity of water depending on kind of rice 

you are cooking and how moist you prefer it. For sticky rice, add slightly more 

water. For fluffy rice, use slightly less water. If you are cooking brown rice, add 

more water. You may also need to adjust water quantity by adding more water 

if you are using rice cooker at a high altitude.

4.  Set inner pot into rice cooker. Make sure inner pot sits directly in contact with 

heating plate by turning it slightly from right to left until seated properly. Cover 

with Lid. WHEN USING AUTOMATIC COOK MODE, DO NOT OPERATE UNIT 

UNCOVERED. STEAM IS GENERATED DURING USE.

5.  Plug unit into appropriate electrical outlet.
6.  All function indicator lights will start to blink. Press White Rice Button “Arroz” if 

cooking white rice or Brown Rice Button “Arroz Integral” if cooking brown rice. 

Only indicator light of selected function will remain solid on.

7.  Press Start/Stop Button   to start automatic cooking process.
  IMPORTANT: If you use sauté function, you must manually turn off sauté 

function by pressing Start/Stop Button   before cooking rice. Lift and remove 

lid carefully to avoid scalding and allow water to drip into inner pot. Use paddle 

or another long handheld utensil to scoop and mix rice. After mixing, cover 

inner pot with lid.

8.  Rice cooker signal sound indicates when rice is ready and will automatically 

switch to keep warm mode. Keep warm indicator light will turn on. Rice cooker 

will automatically keep rice warm at 65°C – 71°C. Rice cooker will keep rice 

warm for up to 3 hours and then will stop heating, going back into the standby 

mode with all function lights blinking.

NOTE: You can interrupt, at any time, cooking or keep warm modes by pressing Start/

Stop Button  . Unit will go back into standby mode with all function lights blinking.
Allow appliance to cool completely before cleaning. Disconnect plug from wall 

outlet when not in use.

Summary of Contents for CKSTRC7029

Page 1: ...STRUCCIONES ANTES DE USAR ESTE APARATO Instruction Manual MULTIFUNCTION RICE COOKER READ ALL INSTRUCTIONS BEFORE USING THIS APPLIANCE Manual de Instru es PANELA EL TRICA DE ARROZ MULTIFUN ES LEIA TODA...

Page 2: ...sperfecto Devu lvalo al Centro de Servicio Autorizado Oster m s cercano para su inspecci n reparaci n y ajuste el ctrico o mec nico 7 El uso de accesorios o aditamentos no recomendados por el fabrican...

Page 3: ...rsonas lo que incluye ni os cuyas capacidades f sicas sensoriales o mentales est n disminuidas o carezcan de experiencia y conocimientos a menos que una persona responsable de su seguridad los supervi...

Page 4: ...luz indicadora mbar 6 Bot n para mantener caliente con luz indicadora mbar 7 Bot n iniciar parar con luz indicadora roja 8 Bandeja de acero inoxidable para cocinar al vapor 9 Asas 10 Bot n para cocina...

Page 5: ...al multifunci n Oster por primera vez siga las instrucciones que se describen a continuaci n 1 Retire todas las etiquetas y materiales de embalaje del producto Retire la pel cula pl stica del panel de...

Page 6: ...ne el bot n de sofre r Solamente la luz indicadora de la funci n de sofre r permanecer encendida 3 Presione el bot n iniciar parar para comenzar a sofre r 4 La unidad calentar la fuente y sofreir los...

Page 7: ...la arrocera Cerci rese de que la fuente est en contacto directo con la placa calefactora para ello mueva ligeramente la fuente de un lado a otro para que quede bien asentada T pela NO USE EL MODO DE C...

Page 8: ...rmanecer encendida 6 Presione el bot n iniciar parar para comenzar el proceso de cocci n al vapor NOTA Si desea voltear o revolver los alimentos en la bandeja levante y quite la tapa con cuidado para...

Page 9: ...mediana 3 tazas Cogollitos de 2 pulgadas Mazorca de ma z 4 3 tazas De 6 pulgadas Habichuelas o jud as 0 5 kg 2 tazas Enteras sin tallos Tirabeques 0 5 kg 2 tazas Enteros sin tallos Papas peque as y t...

Page 10: ...por y deje que el agua se escurra dentro de la fuente Use la paleta u otro utensilio de mano con mango largo para revolver Cuando haya terminado tape la unidad NOTA A ada una peque a cantidad de agua...

Page 11: ...vela con una esponja y agua caliente jabonosa y s quela bien con un pa o Aunque se puede lavar en el lavaplatos autom tico se recomienda lavar a mano 5 Tapa taza medidora y paleta l velas en agua tibi...

Page 12: ...ttachments not recommended by appliance manufacturer may result in fire electric shock or personal injuries 8 DO NOT use outdoors 9 DO NOT let cord hang over edge of table or counter or touch hot surf...

Page 13: ...on or instruction concerning use of appliance by a person responsible for their safety Children should be supervised to ensure they DO NOT play with appliance 24 Close supervision is necessary when an...

Page 14: ...m Cook Button with Amber Indicator Light 6 Warm Button with Amber Indicator Light 7 Start Stop Button with Red Indicator Light 8 Stainless Steel Steam Tray 9 Handles 10 Cook Brown Rice Button with Amb...

Page 15: ...ter Digital Multifunction Rice Cooker for first time please follow instructions below 1 Remove any stickers and packaging materials from product Remove static cling from control panel 2 DO NOT IMMERSE...

Page 16: ...ndicator lights will start to blink Press Saut Button Only Saut Indicator Light will remain solid on 3 Press Start Stop Button to start saut ing 4 Unit will heat up inner pot and saut food inside 5 Th...

Page 17: ...r Make sure inner pot sits directly in contact with heating plate by turning it slightly from right to left until seated properly Cover with Lid WHEN USING AUTOMATIC COOK MODE DO NOT OPERATE UNIT UNCO...

Page 18: ...ooking indicator light will remain solid on 6 Press Start Stop Button to start steam cooking process NOTE If you wish to turn foods inside steam tray lift and remove lid carefully to avoid scalding an...

Page 19: ...medium head 3 cups 2 inch pieces Corn on the cob 4 3 cups 6 inches Green beans 0 5 Kg 2 cups Whole trimmed Snow peas 0 5 Kg 2 cups Whole trimmed Small new Potatoes 0 5 Kg 3 cups Whole White or Yukon G...

Page 20: ...y to avoid scalding and allow water to drip into inner pot Use paddle or another long handheld utensil to stir When done place lid back in unit NOTE Add a small amount of water if necessary to avoid d...

Page 21: ...sit for a while Then wash with hot soapy water using a sponge and dry thoroughly with a cloth Although inner pot is dishwasher safe we recommend hand washing 5 Lid Measuring Cup and Paddle wash in wa...

Page 22: ...queda ou esteja danificado de alguma forma Leve o a uma Assist ncia T cnica Credenciada Oster para que seja revisado ou reparado 7 O uso de acess rios n o recomendados pelo fabricante podem causar in...

Page 23: ...jas capacidades f sicas sensoriais ou mentais estejam reduzidas ou care am de experi ncia e conhecimento necess rios para utiliz lo a menos que uma pessoa respons vel por sua seguran a tenha supervisi...

Page 24: ...apor com luz indicadora mbar 6 Bot o para esquentar com luz indicadora mbar 7 Bot o para Iniciar Parar com luz indicadora vermelha 8 Bandeja de a o inoxid vel para cozinhar ao vapor 9 Al as 10 Bot o p...

Page 25: ...fun es Oster pela primeira vez siga as instru es abaixo 1 Retire todos os adesivos e materiais de embalagem do produto Retire o adesivo transparente do painel de controle 2 N O SUBMERGIR A BASE NA GUA...

Page 26: ...a luz indicadora da fun o refogar permanecer acessa e sem piscar 3 Pressione o bot o para Iniciar Parar para come ar a refogar 4 O aparelho ir aquecer a panela interna e a refogar os alimentos 5 Esta...

Page 27: ...se estiver cozinhando em locais de grande altitude 4 Coloque a panela interna no aparelho Ao colocar a panela interna no aparelho gire a da direita para esquerda para certificar que a panela el trica...

Page 28: ...ANTE O USO 4 Ligue o aparelho na tomada el trica correspondente 5 As luzes indicadoras de todas as as fun es come ar o a piscar Pressione o bot o para cozinhar ao vapor Somente a luz indicadora da fun...

Page 29: ...e a m dia 3 x caras Peda os de 5 cm Espiga de milho 4 unidades 3 x caras 15 cm Vagem 0 5 kg 2 x caras e meia Inteiras cortadas Vagem plana 0 5 kg 2 x caras e meia Inteiras cortadas Batatinhas 0 5 kg 3...

Page 30: ...fa a com que gua quente escorra para dentro da panela interna Use a colher de pl stico que vem com o aparelho ou outro utens lio de pl stico para mexer Em seguida coloque a tampa de volta OBSERVA O A...

Page 31: ...e para lou as e seque bem com um pano macio Embora a panela interior possa ser lavada na lava lou as recomenda se lavar na m o 5 A tampa o copinho medidor e a colher de pl stico lave com gua morna e d...

Page 32: ...ES PARA M XICO IMPORTADOR SUNBEAM MEXICANA S A DE C V AV JU REZ No 40 201 EX HACIENDA DE SANTA M NICA TLALNEPANTLA ESTADO DE M XICO C P 54050 R F C SME570928G90 TEL 53660800 PA S DE ORIGEN CHINA PA S...

Reviews: