background image

15 

2.1.2 Real-time Scan Toolbar 

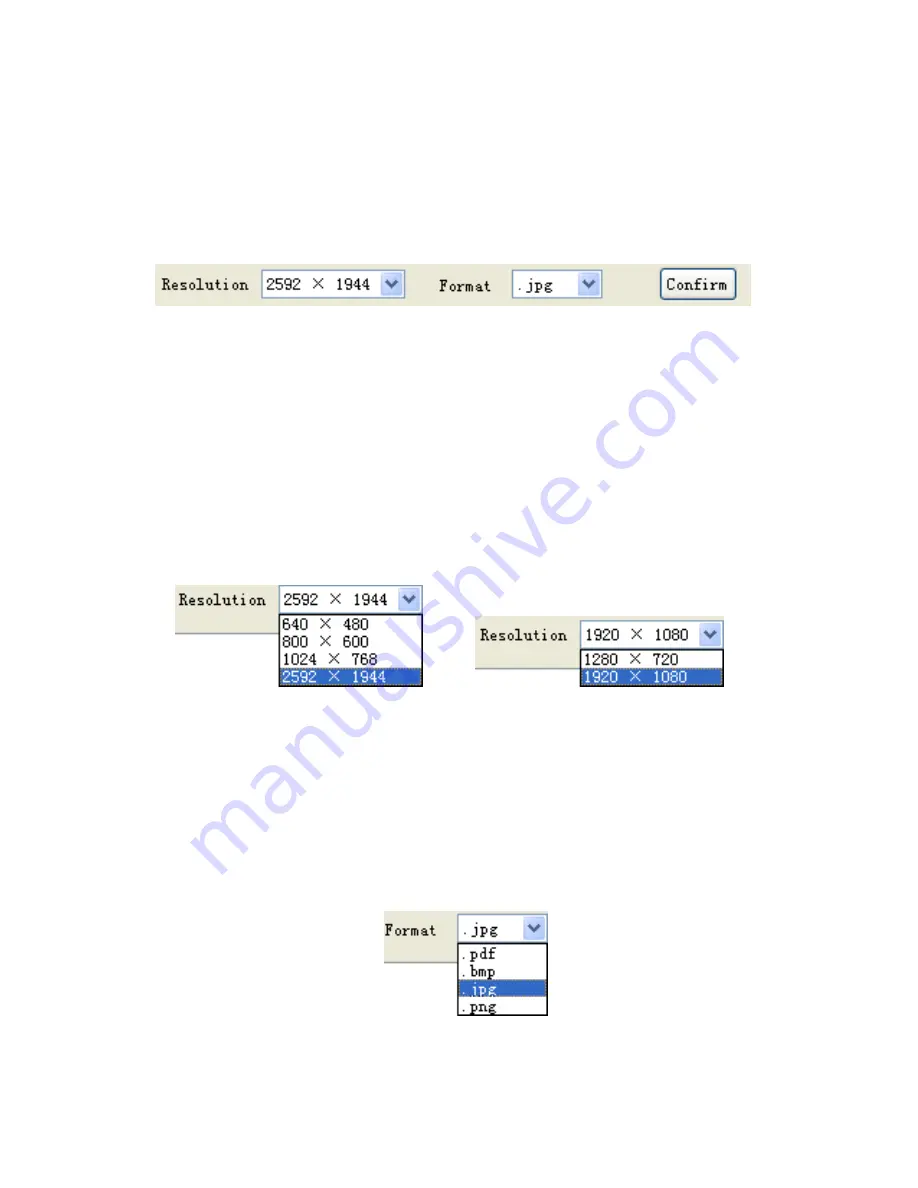
Real-time scan toolbar is made up of two parts: Save Resolution and Save 

Format. 


2.1.2.1Save Resolution 

When the preview resolution is 4:3, scan resolution can only be 4:3, 640×480

800×600,1024×768,2592×1944. The default 4:3 maximum resolution is 2592 

× 1944as shown in image (1). When the preview resolution is 16:9, the scan 

resolution can only be 16:9, 1280 × 720 and 1920 × 1080. The default 16:9 

maximum resolution is 1920 × 1080, as shown in image (2). 


(1)                                                          (2) 

2.1.2.2 Image Format 

Image formats have .pdf

.bmp

.jpg and .png.The program defaults to.jpg. 

You can choose any of them according to your need. 


Summary of Contents for KoPa A99

Page 1: ...KoPa Scanner A99 User s Manual Ver 1 0 SHENZHEN OSTEC OPTO ELECTRONIC TECHNOLOGY CO LTD http www ostec com cn...

Page 2: ...f Software Interface 8 2 1 Video Mode 8 2 1 1 Real Time Preview Toolbar 9 2 1 2 Real time Scan Toolbar 15 2 1 3 Menu 16 2 1 4 Preview Screen Adjustment 18 2 2 Document Work Mode 21 2 2 1 Document Edit...

Page 3: ...ity Exit 31 Chapter4 Tips 32 4 1 How to improve the character recognition rate 32 4 2 How to Edit Text File 32 4 3 Scanned Documents with Spots 32 Chapter 5 Common Questions and Resolutions 33 KoPa Sc...

Page 4: ...the surface do not touch the lens with your fingers Wipe the lens lightly 6 The products are not specifically designed for an outdoor use Do not expose it to outdoor environment without any protectio...

Page 5: ...ns Step 1 Start the computer and put the installation disk into the CD ROM Step 2 Select KoPaCam exe file When the following window appears please choose the language and click Step 3 When the window...

Page 6: ...3 Step 4 When the following window Select Destination Location appears click Browse to choose the file installation path Step 5 When you confirm the file installation path click to continue...

Page 7: ...4 Step 6 When the following window appears click to confirm your chosen file folder and then click Step 7 When the following window appears please tick the shortcut you need and then click...

Page 8: ...tly After confirming please click Step 9 The progress bar will appear during the installation When the following window appears the software is installed successfully Click to complete the installatio...

Page 9: ...he KoPa scanner A99 has been connected with the computer s USB port before you run this device at the first time Otherwise you can only operate is invalid Tip 3 If the device is connected to the more...

Page 10: ...and capture the current scene The preview interface is shown as below Tip 1 KoPa Scanner is only designed for KoPa scanner A99 and it may not run or display abnormal for non KoPa scanner A99 Tip 2 Do...

Page 11: ...terface When program is running the following software interface is supposed to appear 2 1 Video Mode Open KoPaCam Program The program defaults to video mode The software operating interface is shown...

Page 12: ...related to image display effects in order to be called for practical use 2 1 1 1 Preview Mode Selection Preview mode has speed priority mode and quality priority mode The program defaults to quality p...

Page 13: ...8 1280 720 1920 1080 and 2592 1944 The default value is 800 600 You can choose any of them depending on your needs Click 2 1 1 3 Video Preview Parameter Adjustment Users can adjust the corresponding p...

Page 14: ...ironment This parameter is adjusted manually and can only be adjusted manually when Continuous Focus fails AE Automatic Exposure KoPa Scanner A99 can do automatic exposure according to environment Tha...

Page 15: ...able when this option is checked When it is not checked users can make adjustments by White Balance White Balance Users can adjust white balance parameters according to environment This parameter is a...

Page 16: ...ast regulation to make the best effect Contrast Contrast between the light and dark of pictures can be changed and is used with brightness control to make the best effect Saturation Color saturation o...

Page 17: ...rder to improve the rate of OCR character recognition Custom User Customization Mode Users can adjust appropriate parameters according to the actual situation Parameters are saved in the second mode f...

Page 18: ...480 800 600 1024 768 2592 1944 The default 4 3 maximum resolution is 2592 1944as shown in image 1 When the preview resolution is 16 9 the scan resolution can only be 16 9 1280 720 and 1920 1080 The de...

Page 19: ...ced Options and About option Advanced Options is divided into two options Scan and Video Scan You can select the save path of images and PDF documents in this mode as shown in image 1 Video You can se...

Page 20: ...17 2 Click About The following information will appear Click to exit...

Page 21: ...oftware operating interface 2 1 4 Preview Screen Adjustment From left to right Mirror Flip Zoom out Zoom in Actual Size Fit the Screen and Full Screen 2 1 1 4 Mirror and flip Contrast between preview...

Page 22: ...2 1 4 3 Actual Size 1 1 The field angle is variable and defaults to intermediate position If it is more than the current software preview range you can press the left mouse button to drag Under fit t...

Page 23: ...ndow Picture can be dealt in thumbnail window or work mode adjustment document to copy delete rename save as OCR etc Save path of scanned documents My Documents Ostec KoPaCam picture My Documents Oste...

Page 24: ...be modified according to your needs For modification methods please see 2 2 1 2 2 Document Work Mode The following interface will appear when you click 2 2 1 Document Editing Toolbar From left to rig...

Page 25: ...k Click to delete the document in current preview interface 2 2 1 2 Export Click button the screen appears as shown below According to your needs rename the current preview document re select the file...

Page 26: ...below The preview document can be saved in PDF format according to your needs Rename and save as the document to other folders you specify 2 2 1 4 Print Click Three options Print Page Setup and Print...

Page 27: ...24 Print Page Setu...

Page 28: ...o ensure the print effects you should better make the Page Setup and Print Preview before printing 2 2 1 5 OCR Click The screen appears as shown below Users can make OCR recognition to picture documen...

Page 29: ...ing document language The default language of the software is computer operating system language English In accordance with document contents click the edit image button and the following screen will...

Page 30: ...character recognition temporarily only supports characters level layout If the characters are not in level layout they need being adjusted to level layout and then go for OCR character recognition As...

Page 31: ...28 2 2 2 Menu For operating methods please see 2 1 3...

Page 32: ...directly accept pasted pictures 2 2 3 2 Zoom out and Zoom in Click and to zoom out and zoom in the preview document screen The minimum value is 5 of the preview document screen the maximum value is 1...

Page 33: ...30 2 2 4 Document Thumbnail Box Click the document in document thumbnail box to open open the directory cut copy paste delete rename and OCR Part of the operating method scan be found in 2 2 1...

Page 34: ...connect the USB cable to the computer s USB interface If it is used as a desk lamp you need to open KoPaCam software and click auxiliary lighting 3 3 Security Exit For users not familiar with KoPa sc...

Page 35: ...es not tilt If character tilts please adjust the picture to horizontal angle 4 2 How to Edit Text File Scan the text file for character recognition and then edit the document directly 4 3 Scanned Docu...

Page 36: ...r the USB port is connected properly 2 Whether My Computer Device Manager has image processing device USB video device 3 Try to plug out and unplug the device then open KoPaCam software again 4 Check...

Reviews: