10
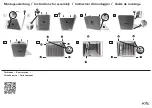
Permanent Wedge Placement (Figure H)
• Apply adhesive to the upper side of the wedge only.
• Locate it in the foot/heel junction and position it before the adhesive sets.
• For split toe feet first install the heel wedge, then remove a thin slice in the middle by cutting with a sharp
knife through the split in the carbon foot module.
• Complete the dynamic alignment by performing calibration. (See chapter
“Calibration”
)
HEEL DIVIDER
The heel divider should be placed in the posterior portion of the split heel. To secure its position, a drop of
instant adhesive can be used on one side.
Flex-foot sock FCX63007 (Figure I)
To protect the cover a Flex-Foot sock is fitted over the foot module before applying the cover. The sock
should fit loosely in the heel area. To hold the Flex-Foot
®
sock in place attach the self adhesive velcro tabs to
the sides and front of the ankle. Press the Flex-Foot
®
sock firmly onto the tabs to hold in place.
It is important that the Flex-Foot
®
sock doesn’t slip down as this will cause interference with the proprio
foot
®
function and performance.
FOOT COVER REMOVAL (Figure J)
To remove the foot cover, grasp and pull on the Flex-Foot Sock. Hold down the cosmetic cover with a hand
on the rear aspect of the cosmetic cover. The heel module will snap out of the heel clip. Continue to pull and
remove the foot completely.
note:
do not
use a Flex-Foot
®
shoe horn or any other lever to remove the foot cover as this may cause
damage to the ankle unit.
CHARGING AND POWER (Figure K)
• Only use the power supply, supplied for proprio foot
®
.
• Connect the power supply cable to the power supply (PRX60015).
»
Green LED turns on continuously.
»
Yellow LED will flash while charging.
• Connect the power source to the battery pack. Allow 3–4 hours to ensure a full charge.
Battery charge
• The LED lights indicate the charge state of proprio foot
®
.
• Press the control button to check the charging level. When the battery is fully charged all LED lights will
turn green.
Guidelines Regarding Lithium-Ion Battery
• Avoid frequent full discharges. Recharging a partially charged lithium-ion does not cause harm.
• Recharging daily is the most efficient routine.
note:
The yellow LED light on proprio foot
®
will blink when charging. The green will be steady.
Power supply
never store
proprio foot
®
fully discharged or fully charged.
The recommended for storage charge level is at 40%. Only use the charger supplied.
attention:
do not
charge when the prosthesis is being worn!
do not
leave the prosthesis/battery in hot places or close to heat emitting devices like radiators.
Warning signals for power loss
Vibratory and/or auditory warning systems are provided by the proprio foot
®
to indicate to the user that
power loss is forthcoming. The warning signals are provided in a series of intermittent pulses. The sequence
of pulses is described in
(Figure L)
. Ensure that the user recognizes the warnings.
Summary of Contents for PROPRIO FOOT
Page 1: ...PROPRIO FOOT Technical Manual...
Page 3: ...3 1 3 1 3 1 3 1 2 1 2 1 2 1 2 1 2 1 2 a b c d e f...
Page 22: ......


