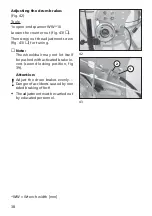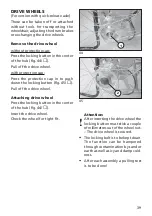
24
19
Height adjustment of the foot-
plates
Tools, depending on model version:
1 x open-end or ring spanner WW* 13
or without tools
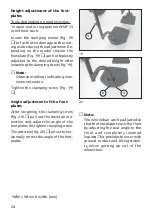
Loosen the clamping screws (fig. 19/
➀
) so far that no damage to the coat-
ing occurs during the adjustment. De-
pending on the model version the
footplate (fig. 19/
➀
) can be steplessly
adjusted to the desired height after
loosening the clamping screw (fig. 19).
☞
Note:
Observe markings indicating max-
imum extension.
Tighten the clamping screw (fig. 19/
➀
).
Angle adjustment of the foot-
plates
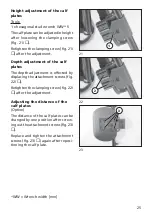
After loosening the clamping screw
(fig. 20/
➁
) pull out the dovetail con-
nection and adjust the angle of the
footplates. Re-tighten clamping screw.
The setscrew (fig. 20/
➂
) serves to hor-
izontally correct the angle of the foot-
plates.
*WW = Wrench width [mm]
1
20
2
3
☞
Note:
The wheelchair can be adjusted so
that the footplates touch the floor
by adjusting the seat angle to the
front and completely lowered
legrests. This provides the user with
ground contact and tilting stabili-
ty when getting up out of the
wheelchair.

