background image


Precaution  


Thank  you  for  purchasing  this  electronic  instrument.For  perfect  operation  and  
security, please read the manual carefully and keep it for future reference.  


Safety Precautions  


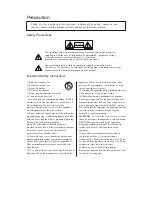
CAUTION  

RISK OF ELECTRIC 

SHOCK  


DO NOT OPEN  


The lightning flash with arrowhead symbol within an equilateral triangle is 
intended to alert the user to the presence of uninsulated    dangerous voltage   
within the product s enclosure that may be of sufficient  
magnitude to constitute a risk of electric shock to persons.  
 
The exclamation point within an equilateral triangle is intended to alert  
the  user  to  the  presence  of  important  operating  and  maintenance(servicing) 

instructions in the literature accompanying the product.  


Important Safety Instructions 


1) Read these instructions. 
2) Keep these instructions. 
3) Heed all warnings. 
4) Follow all instructions. 

(Figure 1) 

5) Do not use this apparatus near water. 
6) Clean only with dry cloth. 
7)  Do  not  block  any  ventilation  openings,  install  in 
accordance  with  the  manufacturer  s  instructions.  8) 
Do not install near the heat sources such as 
radiators, heat registers, stoves, or other apparatus 
(including amplifiers) that produce heat.  
9) Do not defeat the safety purpose of the polarized or 
grounding-type plug. A polarizedplug hase two blades 
with one wider than the other. A grounding type plug 
has two blades and a third grounding  
prong. The wide blade or the third prong are  
provided for your safety, if the provided plug does not 
fit into your outlet. consult an electrician for  
replacement of the obsolete outlet. 
10) Protect the power cord from being walked on or 
pinched particularly at plugs. convenience receptacles, 
and the point where they exit from the apparatus. 11) 
Only use attachments/accessories specified by the 
manufacturer. 
12)  Use  only  with  the  cart,  stand,  tripod,  bracket,  or  
table specified by the manufacturer, or sold with the 

apparatus. When a cart is used, use caution  when 
moving  the  cart/apparatus  combination  to  avoid 
injury from tip-over(Figure 1). 
13) Unplug this apparatus during lightning storms or 
when unused for a long periods fo time.  
14) Refer all servicing to qualified service personnel. 
Servicing is required when the apparatus has been 
damaged in any way, such as power-supply cord or 
plug is damaged, liquid has been spilled or objects 
have fallen into the apparatus, the apparatus has been 
exposed to rain or moisture, does not operate 
normally, or has been dropped. 

WARNING

:  To  reduce  the  risk  of  fire  or  electric  

shock, do not expose this apparatus to rain or moisture.  

CAUTION

: Apparatus shall not be exposed to 

dripping or splashing and no objects filled with 
liquids, such as vases, shall be placed on the  
apparatus. 
Always make sure all batteries are inserted in  
conformity with the +/- polarity markings.  
Always replace all batteries at the same time. Do not 
use new batteries together with old ones. Also, do not 
mix battery types, since this can cause  
overheating, fire, or battery filuid leakage.  
Remove the batteries from the instrument if it is not 
to be used for a long time.  

Summary of Contents for TD36

Page 1: ...Electronic Drum TD36...

Page 2: ...our safety if the provided plug does not fit into your outlet consult an electrician for replacement of the obsolete outlet 10 Protect the power cord from being walked on or pinched particularly at pl...

Page 3: ...ack 8 USB MIDI 8 Connecting Headphone 8 Start to Play the Drum 9 Switch the Power On 9 Set the Master Volume 9 Select Drum Kits 9 KIT Button 9 CLICK Button 10 REC PLAY Buttion 11 SONG Button 12 TEMPO...

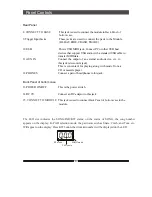
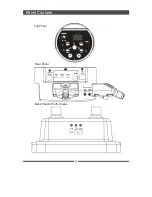
Page 4: ...Panel Controls Top Panel 1 2 5 Rear Panel 8 9 CONNECT TO BASE RIDE CRASH HI HAT Back Panel of bottom case 3 4 6 7 10 SNARE USB AUX IN PHONES 11 12 13 14 15 POWER CONNECT ON OFF DC 9V TO MODULE 2...

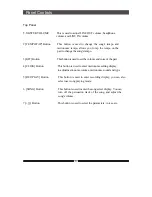
Page 5: ...e tempo on the pad to change the song s tempo This button is used to set the volume and voice of the pad This button is used to enter metronome setting display to adjust metronome volume metronome sou...

Page 6: ...IDI data Connect the output of an external audio device etc to this jack stereo mini jack This is convenient for playing along with music from a CD or cassette player Connect a pair of headphones to t...

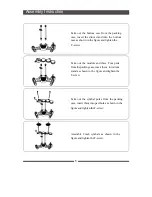
Page 7: ...en the T screw Take out the module and three Tom pads from the packing case insert them into drum stand as shown in the figure and tighten the T screw Take out the cymbal poles from the packing case i...

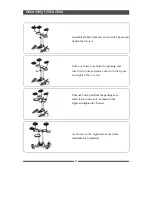
Page 8: ...ke out Snare pole from the packing case insert it into drum stand as shown in the figure and tighten the T screw Take out Snare pad from the packing case insert it into Snare pole as shown in the figu...

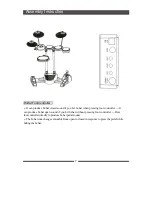
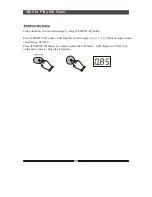
Page 9: ...i hat when pressing foot controller It can produce hi hat open sound if you hit hi hat without pressing foot controller Press foot controller directly to produce hi hat pedal sound The hi hat tone cha...

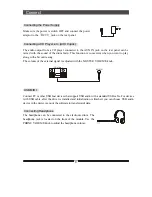
Page 10: ...a favourite song The volume of the external signal is adjusted with the MASTER VOLUME knob CD player AUX IN USB MIDI Connect PC or other USB host devices that support USB audio with a standard USB ca...

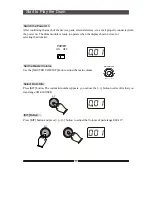
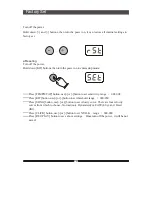
Page 11: ...the display shown below for selecting the drum kit POWER ON OFF Set the Master Volume MASTER VOLUME Use the MASTER VOLUME knob to adjust the main volume MIN MAX Select Drum Kits Press KIT button The c...

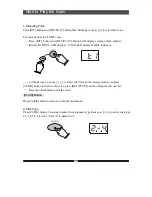
Page 12: ...t1 then LED displays TOM1 instrment hit the pad go on or use to select the Voice In this mode you also can press CLICK button to listen to the voice press REC PLAY button to Deposited in user kit Pre...

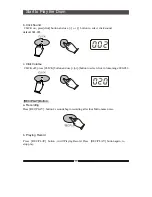
Page 13: ...01 003 c Click Volume CLICK off press CLICK button and use or button to select click volume range 000 032 REC PLAY Button a Recording Press REC PLAY button 2 seconds begin recording after four Metrono...

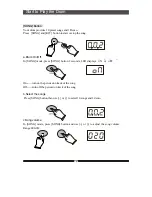
Page 14: ...On Off In SONG mode press SONG button 2 seconds LED displays oN or oFF On turn on the percussion track of the song Off turn off the percussion track of the song b Select the songs Press SONG button t...

Page 15: ...ust tempo by using TEMPO TAP button Press TEMPO TAP button LED displays current tempo use or button to adjust tempo value Range 020 240 Press TEMPO TAP button 2 seconds to enter the TAP mode LED displ...

Page 16: ...EMPO TAP button use or button to set sensitivity range 001 008 Press KIT button use or button to set threshold range 000 050 Press SONG button use or button to set velocity curve There are four veloci...

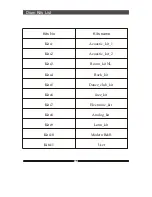
Page 17: ...Kits No Kits name Kits1 Acoustic_kit_1 Kits2 Acoustic_kit_2 Kits3 Room_kit NL Kits4 Rock_kit Kits5 Dance_club_kit Kits6 Jazz_kit Kits7 Electronic_kit Kits8 Analog_kit Kits9 Latin_kit Kits10 Modern R B...

Page 18: ...Voice List Group 1 Kick Drums Group 2 Snare Drums Group 3 Toms 16...

Page 19: ...Voice List Group 5 Hi hats Group 4 Cymbals 17...

Page 20: ...Style List Style No Style name 01 Rock Shuffle 02 Surf Pop 03 Techno 04 60 s Rock 05 Hard Rock 06 Pop Bossa 07 80 s Rock 08 16 Beat 09 Pop Shuffle 10 Guitar Pop 18...

Page 21: ...O X O X O X O X O X O 1 X O Remarks Memorized Bank Select Modulation Portamento time Data Entry Volume Pan Expression Sustain Portamento Sostenuto Soft pedal DSP TYPE DSP DEPTH RPN LSB MSB Reset all...

Page 22: ...n Voices Drum Sets 10 preset drum kits and 1 user drum kit Styles 10 Styles Pad Control Sensitivity Threshold Velocity Curve XTALK Demo 1 Song Song recording Real time Record and Playback Others Tap C...

Page 23: ......

Page 24: ......
Reviews: