10
Remember, accurate polar alignment is not needed for casu-
al visual observing. Most of the time, approximate polar
alignment, as outlined previously, will suffice.
Tracking Celestial Objects
When you observe a celestial object through the telescope,
you’ll see it drift slowly across the field of view. To keep it in
the field, if your equatorial mount is polar-aligned, just turn the
R.A. slow-motion control. The Dec. slow-motion control is not
needed for tracking. Objects will appear to move faster at
higher magnifications, because the field of view is narrower.
Optional Motor Drive
An optional DC motor drive system (EQ-3M, #7828) can be
mounted on the AstroView’s equatorial mount to provide hands-
free tracking. Objects will then remain stationary in the field of
view without any manual adjustment of the R.A. slow-motion con-
trol. The motor drive system is necessary for astrophotography.
Understanding the Setting Circles
The setting circles on an equatorial mount enable you to locate
celestial objects by their “celestial coordinates.” Every astronomical
object resides in a specific location on the “celestial sphere.” That
location is denoted by two numbers: its right ascension (R.A.) and
declination (Dec.). In the same way, every location on Earth can be
described by its longitude and latitude. R.A. is similar to longitude
on Earth, and Dec. is similar to latitude. The R.A. and Dec. values
for celestial objects can be found in any star atlas or star catalog.
So, the coordinates for the Orion Nebula listed in a star atlas
will look like this:
R.A. 5h 35.4m Dec. -5° 27’
That’s 5 hours and 35.4 minutes in right ascension, and -5
degrees and 27 arc-minutes in declination (the negative sign
denotes south of the celestial equator). There are 60 minutes
in 1 hour of R.A and there are 60 arc-minutes in 1 degree of
declination.
The telescope’s R.A. setting circle is scaled in hours, from 1
through 24, with small lines in between representing 10-
minute increments. The upper set of numbers apply to
viewing in the Northern Hemisphere, while the numbers
below them apply to viewing in the Southern Hemisphere.
The Dec. setting circle is scaled in degrees.
Before you can use the setting circles to locate objects, the
mount must be accurately polar aligned, and the setting cir-
cles must be calibrated. The declination setting circle was
calibrated at the factory, and should read 90° when the tele-
scope optical tube is pointing exactly along the polar axis.
Calibrating the Right Ascension Setting Circle
1. Identify a bright star near the celestial equator and look up
its coordinates in a star atlas.
2. Loosen the R.A. and Dec. lock levers on the equatorial
mount, so the telescope optical tube can move freely.
3
Point the telescope at the bright star whose coordinates
you know. Center the star in the telescope’s eyepiece.
Lock the R.A. and Dec. lock levers.
4. Loosen the large setscrew just above the R.A. setting circle
and rotate the R.A. setting circle so the pointer indicates the
R.A. coordinate listed for the bright star in the star atlas. Do
not retighten the setscrew when using the R.A. setting cir-
cles for finding objects; the set screw is only needed for
polar alignment using the polar axis finder scope.
Finding Objects With the Setting Circles
Now that both setting circles are calibrated, look up in a star
atlas the coordinates of an object you wish to view.
1. Loosen the Dec. lock knob and rotate the telescope until
the Dec. value from the star atlas matches the reading on
the Dec. setting circle. Retighten the lock knob. Note: If the
telescope is being aimed toward the south and the Dec.
setting circle pointer passes the 0° indicator, the value on
the Dec. setting circle becomes a negative number.
2. Loosen the R.A. lock lever and rotate the telescope until
the R.A. value from the star atlas matches the reading on
the R.A. setting circle. Retighten the lock lever.
Most setting circles are not accurate enough to put an object
dead-center in your finder scope’s field of view, but they’ll get
you close, assuming the equatorial mount is accurately polar-
aligned. The R.A. setting circle should be recalibrated every time
you wish to locate a new object. Do so by calibrating the setting
circle for the centered object before moving on to the next one.
Confused About Pointing the Telescope?
Beginners occasionally experience some confusion about
how to point the telescope overhead or in other directions. In
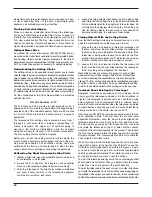
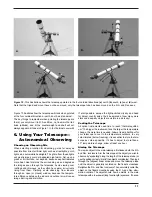
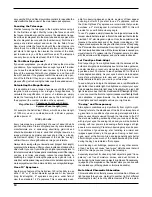
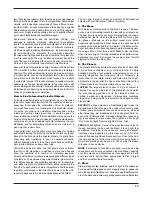
Figure 1 the telescope is pointed north as it would be during
polar alignment. The counterweight shaft is oriented down-
ward. But it will not look like that when the telescope is pointed
in other directions. Let’s say you want to view an object that is
directly overhead, at the zenith. How do you do it?
One thing you DO NOT do is make any adjustment to the lat-
itude adjusting T-bolts. That will spoil the mount’s polar
alignment. Remember, once the mount is polar-aligned, the
telescope should be moved only on the R.A. and Dec. axes.
To point the scope overhead, first loosen the R.A. lock lever
and rotate the telescope on the R.A. axis until the counter-
weight shaft is horizontal (parallel to the ground). Then loosen
the Dec. lock lever and rotate the telescope until it is pointing
straight overhead. The counterweight shaft is still horizontal.
Then retighten both lock levers.
What if you need to aim the telescope directly north, but at an
object that is nearer to the horizon than Polaris? You can’t do
it with the counterweight down as pictured in Figure 1. Again,
you have to rotate the scope in R.A. so that the counterweight
shaft is positioned horizontally. Then rotate the scope in Dec.
so it points to where you want it near the horizon.
To point the telescope directly south, the counterweight shaft
should again be horizontal. Then you simply rotate the scope
on the Dec. axis until it points in the south direction.
To point the telescope to the east or west, or in other directions,
you rotate the telescope on its R.A. and Dec. axes. Depending on
the altitude of the object you want to observe, the counterweight
shaft will be oriented somewhere between vertical and horizontal.


