10
Magnification
Magnification, or power, is determined by the focal length of the
telescope and the focal length of the eyepiece. Magnification is
calculated as follows:
Telescope Focal Length (mm)
= Magnification
Eyepiece Focal Length (mm)
Magnification of the telescope can be changed by using differ-
ent eyepieces. The XT8 PLUS has a focal length of 1200mm.
So, the magnification with the supplied 10mm eyepiece is:
1200mm
= 120x
10mm
By the same formula, when using the 28mm DeepView eyepiece
the magnification would be 42.9x.
The maximum attainable magnification for a telescope is directly
related to how much light its optics can collect. A telescope with
more light-collecting area, or aperture, can yield higher magnifi-
cations than a smaller aperture telescope. The maximum practi-
cal magnification for any telescope, regardless of optical design,
is about 60x per inch of aperture. This translates to about 480x
for the XT8 PLUS.
Keep in mind that as magnification is increased, the bright-
ness of the object being viewed will decrease; this is an inher-
ent principle of the physics of optics and cannot be avoided. If
magnification is doubled, an image appears four times dimmer.
If magnification is tripled, image brightness is reduced by a
factor of nine!
Note About High Magnifications:
Maximum magnifications are achieved only under the most
ideal viewing conditions at the best observing sites. Most of
the time, magnifications are limited to 200x or less, regard-
less of aperture. This is because the Earth’s atmosphere dis-
torts light as it passes through. On nights of good “seeing,” the
atmosphere will be still and will yield the least amount of dis-
tortion. On nights of poor seeing, the atmosphere will be turbu-
lent, which means different densities of air are rapidly mixing.
This causes significant distortion of the incoming light, which
prevents sharp views at high magnifications. The sharpest
images will always be achieved at lower magnifications.
Tube Balance
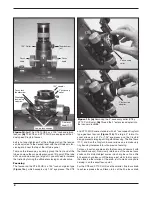
The SkyQuest XT PLUS tube is held on the Dobsonian base
with two altitude axis coupling knobs (
Figure 10). The one on
the right side acts simply as a retaining knob, while the one on
the left side is the “tensioning” knob. Turning this knob clock-
wise pulls the telescope’s left side bearing into the left side
panel, increasing the friction between the side bearing’s fiber
ring and the melamine surface of the side panel. The tighter
the knob is turned, the greater the friction and the stiffer the
tube will become to move up and down. Ideally you’ll want
to set the tension such that the tube moves relatively freely,
so that you can “track” objects smoothly by moving it in small
increments while viewing through the eyepiece.
If using heavier accessories on the front of the scope, increas-
ing the tension on the altitude axis will prevent the front of the
scope from sagging under the weight. That is, you can “adjust
out” a modest scope imbalance by increasing the tension via
the tensioning (left) knob.
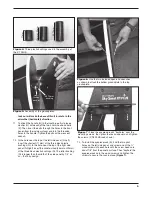
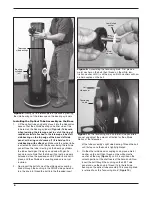
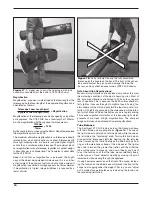
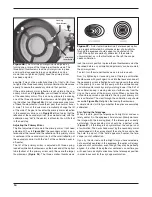
Figure 17.
A proper way to carry the telescope, with tube
assembly uncoupled from the base. (XT8 PLUS shown)
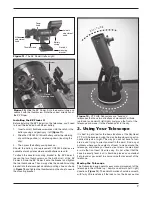
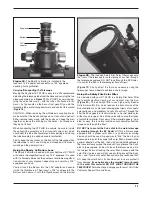
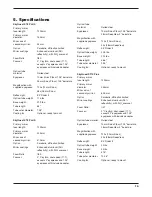
Figure 18.
Do not attempt to carry the fully assembled
telescope by the handle on the base! The front of the optical
tube could contact the ground and damage the tube, the
focuser, and any attached accessories. (XT8 PLUS shown)


