19
you can perform all of these
tasks in each of the tabs of the
Combine Images window.
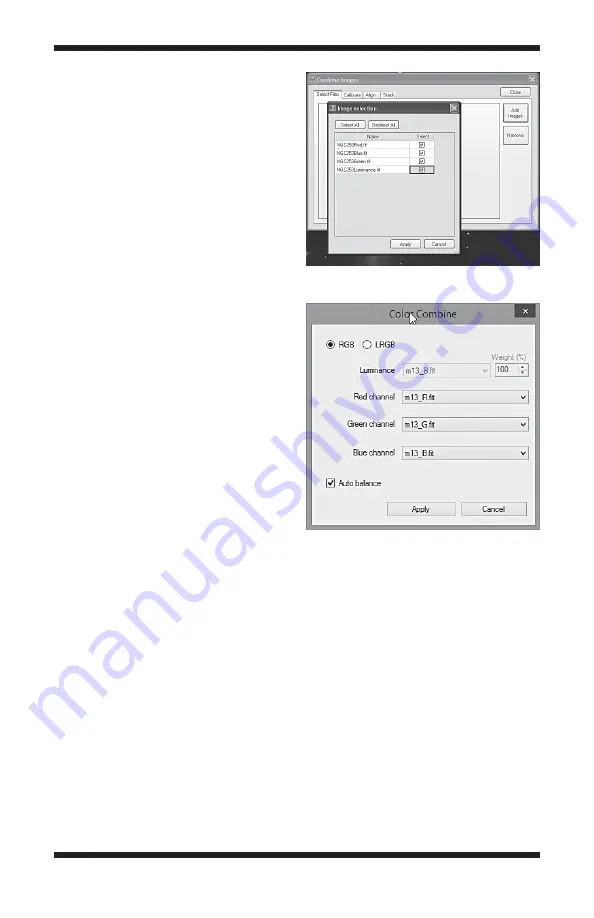
3. Select
Add Images, then Select
All, then Apply (Figure 20).
4. Proceed to the
Stack tab.
Keep the default settings. We
recommend
Sigma Reject which
is effective at removing unwanted
leftover hot pixels, satellite trails,
or other unwanted artifacts from
your image.
5. Click
Combine, and your resultant
image will appear. If the image did
not appear to combine correctly,
go back to the
Align tab and try to
use a different alignment method.
Normally the
Auto Star matching
is the easiest method.
Check the box “Convert to Color” to
automatically convert a raw image to a
color image after combining images.
Getting a Color Image with the
G4 Monochrome
The G4 Monochrome requires captur-
ing images through a series of filters,
such as Luminance, Red, Green and
Blue filters to obtain a color image, or
with specialized narrowband filters.
The image processing program ultimately wants to have image data for Red,
Green and Blue.
RGB/LRGB Combine Using CameraStudio
After aligning and combining each of the individual RGB or LRGB file groups the
resultant images can now be combined into RGB or LRGB channels by selecting
process->color->RGB combine and assigning open files to one of the RGB or
LRGB channels (
Figure 21).
RGB/LRGB Combine Using Photoshop
Camera Studio allows you to export 16 bit TIFF files or the raw FIT files to your
favorite post image processing program such as Photoshop. Save and export
each of your color channel images from the Monochrome G4. If you used LRGB
filters, export each of the LRGB images to a program like Photoshop. Before
exporting, align and combine each of the LRGB images individually, then align
Figure 20.
Select the open images to
align.
Figure 21.
RGB and LRGB Color
combine.


